
Customized Cage Lantern Light Fixtures
If you have been following for a while then you know that we have been working hard on finishing off our boys’ shared bedroom space… and today I have another thrifty project to share with you- these Customized Cage Lantern Light Fixtures. 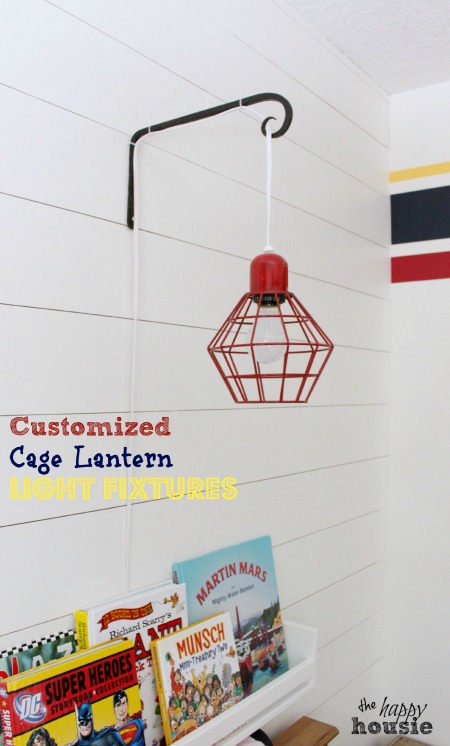 Honestly, I thought I loved the planked wall. And then I loved the DIY Book Display Shelf. Even the old toolbox book holder and their PB Knockoff Oar Décor were my faves for a moment. And don’t let me forget how much I loved their Icelandic Flag Dresser. But despite all those projects, I think this project has them all beat. It is my favourite thing in the room so far. And it was super thrifty so that makes it even better. Here is what we did….
 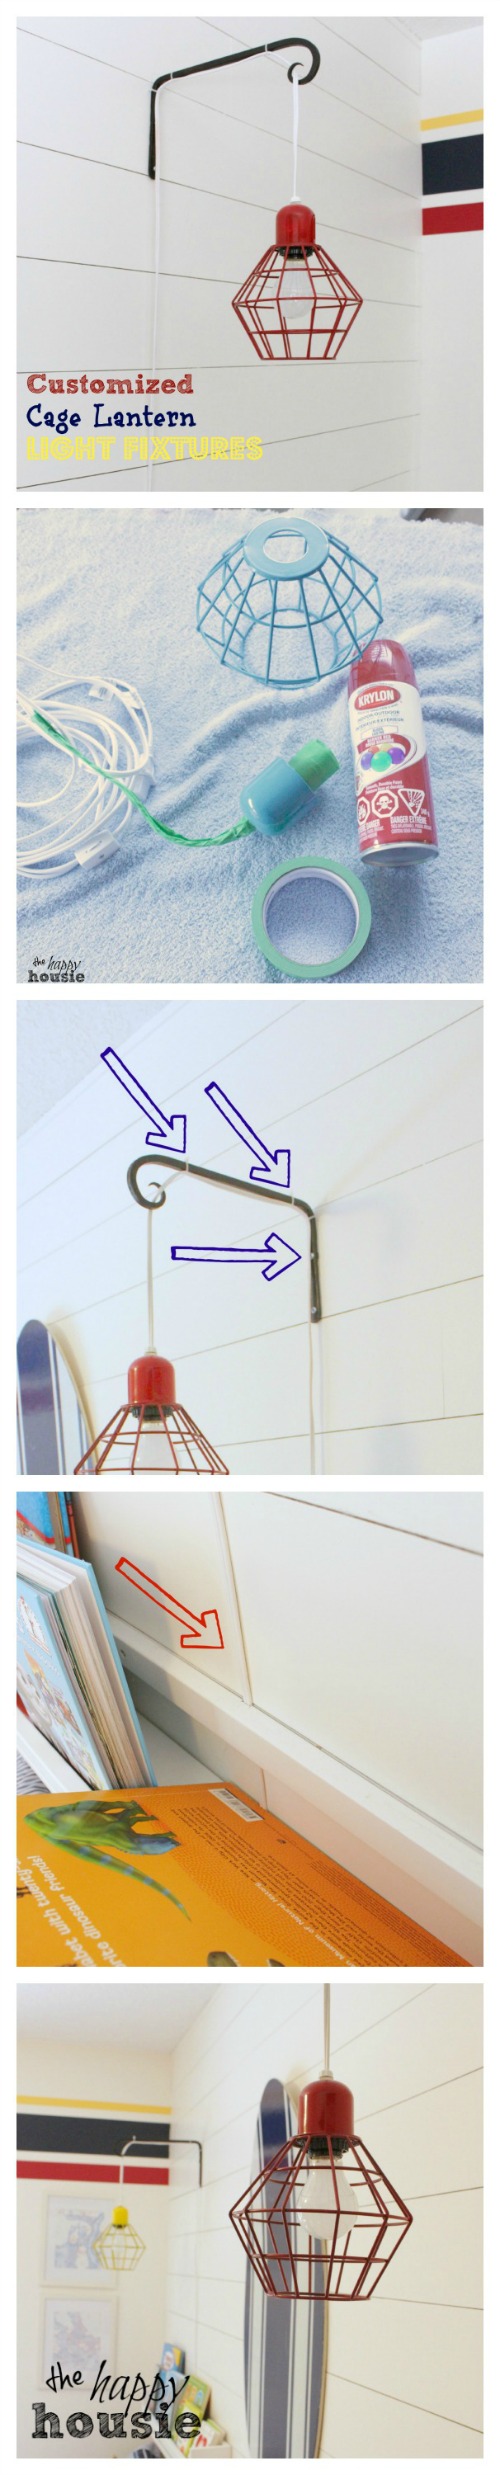 See? Super easy!! And crazy thrifty because I found these cage lantern style fixtures on CLEARANCE at Target for $8 each. Yes, I said EIGHT BUCKS!! (Have I mentioned how joyful I am that we have Target in the great white north now??).
 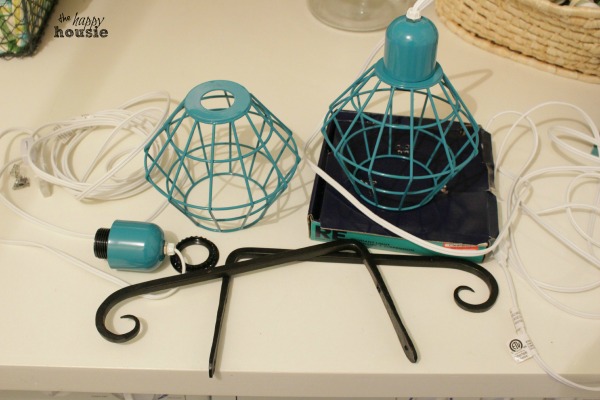 Even though I loved the teal color of them they were totally the wrong color for the boys room… but of course with a little spray paint that was easy to solve…
 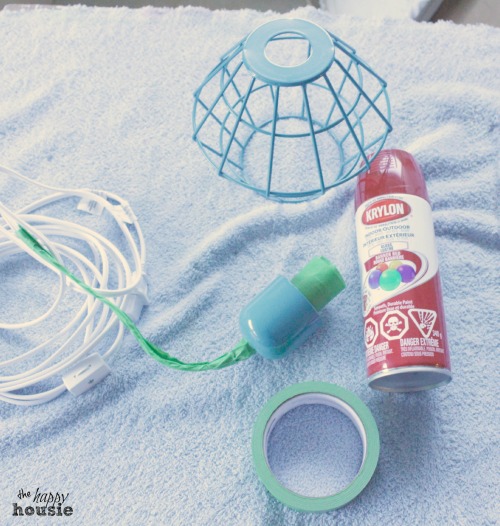 We kind of have a theme going where my oldest son’s side has red accents and my youngest son’s side has yellow accents. One thing I would do differently if I were to do this project again: I would probably spray prime them first just so that it doesn’t take as many coats of the color to get a pure tone (the yellow was especially tough…). Once they were painted and dry we hung them using some brackets found in the garden section of the hardware store. They are an ORB type of finish so they work well with the main schoolhouse light fixture in the boys’ room as well as with all the doorknobs in our house. We just held the cord tightly to the bracket using plastic ZAP straps. Super easy and you really don’t notice them very much… (of course you notice them below because I have giant blue arrows pointing to them all).
 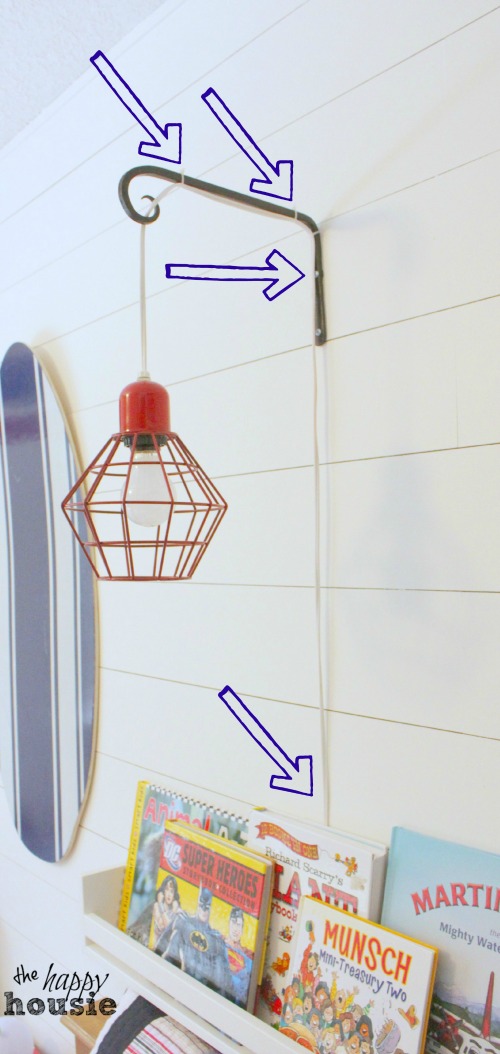 The cord slides right down the wall in behind the DIY Book Display Shelf, which we notched out slightly to accommodate the cord:
 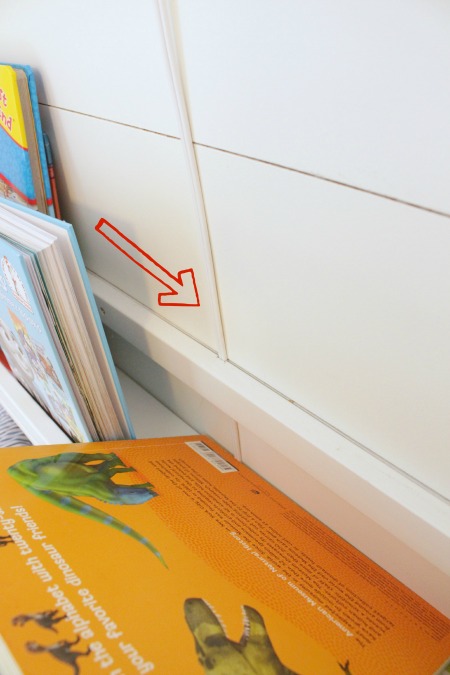 See?!? Easy, cute and done!! And much less expensive trying to wire in new wall fixtures. Of course, I love these fixtures from PB Kids – but the cost of them ($110 Canadian or $79 US dollars) as well as the cost of wiring in wall sconces was way out of my miniscule bedroom budget…
 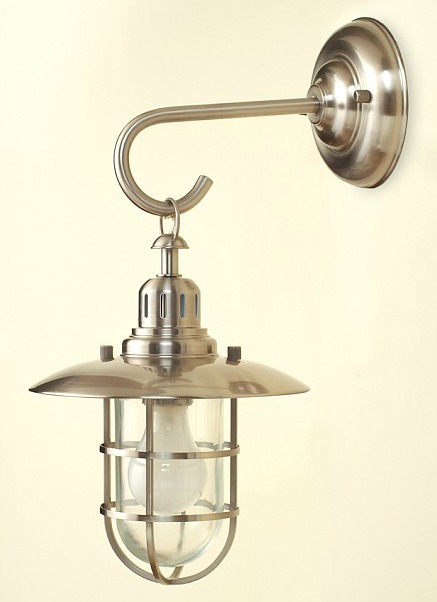 I think these achieve a similar look for much less, don’t you? (With a little more bold punch of color, of course:)
 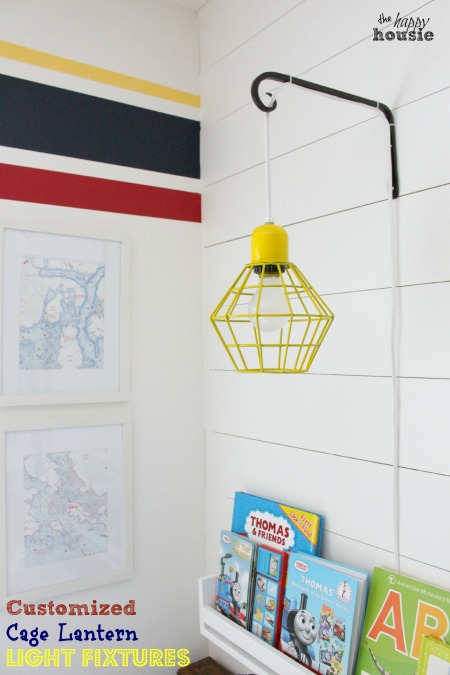 I love the bright color (surprise surprise)… especially against the crisp white planked walls.
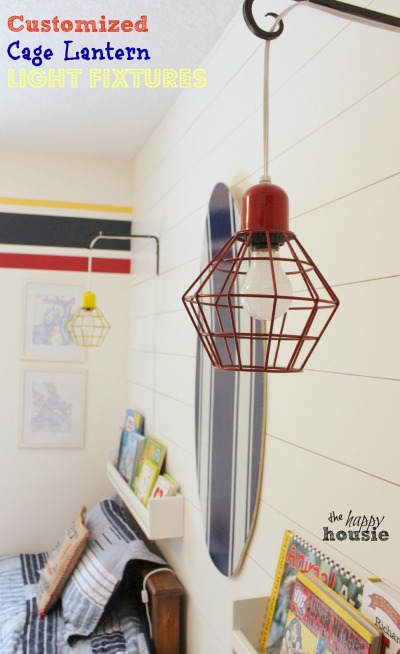
If you like these, you may want to check out:
Lots of projects down… and several more to go. I can’t wait to show you what we are going to do for window treatments, as well as how I plan to customize their closet. It is coming together and I can’t wait to see it finished!!
Are you up to any room revamps at your place? How is it going so far? Lots of progress being made? Or hard to get into it??
Oh, and if you didn’t get the chance to yesterday- don’t forget to head over and enter the giveaway I have going on right now for a $600 Visa Card!!

Thanks for reading. And remember my housie friends, HOME isn’t built in a day. Enjoy the journey!


I may link up at some of these fabulous places below, for more info check out housie parties:
Make the Scene Monday , Monday Funday , Give Me the Goods Monday , Inspiration Monday, Craft-o-Maniac Monday, Nifty Thrifty Tuesday, Project Inspire{d} , Inspire Me Tuesday, The Scoop, Hit Me With Your Best Shot, Wow Me Wednesday Whimsy Wednesday , Fall Into Fall , From Dream to Reality, The Inspiration Exchange, Live Laugh Rowe Live Laugh Linky, Thursdays Are Your Days, The Weekly Creative , The Creative Connection, Inspire Me Please, Catch as Catch Can, Fabulously Creative Friday, Party Junk, Pinworthy Projects , Link Party Palooza,, Weekend Bloggy Reading, Strut Your Stuff Saturday, Spotlight Saturday, Get Schooled Saturday, Overflowing With Creativity , , Suburbs Mama , That DIY Party


Hi–
LOVE your boys’ room! My son’s favorite color is yellow, and I’ve been trying to find a way to incorporate it into his room without it looking ‘baby’ish, and your nautical room is such an inspiration! What color yellow paint did you use for the lantern fixture? I found on your details that you’d used ‘Nacho Cheese’ BM for the paint details in the room, but I can’t find the specifics on the spray paint, and I don’t think you hand painted these fixtures?
Thanks!!
Shannon
Hi Shannon, I am thrilled you found some inspiration! I believe that I used Krylon Sun Yellow – it doesn’t match the same yellow as the Nacho Cheese but it a nice bright complementary yellow. I definitely spray painted them- and spray paint choices in yellow are fairy limited – at least around here. I hope that helps. Good luck with your project!
Thats so unique and cool. The colors you chose are fun, I’ll be stopping by target on the way home.
Krista…These lanterns rock! What an awesome find and love the happy colors. Your boys are fortunate to have a creative Mom who decorates so well:)
Krista this room is looking amazing I think any kid would love to have this room. I really don’t know which part of of this room is my favorite. I really want to give my boys room a makeover now!
Another AMAZING project, Krista! I swear, you never cease to amaze me. I love these! Pinning and sharing!
Aw, you are too sweet Tasha! But thank you!! And thanks for the pin and share:)
These look awesome Krista, and for such a great price! I am really loving this room, you are my hero! Thanks for all the great inspiration, you have done so many great projects!
Aw, Mindi! You are so funny:) I was pretty thrilled about the bargain though! Have a great weekend, friend:)
Going to be completely honest here. I wanted to feature every single project you submitted last week to the Creative Connection Party! You’ve got talent my friend :o)
Pinning this now to our group board!
Um, you totally made my day Meredith! How sweet are you? Thank you sooo much!! And thanks for hosting each week- love your party!
Nice job. I just did a post yesterday about the different things used today for lights….
Thanks so much for the visit Pam! There are certainly some crazy-interesting ideas for things to turn into light fixtures nowadays!
They turned out great – and what a steal!
I know Carrie – they were even cheaper at the till then they had been marked on the shelf (added bonus!!). Glad I went with them even though I wasn’t originally sure how to hang them.
I love the look of the lamp…great idea!
Thanks Janice- my boys love these above their beds! Thanks for your visit:)
These turned out so great. I’m pinning now!
Thank you Amy!!
Those are SO awesome Krista!! Love love love them! Pinning!
Thank you Chelsea!! I’m thrilled about the pin!!
These are so great!
Thanks for sharing exactly what to do!
I’m dying to try this!
~Amber
Thanks Amber- I am thrilled with how they turned out! Thanks for coming by and for your kind comments!!
So fabulous! What a great boys room! I love that you painted them different colors~
Jenna
Thanks Jenna- I love having a different color for each boy- the room is still quite symmetrical but each of their sides is slightly different due to the colors.
Looks great! I love this room. So glad it looks like a kids room and has a happy vibe. 😀 I bet your boys love it!
Thanks Julie- they do love it. I love being in there now too!!
These are awesome, Krista! They look perfect in your boys’ room!
Thank you April!! I love how they turned out and how they look against the planks. So glad you came by!
I was stalking those at my Target! How funny is that, I didn’t get them (I missed out – boo) but I was planing on spray painting them pink for my girls room. I am glad to see someone else had the same idea. 🙂
Lol- they are super cute, aren’t they? I am glad that I took up the chance to grab them when I did- almost passed them up because I wasn’t certain how to hang them.
Krista,
Love, love, LOVE them! They look amazing in the boys’ room with all of the other fun touches that you have done…and that price. Incredible! 🙂
~Sarah
Thanks Sarah! I love me a bargain! And the fun colors are pretty cute too. Thanks for coming by!!
I LOVE these! They look awesome in that room. Very well done.
Thanks Tricia!! I am totally happy with how they came out- glad I didn’t pass them up when I wasn’t sure how the heck to hang them!!