
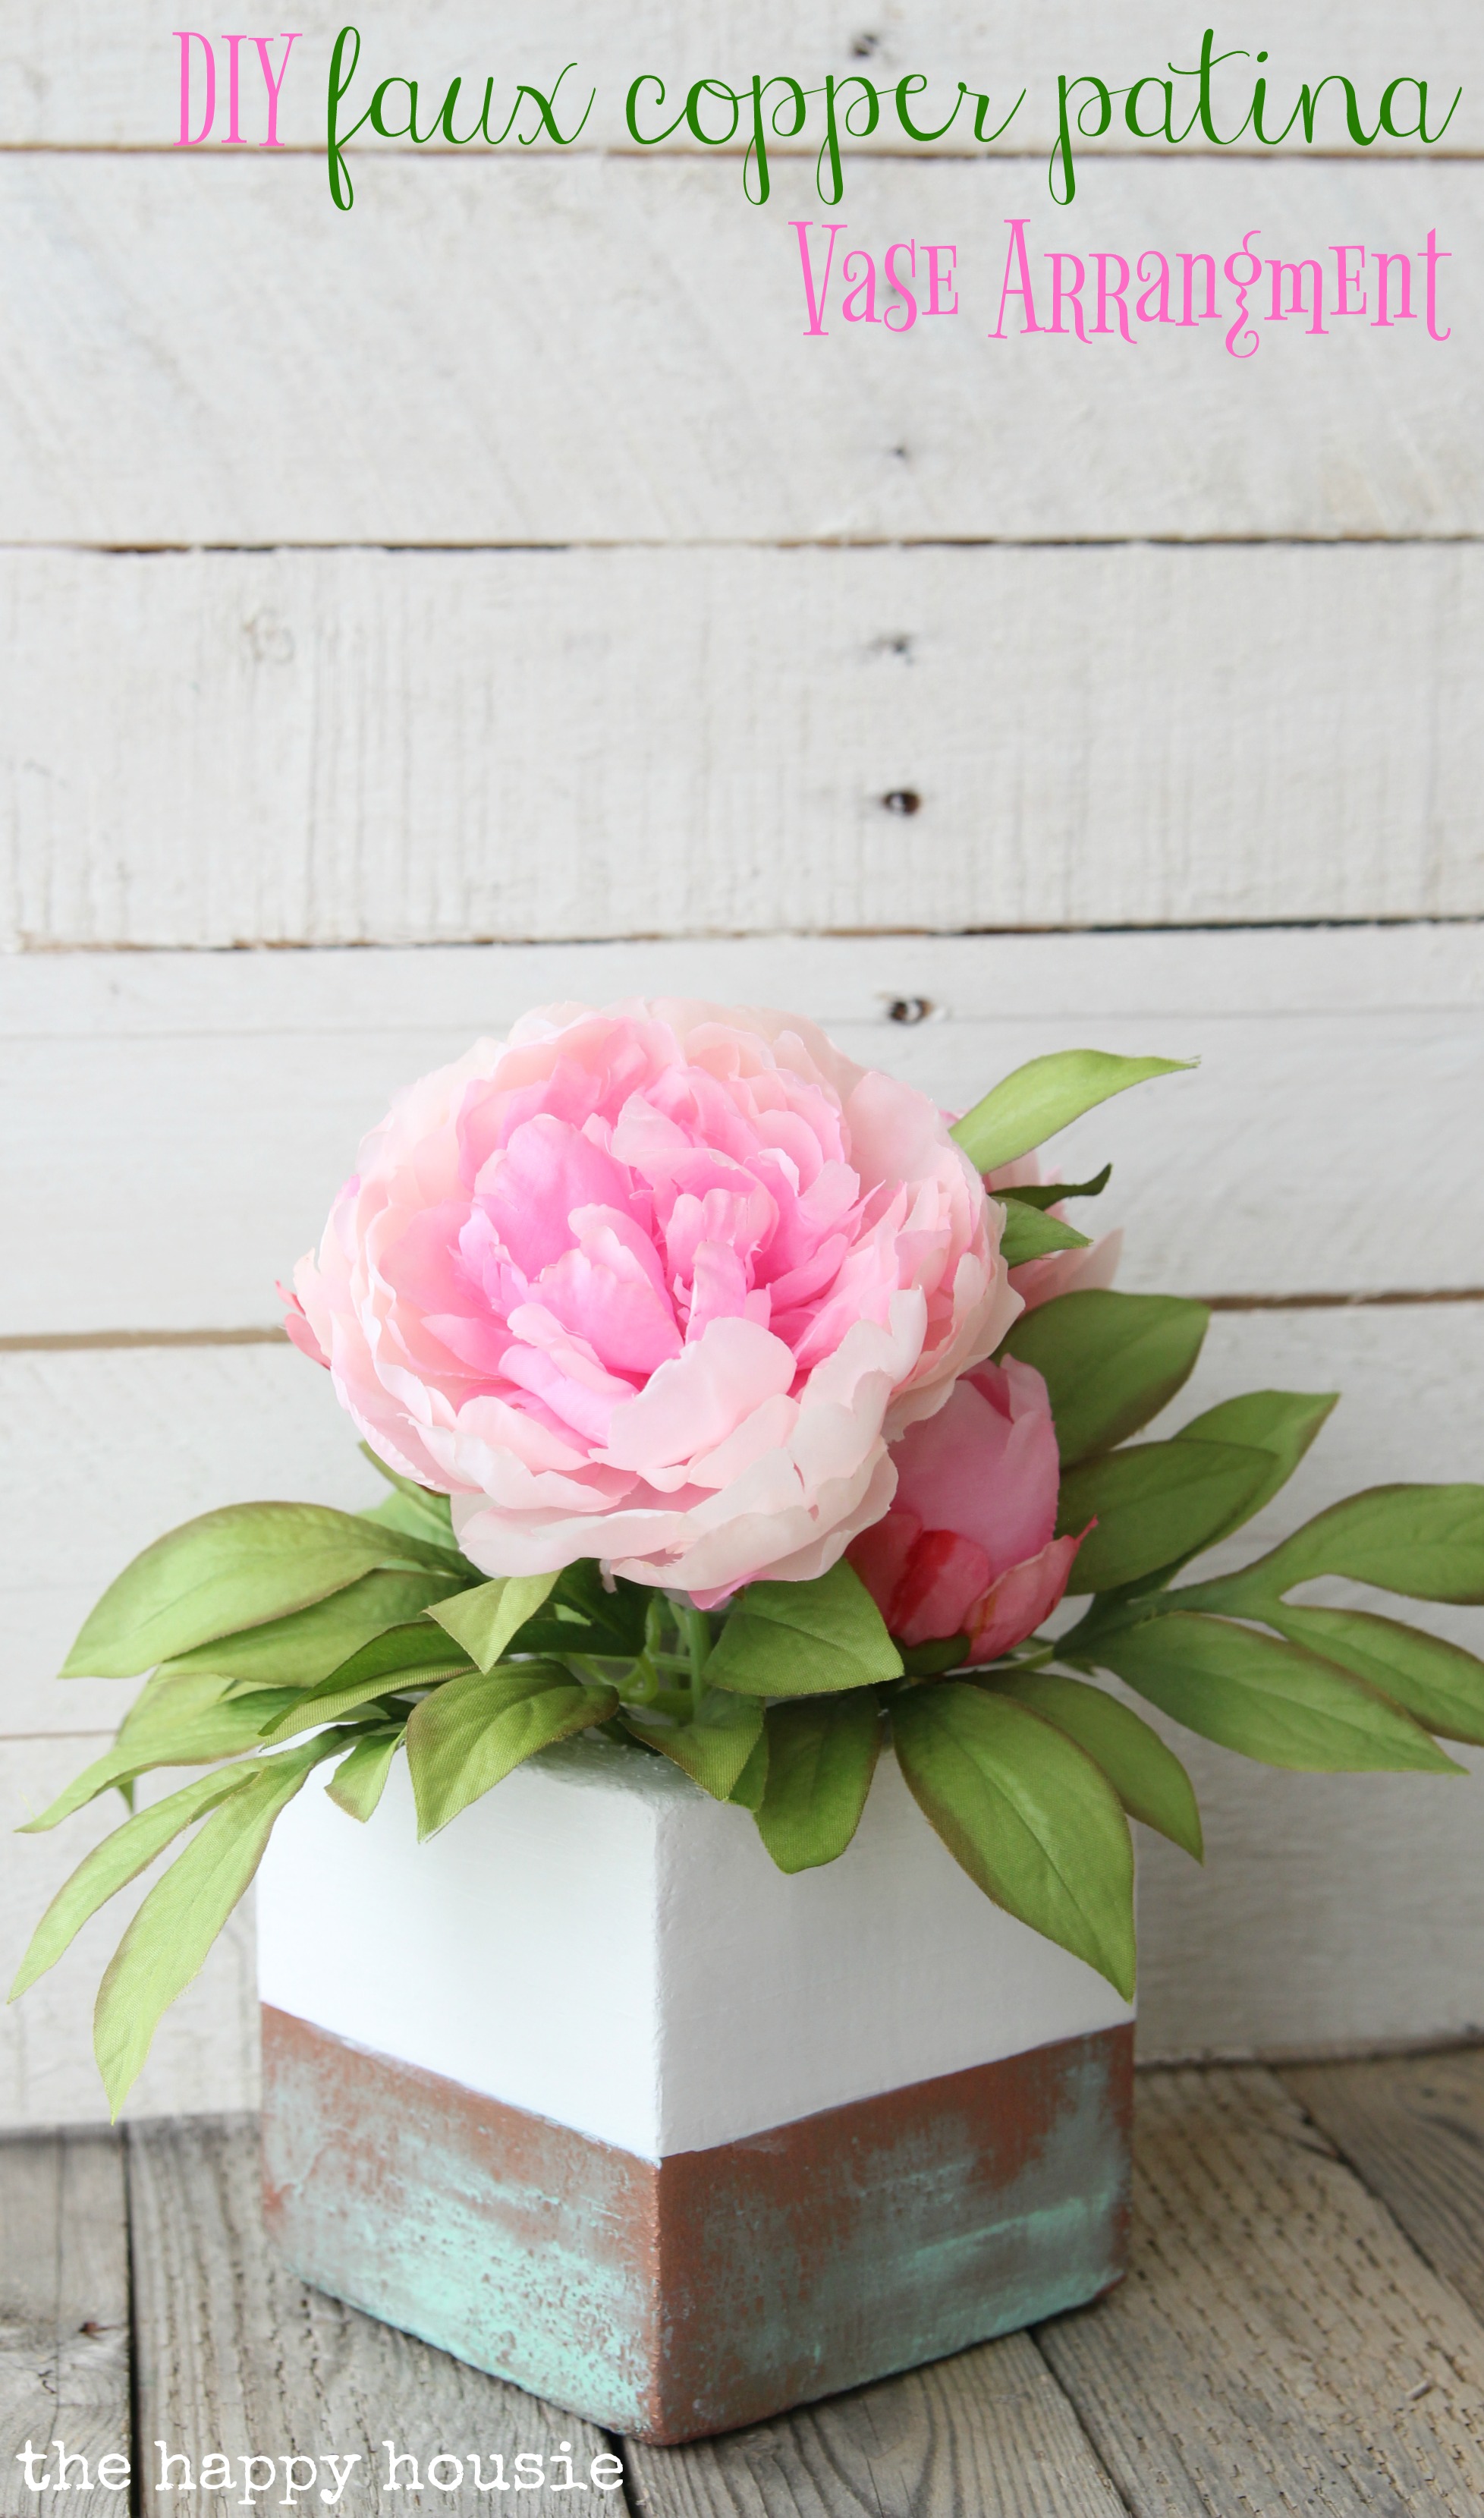
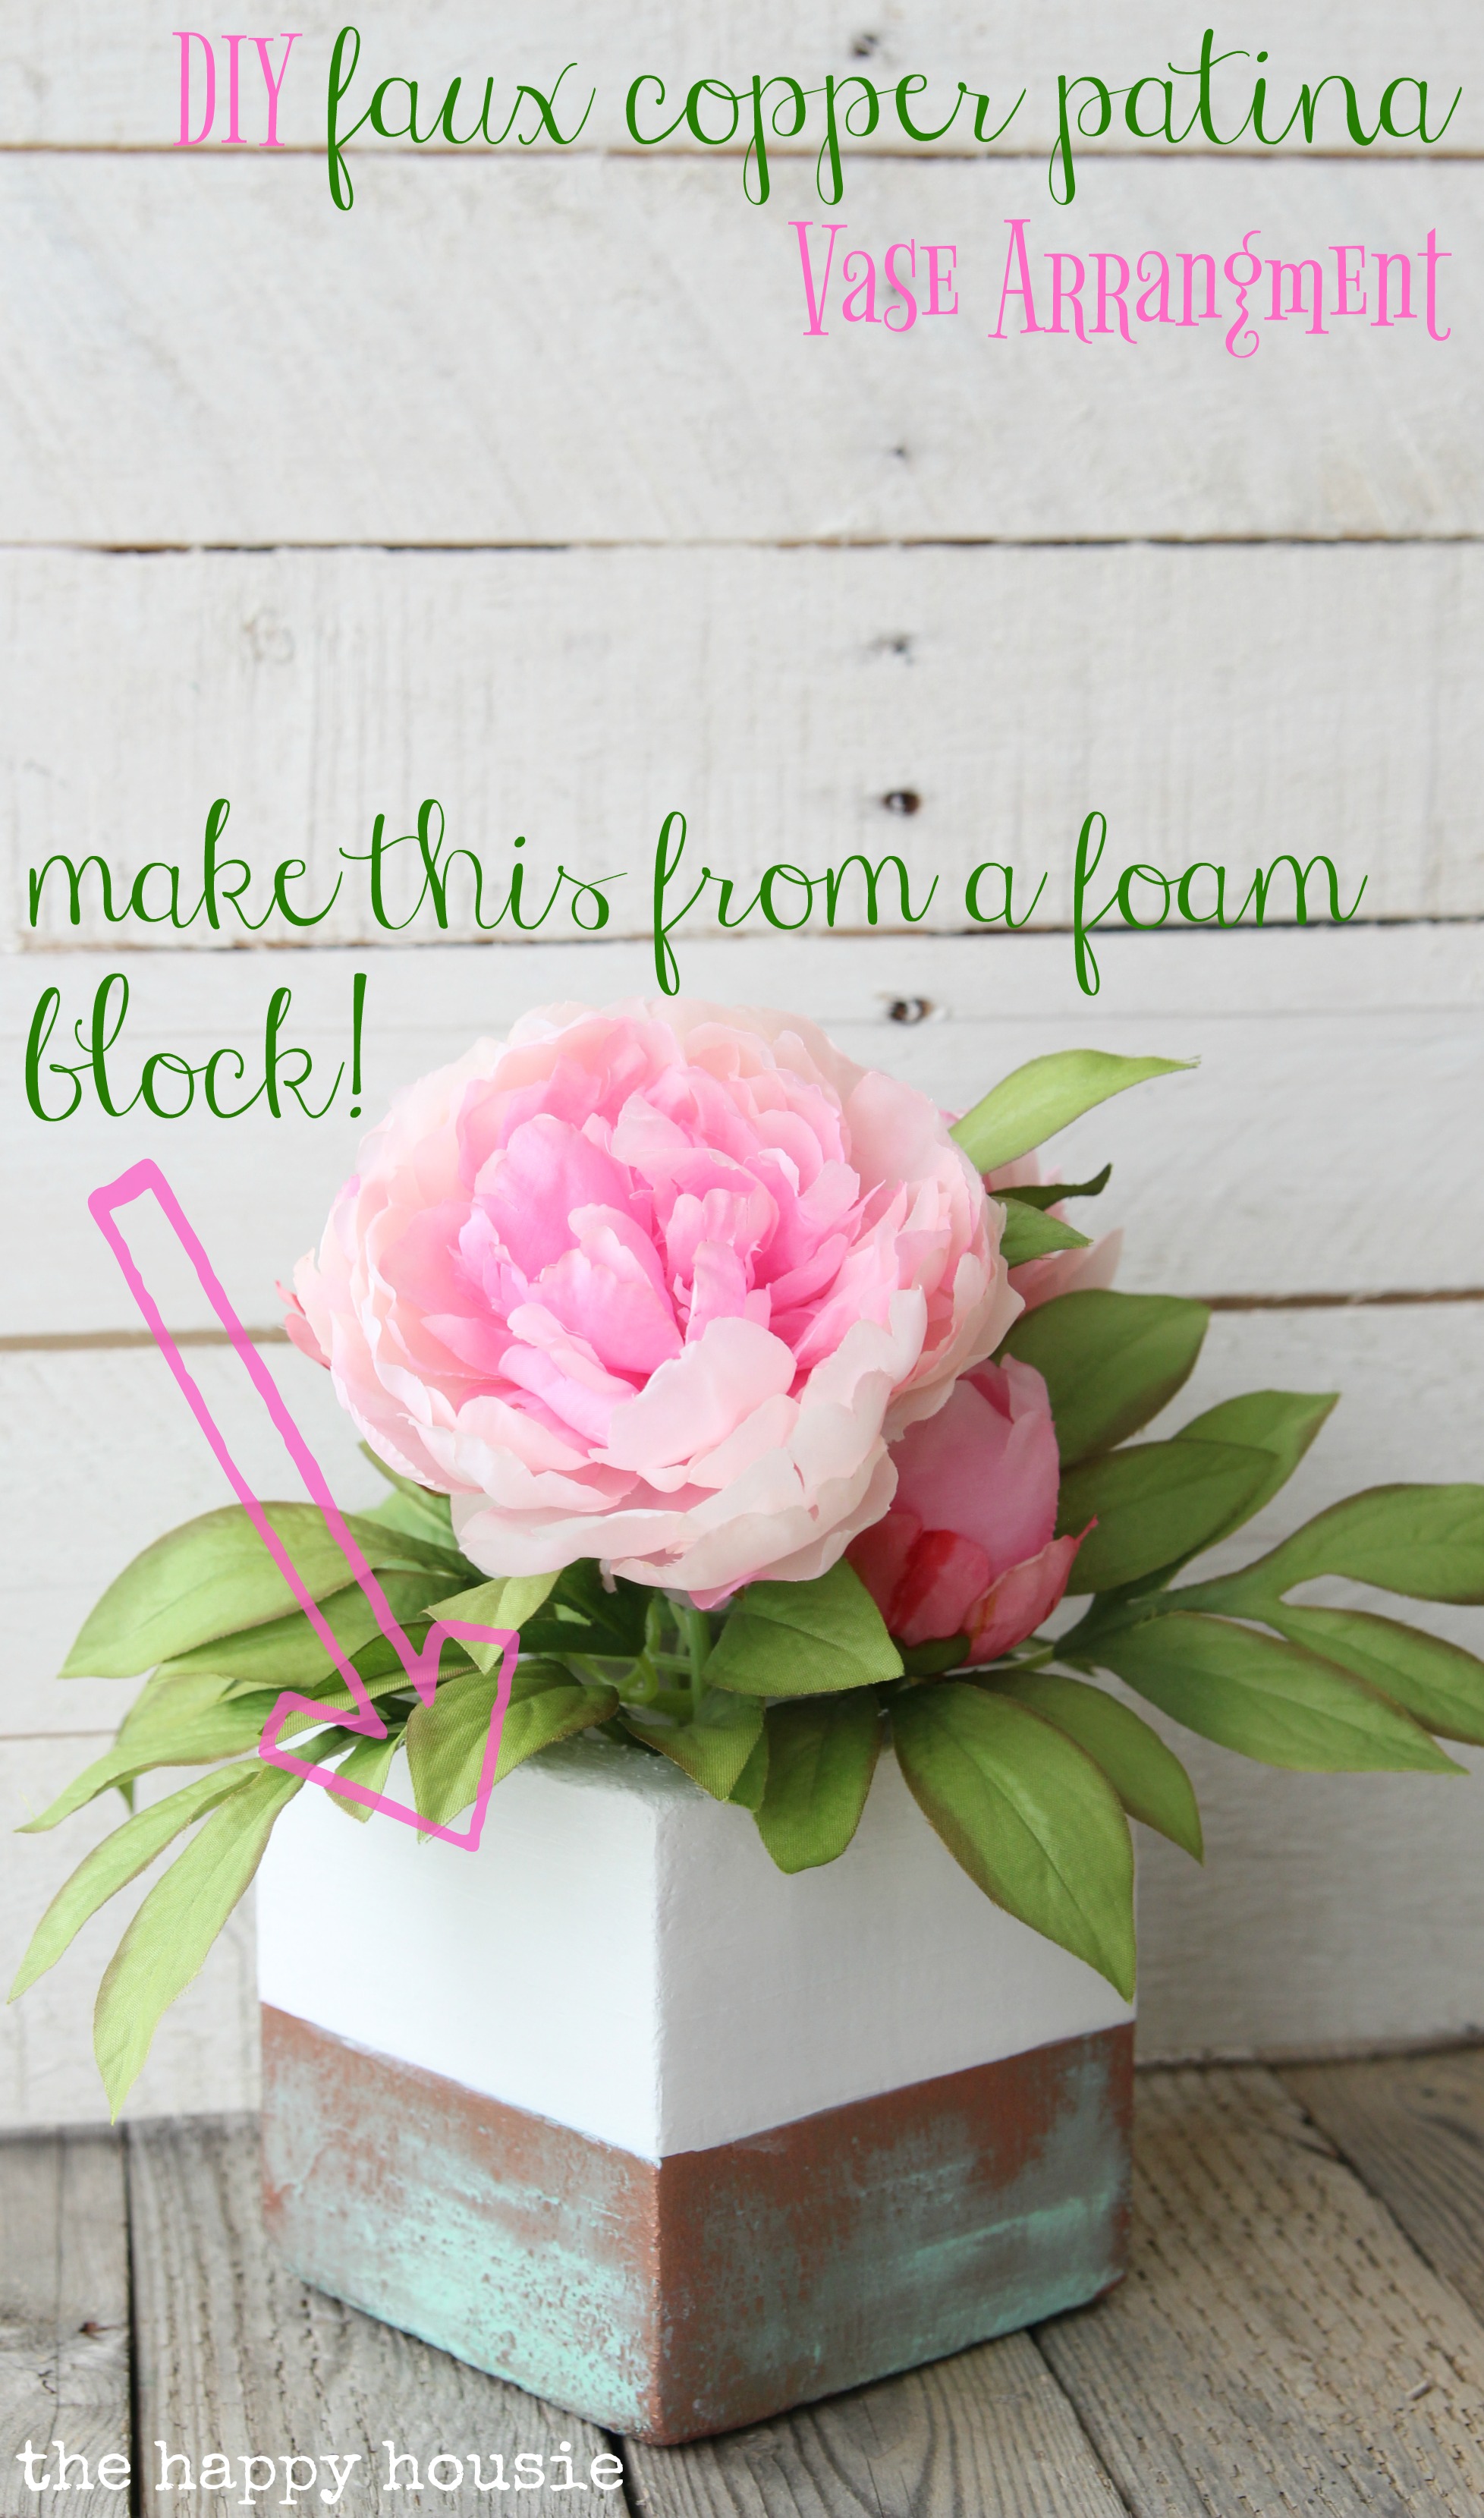
DIY Faux Copper Patina Vase Arrangement
Brighten up your day with my tutorial for a faux copper patina vase arrangement!
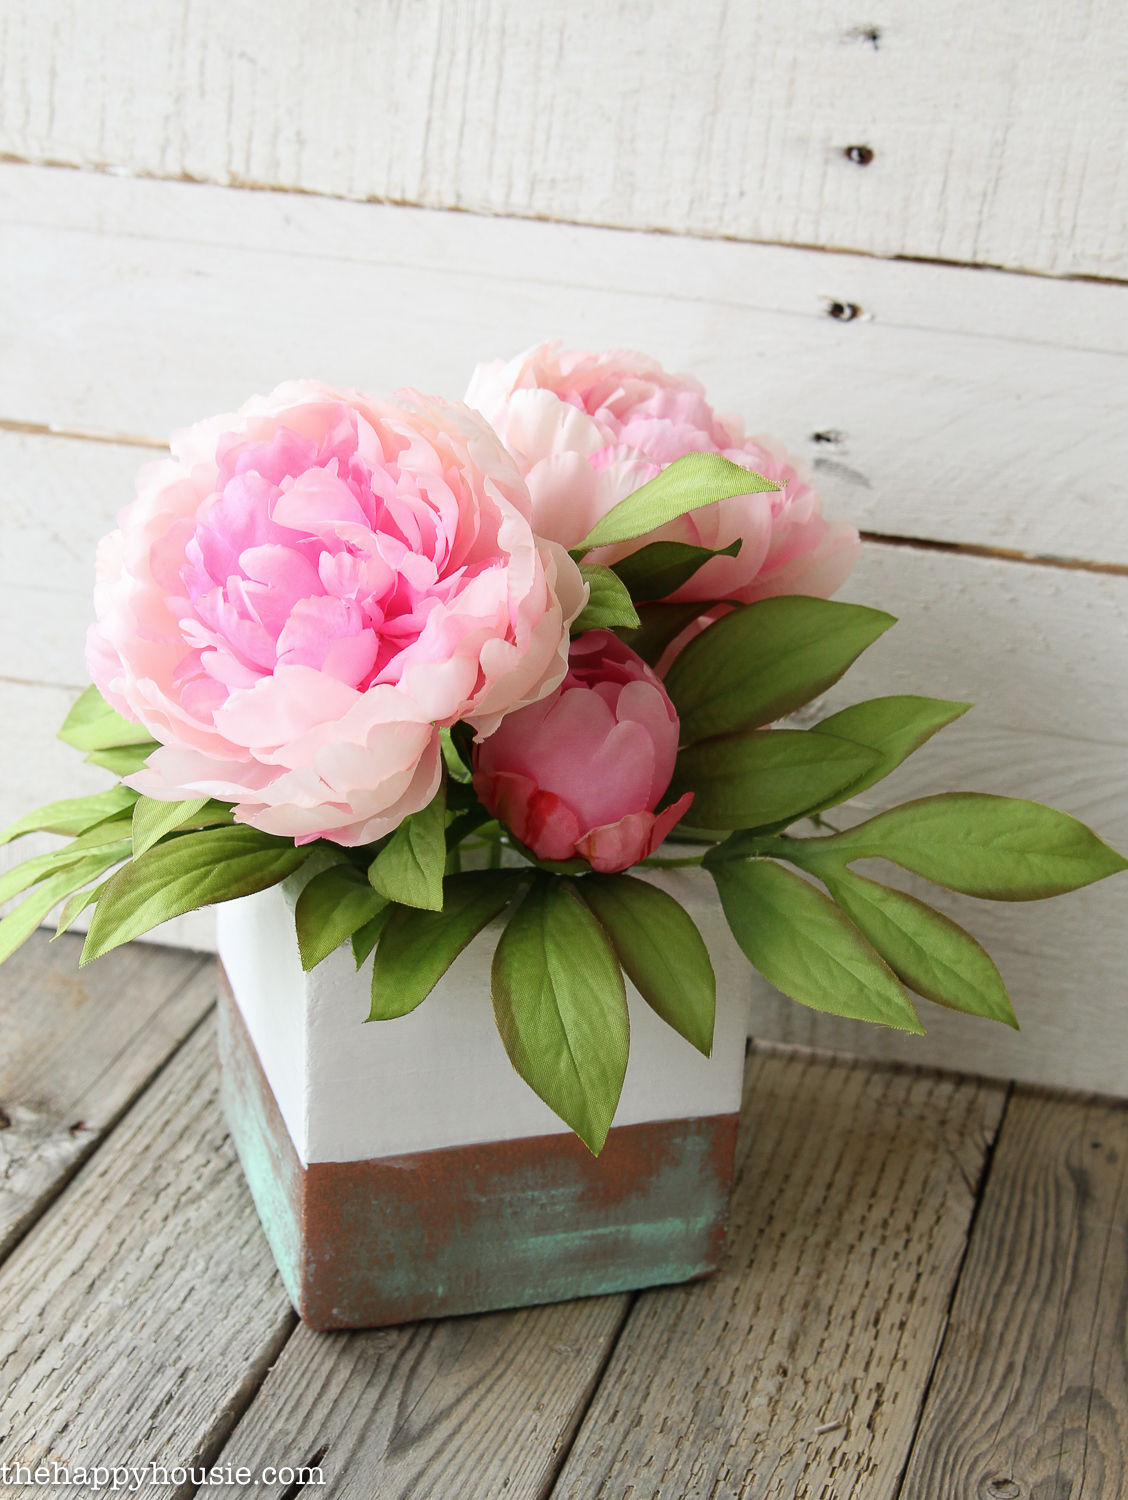
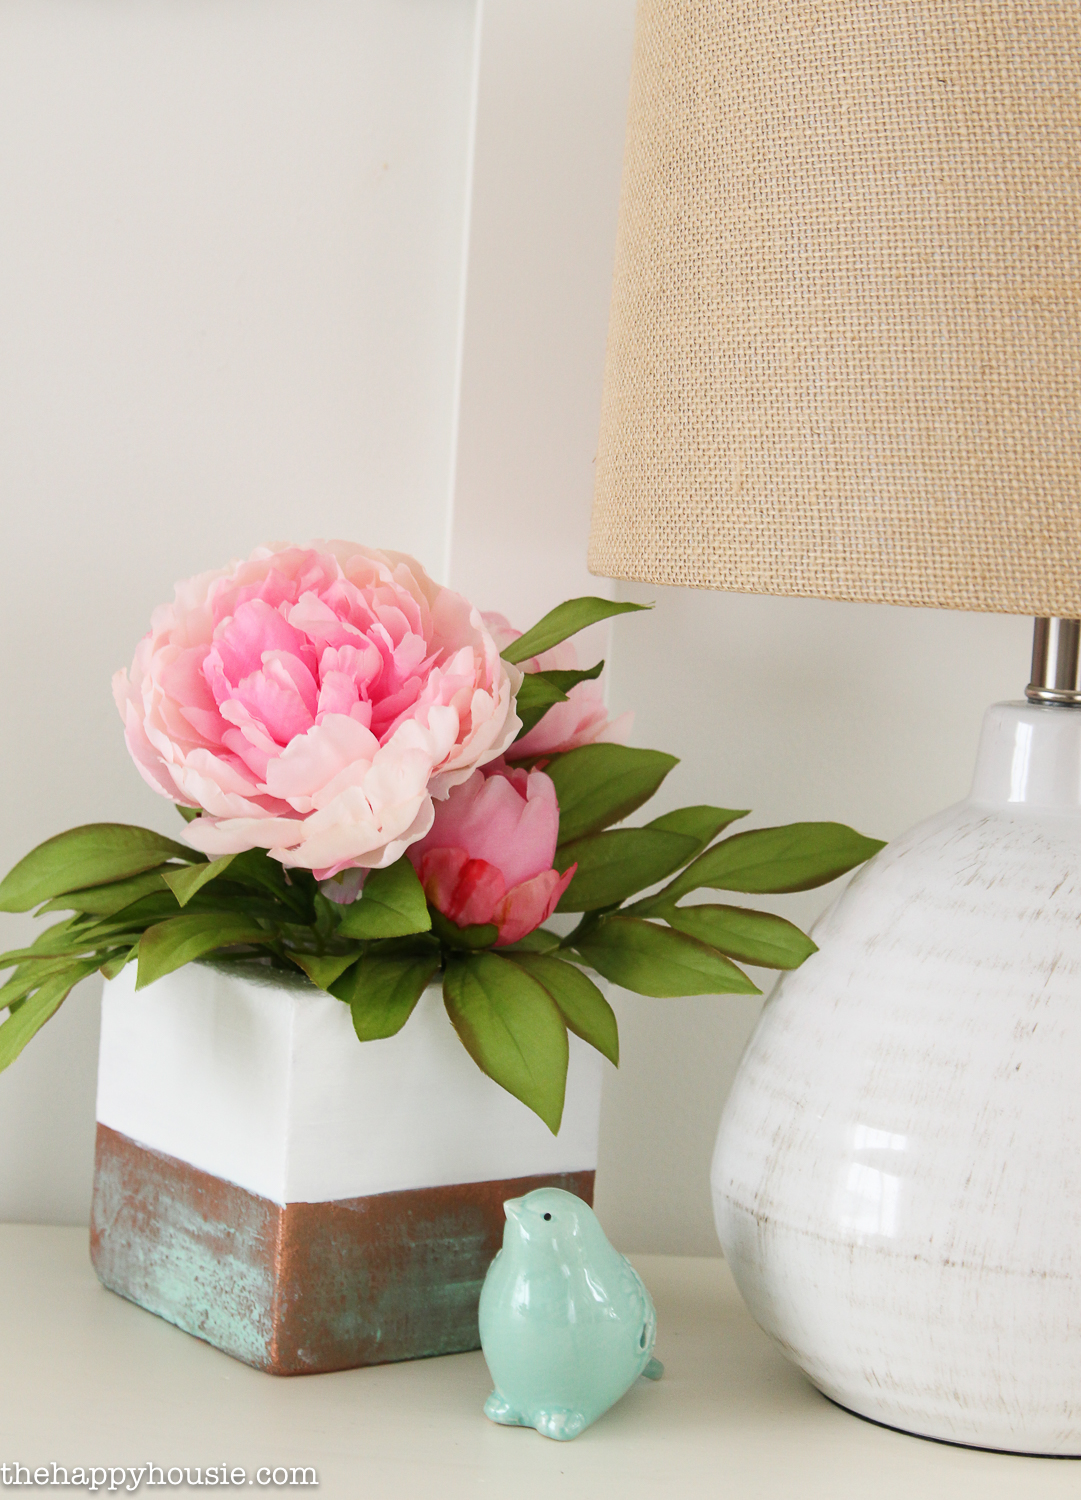
How fun is this little DIY faux copper patina vase arrangement that I whipped up to display some of my favourite spring blooms?
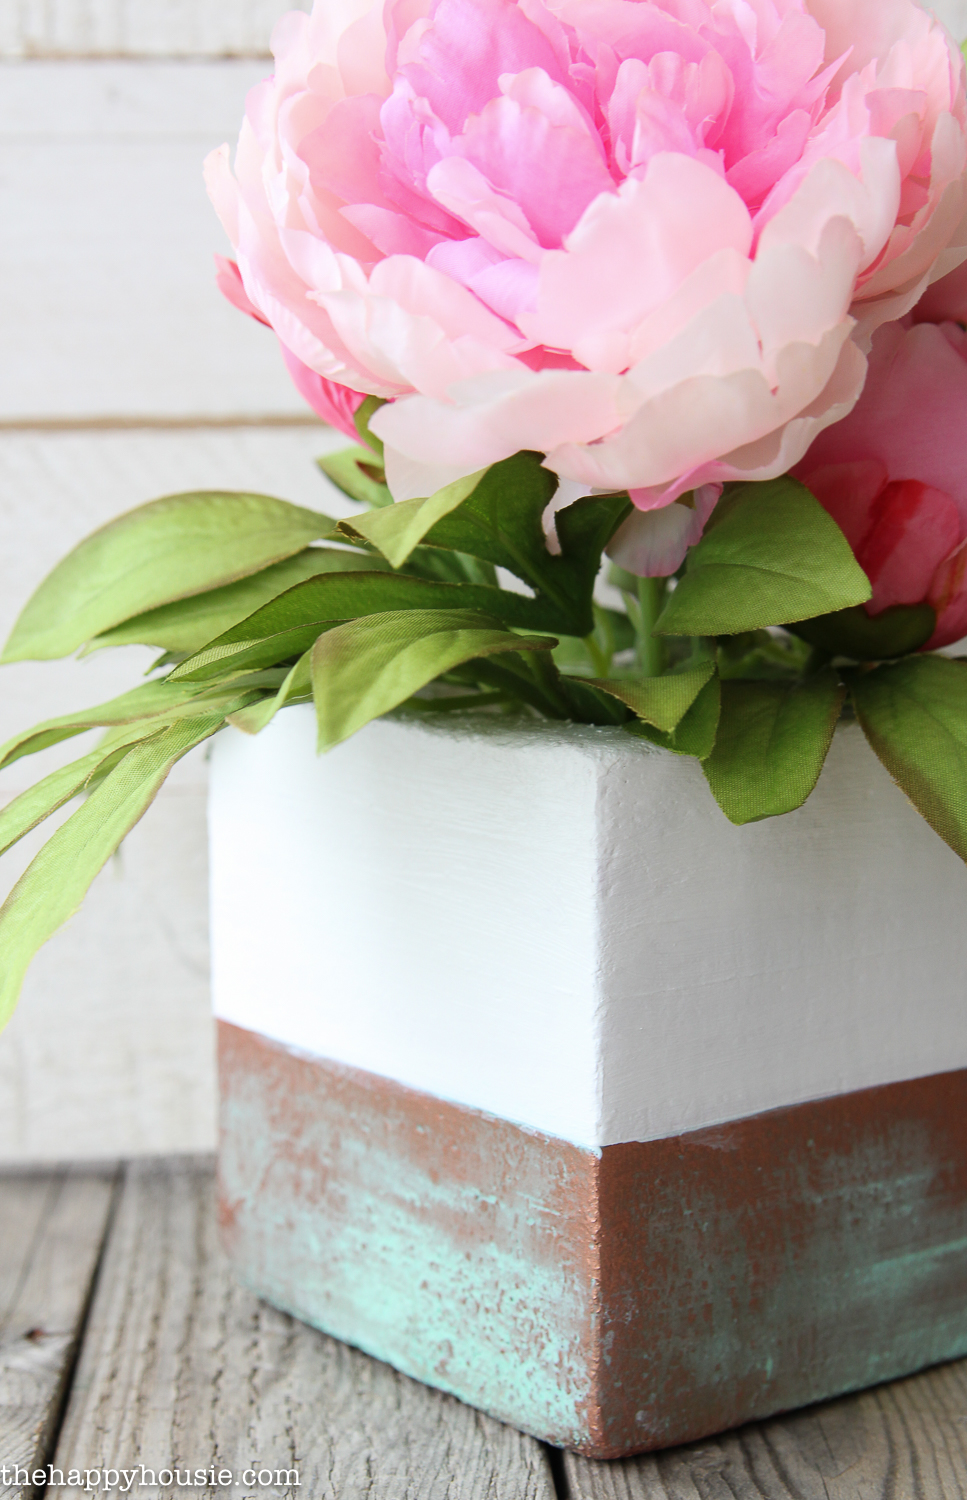
Isn’t it hard to believe that I made it out of a Make it Fun Foam block?! Truly!
It’s so cheery and springy, really brightens up the day!
Speaking of spring…it’s on the way, right??
We just had a huge dump of snow this week… enough to close the schools yesterday. And now it’s icy rain. Yuck!
But when things are looking pretty bleak and gross outside, it’s even more fun to add some cheery spring colour inside! And somehow the month of February always gives me the motivation to start adding some pink into our decor.
And in a house full of boys, I don’t get to use pink all that often! So I’m going to embrace it fully this spring and add hits of pink all over. Pink peonies are my favourite. And pretty faux peony stems definitely last a lot longer, and are available much earlier; like, say, February!
![]()
To make this I used…
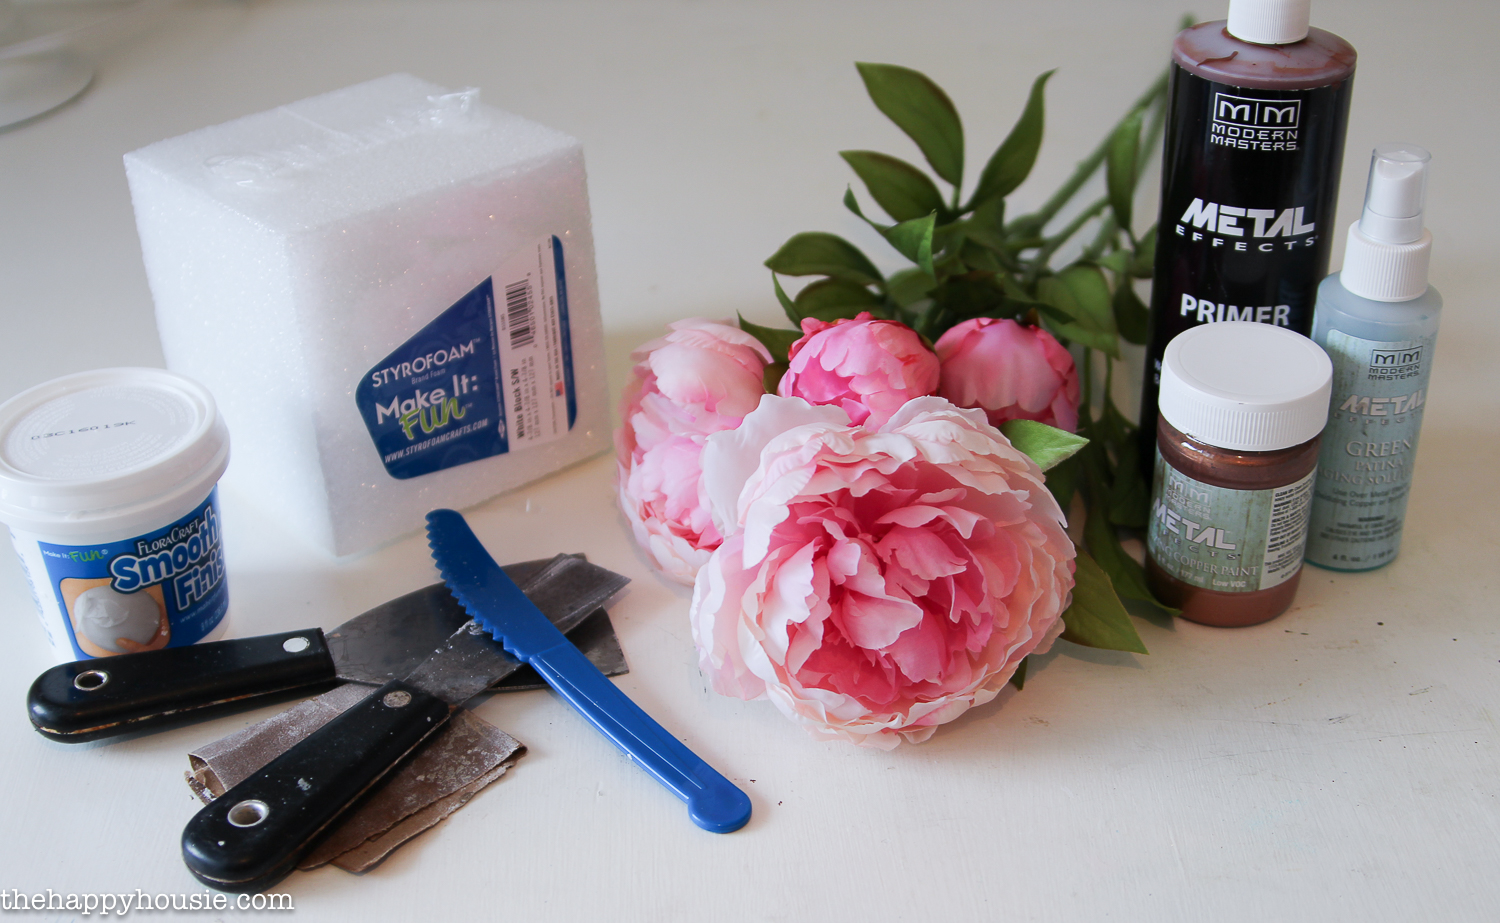
- FloraCraft Make it Fun Foam Block – 4 7/8″ square
- FloraCraft Make it Fun Smooth Finish
- Knife Tool
- Putty Knife
- Sand Paper
- Modern Masters Metal Effects Copper Paint & Green Patina (I didn’t end up using the primer)
- Martha Stewart Craft Paint in Wedding Cake
- Yellow FrogTape for Delicate Surfaces (not pictured here)
- Faux Flowers – I used two peony stems including the leaves and buds (I got mine at Michaels on a BOGO sale!)
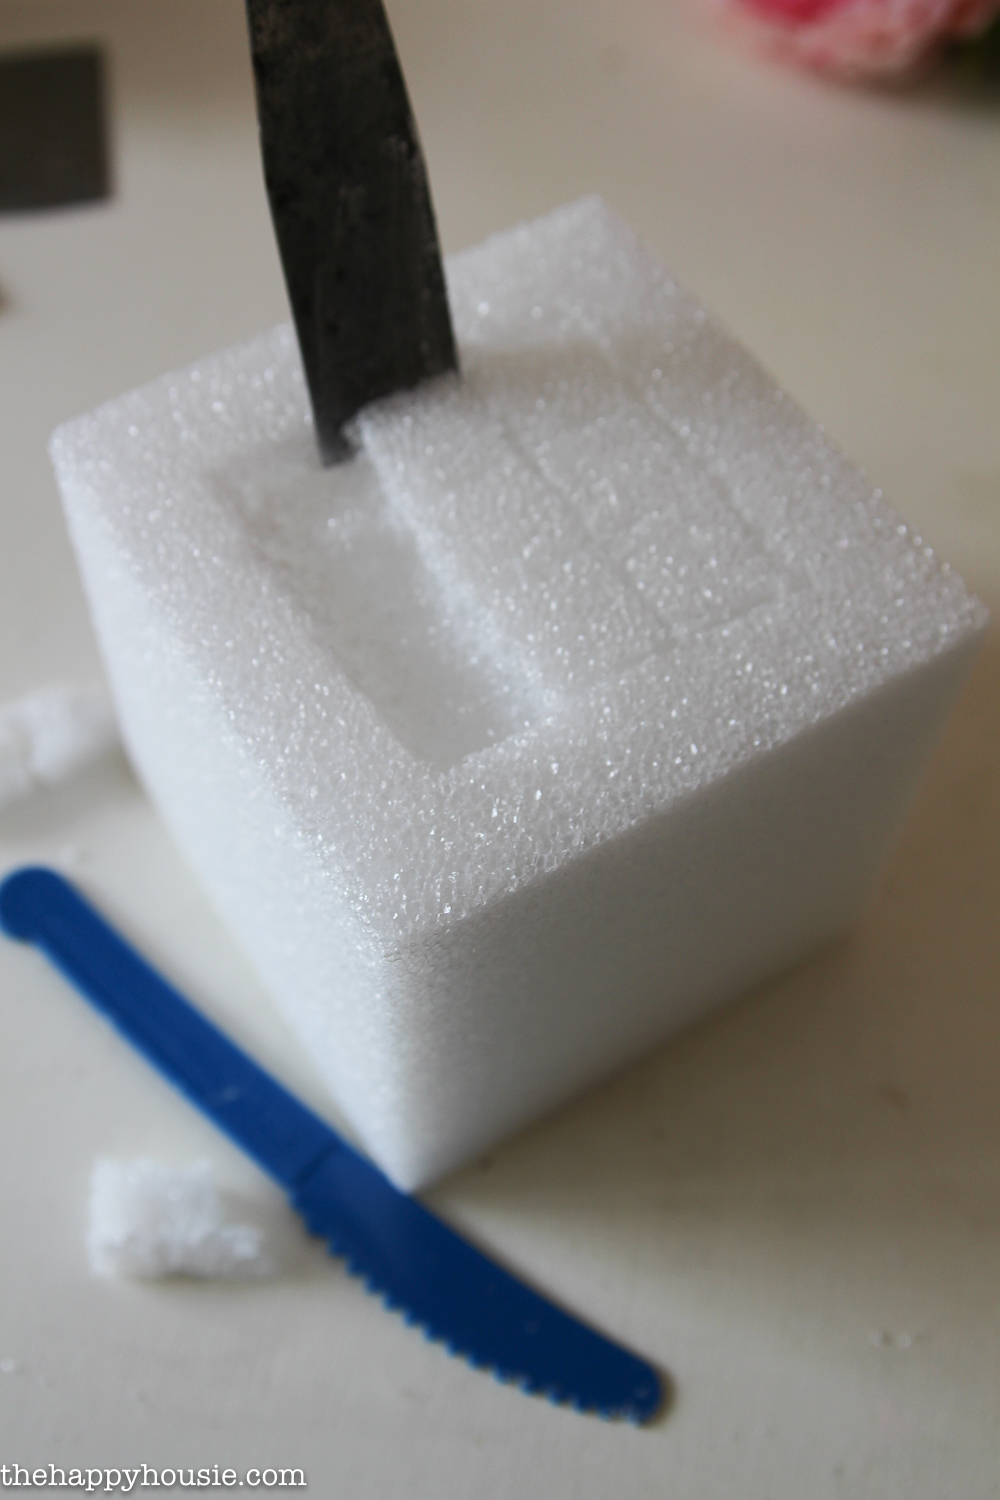
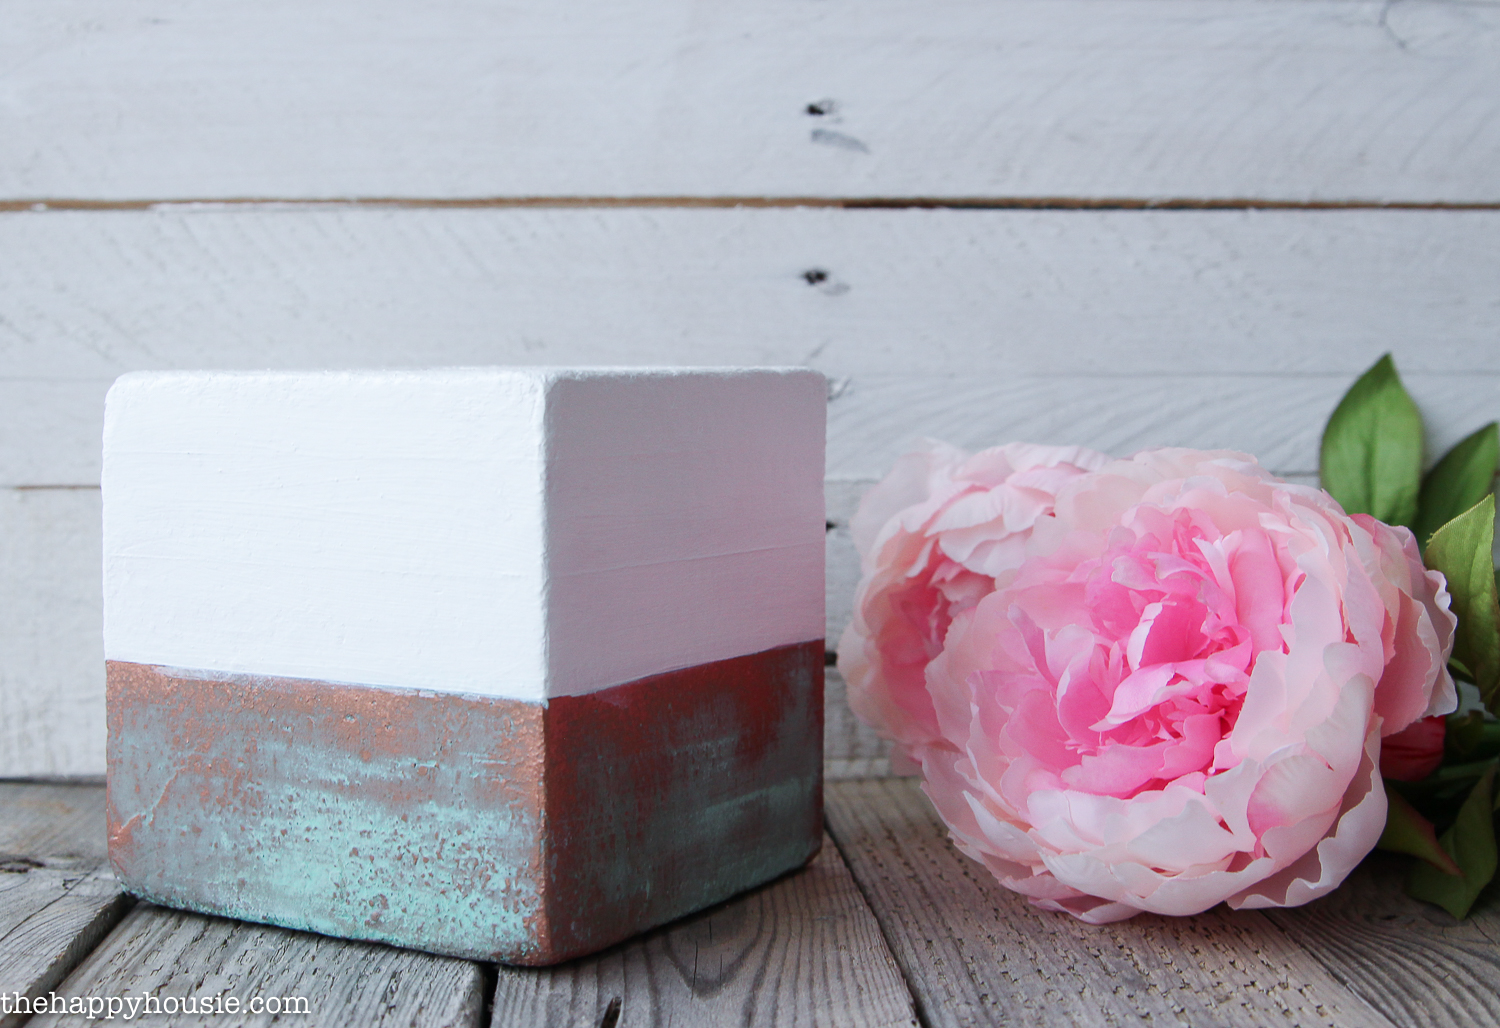
I started by carving a square into the top of my foam block to create a faux vase opening. I scored the top into a square using my Foam Knife and then cut it into a grid. I then popped the little squares out with a spatula tool. I did this two layers deep, or about 1.5-2 inches deep.
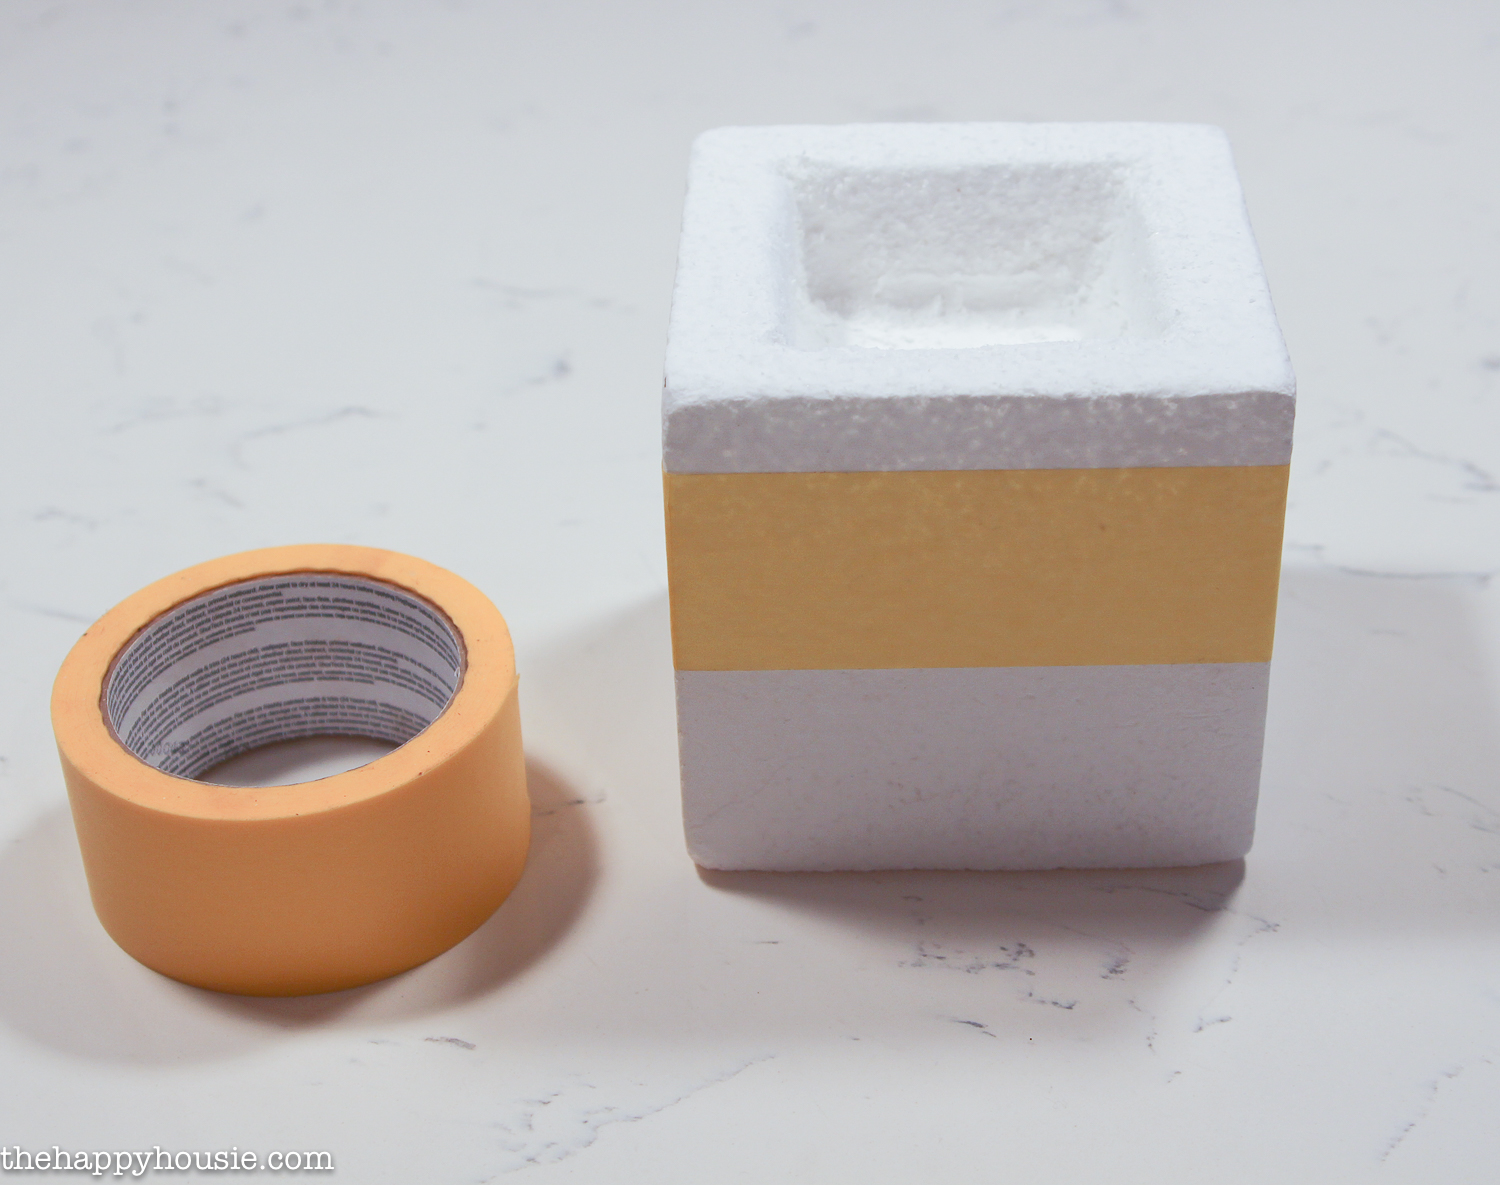
Then I covered the foam block with a few coats of Smooth Finish, letting it dry and sanding between coats, until I had a smooth edged finish all over the block.
Once that was dry, I added some FrogTape for gentle surfaces to mark off a straight line for the copper paint along the bottom of the faux vase.
I did two coats of copper paint and let each dry. I added a third coat and then sprayed with it with Metal Effects Green Patina Aging Solution. As it dries it creates a green patina effect on the copper.
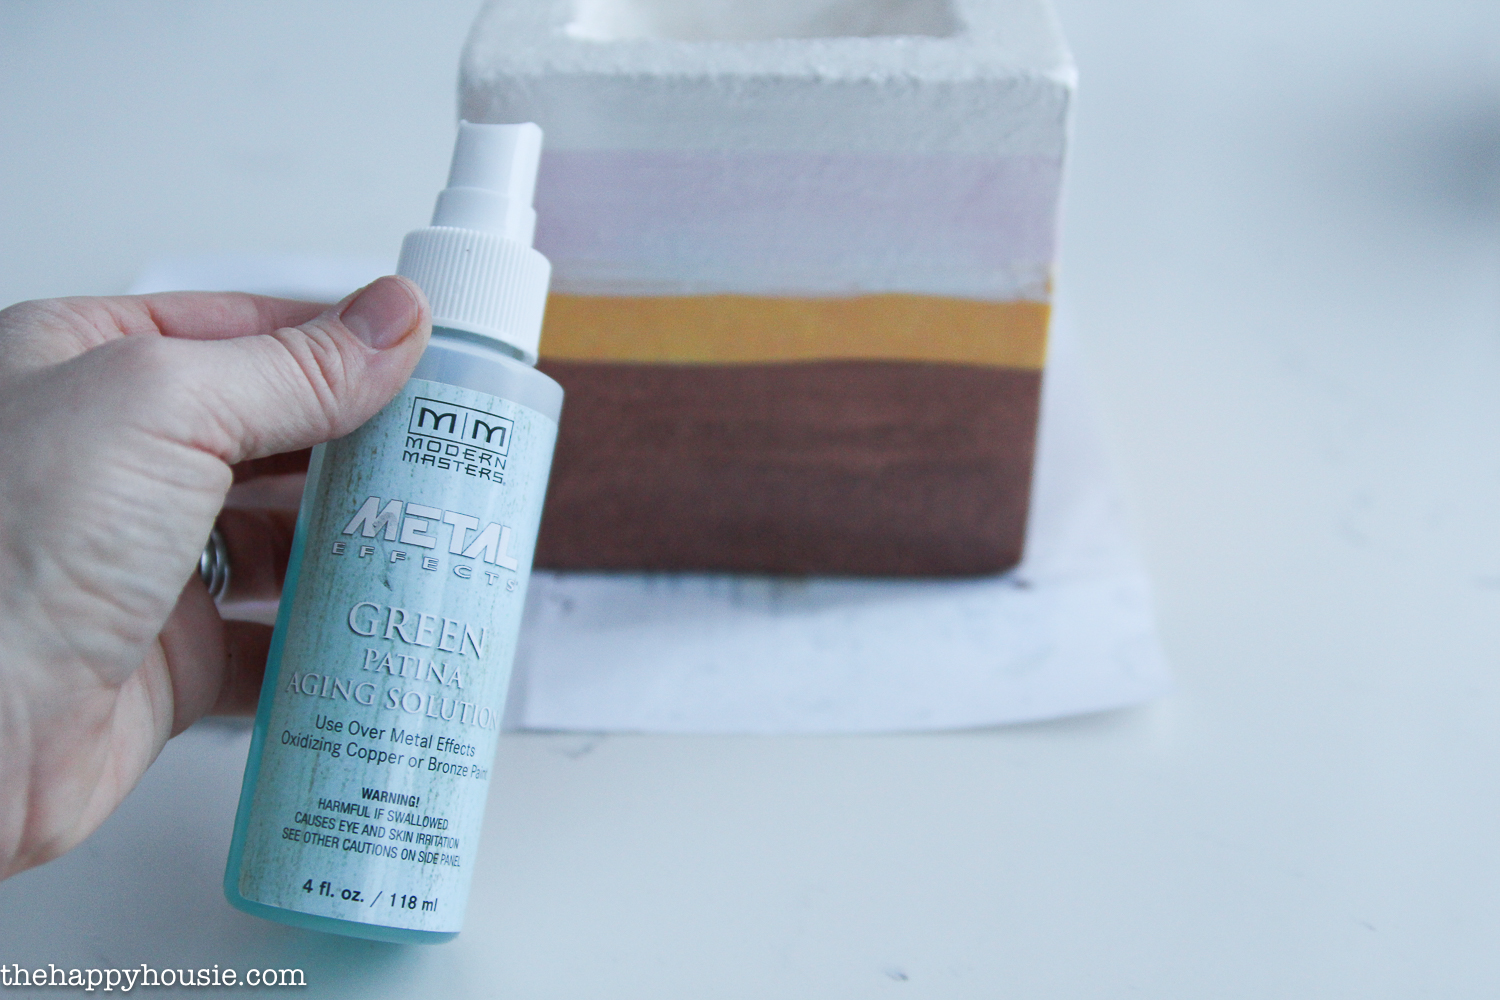
I used my gentle surfaces tape to mark another line along the top of the copper paint and painted the upper half of the foam block vase with Martha Stewart Wedding Cake craft paint.
Done!
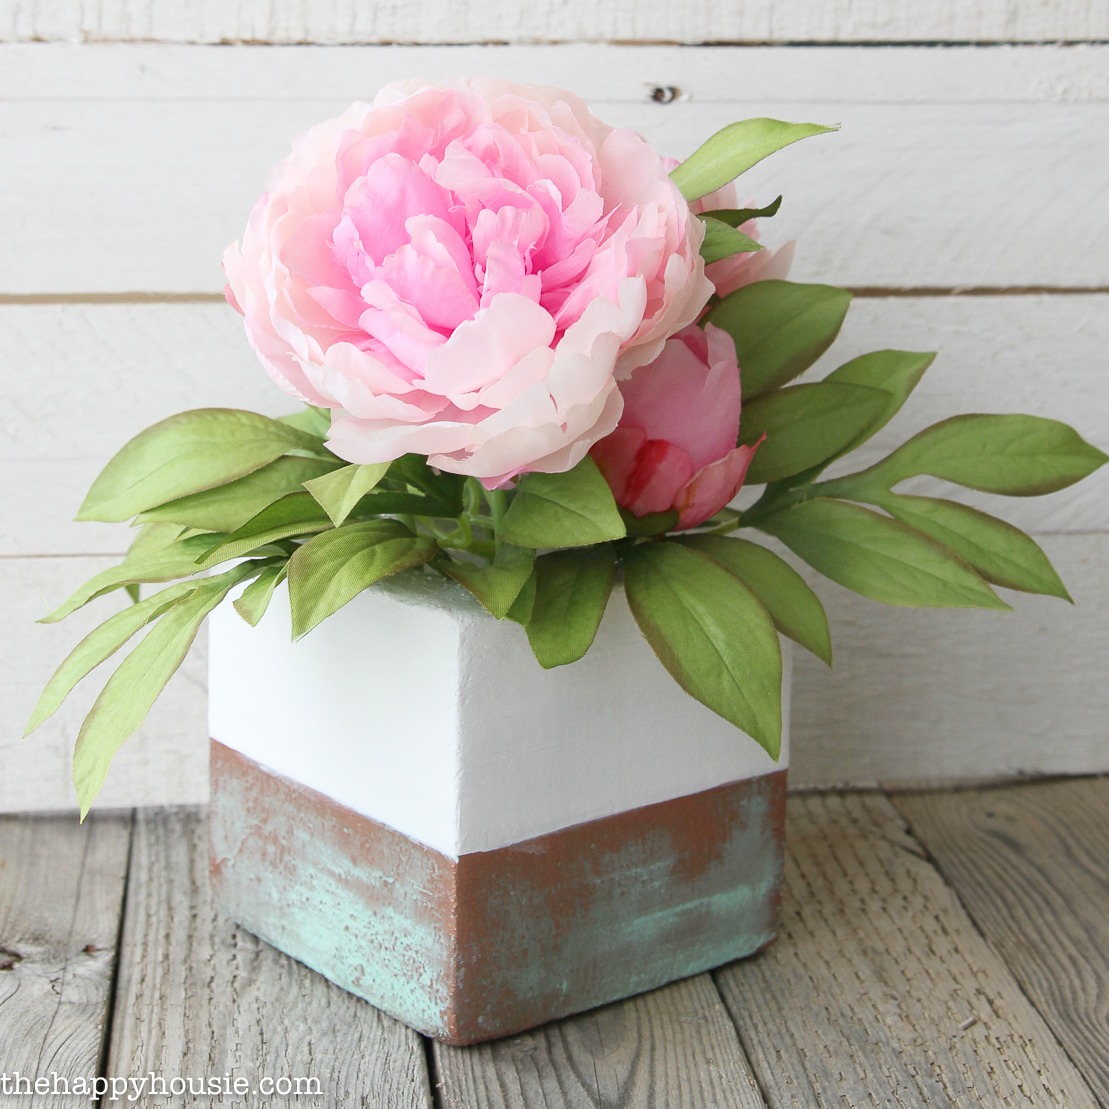
Time to add the pretty pink flowers!
I cut my two peony branches to separate the flower, the flower buds, and the additional leaves. From two floral stems, I ended up with two large peonies, two smaller peony buds, and about six leaf branches.
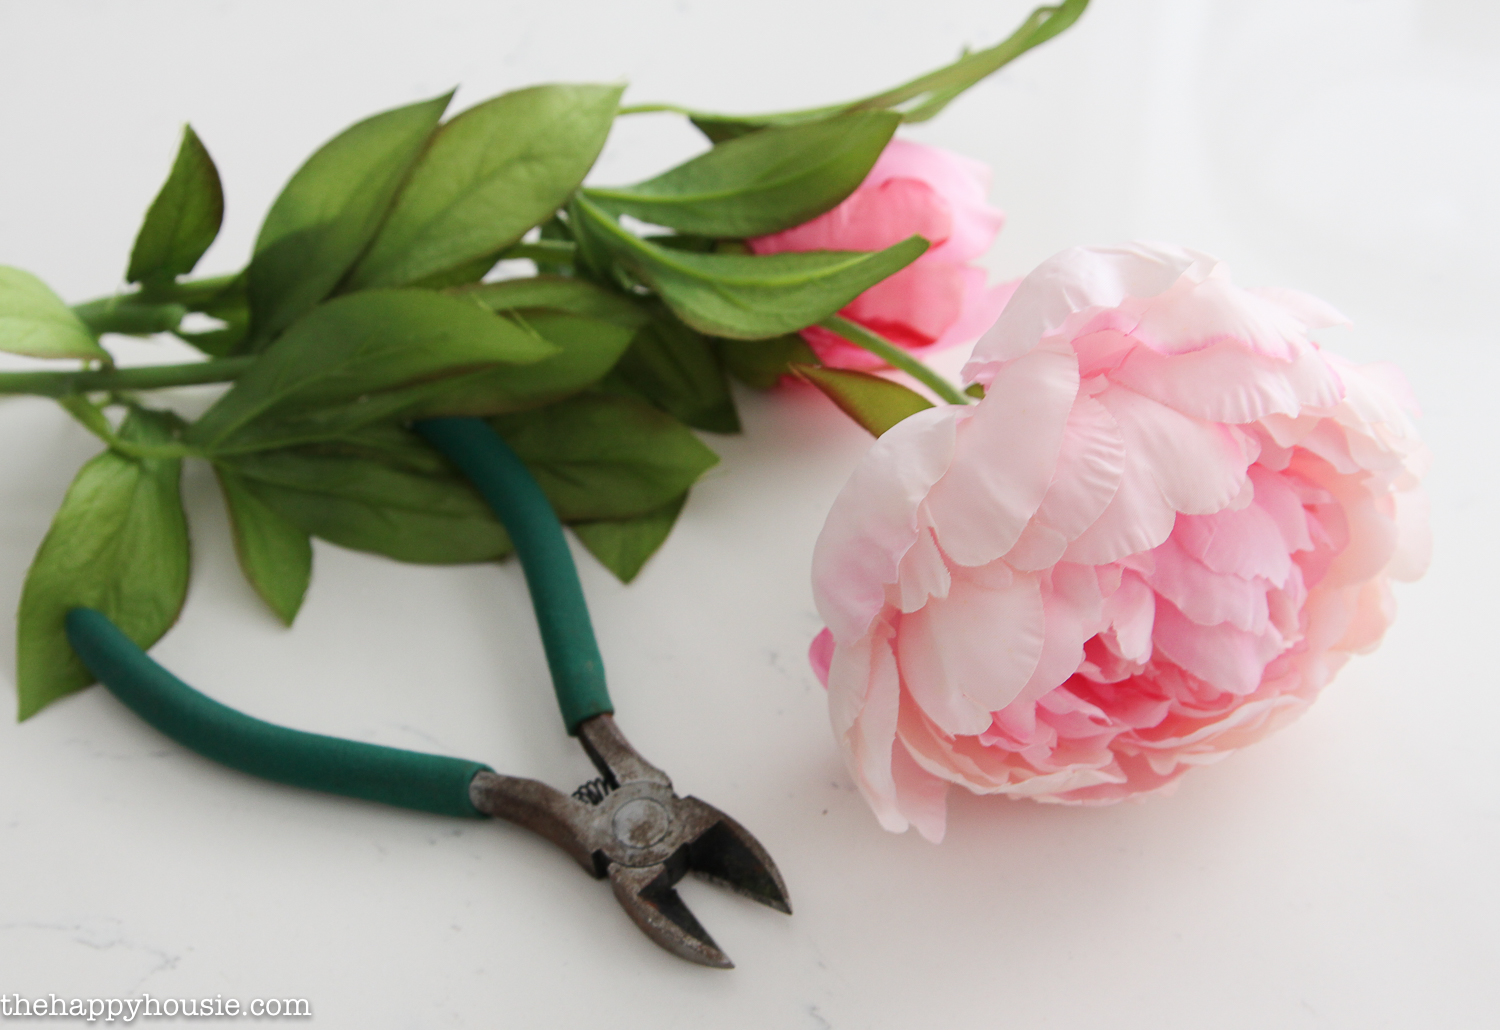
Because the “vase” is a foam block, I was able to secure the flowers inside the vase mouth by pushing the stems into the foam. You could also use a little bit of hot glue to secure them into place where you want them, but I just played around with the placement and didn’t need to use any glue.
Cute, right?
Want to remember this??


![]()
![]()
![]()
![]()
![]()
![]()
![]()


This is absolute genius! I love the finished product! I have featured it in my DIY Christmas Gift round up. You can see the feature here – https://adollarearned.com/quick-easy-diy-christmas-gifts-family-will-love/ Feel free to share!
Congratulations on being featured on #HomeMattersParty ! You are my first nomination that they have used! I love love love your Beautiful vase! Thanks for sharing your “how to” with us!
Jeannee
This is so pretty Krista!! You did an awesome job, I love it! You are my Rock Star Pick from the Creativity Unleashed Party! Come on over and vote for your project at this weeks party! Thanks for linking up! Hugs!
Hey, Krista! Just wanted to let you know that we loved your DIY Faux Copper Patina Vase Arrangement so much when you shared it at the #HomeMattersParty last week, we’ve FEATURED it THIS WEEK! Hope you can check it out when you get a sec. Happy Friday!!!
http://lifewithlorelai.com/2017/02/23/home-matters-linky-party-124/
~Lorelai
Life With Lorelai / Home Matters Linky Party
Thank you for sharing. It is so delicate and rustic. Love it.
Totally fooled me. I thought this was a painted ceramic vase. This would be great to place on small shelves.
Oh my gosh! How easy to make! Thanks for a great tutorial!
Found you on the Wine’d Down link party…love this project! Pinned it:)
What a fun craft project. I can’t believe it was made from foam! Your photos are so pretty, as well. Thanks for sharing!
Love this.. It is soo pretty! Sharing on Twitter. Thanks for linking up at MerryMonday!
Kim
Wow!! I never would have guessed this used to be a foam block! You are so creative.
What a great idea to use a foam block as a vase. And why in the world have I never thought of using faux peonies?! They’re my favorite flower but their season is always too short (for me. :)) Thanks so much for sharing! Have a great week. 🙂
How clever is this? Not in a million years, would I have guessed that was a foam block. The possibilities! So glad to have discovered this on #CreateLinkInspire Sue x ~ @SuzyHomemakerUK
Great effect. I had no idea with was a foam block, when I read that I had to take a second look – amazing.
And well done for introducing a little pretty in a house of boys.
Amazing transformation, and so pretty for spring!