
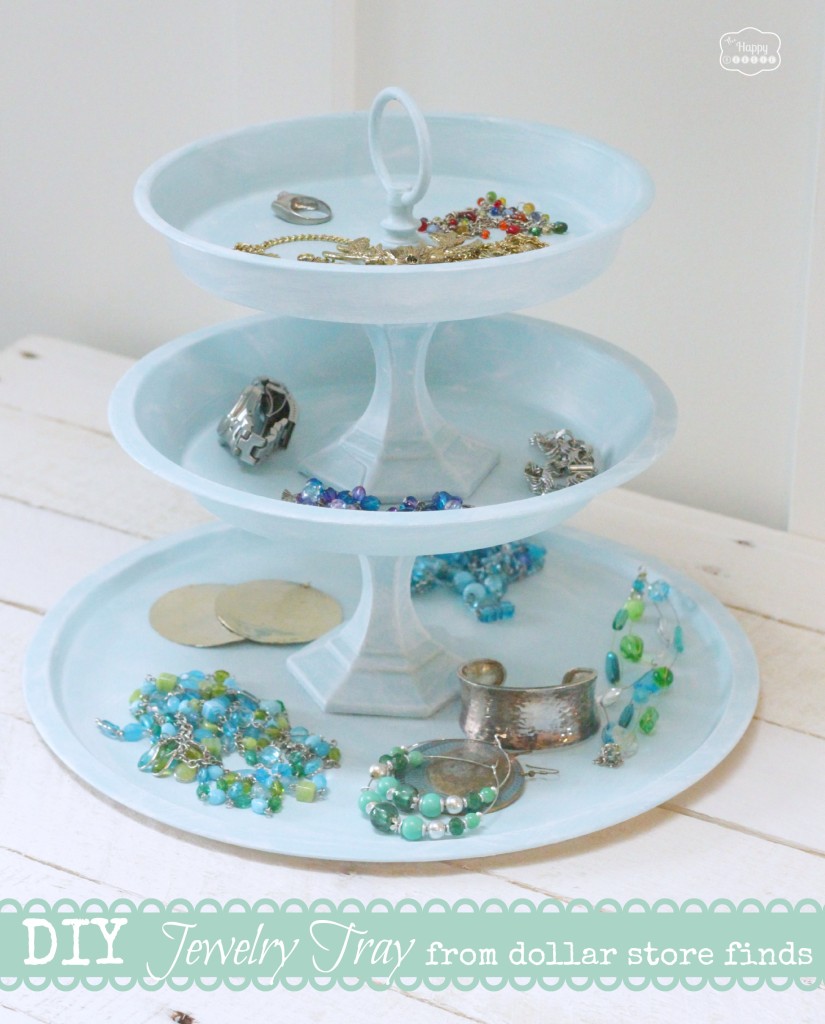
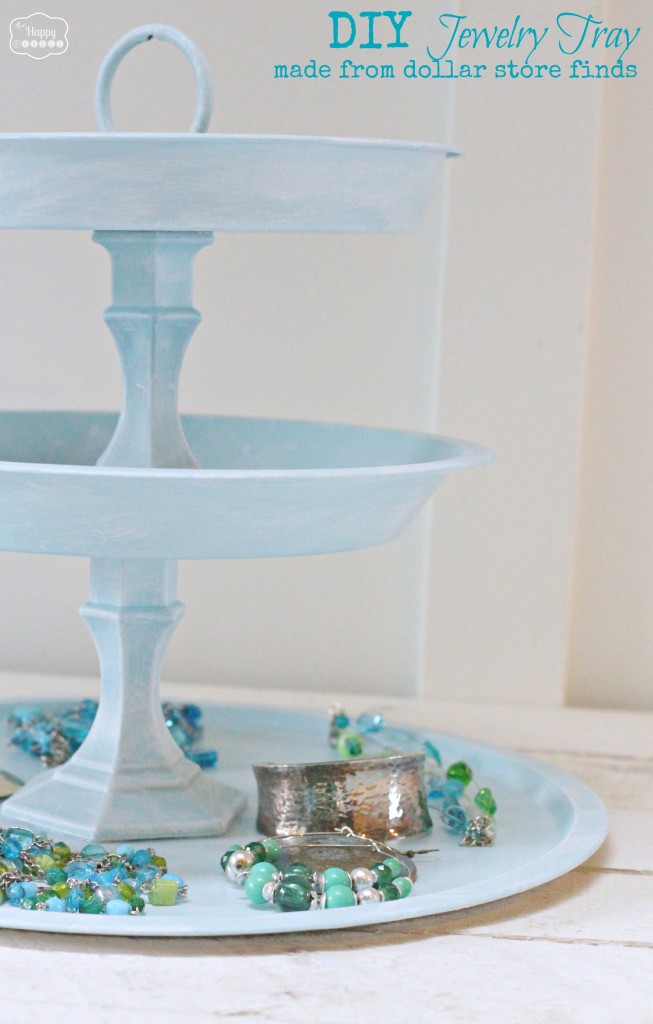
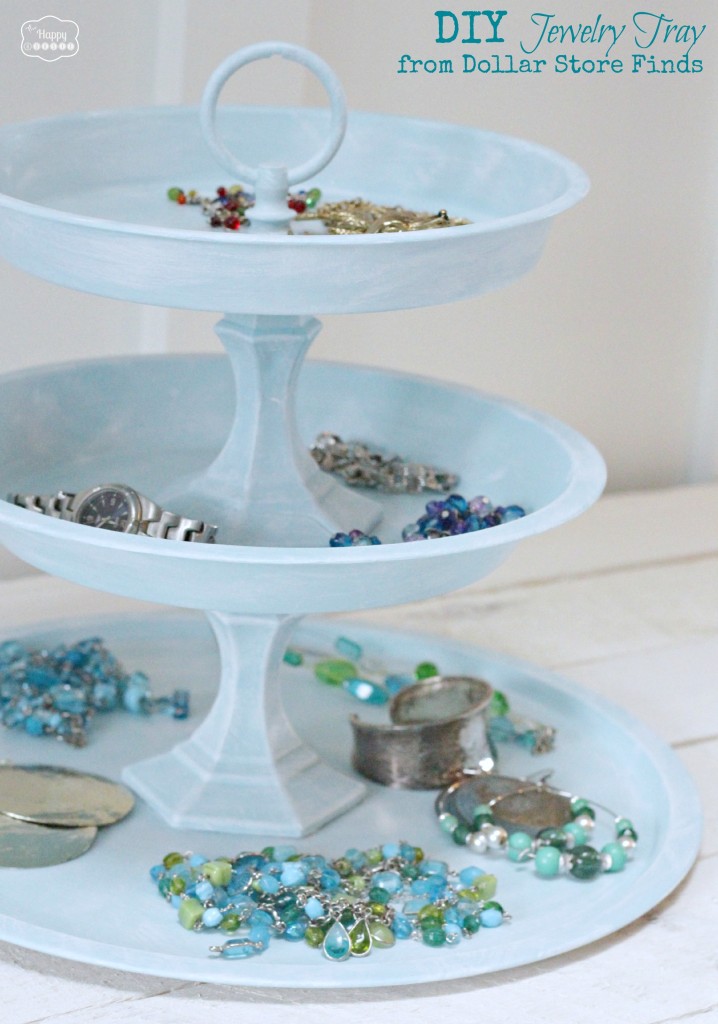
DIY Tiered Jewelry Tray from Dollar Store Finds
Create your own tiered jewelry tray with this tutorial, and you will be amazed at how easy it is to do!
Onward and Upward with the closet organizing kick. The 411 on my progress so far…
Clothes purged – check.
Baskets organized and labeled – check.
Scarf and Hat solution – check.
Jewelry Organized – in progress.
I whipped up this super pretty little DIY Jewelry Tray using only items from the Dollar Store (oh, and some glue and paint from Walmart) to help me out with the jewelry organization. I can’t wait to show you how easy it was!
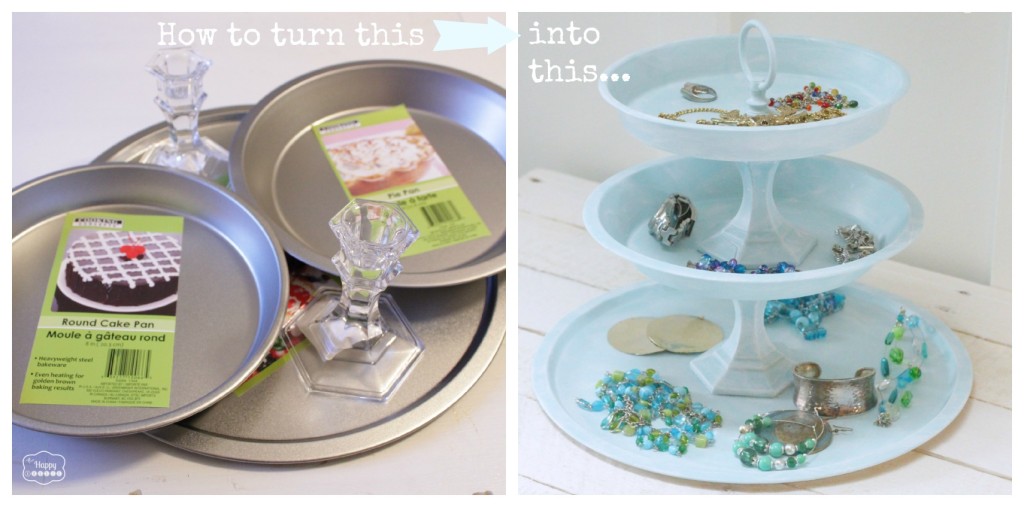
Today I am going to show you how I went from this…to this…
![]()
To make this you will need:
– 2 (dollar store) candle sticks
– a pizza pan, a 9″ pie pan, and an 8″ cake pan (also from the dollar store)
-I had a leftover lamp finial from a thrift store lamp that I added to the top but this isn’t a necessary step
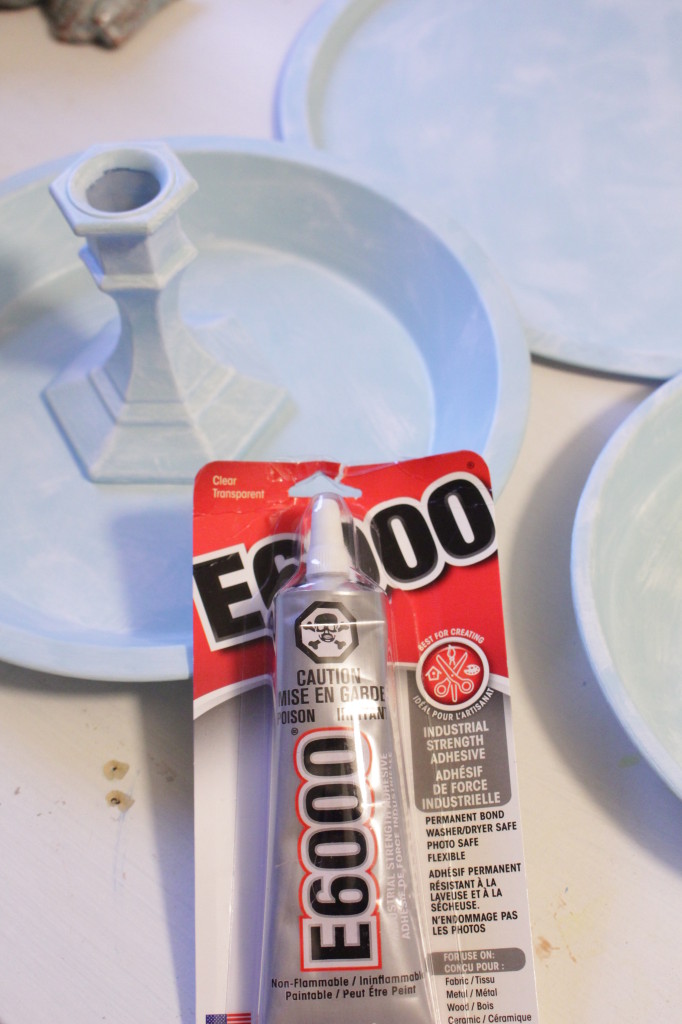
– E6000 Craft Glue (I bought mine from Walmart)
– Martha Stewart Multi-Surface Craft Paint in colour(s) of your choice – I used Summer Haze and Wedding Cake
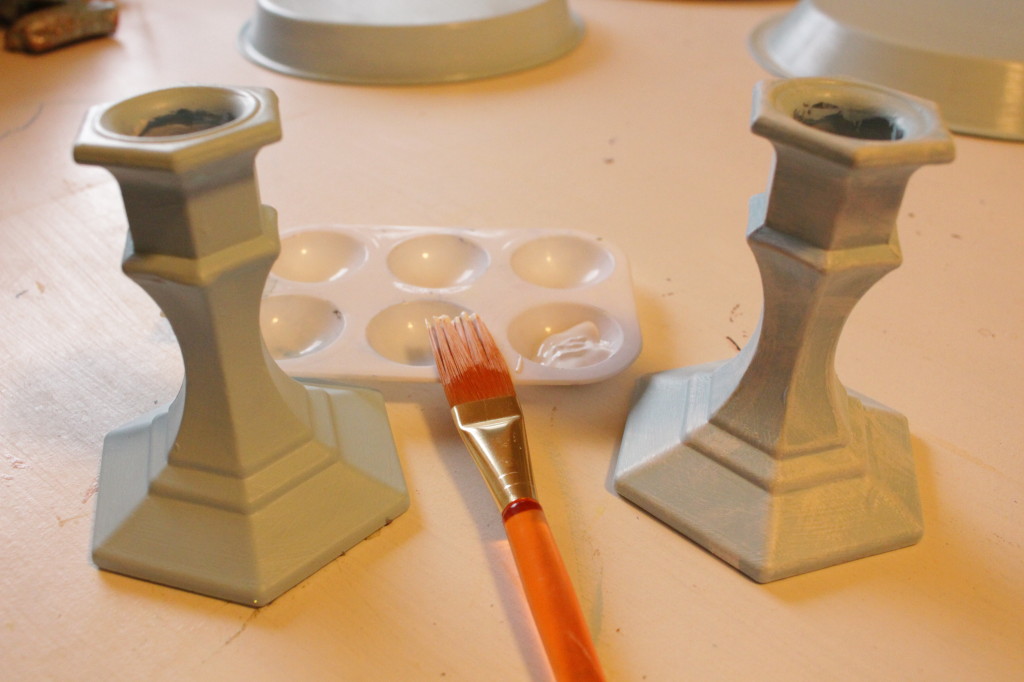
I started out with these…
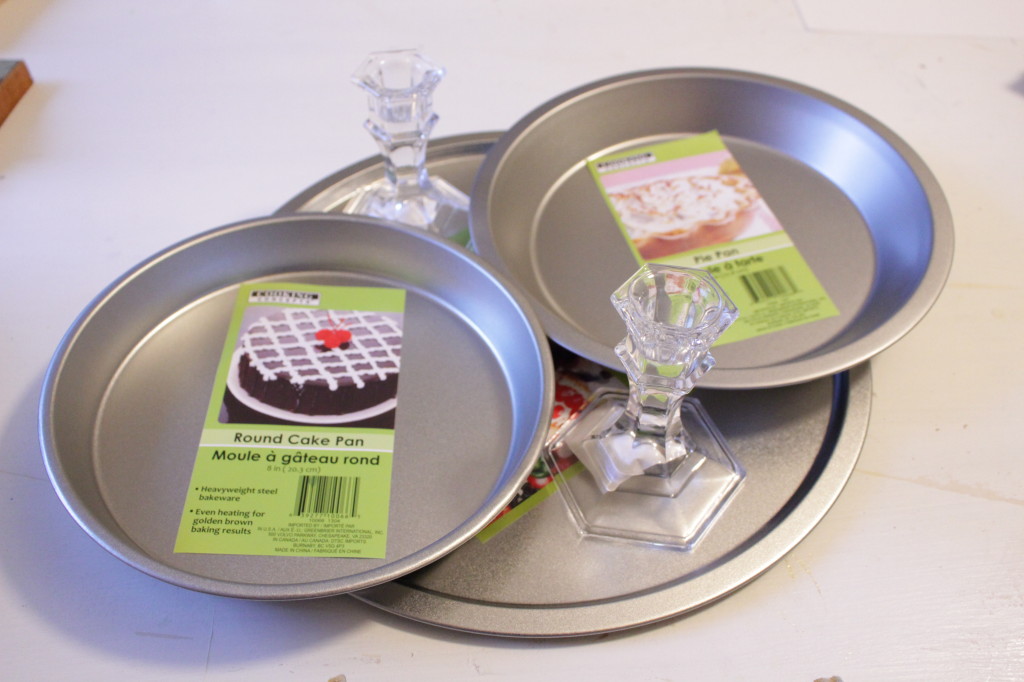
I cleaned them off first using rubbing alcohol (following the instructions on the paint) and let them dry. Then I gave them all a couple of coats of the Summer Haze colour….
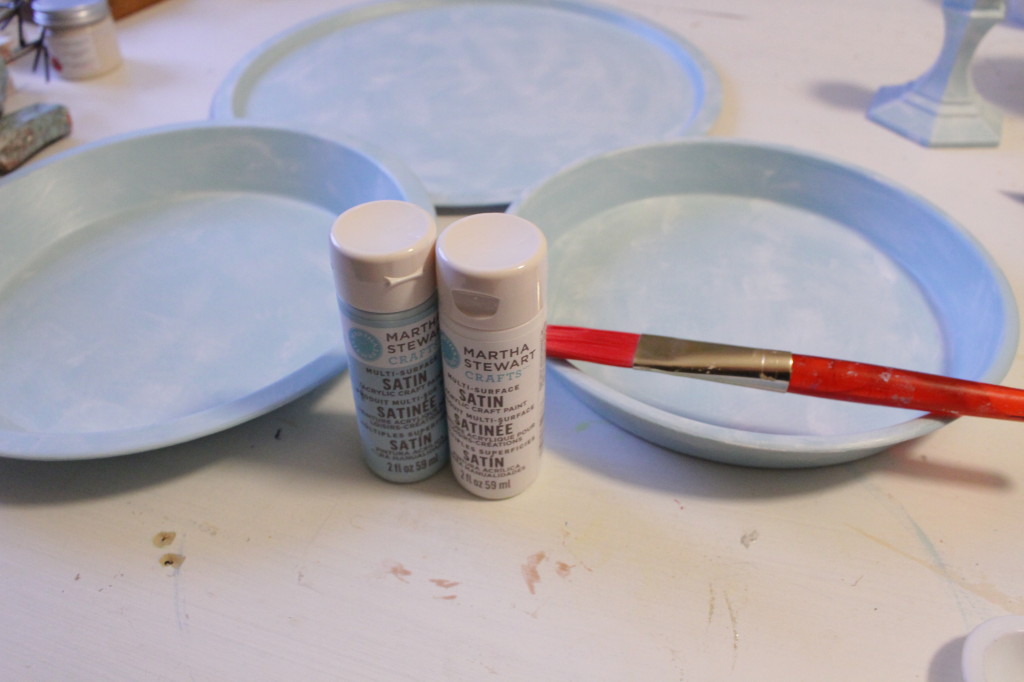
After the two coats of Summer Haze I ‘dry brushed’ on some of the Wedding Cake color to give it a washed/distressed appearance. To ‘dry brush’ I just wiped off most of the paint on my brush on a piece of scrap paper before lightly brushing it onto the pieces, using strokes in random directions.
See the before (on the left) and after (on the right) below…
Once all the pieces were painted I let it thoroughly dry and then glued them together using my E6000 glue…following the instructions on the package (and measuring to make sure I was centering the candle sticks on the trays). I glued the first candlestick to the pizza tray and the other candle stick to both the pie tray and the cake tray. I let these dry and set up overnight before gluing the whole thing together.
Done!
I plan to follow the instructions on the Martha Stewart Multi-Surface Paint and let my piece CURE for 21 days- so I am being very careful with it until then. You could probably also give it all a top coat of a sealer spray but I didn’t do this. I trust that after a few weeks the paint will have fully cured and I am willing to be extra gentle with it until then (meaning I am not letting my three year old anywhere near it for a while…).
I am thrilled with how this jewelery organizer turned out – even better then I expected. And it is the perfect way to keep my regularly worn jewelry neatly corralled in my closet… I can’t wait to show you how the whole thing is coming together. Then it is onto my bathroom drawers. They look like a cyclone hit them.
I like this tray so that I can see my jewelry rather then hiding it in a box – and also because I am more likely to put it ‘away’ when it is coralled on a tray like this. But would this system work for you??
How do you store your jewelry? What about your scarves?
Thanks for reading. And remember my housie friends, HOME isn’t built in a day. Enjoy the journey


This was featured at!


I may link up at some of these fabulous places below, for more info check out housie parties:
Make the Scene Monday , Monday Funday , Give Me the Goods Monday , Inspiration Monday, Craft-o-Maniac Monday, Nifty Thrifty Tuesday, Project Inspire{d} , Inspire Me Tuesday, The Scoop, Hit Me With Your Best Shot, Wow Me Wednesday Whimsy Wednesday , Fall Into Fall , From Dream to Reality, The Inspiration Exchange, Live Laugh Rowe Live Laugh Linky, Thursdays Are Your Days, The Weekly Creative , The Creative Connection, Inspire Me Please, Catch as Catch Can, Fabulously Creative Friday, Party Junk, Pinworthy Projects , Link Party Palooza,, Weekend Bloggy Reading, Strut Your Stuff Saturday, Spotlight Saturday, Get Schooled Saturday, Overflowing With Creativity , , Suburbs Mama , That DIY Party
I’m also sharing this project at The Great Dollar Store Challenge at The Everyday Home
Love love this! Just one question, what is used on the top with the ring in it? Somehow I can’t seem to figure out what that is.
Hello! I featured your tutorial in my blog series, Living in a White Box. My series features tips, inspiration, and ideas for how to decorate rental homes. Your tired tray is perfect for my latest post as it’s a great way to decorate on a budget.
If you like, you can grab a featured button and check out my post at Living in a White Box: Dollar Store Decor. Thanks for sharing your amazing creativity!
Please tell me what you use Milk Paint on. Or how you use it.
Hi Carla! I haven’t actually used milk paint before but one day I would love to give it a try- if you visit Allison at The Golden Sycamore she does a lot of stuff with milk paint and could probably help you with your question. And Miss Mustard Seed is the queen of milk paint!!
Great idea! I’d love it if you’d share this at my link party, going on now!http://www.accidentallywonderful.blogspot.com/2014/02/accidentally-wonderful-wednsday-4.html
Thanks for your sweet comments! And thank you so much for the personal invitation!
I love your jewelry tray. I recently made one in white for my kitchen. What is the ring thing that you have on top? It sets it for. Thanks.
I’m not a jewelry person but do like your jewelry tray.
I was thinking maybe using as a tiered candy display(using wrapped candy of course) or maybe use as a fruit display.
Something like this will also be great sitting on your entrance table to put your keys, sunglasses, wallet, loose change,etc. on when coming home from work or wherever. You will know right where everything is before heading out the door and no more looking for your lost keys.
Now here is a suggestion for homemade milk paint that you could use.
Make your own:
Milk Paint
1/4 cup sweetened condensed milk
food coloring
Add a few drops of food coloring to sweetened condensed milk until desired color is achieved. When this paint dries, it will be very shiny.
You are so right Colleen – it has so many potential uses! Thanks for the milk paint recipe – sounds interesting. I will have to try it:)
Wow, this is amazing, best one I’ve seen! And I love your new blog design! You’re being featured on Sunday Features {from Give Me The Goods} and on my FB page today 😉
Hugs,
Jamie
Thank you Jamie! I added your button and link to my post -so thrilled to be featured and thank you for the share!!
This is lovely, Krista! I would never had guessed you made it with Dollar Store items….I am going to make a trip there this week and make one of these for my bedroom. Thanks so much for sharing at Project Inspire{d}~ pinning and sharing! Hugs
Thank you Mary Beth! It was a fun and easy project and I am so thrilled with how practical it is – I use it daily now!
You would never know this was made from dollar store candlesticks and baking pans – genius! I have been wanting unique cake stands and either can’t find any I like or won’t pay the price retailers are asking for them. Hellllllllo…thanks for the inspiration Krista!
Hi Marie! I thought they might work as cupcake stands as well but the paint I used isn’t food safe so I didn’t want to ‘advertise’ it as such- so I don’t know what you would put on it to make it food safe, of if you even need to if the cupcakes are in their wrappers??
I didn’t think of that Krista. I would think using paper doilies on the bottom would be alright. Perhaps if I do this I will scope out food safe paint.
Or maybe a sealer that is food safe? I think that if you use paper under it you would be fine… but if you do find a food safe product to seal it with I would love to hear about it!
I love this! What a great idea, would never guess items were from the dollar store. Thanks for the inspiration!
Thanks so much Tammy – and thanks for your visit!!
How cool! I love dollar store projects, and this one turned out so great! Very pretty! Have a great week, Krista!
~Abby =)
Thank you Abby! I am already using it on a daily basis too – so nice when projects actually work out as intended!
Wow! This is pure genius, I can’t believe how great it turned out! Good job!! This idea would be perfect for cupcake stand as well. FAB
Hi Sonnet! I agree it would be a great cupcake stand but I wonder if you would need to use some type of food safe finish? Maybe not if the cupcakes are always only in their wrappers….
How great are these?? I can see using them also as appetizer trays at parties! Love the colors that you picked too, classy yet simple. Just perfect. I am starting a Monday Morning Linky Party dedicated to all thing beauty related and I would love for you to post something, if you are so inclined 🙂
http://www.confessionsoftheperfectmom.com/2014/01/26/monday-morning-makeup-madness-party-1/
Hi Kat! I think they would be perfect as food trays but you would want to seal the paint with some kind of food safe product. I am not sure what to use for that. Thanks so much for your visit and invite!!
This is an adorable and easy project! I look forward to making one of my own one day 🙂 Currently, I store all my rings, bracelets and earrings in a Ziploc sandwich baggie behind the TV in my room (I’m staying w/friends temporarily) – iy’s a pain to have to dump the bag out each time I want to wear a piece of jewelry…
I bet that is a pain! I am certainly enjoying being able to use the jewelry tray and not have to put ‘away’ my jewelry each night!!
This is soooo great. Here I go off to the dollar store!
Hi Alexis!! Thanks – it was an easy and is a super practical project. I already use mine every day!!
love how this turned out great job
Thank you so much!
Awesome..I need this so thanks for the tutorial. I’m off to make one soon.
tammy
Thank you Tammy! It was easy and I love it -so practical.
The dry brushing looks AWESOME. And I love that you used dollar store items! So creative, Krista!
Thanks Amy! I think the dry brushing added more dimension then the flat paint:)
Krista – this is SO cute! I love it! Jewelry organization is my weakness, and this is one of my favourite projects!
Hi Tara – does spreading your items out all over the counter count as organization? That is my usual method. Glad I have a spot to coral things now without having to actually put them ‘away’ each night.
HI Krista, great wonderful post, you’ll have all of us making these. I was just at a $tree tonight, doggone it, I’d have been buying these supplies. I need something like this for my jewelry, it’s in boxes in my dresser so forget what I have to wear with things.
Love your jewelry, we seem to like same colors. The green and blue must go beautifully with your gorgeous red hair. I have gray hair but just love those colors so I wear them whether I look good in them or not, lol. This looks pretty easy to make, love the E6000 glue. I’ve repaired things and made things using this glue and was very happy with how it performed.
Happy weekend
That is such a good point JaneEllen- when your jewelry is stored away where you can’t see it, you forget what you have and don’t use it! I love love love green and blue- and I seem to gravitate to it in my jewelry and clothes (and home…). I think those colors look beautiful on everyone- they have so much life and energy to them. I am glad to have finally bought my first E6000 – I see many uses for it ahead!! Hope you have a wonderful weekend:)
Hi Krista, I love your project! This could be used for so many things in addition to jewelry. I think the finial really makes it!
Thanks so much Jane! I agree about the finial- glad that I finally found a use for it (I have been holding onto it for a while). Thank you for coming by!!
Ok, I am not going to say I love this I am going to say I LOVE this. 🙂 I may have to borrow this idea b/c I am looking for some cupcake displays for an upcoming event and this would be perfect. No…PERFECT. 🙂
Thx for joining in the 1st Great Dollar Store Challenge. I pinned it! Hope you join up next month, too. 🙂
Blessings, Barb
Barb- thank you so much for your super kind words and encouragement – they totally made my day when I read them! And thanks so much for hosting the fun challenge – I love making stuff out of dollar store finds!! Can’t wait to join the next one:) Thank you for the pin- I am really honoured that you came by in person!
You are just way too creative! I love this!
Thanks Sarah:) Hope you are having a great weekend so far!
What a sweet little project Krista! ….your jewels look pretty stored on your new jewelry tray. I might try something like this too..I’m thinking a smaller version to place near our front door for my hubby’s keys, watch and wallet. Thanks for the inspiration!
That is a seriously great idea Allison- the perfect spot to coral keys etc. Glad you found a little inspiration -thanks for the visit!
So cute! You amaze me!!! Also slooooow down. 🙂 Some of us just started our closet purging. Which is not going well, actually the opposite of well, so opposite it equals buying more clothes but no purging in site. Sigh.
Haha – somehow my closet organizing has stalled out- I just have a few more little jobs so I would love to try to get it wrapped up this weekend!
This is adorable. I really want to make one now! I may even have all I need at home. Thanks for sharing Krista!
Hi Kelly- even better if you already have the supplies at home!! Thanks so much for coming by:)
I love that idea. I have attempted to make one before – but didn’t use the proper glue so it fell apart.
Thanks for posting all of the steps!
Hi! I guess using a super strong glue is pretty critical. I used to try to hot glue everything but have now learned that sometimes projects require a little more then that! Thanks for your visit:)
Love it Krista! It is a super cute idea.
Thanks Mary! It is already in full use- I love when a project turns out super practical and useful:)
What an awesome idea! I am definitely going to make 1 (or more) of these. Thanks for sharing such a great idea.
Hi Lori! I think I need to make one for sister-in-law now… they are so easy, cute, and practical! Thanks so much for the visit!
So cute! I love it. Shared and pinned.
Thanks Tricia! And thanks so much for the pin and share!
So cute, I have been wanting to make something like this, and I can’t live without my E6000!
Hi Jenna! That was my first time using it – I have a few other glues I have used in the past… but I must say I was pretty thrilled with it. It just may be my go-to glue now.
Oh. I L.O.V.E. this!! So elegant and useful! And the finial at the top adds the perfect touch! Way to go!
Hi Sondra!! Thank you so much… I love the finial as well… I have been hoarding (I mean, hanging onto it) for a while knowing that it would find a perfect purpose someday. Glad to finally use it! Thanks so much for your kind comments!!
Absolutely love this project, Krista! I am in a progress of organizing my closet and I think i will have to make something like this!
Thanks Aniko! I am loving it already because, I must admit, I didn’t always feel like putting my jewelry back in the proper spot at the end of the day and it was spread out all over my closet counter space. Now at least it will be neatly stored! Hope you have a great day!!
So genius!!! I tried to come up with a different word since Tasha used genius already, but it really is the right word. 🙂
Aw, thanks Melissa! I am just glad the whole thing worked out as I had envisioned! I’m so thrilled you came by -thanks for your kind words!!
Krista, this is so awesome! I love how you made this with dollar store buys! I’m always looking around the DS for inspiration. I think I may need to make one of these for my dresser! So beautiful. – Melissa @Two It Yourself
Hi Melissa! I love making fab stuff out of dollar store finds too- such a fun challenge!! Thanks so much for your visit:)
Love it, Krista! I have one of those shallow top dresser drawers that I have organizers with different sections that hold my jewelry. But I still have earrings on my nightstand and bracelets on top of my dresser and necklaces in my bathroom! I think I need one of these! You are awesome at seeing the potential in dollar store finds! 🙂
Thanks Christy! I love to make stuff out of dollar store (and thrifted) finds… I always spread my jewelry out all over the ‘counter’ in our closet- so this is the perfect way to corall it all and make the clutter a little ‘prettier’:) I would make you one but I don’t think it would survive the shipping!
KRISTA! You are a genius! I love, love, love this and totally need exactly this to store my jewelry. Looks like I am headed to the dollar store this weekend!
Haha glad you like it Tasha!! I have already put mine into use (carefully, of course, while the paint ‘cures’) but I can see it will be super handy!!
This came out great, Krista! You used 2 candlesticks.. Lovely. Best wishes, Linda Crafts a la mode
Thanks so much Linda!! And thanks for coming by!