
Easy Thrifty DIY Butterfly Art
I will show you how to create this easy DIY butterfly art that I created for my friend’s daughters bedroom.
So I have a bit of a thing for butterflies….
When we got married we had a bit of a butterfly theme to our wedding.
My husband chose it. He is a bit of a butterfly nut too. {kidding}
I even kept the butterfly printed fabric from our wedding in case we ever had a baby girl. But we didn’t.
Good thing I have a friend who let me “borrow” her daughter to decorate for. You may have seen the Butterfly Lantern Light Fixture that I shared the other day? Well, this is another little DIY butterfly project that we did for her room.
Easy and Thrifty DIY Butterfly Art.
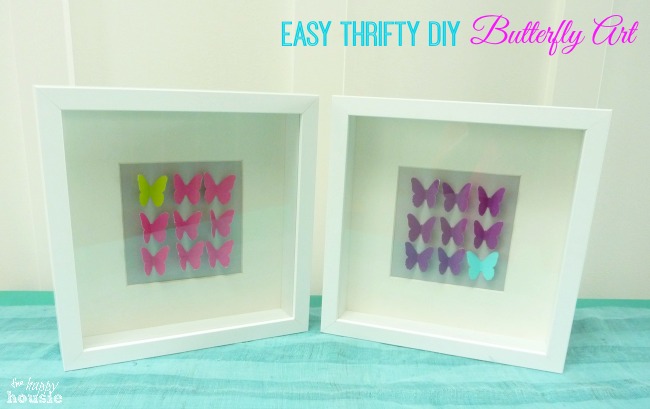
I got these pretty little shadowbox frames at Ikea. I love these frames and have used them for lots of projects. They come in two sizes and these are the smaller ones.
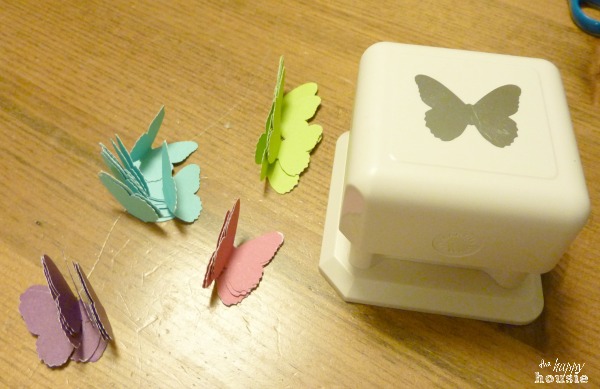
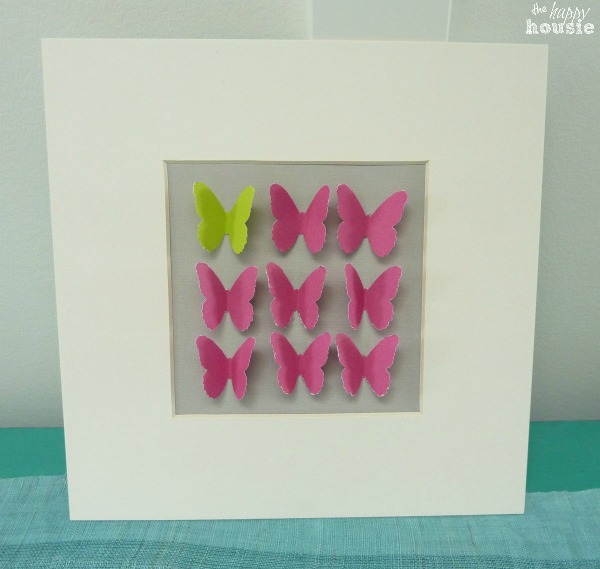
Like with the lantern, we used a butterfly punch from Michaels to cut out all kinds of butterflies from some cardstock that matches the decor in the room.
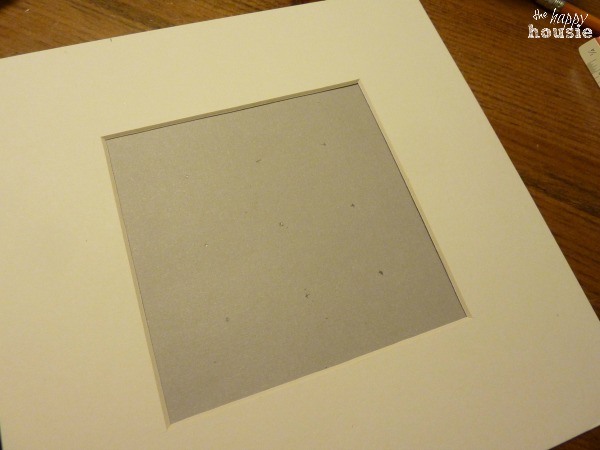
Then I marked out a neutral piece of cardstock with little dots in a grid pattern to help me glue them on evenly. I used a ruler to help me space them.
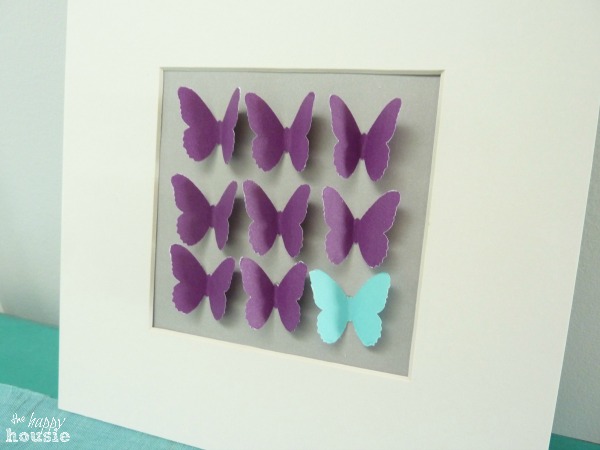
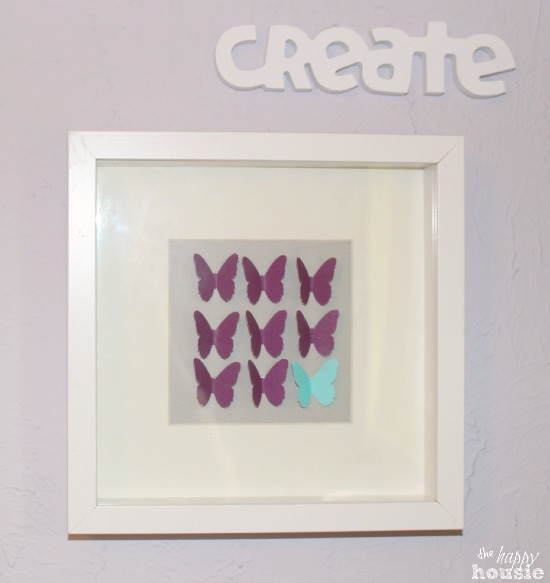
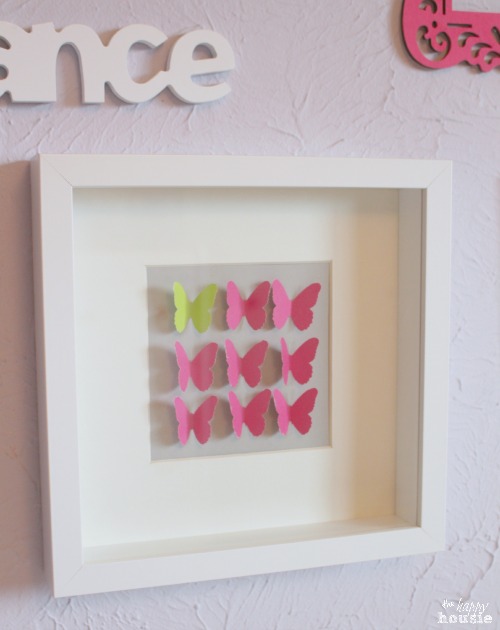
A little hot glue and you are done! We did a light lilac toned background paper but you could really choose any color. I like the contrast of one butterfly that is a different colour…
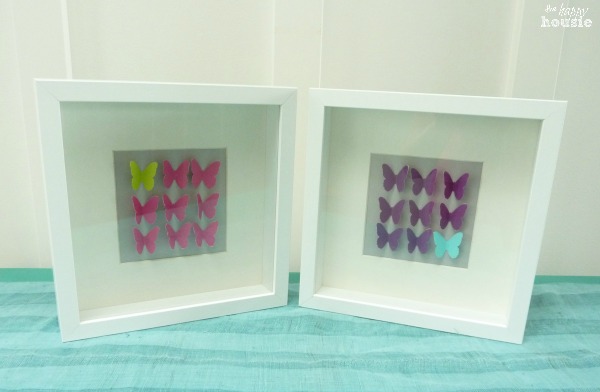
I made these for the pretty gallery wall above her bed…
Like it? Want to try it?
Pin it to remember it!

Tomorrow I am going to be sharing the whole room reveal!!
I can’t wait to show you all the fun and thrifty DIY touches we added…
Thanks for reading. And remember my housie friends, HOME isn’t built in a day. Enjoy the journey!


I may link up at some of these fabulous places below, for more info check out housie parties:
Monday Funday , Give Me the Goods Monday , Inspiration Monday, Nifty Thrifty Tuesday, Tip Junkie, Project Inspire{d} , Inspire Me Tuesday, The Scoop, Hit Me With Your Best Shot, Wow Me Wednesday, Whimsy Wednesday , From Dream to Reality, The Inspiration Exchange, Wow Us Wednesday, Live Laugh Rowe Live Laugh Linky, Thursdays Are Your Days, Inspire Me Please, Catch as Catch Can, Fabulously Creative Friday, Party Junk, Pinworthy Projects , Link Party Palooza,, Weekend Bloggy Reading, Strut Your Stuff Saturday, Spotlight Saturday, Get Schooled Saturday, Overflowing With Creativity , , Suburbs Mama , That DIY Party


Adorable Krista- what does your wedding fabric look like? Love how these are 3D, perfect for a little girls room 🙂
Adorable, and so easy! If I ever have a daughter, I would love to make this for her, and I’m pretty sure my son would love to help. He loves paper punches!