
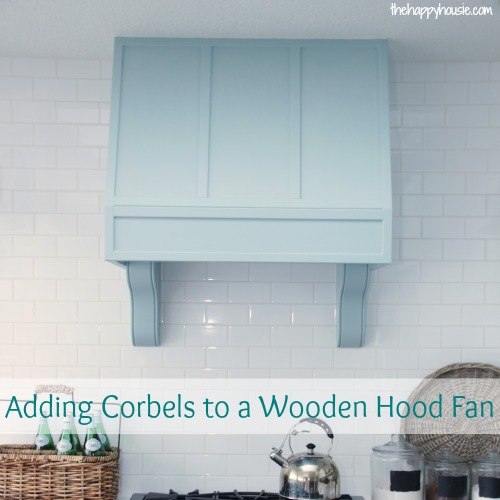
Pump Up the Kitchen Drama: How to Add Corbels to a Wooden Hood Fan
I will show you how adding corbels to your hood fan really adds to the kitchen decor!
If you saw the original design plan for this kitchen renovation, you may remember there being talk about open shelving.
Like, quite a lot of open shelving.
As in, two long open kitchen shelves on EITHER side of the wooden range hood.
Well, you know what they say.
The best laid plans…
So instead of how to install corbels to support open shelving…this project became how to add corbels to a wooden hood fan.
Much more exciting DIY project, don’t you think?
This story begins long ago.
Last July in fact. At the Haven Conference in Atlanta.
Picture me, wandering around meeting with vendors at the various booths. I happen upon the Osborne Wood Products booth and am immediately taken with their products.
They make everything from beautiful crafted kitchen island legs to table legs, furniture feet to corbels.
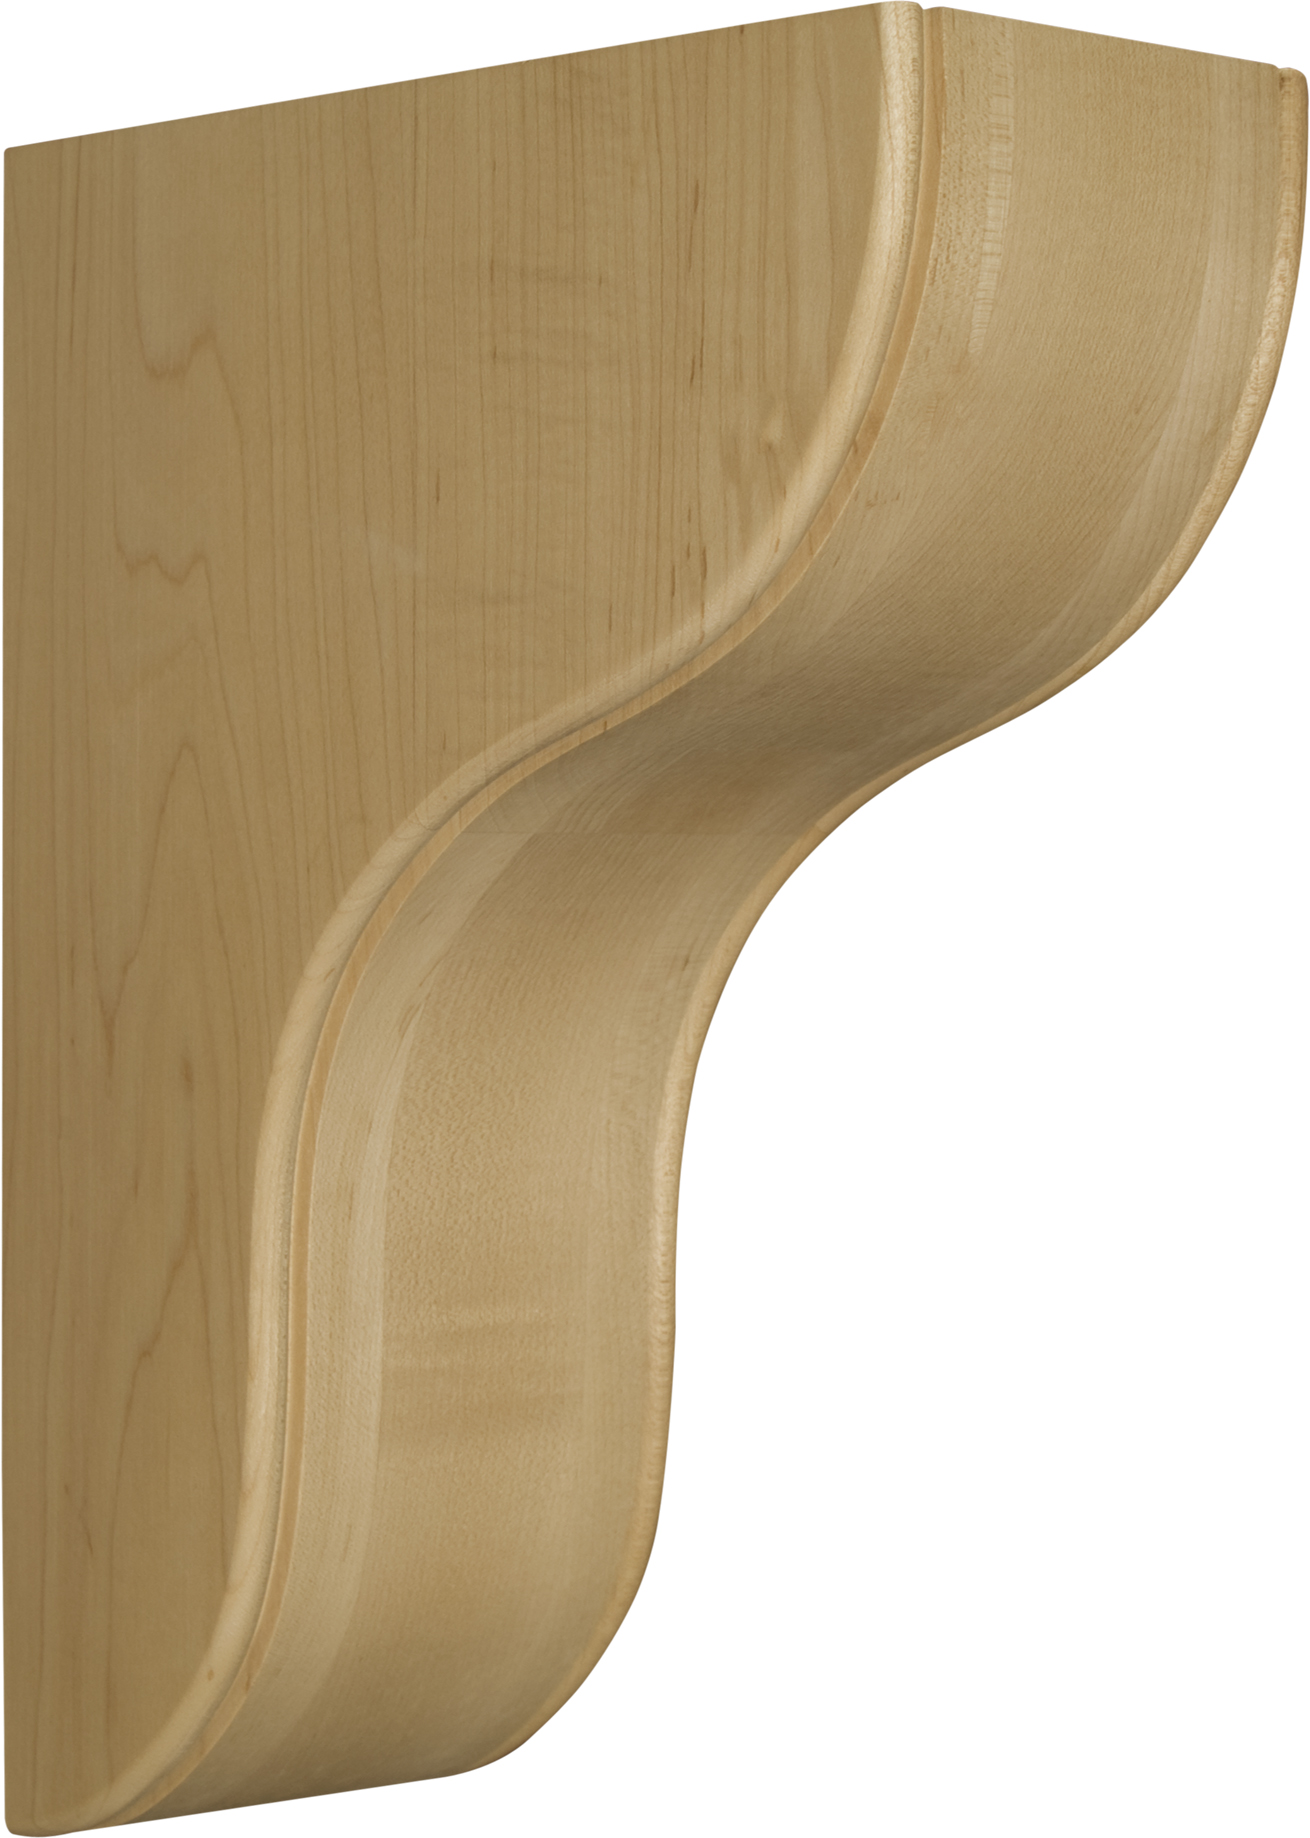
And it was the corbels that tickled my fancy. As soon I saw their catalogue, I knew that I wanted to try to integrate some of their beautiful solid wood corbels into our kitchen design.
But this is the part in the story where my vision and my math and measurement skills go amiss.
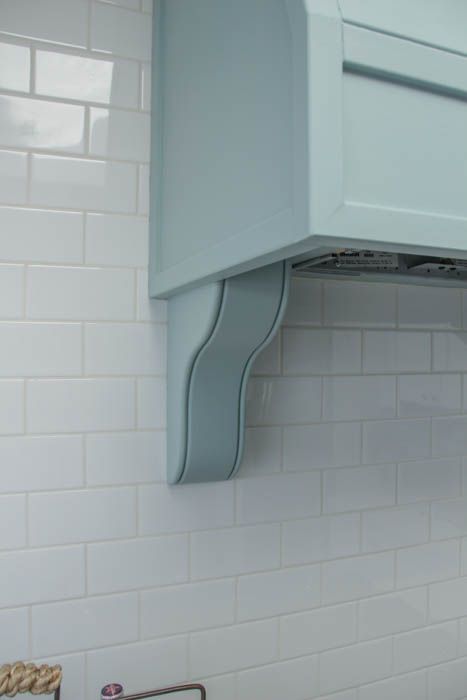
Let’s just say that when I originally ordered these Boston Bar Brackets with the Beaded Edge, I didn’t envision them being quite as large and solid as they are.
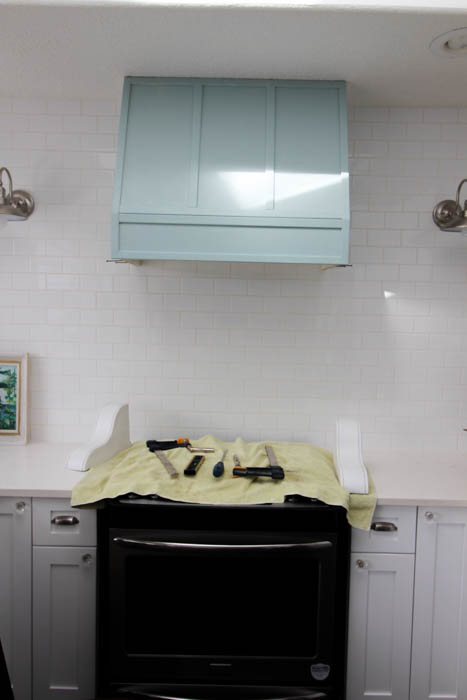
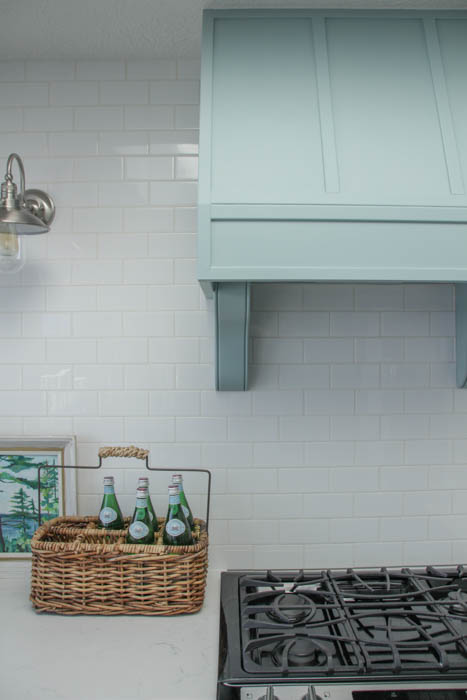
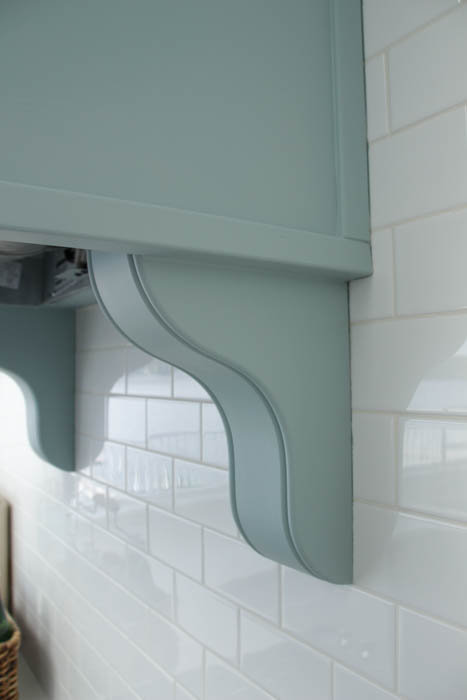
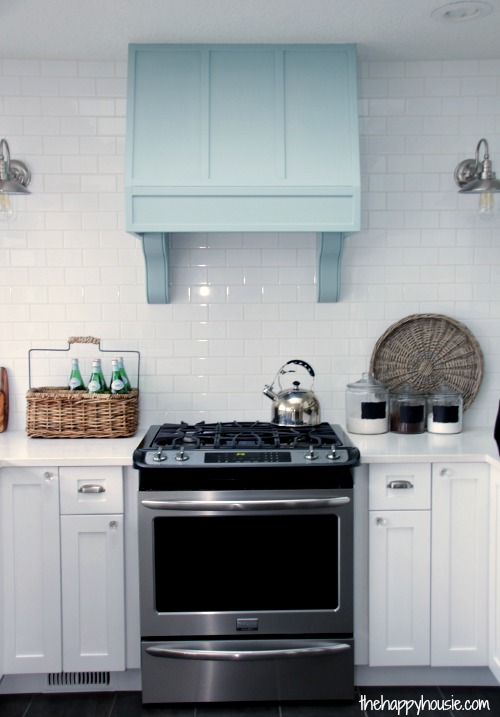
Don’t get me wrong. They are incredible and I love them. In fact, I think I probably love the redesigned use of the corbels more then my original plan. I mean, don’t you think they look amazing as faux supports for our DIY Wooden hood fan?!
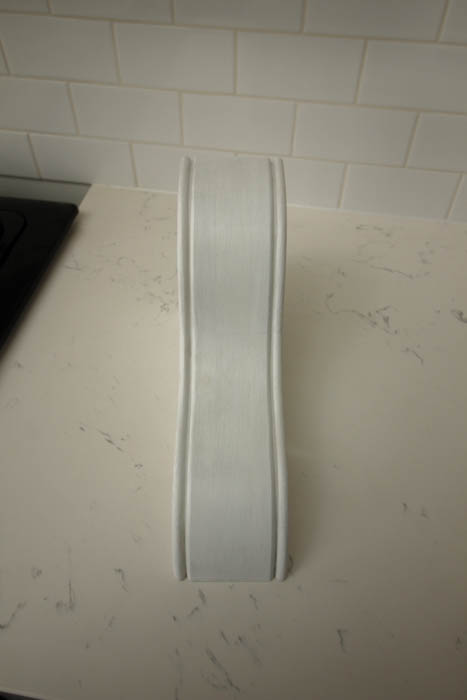
As I mentioned, I ordered the Boston Bar Bracket with Beaded Edge made in soft maple as I knew that I was going to paint them. {Originally the plan was for the hood fan to be white, but you can see that plan took a dive as well.}
Before installing these wooden brackets, I gave them a couple of coats of a good primer for raw wood.
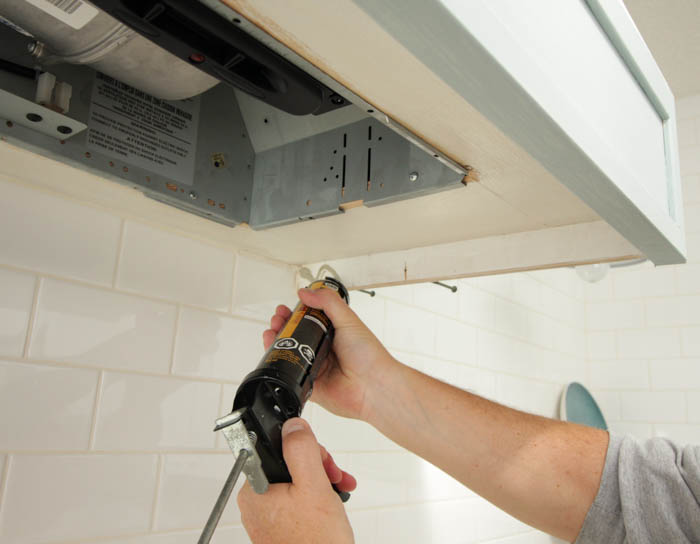
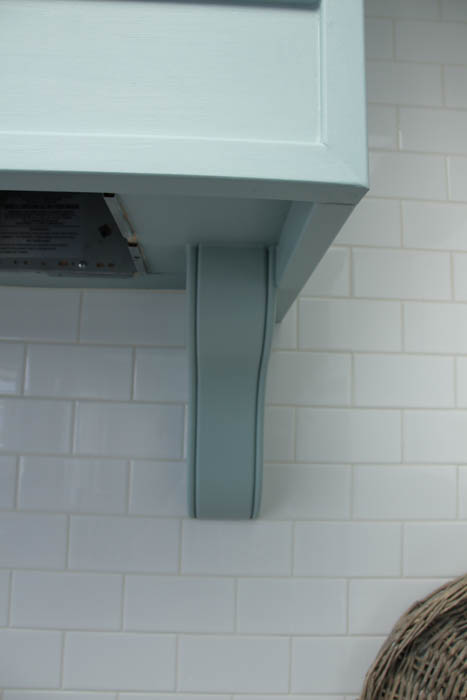
You would usually hang these before putting a shelf or surface above them, as the brackets on the back are designed to slide over and down a screw. Of course, we had to come up with a completely different method because we had decided to add them OVER top of our tile, rather then trying to work around them while tiling (it seemed like that might just get a little finicky, you think?!).

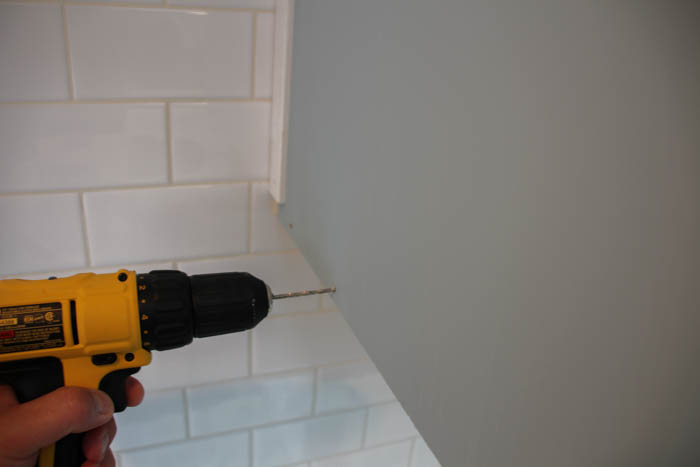
So after much discussion and consultation with my Dad, who is my go-to for most questions like this, we decided upon this course of action…. We pre-drilled through the side of the corbel that was going to sit snug against the edge of the wooden fan. We didn’t drill all the way through the corbel, just far enough into it so that it wouldn’t split when we screwed into through the outside edge of the wooden fan.
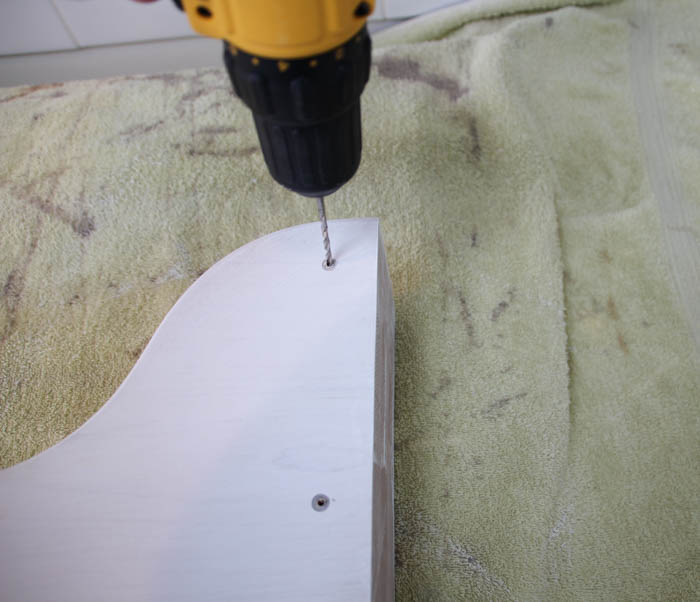
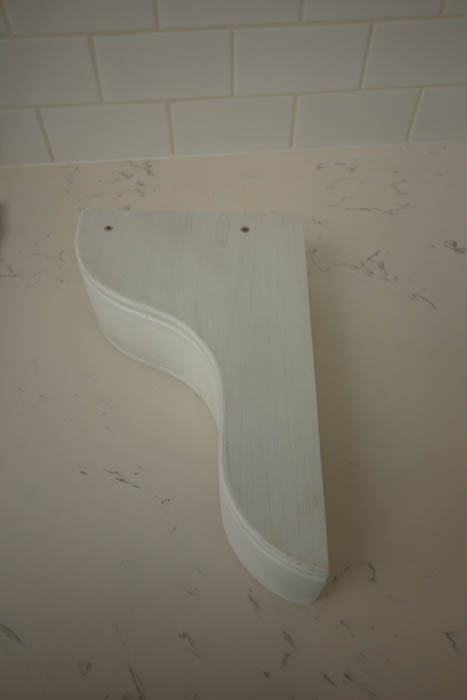
We also pre-drilled through the outside edge of the wooden hood fan where we planned to attach the corbels. We did drill right through the plywood that the wooden hood fan is built from. {Wondering how we DIYed it? I shared that here}
So this is how it looked before the wooden corbels were added… with our supplies all ready to go.
We used construction adhesive and added it along the top of the corbel (where it would adhere to the plywood just around the broan insert.
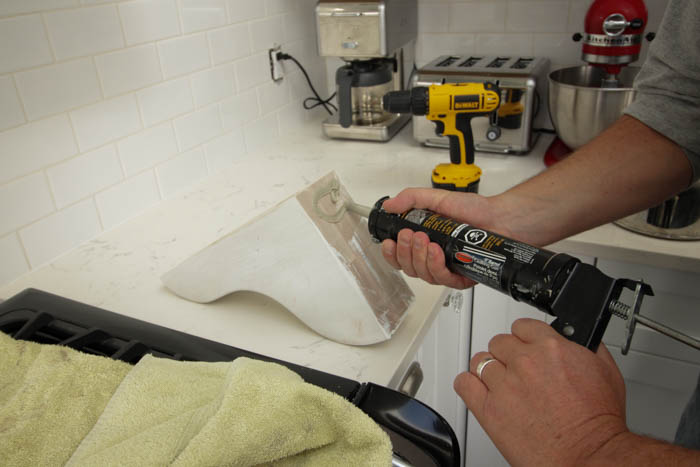
We also added the adhesive to the edge and top inside the hood fan as below…
Next, we held the corbel up in place, and made sure it was level. We also were prepared by adding some ridiculously long screws through the outside edge of the plywood hood fan cover .
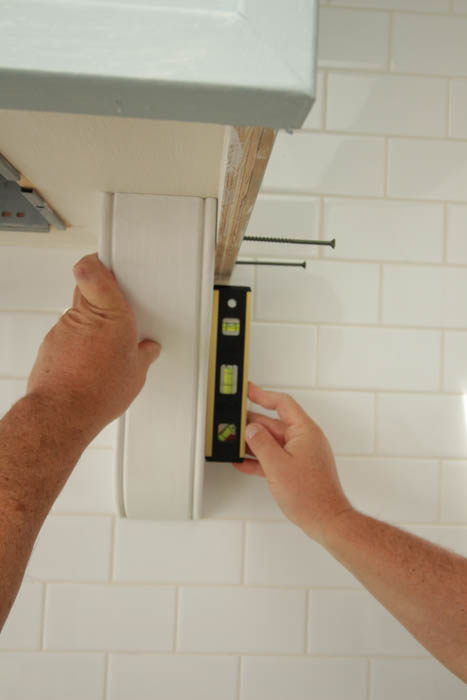
Next we clamped it to help hold it in place, and then screwed through the side of the wooden hood fan and into the predrilled holes on the corbel…
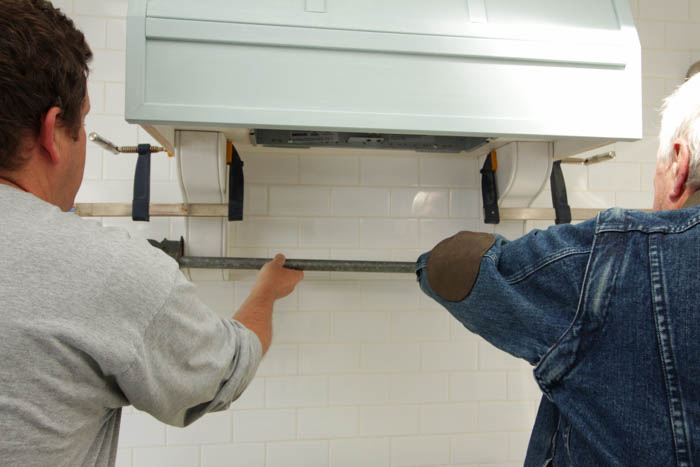
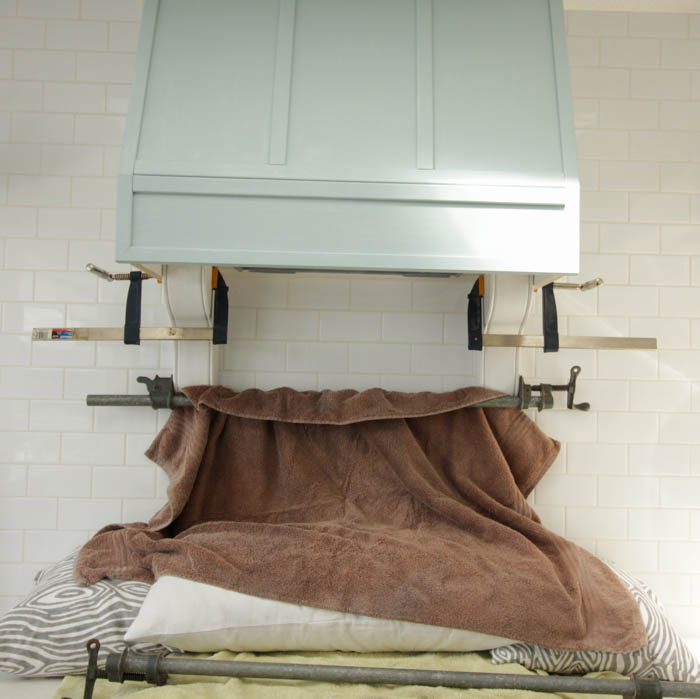
We noticed that they were pulling slightly outwards so we rigged up this massive clamp system to secure them in place while the adhesive dried and completely. We let it sit overnight in this beautiful contraption just to make sure it was all just-so.
Yes, you can see we also rigged up quite a protection for our range – between the old work towels and pillows and cushions, there was little risk of my new gas range being destroyed should something decide to give-way.
Do you think we are a little overcautious?
And after a long night of setting up…
Done!
{we still had to reinsert the screen for our broan insert in these photos- it looks much more finished underneath once that is back in place}
I love how it turned out- and am glad that I ditched the double open shelves in favour of the beautiful corbel-based hood fan with the sconces flanking it. I just love how open and airy it feels – and because we extended our kitchen and added a ton more base cabinetry there is still plenty of storage space.
Plus, I did get one open shelf. I’ll share the DIY on that one soon…
Think you might have a corbel project somewhere in your future?

Next week I will be back to share the other spot that we used our other pair of Boston Bar Bracket corbels… I can’t wait to show you how it turned out!
In the meantime, head over to Osborne Wood Products and check out all the beautiful corbels and legs and brackets they have. I am already plotting a table project for our dining room and would love to try out something like these Country Squire Dining Table legs…
But we just might have to wait until after the summer for that one.

![]()
![]()
![]()
![]()
![]()
![]()
![]()


It looks amazing!! Would you share the name of the blue paint you used?! It is So so beautiful!!
Hi Ladawn! Yes, absolutely – the paint colour is Wedgewood Gray by Benjamin Moore. I think it’s actually quite similar in colour to the paint we just used to repaint our laundry room cabinets and back door {Rustoleum Serenity Blue Chalk Paint}. Hope that helps!!
I absolutely love the idea of adding the corbels- so much character! The color is gorgeous!
The corbels totally make it, Krista!! Love it!
Wow the corbels add so much detail to the wooden hood fan! I love this idea!
Gorgeous, Krista. I’m completely smitten with the blue and the corbels – like IN LOVE!
SO beautiful Krista! I loved the hood before but the corbels look even more perfect if that’s possible!
Oh you so made the right choice Krista, the corbels are perfect with your DIY Range Hood. And no you were not being overly cautious – I’d have done the same thing. Who wants to replace a brand spanking new gas range $$$$. Looking forward to seeing your open shelving next!
I love the blue of the hood fan. I think the new corbels add a lot visually and makes it seem like the hood fan is more customized and built in. It looks great!
This is absolutely brilliant Krista! LOVE how it turned out! Can’t wait to see how everything is coming together!
the peeks are sooooo good! love how this kitchen is coming out! love the blue!