
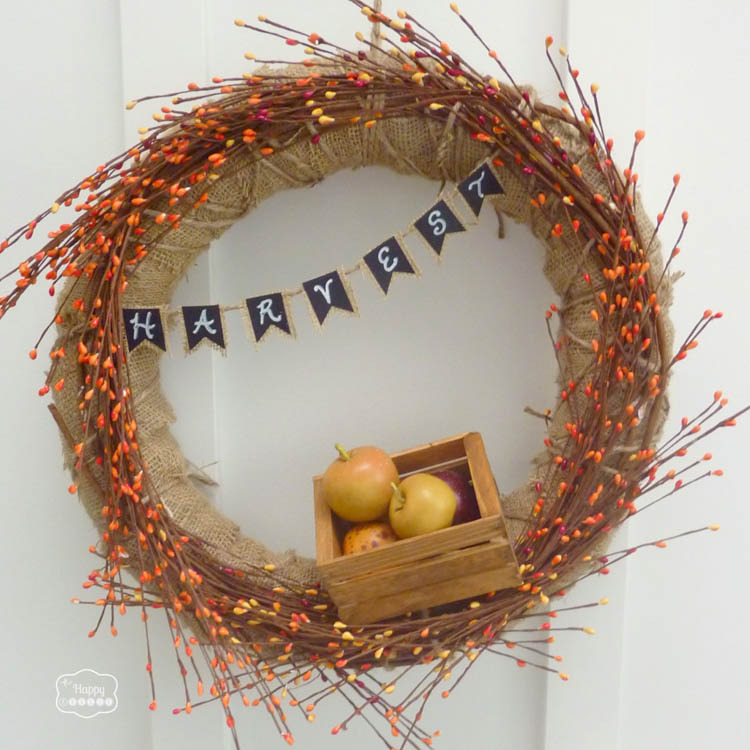
Burlap Fall Harvest Wreath with Mini Chalkboard Bunting
September is well underway and as loathe as I am to part with summer, I suppose the time has come to open my heart to Fall and welcome her into our house with a new wreath on the door… today I am sharing how I created this Burlap Fall Harvest Wreath with a Mini Chalkboard Bunting.
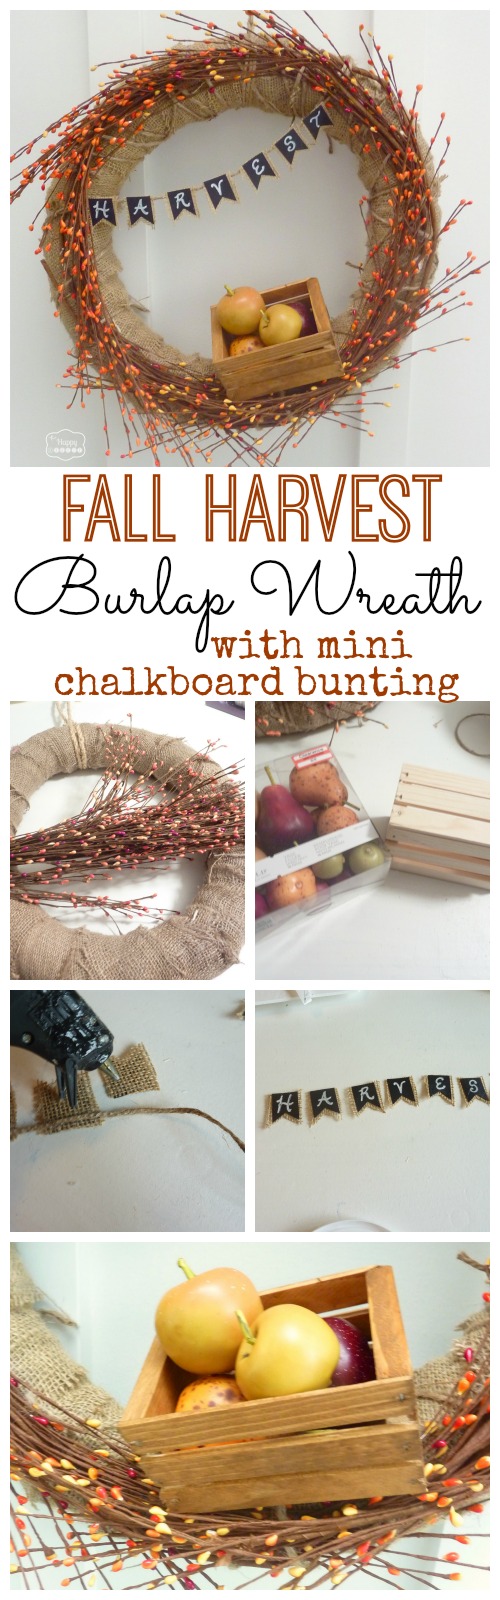
For this wreath you will need:
![]()
– a wreath form wrapped in burlap
– fall floral picks
– scissors
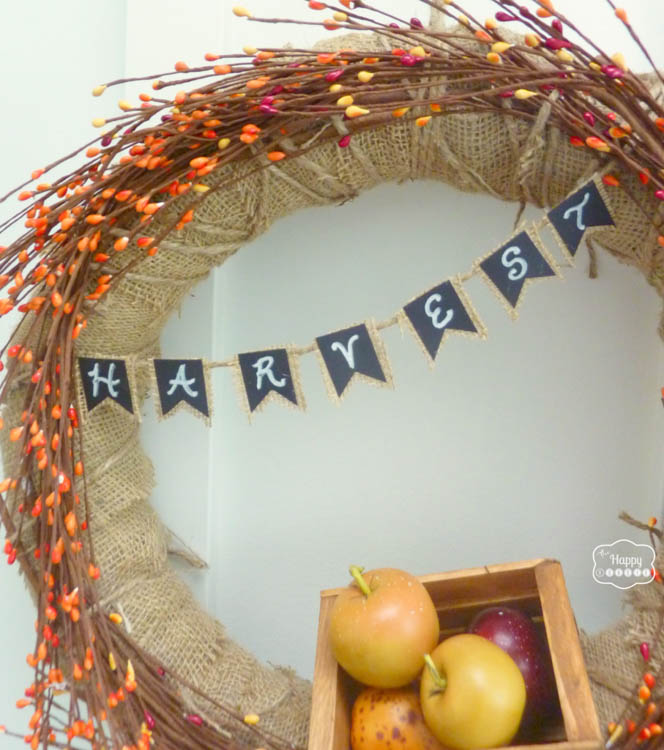
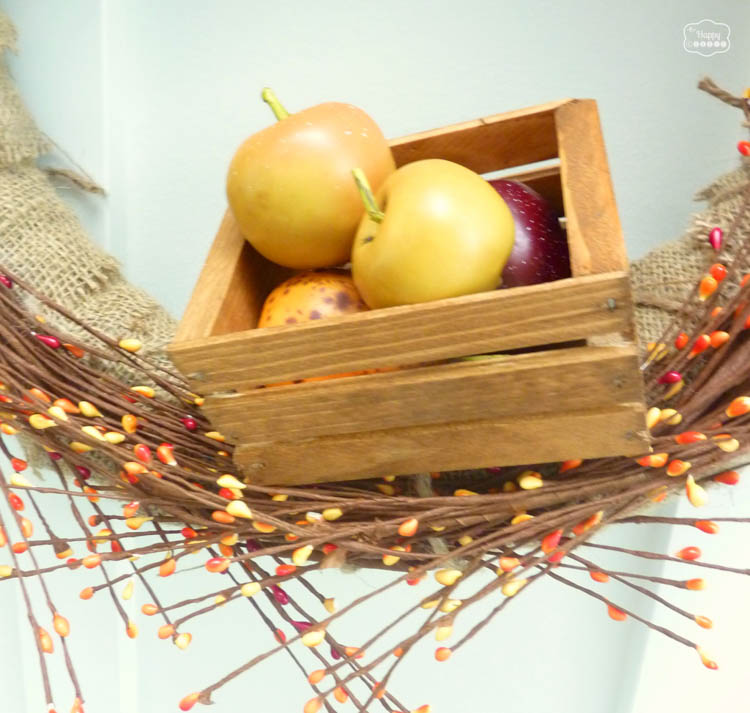
– a mini crate and some harvest themed crate fillers (like mini apples)
– burlap, black cardstock, and a white paint pen for the bunting
– your hot glue gun
I started out with my summer wreath – still cute but oh so ‘last June’…
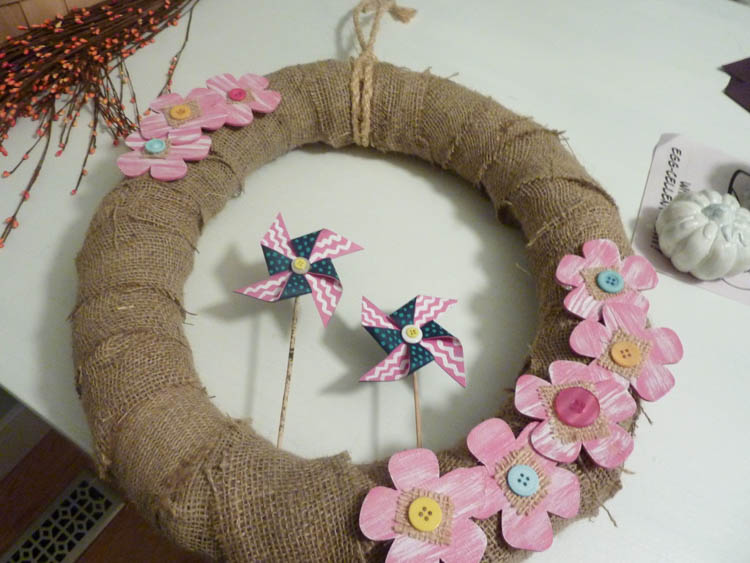
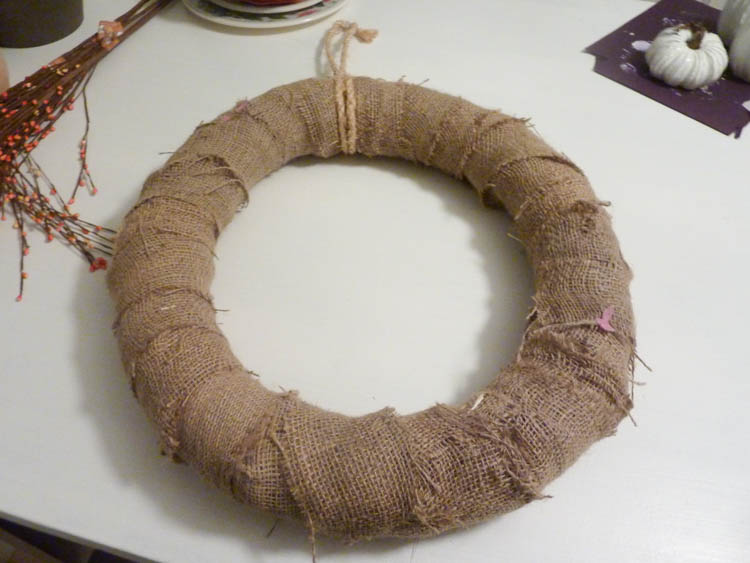
I removed the flowers and pinwheels leaving the basic burlap wrapped form…
Next I attached the floral picks to the burlap form by tying it with twine…
tying it with twine is a much lower commitment then using hot glue so there will be less blood sweat and tears when I tear it apart in a few weeks months.
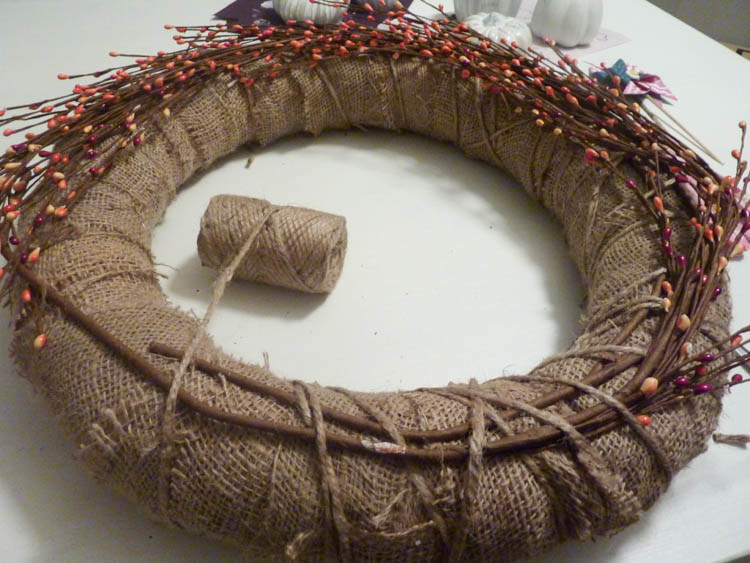
Once the picks are all attached around the wreath you don’t see very much twine… it blends in really well with the colour and texture of the burlap.
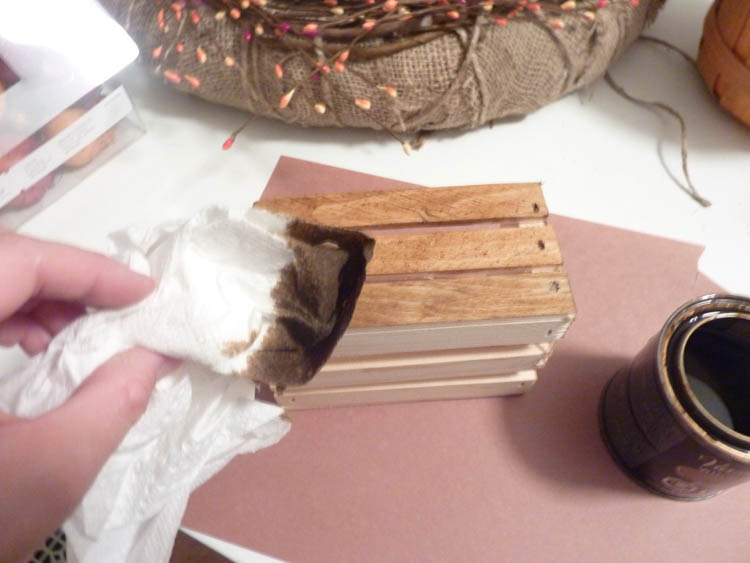
Next I used some wood stain to warm up a little crate that I had picked up at Michaels… Yes, I am rubbing it on with a paper towel – another low commitment method.
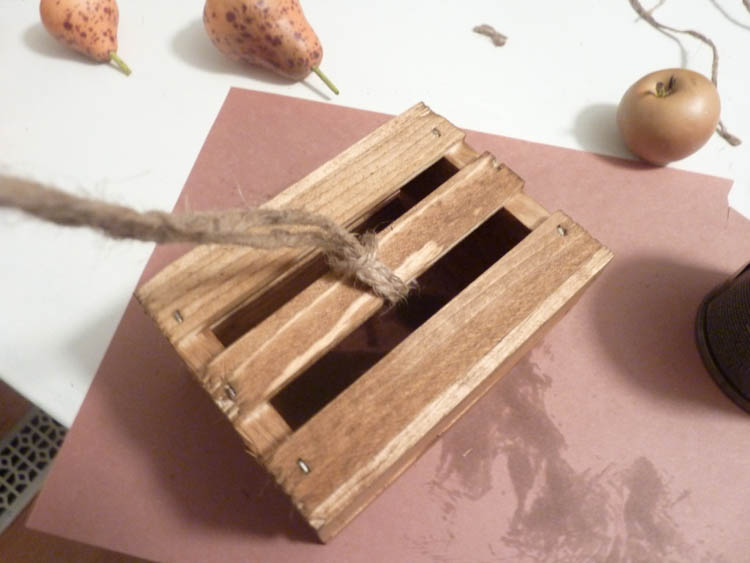
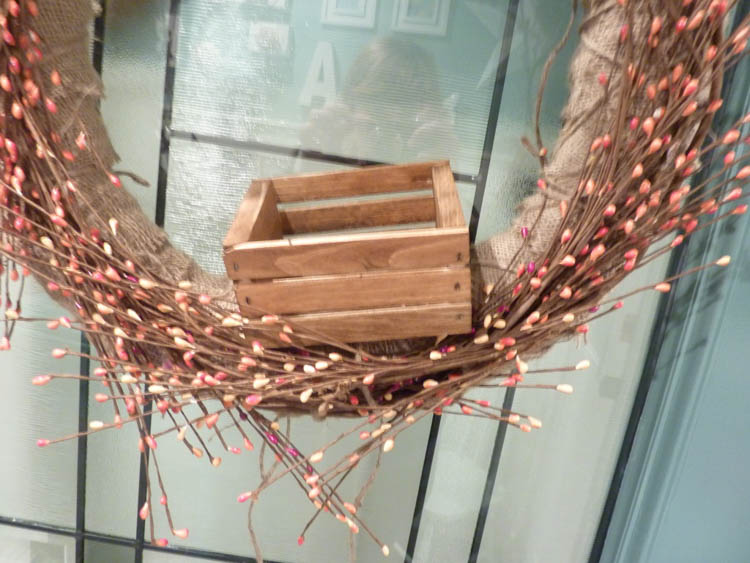
Once the stain dried (almost instantly!) I tied the crate onto the wreath by wrapping some twine through the bottom of it…
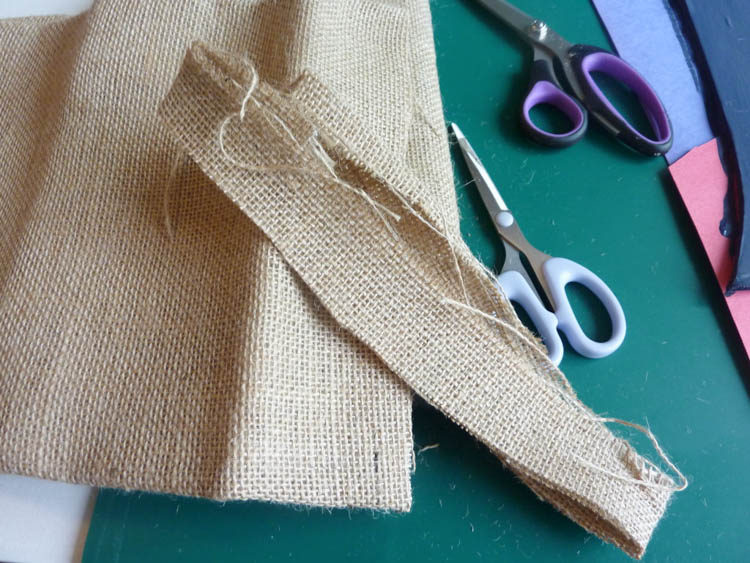
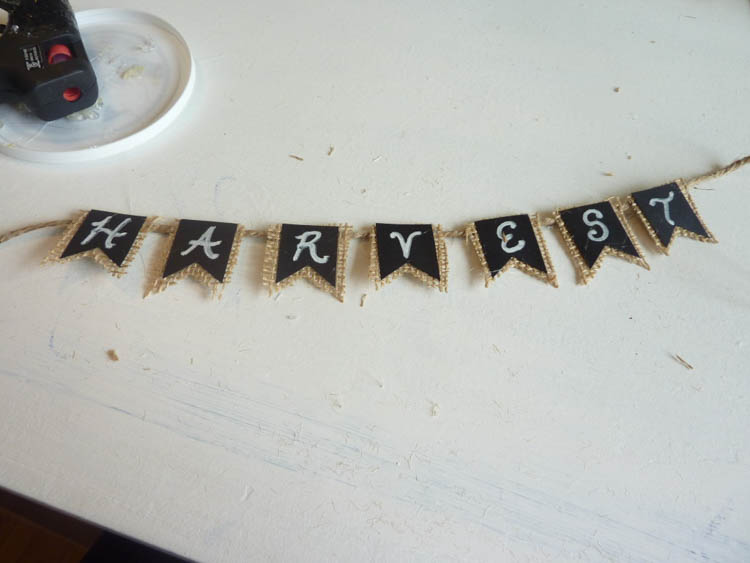
To create the faux mini chalkboard bunting I cut some black cardstock into little cubes and then cut them into the bunting shape I wanted… what would you call that shape????
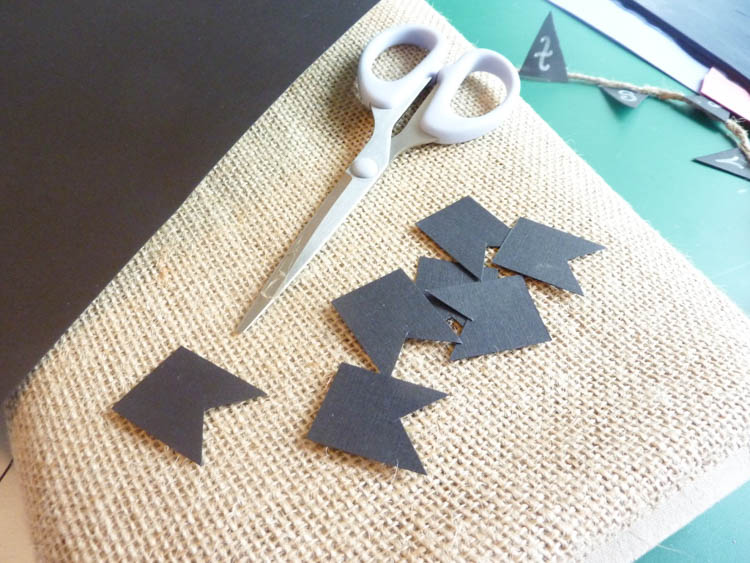
I also cut out some burlap to be the background for the mini ‘chalkboards’…
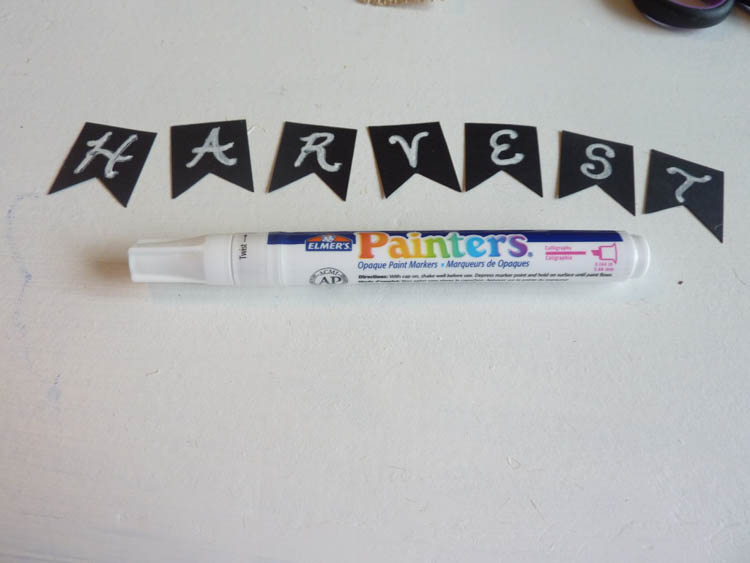
Wrote the lettering on using a paint pen…
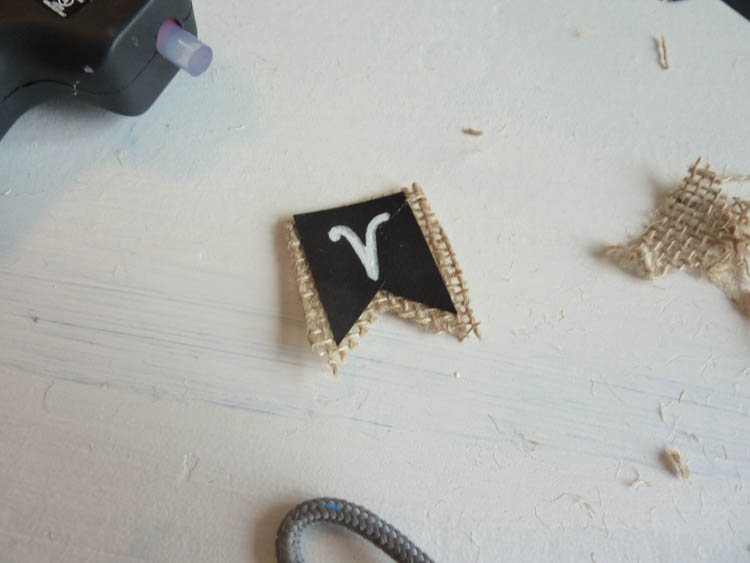
Glued the chalkboards onto the burlap and trimmed the burlap to act as a little frame for the chalkboards…
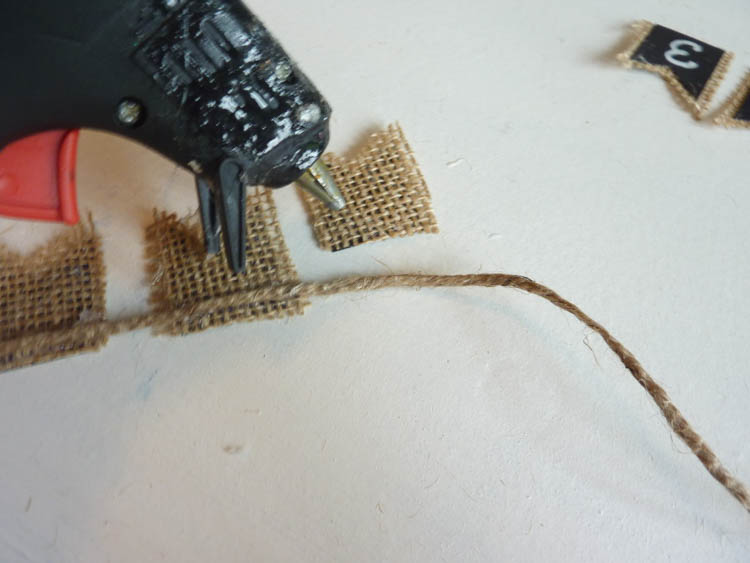
And glued the whole thing together by attaching twine along the back of each piece…
Done!
I attached the bunting by tying each end of the twine hangy piece to the twine that was used to attach the floral picks to the wreath.
Want to try it?
Pin it to remember it!
Fall wreaths are so much fun!! I can’t wait to see what y’all have to share this coming Sunday for the Get Your DIY On Challenge – don’t forget to come back at 4pm PST to link up YOUR FALL WREATH!
And check out what my gorgeous cohosts have whipped up and are sharing today over on their respective blogs…
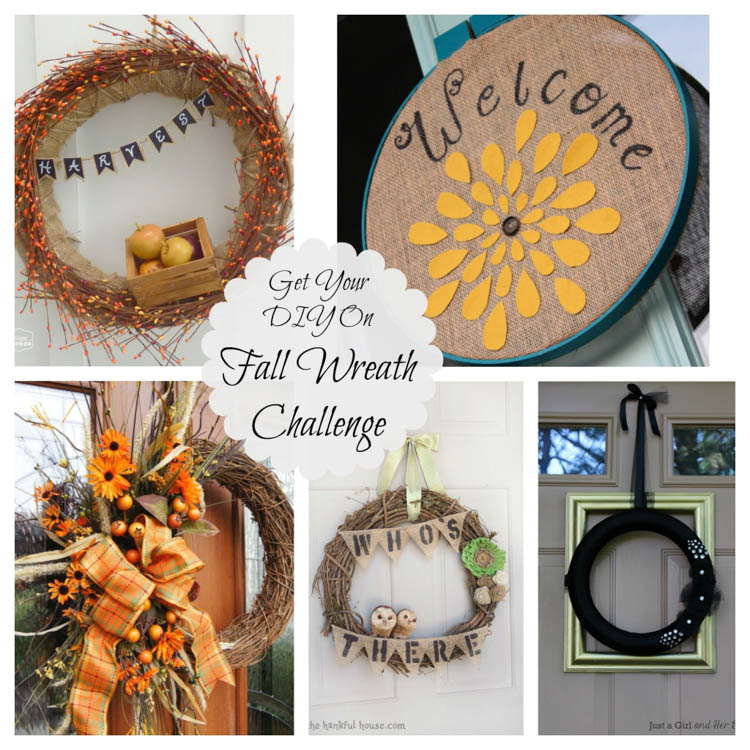
Embroidery Hoop Welcome Fall Wreath by April at House by Hoff
Traditional Grapevine and Fall Flower Wreath by Christy at Confessions of a Serial DIYer
Who’s There Owl Wreath by Mandy at The Hankful House
Black and Gold Frame Wreath by Abby at Just a Girl and Her Blog
Thanks for reading. And remember my housie friends, HOME isn’t built in a day. Enjoy the journey.

This was featured!


I may link up at some of these fabulous places below, for more info check out housie parties:
Make the Scene Monday , Monday Funday , Give Me the Goods Monday , Inspiration Monday, Craft-o-Maniac Monday, Project Inspire{d} , Inspire Me Tuesday, The Scoop, Wow Me Wednesday Whimsy Wednesday , Sizzle Into Summer Party, From Dream to Reality, The Inspiration Exchange, Work it Wednesday, Hookin’ Up With House of Hepworth’s, Live Laugh Rowe Live Laugh Linky, Transformation Thursday, Thursdays Are Your Days, The Weekly Creative , The Creative Connection, Fabulously Creative Friday, Party Junk, Pinworthy Projects , Link Party Palooza,, Weekend Bloggy Reading, Strut Your Stuff Saturday, Spotlight Saturday, Get Schooled Saturday, Overflowing With Creativity , , Suburbs Mama , That DIY Party


This is too cute! I’d love it if you’d link this up to my blog hop party, DIY Weekend:
http://mrandmrswinslett.blogspot.com/2013/09/diy-weekend-919.html
Thank you!
Miranda @ Mr. and Mrs. Winslett
Thank you!!
Love your wreath, that little mini crate is too cute!
Thank you Abby! I love the mini crates too- had to use some of in fall mantel-scape as well! I love miniature things:) Thanks for your visit and kind comments!!
Oh my gosh, that is just the cutest little basket of apples. And the cute chalkboard/burlap bunting. So fun. Love this idea 🙂
Thank you Amanda! I love apples for early autumn:) Have a great day!!
I love this! I think that the black cardstock over the burlap plus a white paint pen gives it a great mini chalkboard feel! thanks for sharing it at the Pinworthy Project Linkup!
It might be a faux mini chalkboard but as long as it gives the look- who cares! Thanks so much for your visit and sweet comments PJ!
Beautiful wreath. You do a really great job! Don’t forget to link up to The DIY’ers! http://homecomingmn.blogspot.com/2013/09/the-diyers-29.html
Thank you Kayla – I will hope over and add you to my list… what day do you guys host your party on? And what time does it go live?
SO cute Krista!! I love the bunting, pinning 🙂 xo
Thanks Tanya! I was glad to do a temporary chalkboard over top so I can reuse the bunting – think it will come in very handy!!
Super cute Krista! I should do a wreath on my door, I love the little chalkboard bunting! And thanks for your sweet comment on my blog!
Hi Mindi! I love your blog!! You always do such amazing things:) You could probably build yourself a wreath out of wood!
What a super cute wreath Krista, I do like the little bunting best!!
I love the burlap bunting too Heather -so much so that I had to recreate it for my new autumn mantel:)
Your wreath is so cute, the little banner is my favorite part. Great idea using pool noodles. Lot less expensive than foam wreaths or others. I try to find wreaths at the thrift stores but they’re getting ridiculous with their pricing. Come on people, it’s a thrift store.
Happy weekend.
I agree – seriously, thrift stores are sometimes as expensive as dollar stores for similar items. I don’t get it!!
Do you know what these wreaths reminded me of?
Autumn.
Some people call it ‘fall’, and now i know why some people have those cyclical seasonal disorders.
It’s because their not crafting!
Those colors on the wreath remind me of one thing: pumpkins!
I just can’t wait when the pumpkins are ready. I want pumpkin pie!
Katie
Hi Katie! We get pumpkin pie pretty soon since Canadian Thanksgiving is in October!! I love it too!
Love this! Cute little banner! Krista, where did you buy the paint pen with a tip that small?
Oh … Neat tidbit .. foam core wreaths can be expensive sometimes … but at this time of year those sponge pool noodles are half price (check $0.99) for one. One cut in half will make two small to medium wreaths. Connect the ends with some packing tape (the clear stuff) and then wrap in burlap as Krista showed you!! How cool is that?? I could not help but share this tip with good people!
Hi Ella! A pool noodle is exactly what is underneath all that burlap!! Lol!
~Krista
Perfect!! 😀
Thanks Ella!!
I want that mini chalk board banner….soooo cool
Thanks Christine!! I did a larger size one for my autumn mantel… I guess it is my new thing for the moment! I love it too:)
Krista I love your bunting! It’s adorable. Love, Love, Love it!!
Yay! Thanks Mandy!!
Love this wreath especially the little bunting banner. So cute! I started working on mine this week but it’s a slow process. Hoping to finish it up in time for the link up!
Hi Stephanie! I hope you do too…. but sometimes life does have a habit of getting in the way of our best intentions:)
it’s gorgeous Krista! I love it and love all the little details and of course you know I LOVE your chalkboard bunting made with cardstock; great idea! 😉 can’t believe summer is gone, over here it’s cold and raining this morning & yesterday it was very hot! ah! September! 😉
btw, I started working on my wreath for Fall but haven’t had time to continue working on it, hope I will before the party! 😉
Hi Ingrid! I look forward to seeing your wreath – whenever you get it finished. I am sure it will be adorable!!
You had me at chalkboard – so cute!
Kelly
Thanks Kelly! So thrilled you came to visiti!!
This is adorable, Krista! You have beautiful penmanship! XO
Thanks Christy- I think we are always hard on our own handwriting but I am not sure why when the fonts we choose or like are often a handwriting font!
Krista, this is just a darling wreath and I have a total crush on that adorable little bunting! Love this! Pinning! Hope you have a happy Thursday! 🙂
Thank you Cindy! I have a feeling you may be seeing a little or LOT more of that bunting in the weeks to come!
Love the wreath! That little apple crate is adorable and so is the chalkboard bunting. Great ideas!
Thank you Courtney!!
Oh, I’m first to comment again! Honestly, I don’t sit by my computer all day – I just hear my inbox “beep” when mail comes in – like yours tonight! LOVE your wreath – I honestly thought that lettering was on real chalkboard pieces! I love your paint pen – must look out for one of those! And one day I’ll use my new glue gun!!!
Lol Petra!! I am sure it is just that you are awake when my things get posted and no one else is because of time zones!! The black cardstock really is a good double for a chalkboard finish- even up close. So glad I tried it!! I am pretty excited about the possibilities behind my new paint pen:)