
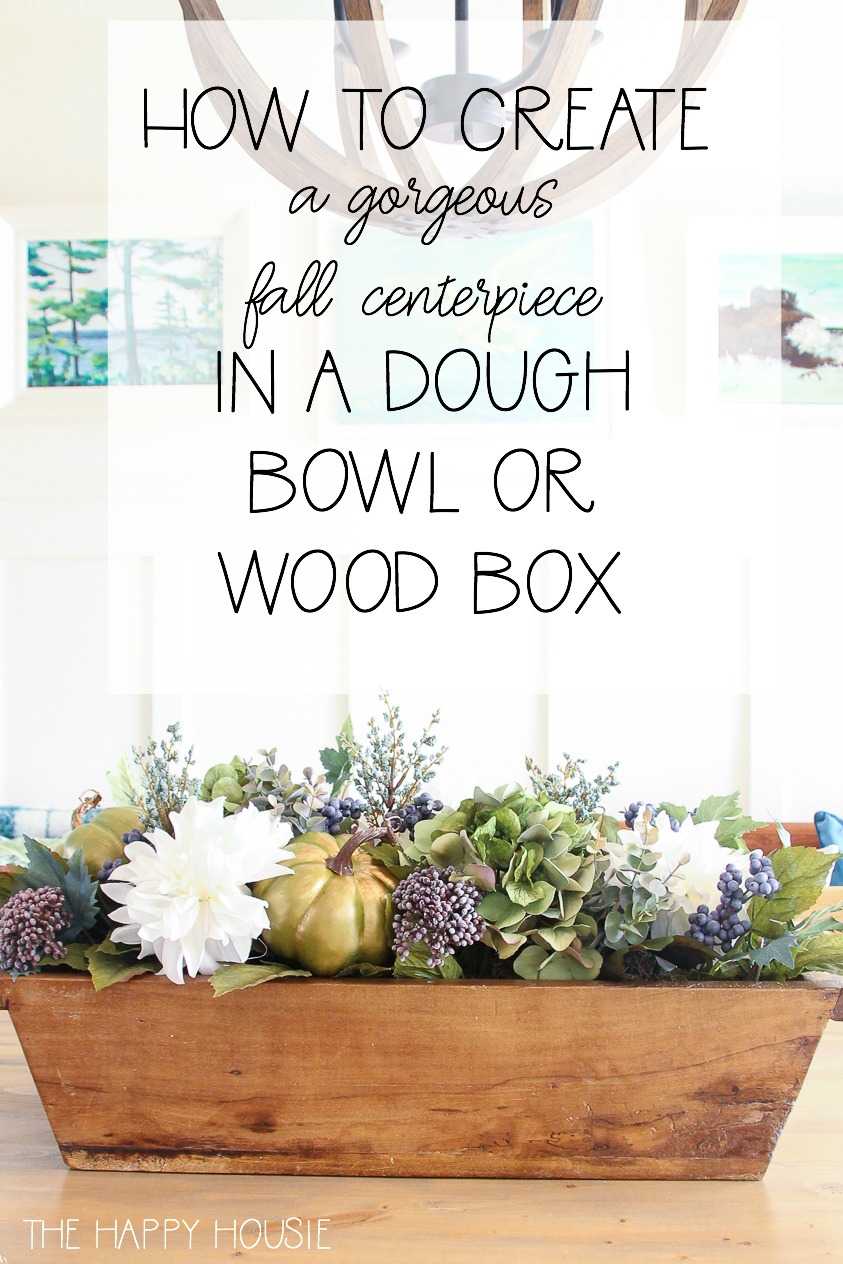
DIY Fall Centerpiece in a Dough Bowl
Today I’m showing you how to create an easy but beautiful high-end looking DIY fall centerpiece in a wooden dough bowl.
I have to confess that this DIY project has been a long time coming. Months. Or come to think of it, maybe even a year!
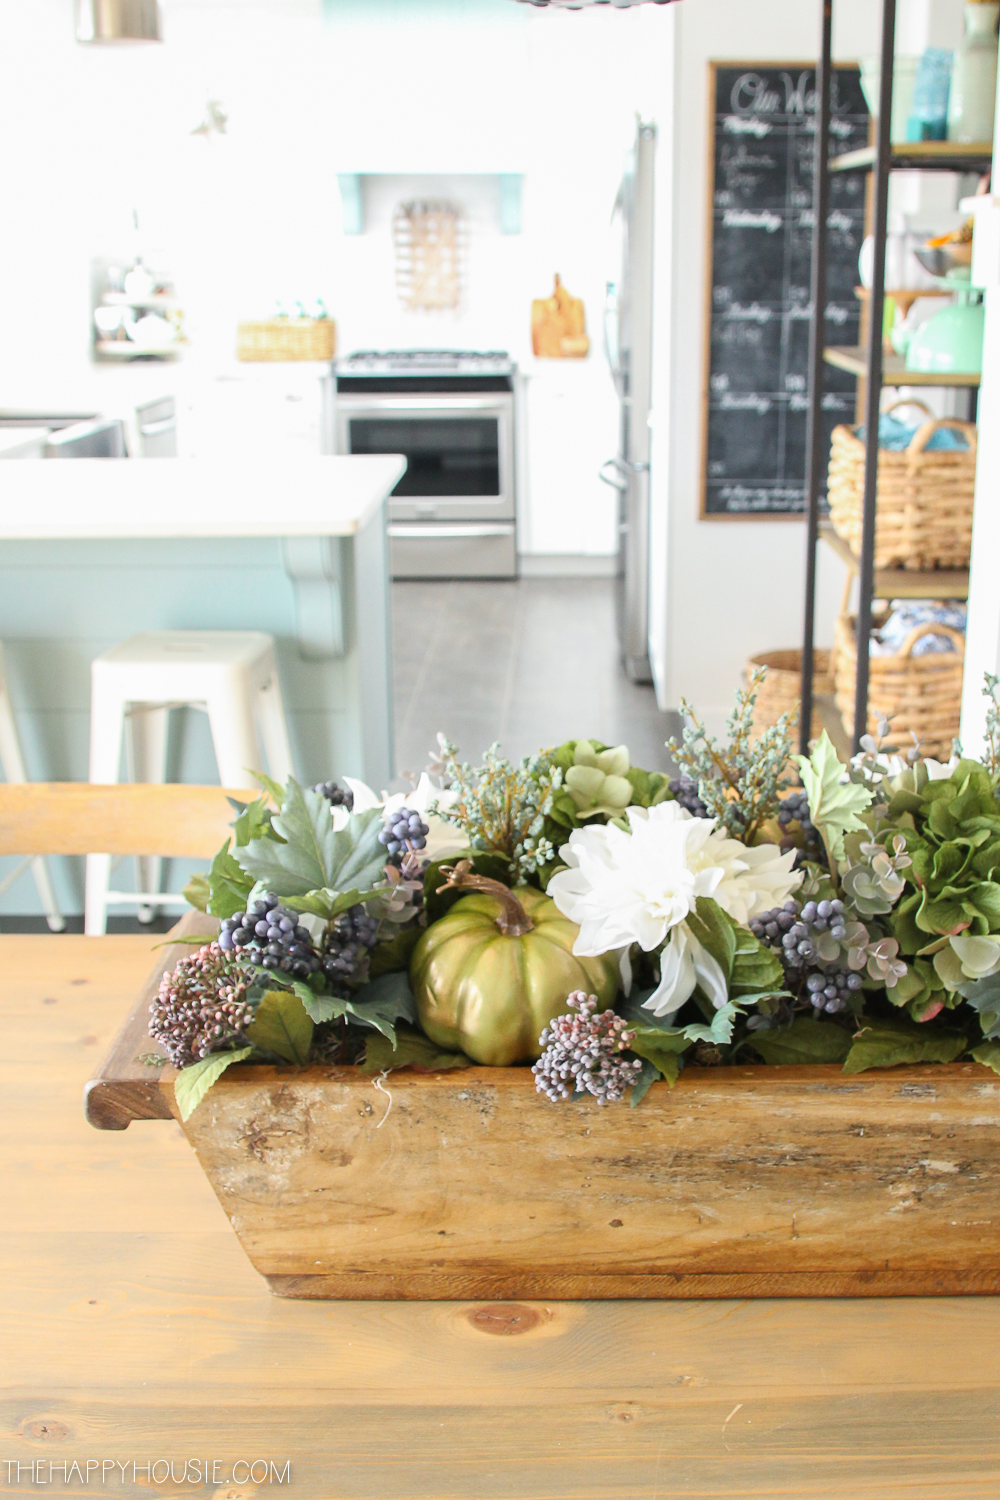
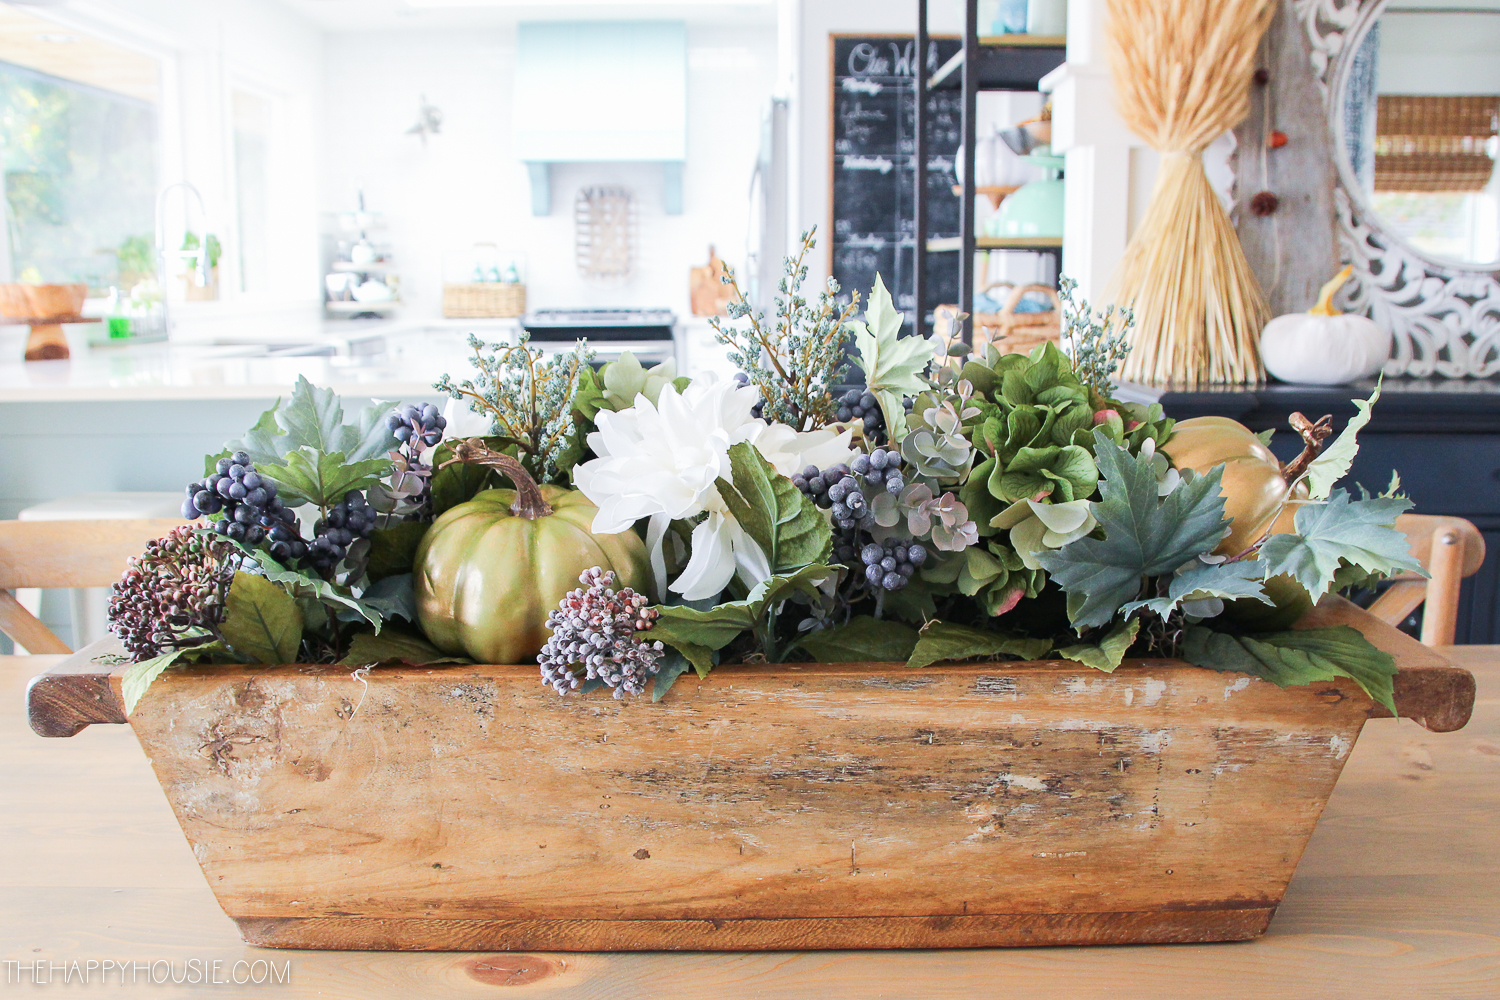
I discovered this beautiful vintage dough bowl or big wooden trough (I’m not really sure what to call it?), at a nearby antique/vintage shop quite a while back, and it has sat empty on my table for a LOOOOOONG stretch.
I always meant to get around to creating some kind of floral arrangement in it… but I kept putting it off and putting it off. Then, after tackling my high-end style fall wreath on a low-end budget a few weeks back, I knew I had finally found exactly the look I wanted for this dough bowl. I shared a few glimpses of it during our fall home tour on Monday, and have had several questions from readers since then about it. SO…I figured the time was ripe to share the how-to with you all!

What I love about having a faux arrangement in our dining room is that is lasts meet ALL SEASON LONG. I don’t have to worry about picking up new flowers every week or two, and the quality of some of the faux stems you can buy is so good these days, that it’s even hard to tell they’re fake!
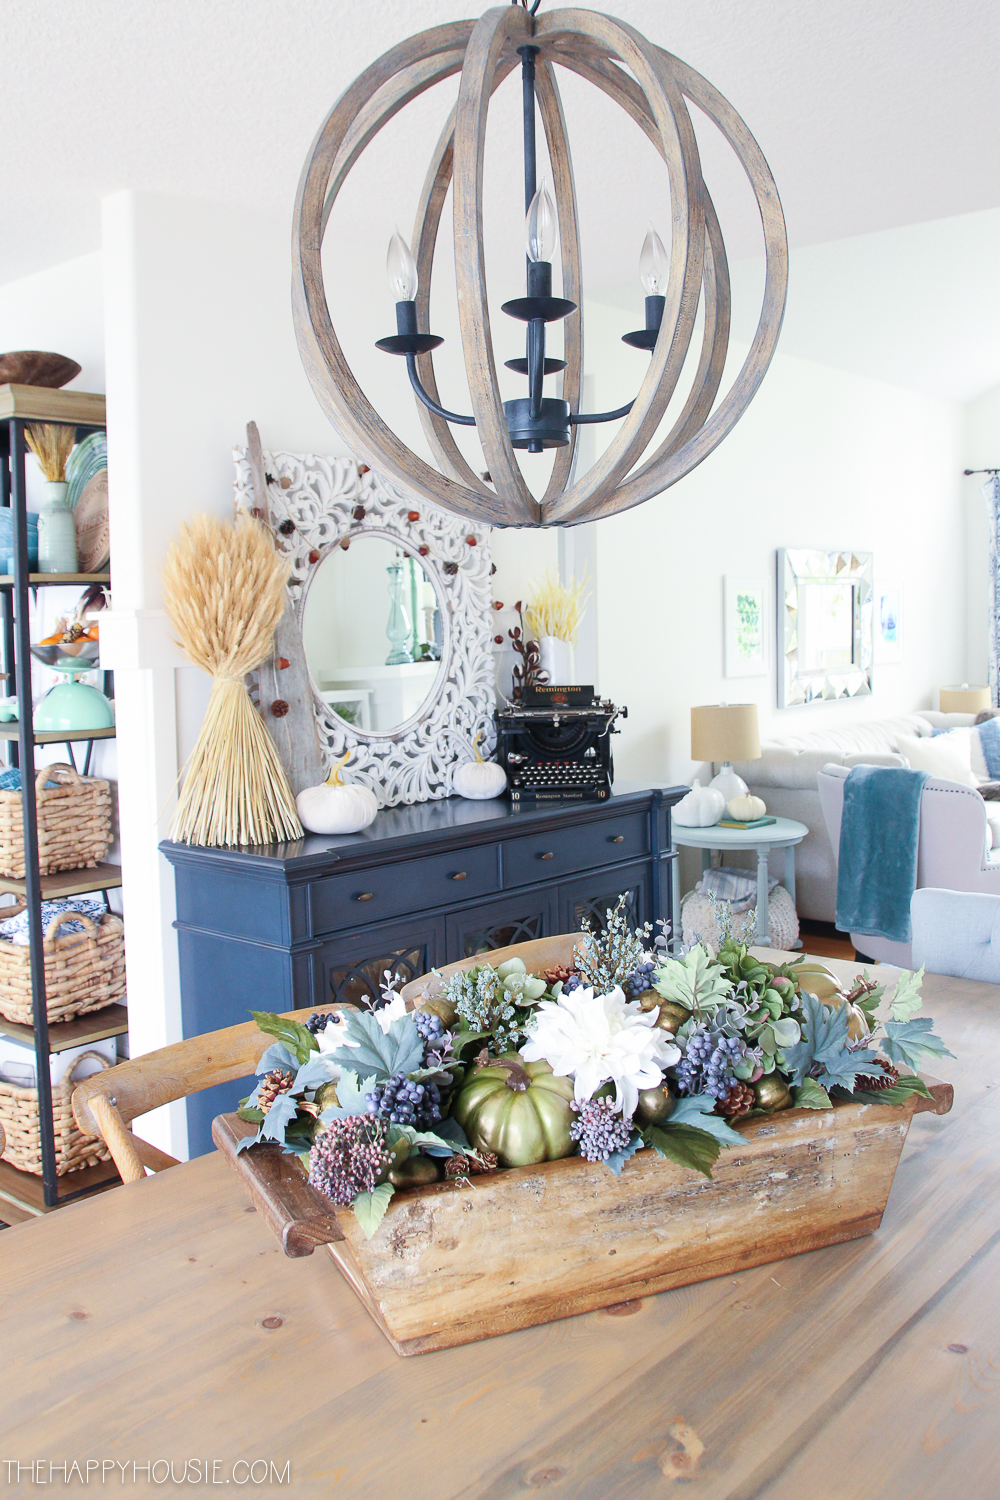
As I mentioned, my “dough bowl” is from a vintage/antique store in a nearby town, but I have seen them online as well. I’ve collected some for you, below. My friend’s husband built her a beautiful wooden trough style one (more like a long box), and it works lovely as well. Make sure to look at the measurements of whatever you are ordering (including the depth of it!) and compare it to the size of your table to make sure it would work.

If you have some DIY skills and some tools, you could also build your own trough style centrepiece box using a tutorial like this one from My Thrifty House. Or make a trough box style one using a tutorial like this one from Sand and Sisal.
I bought all my faux floral pics at Michaels on sale – watch for either BOGO or 40% off. The BOGO is a better deal, but 40% is still a good sale as well. Later in the season I’ve even seen 60% seasonal…so you could keep your eye out for that. You just may have to wait a little longer and the selection may be quite picked through by then.
I ended up buying WAY WAY too many, which I had a feeling about, but I would rather have too many then not enough and only getting part way through the project before having to go back to the store, right? Especially since our closest Michael’s is over an hour away.
Since I knew I’d likely be taking them back, I began with just one stem or pic of my favourites and cut them. I waited until I knew I really needed a stem before I cut it up (I bought two of a few types and didn’t use most of them).
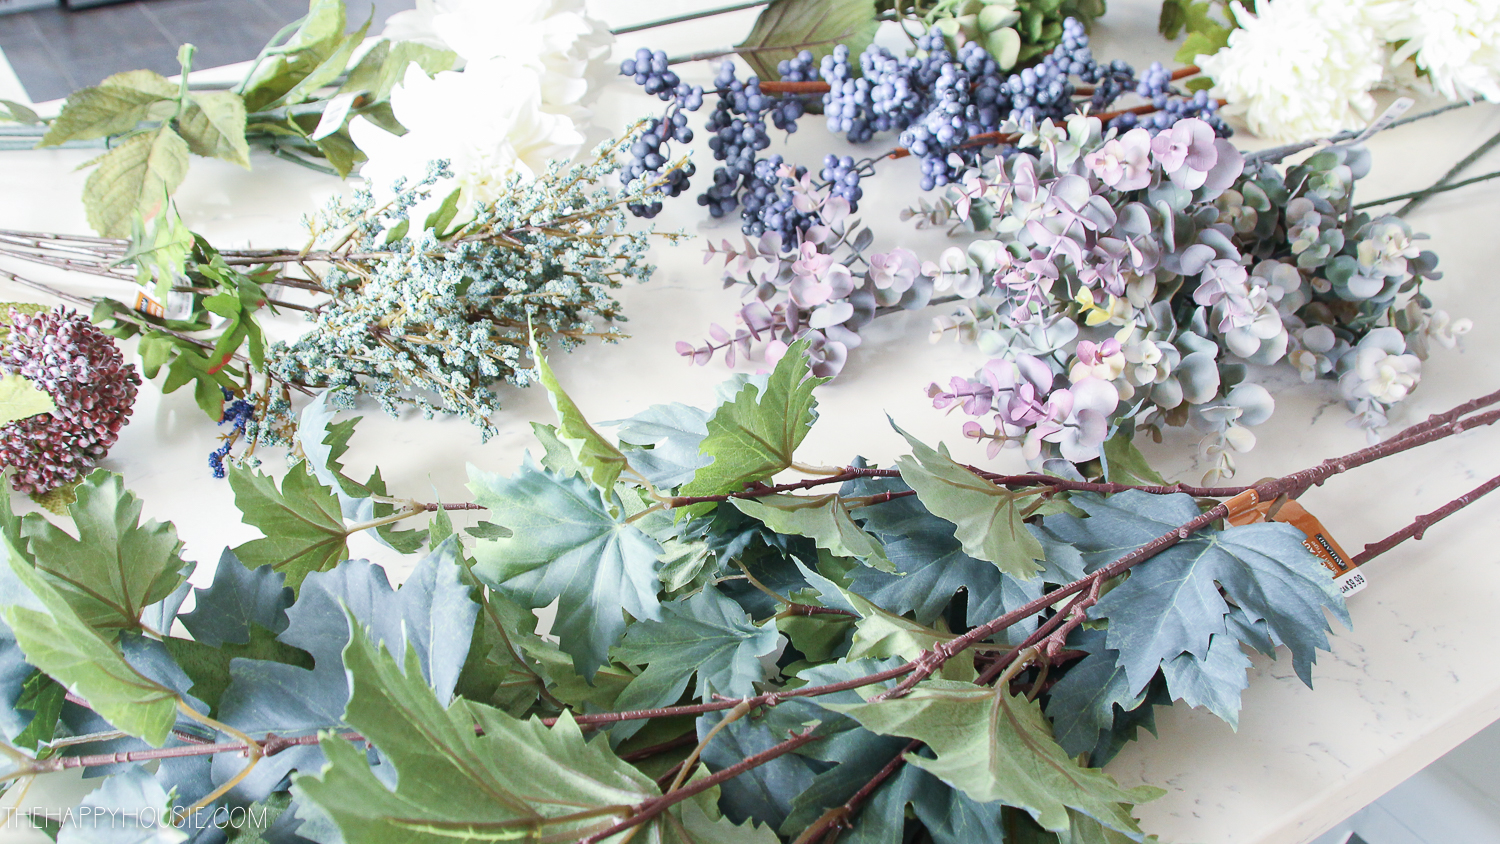
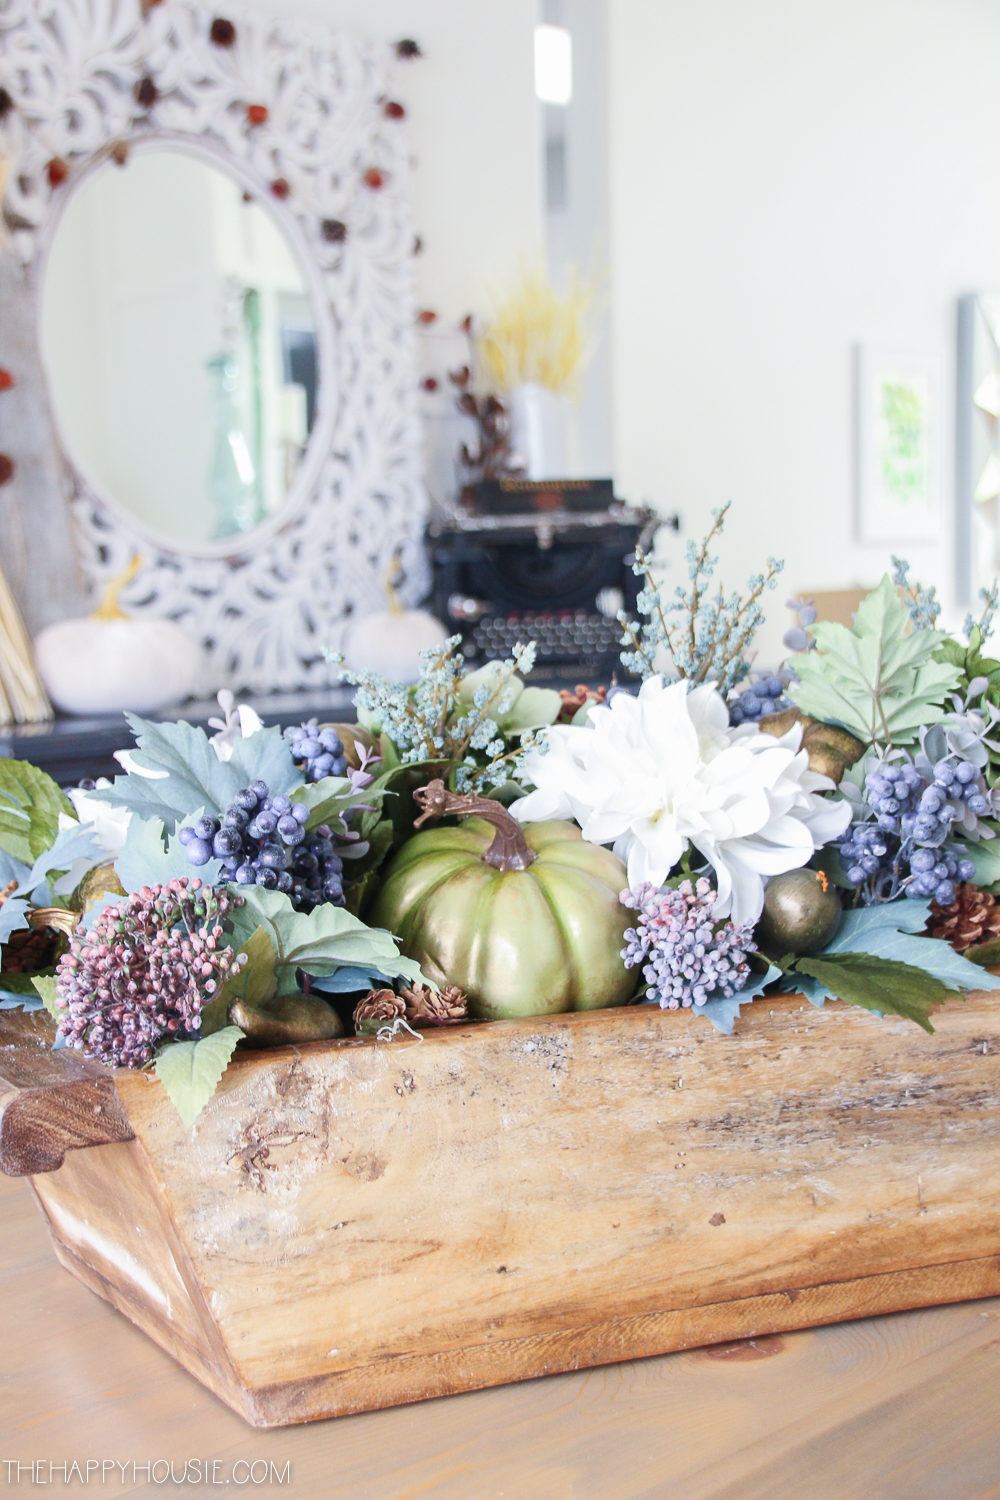
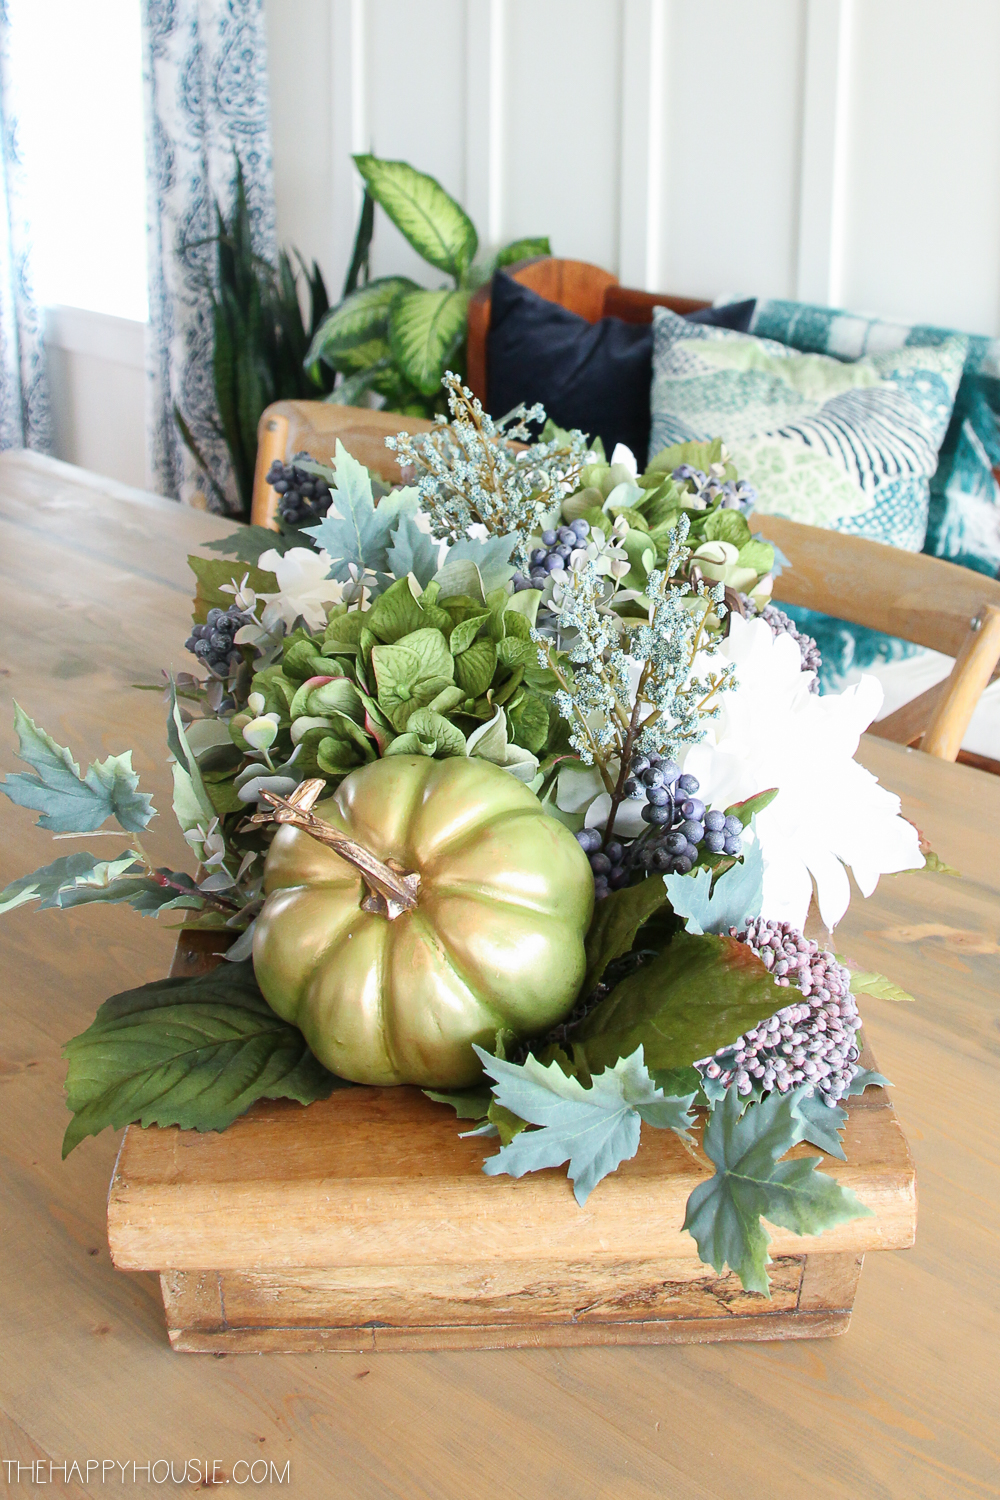
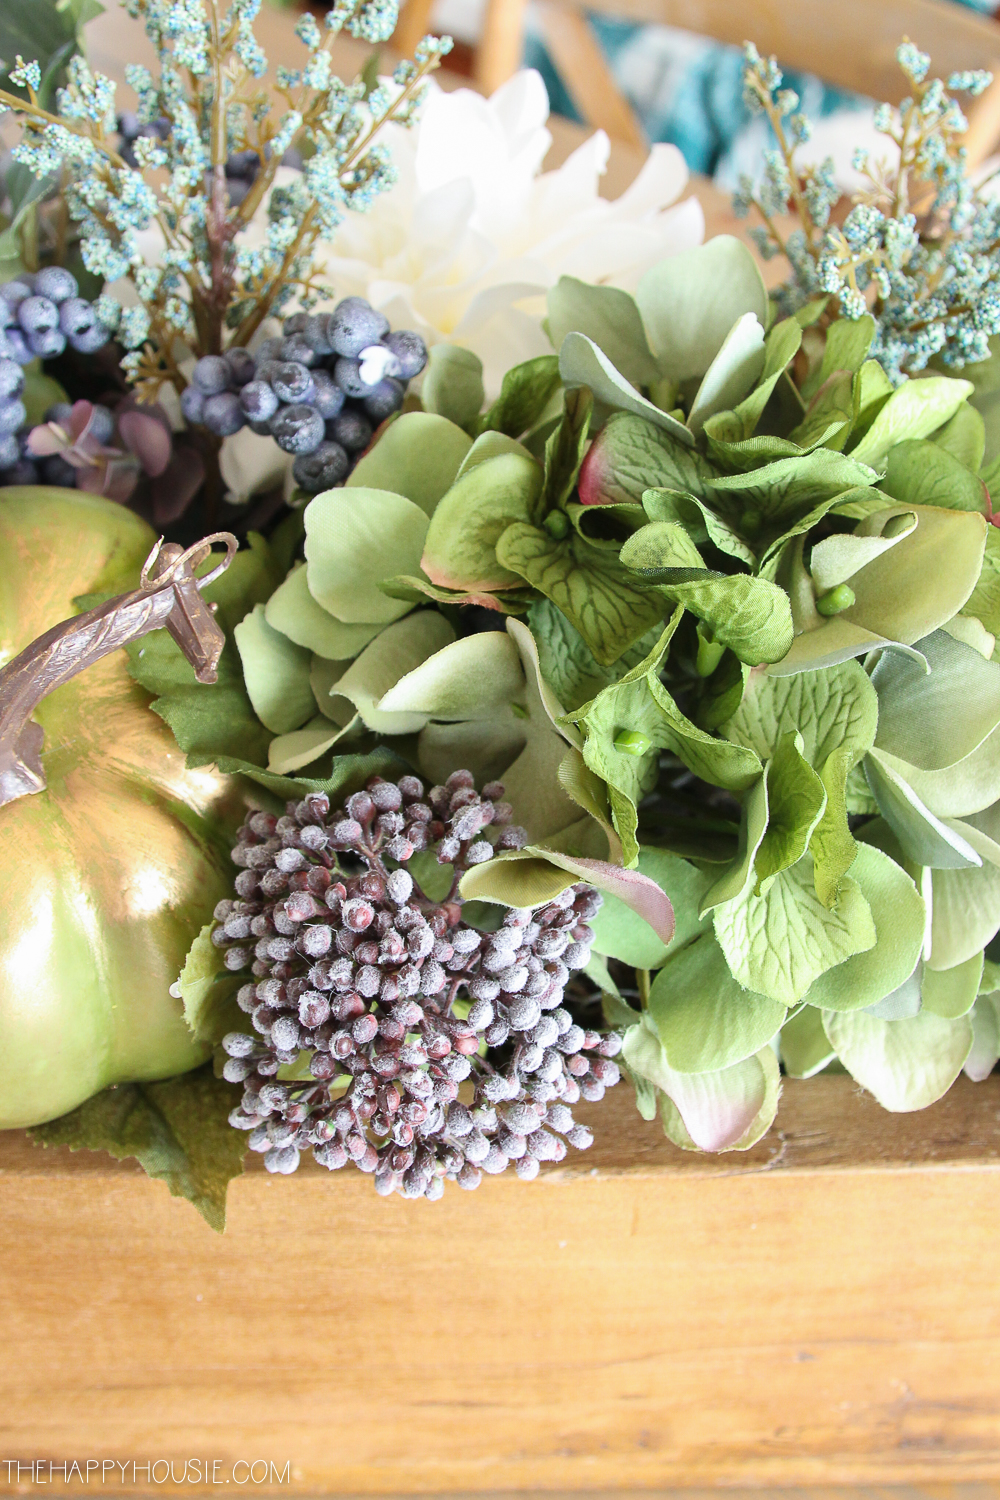
In addition to the floral pics I chose, I used reindeer and dried moss, white foam (I think the green floral foam would work as well), and wire snippers to cut the branches and flowers with. I also finished it off with some faux fall pumpkins (also on sale at Michaels), and pinecones and mini gourds from the dollar store.
You can watch how I pulled it all together in this quick step-by-step video:
If you prefer a traditional tutorial, then here are the steps I followed:
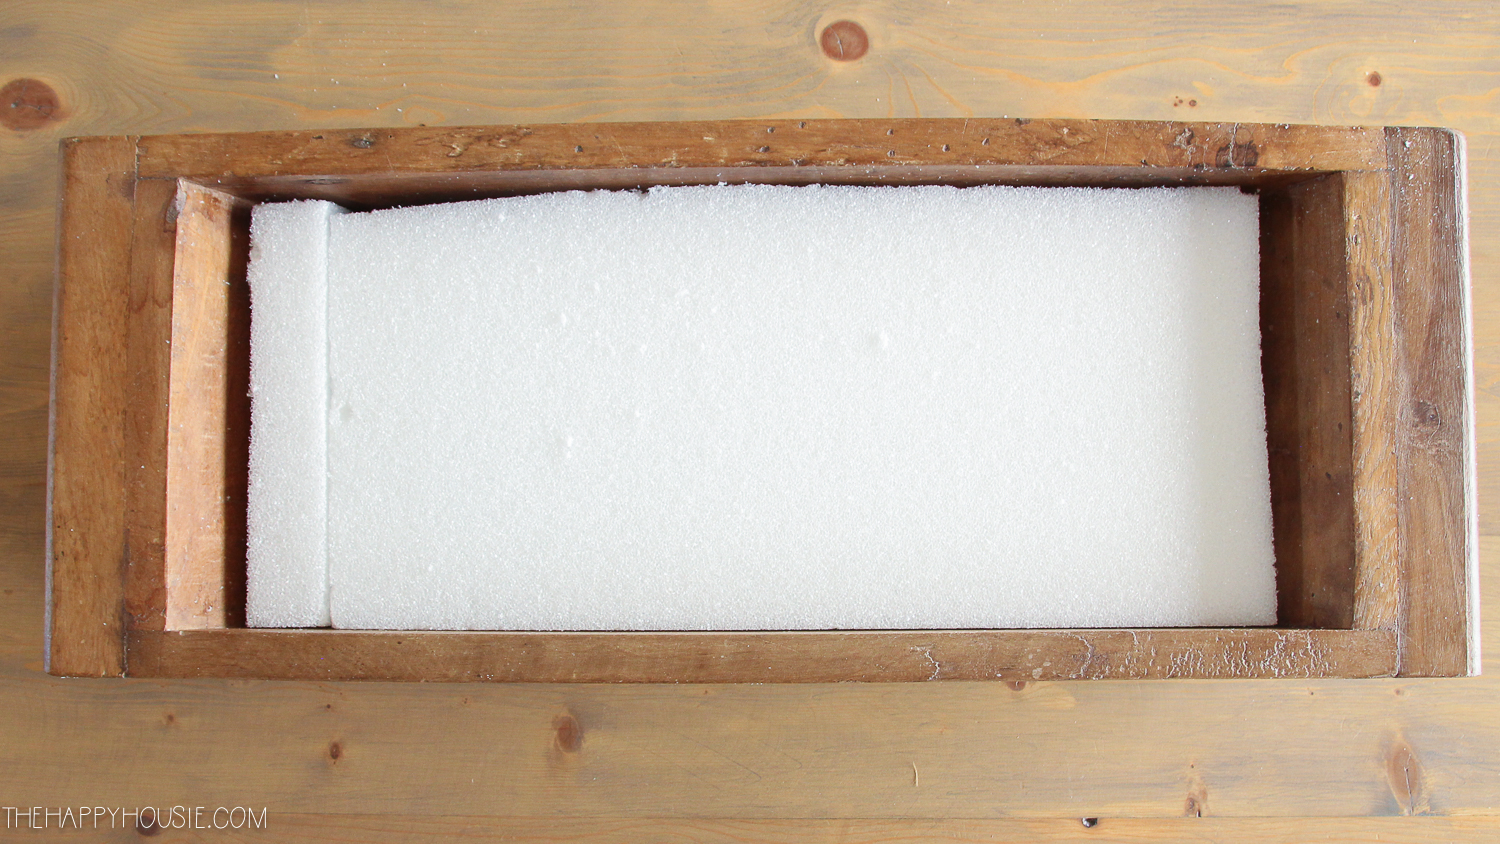
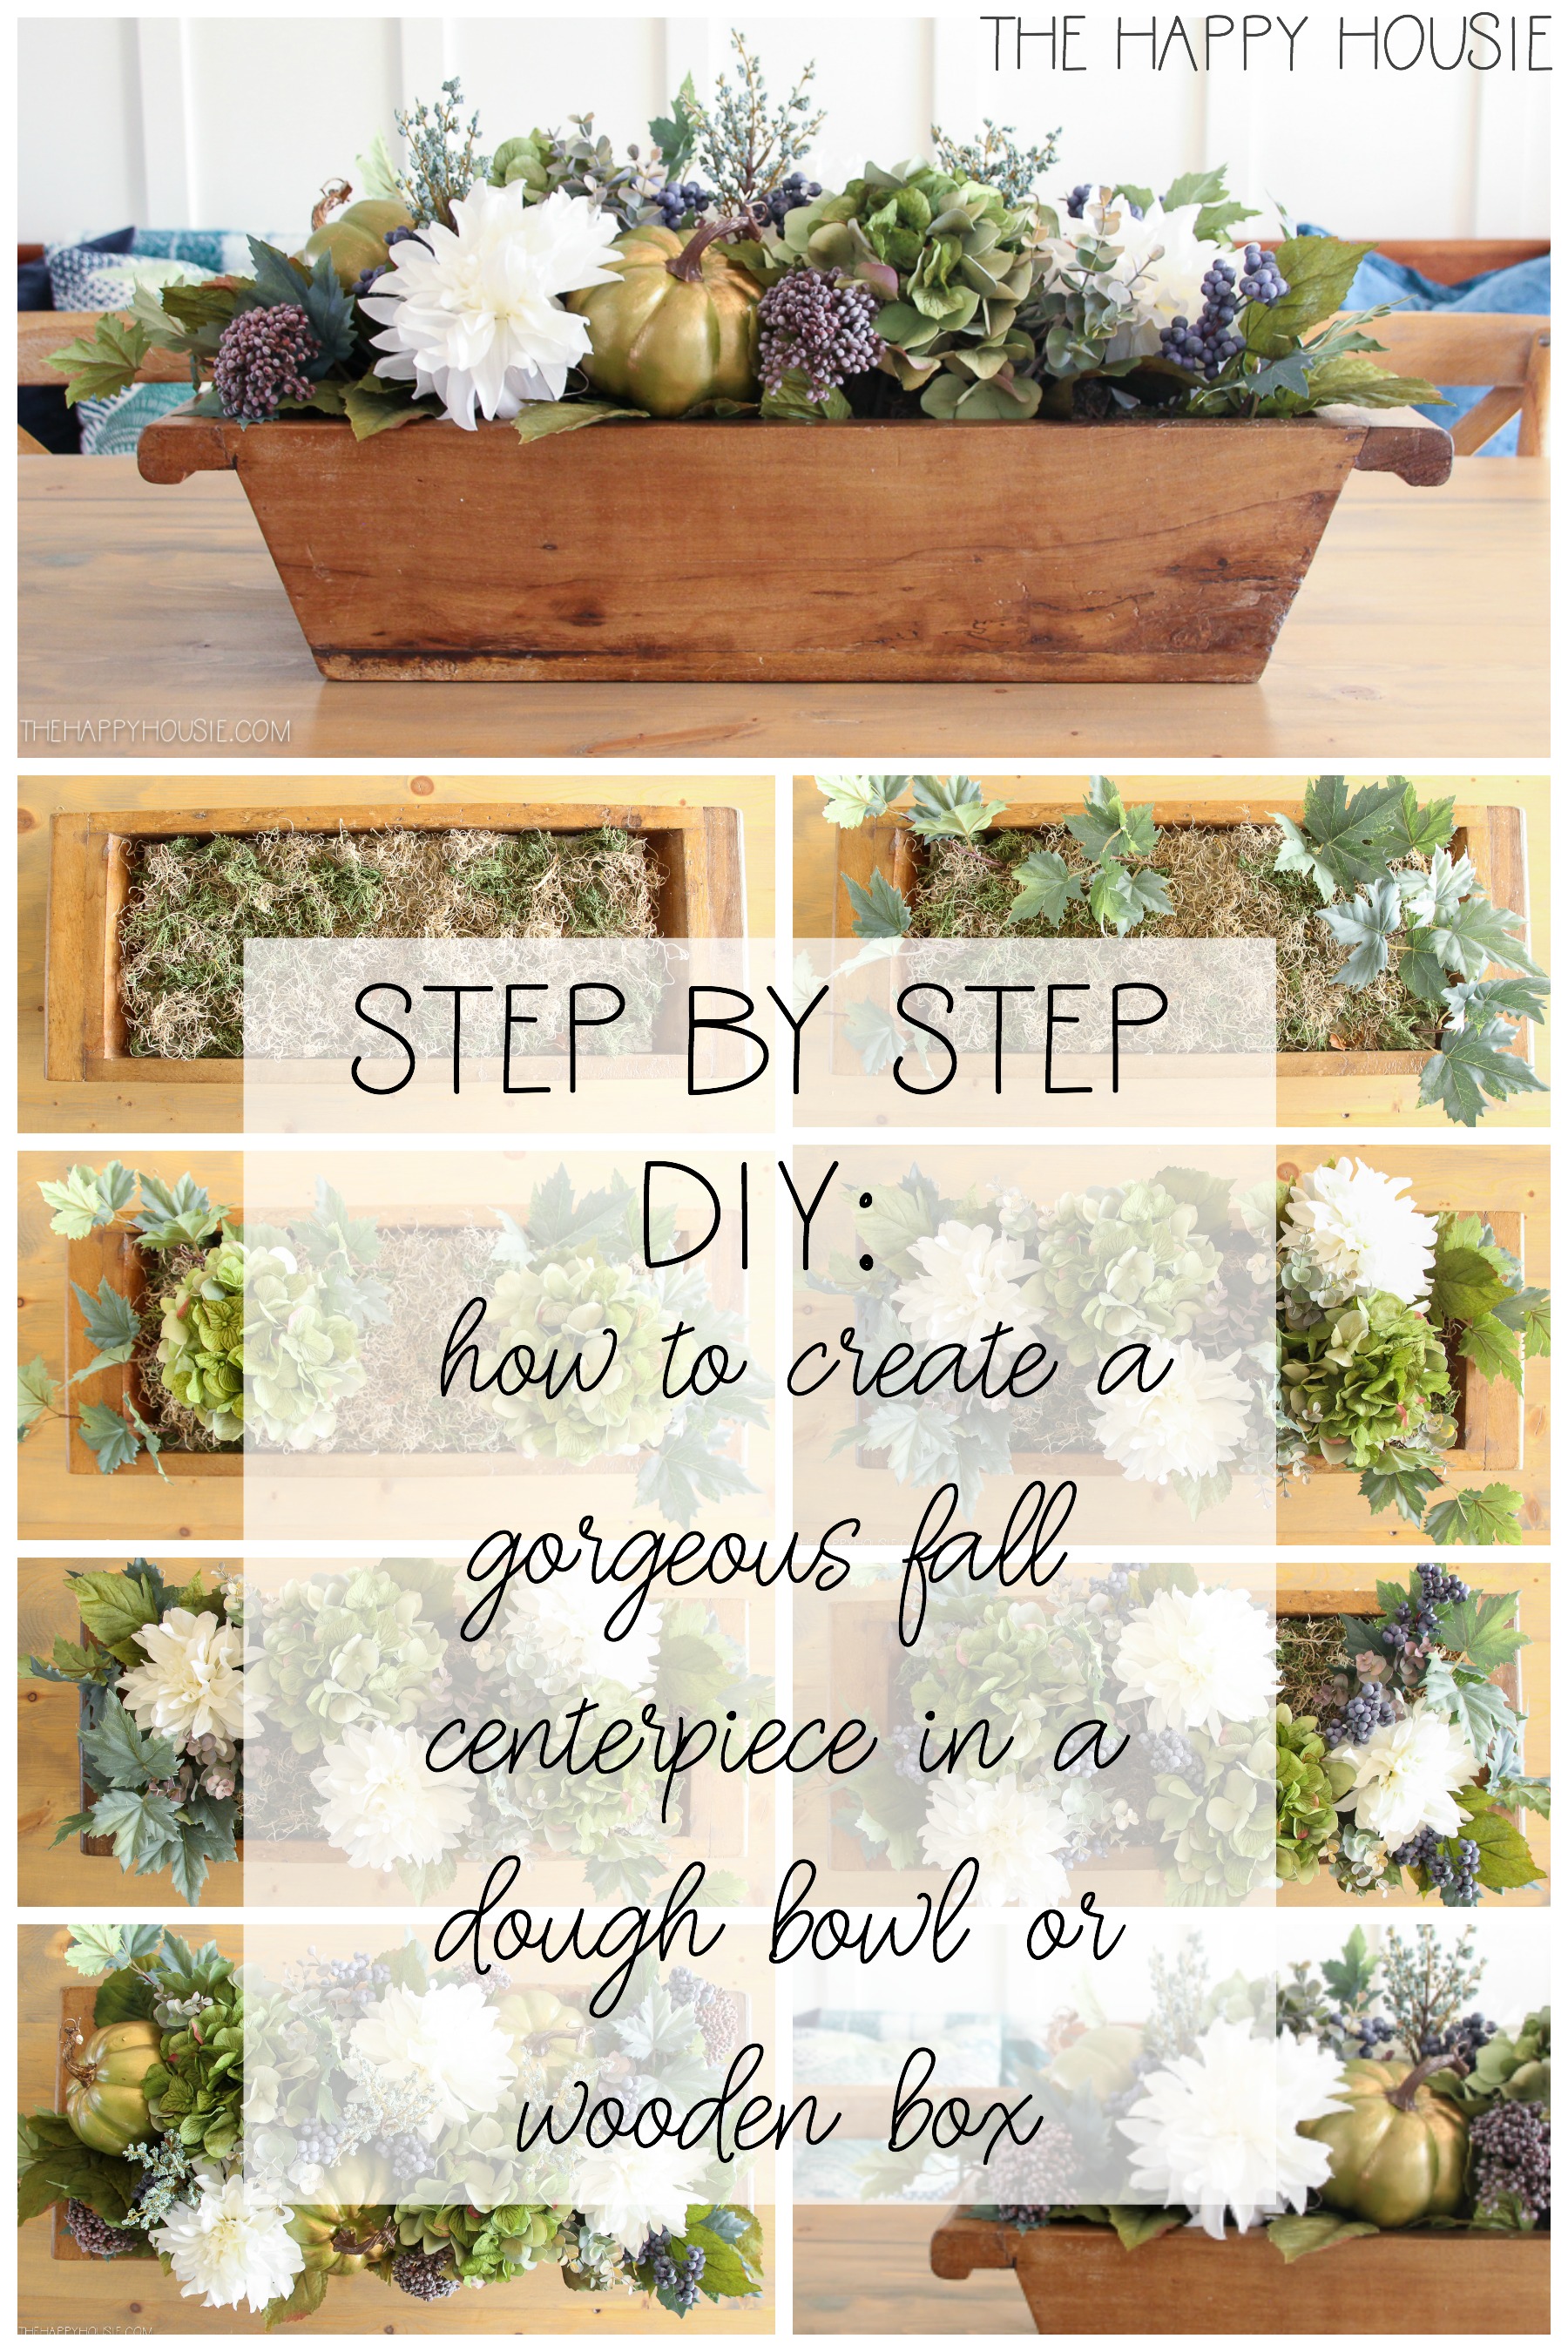
One:
Fill the dough bowl or wood box with foam (floral foam should work as well as white styrofoam):
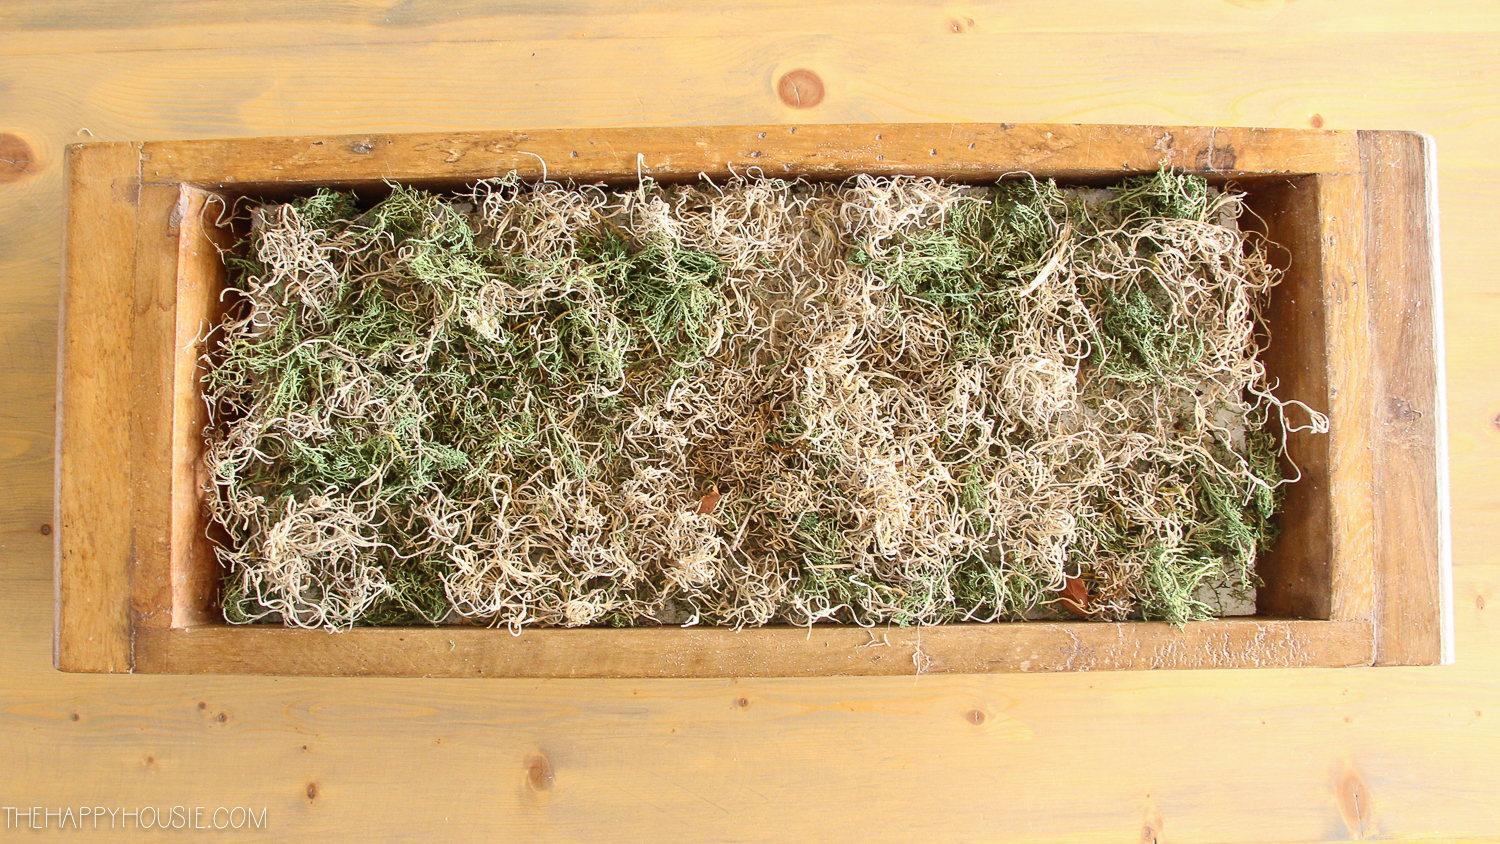
Two:
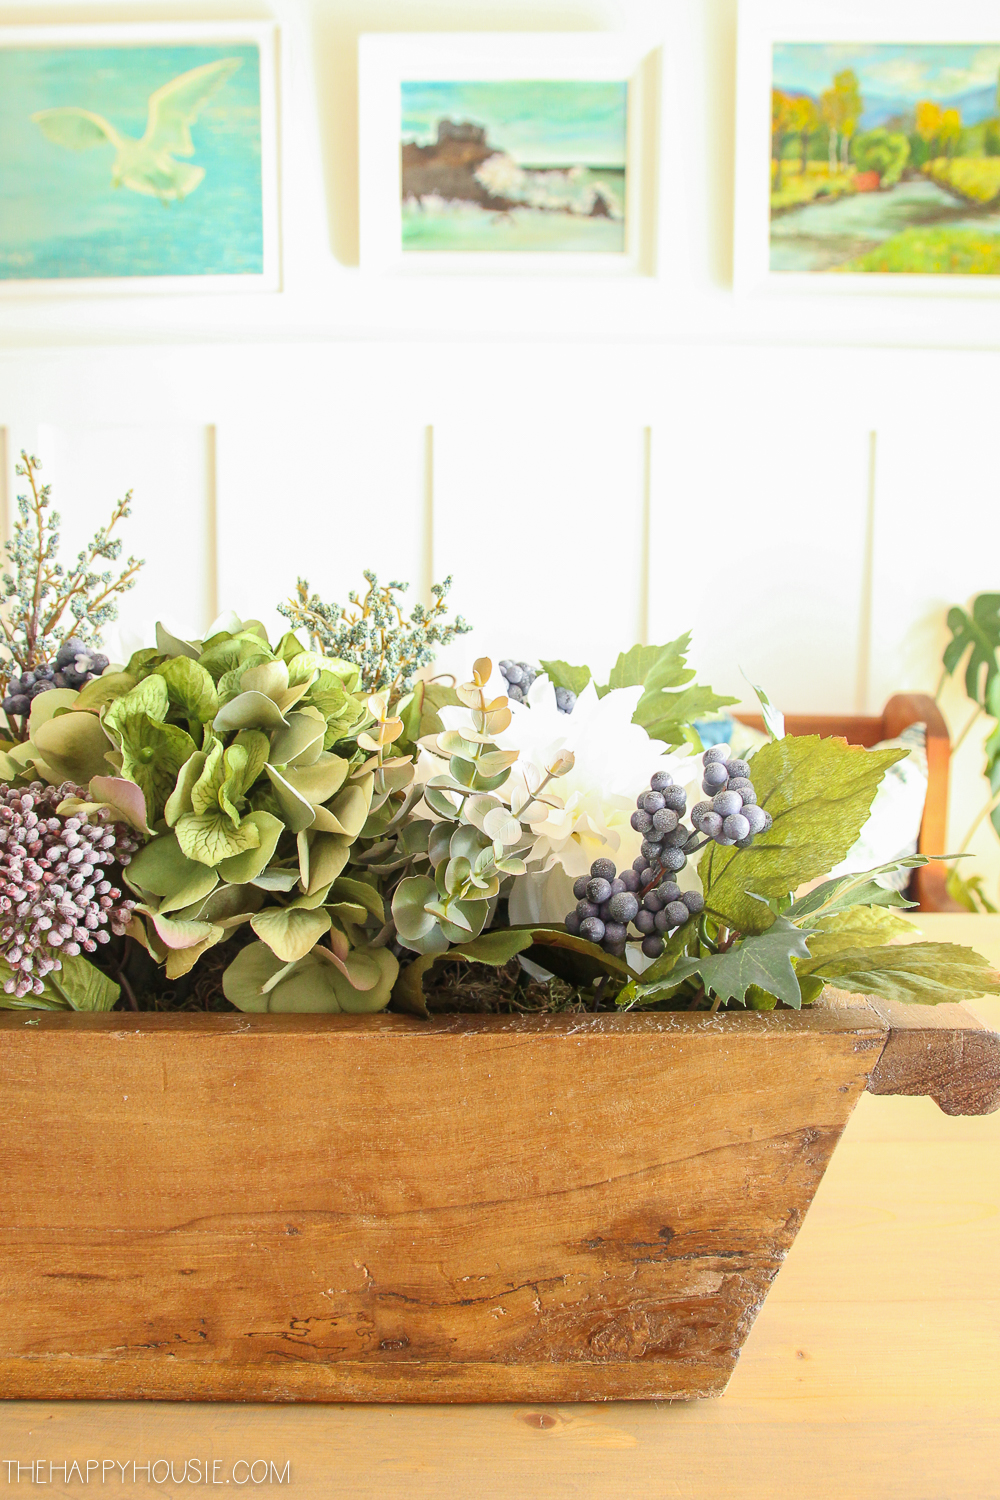
Cover the foam with a mix of mosses. I used reindeer moss as well as a dried/brownish toned moss:
Three:
Begin by stuffing some leaves around the outer edges…

Four:
Next add in your largest, most foundational flowers:
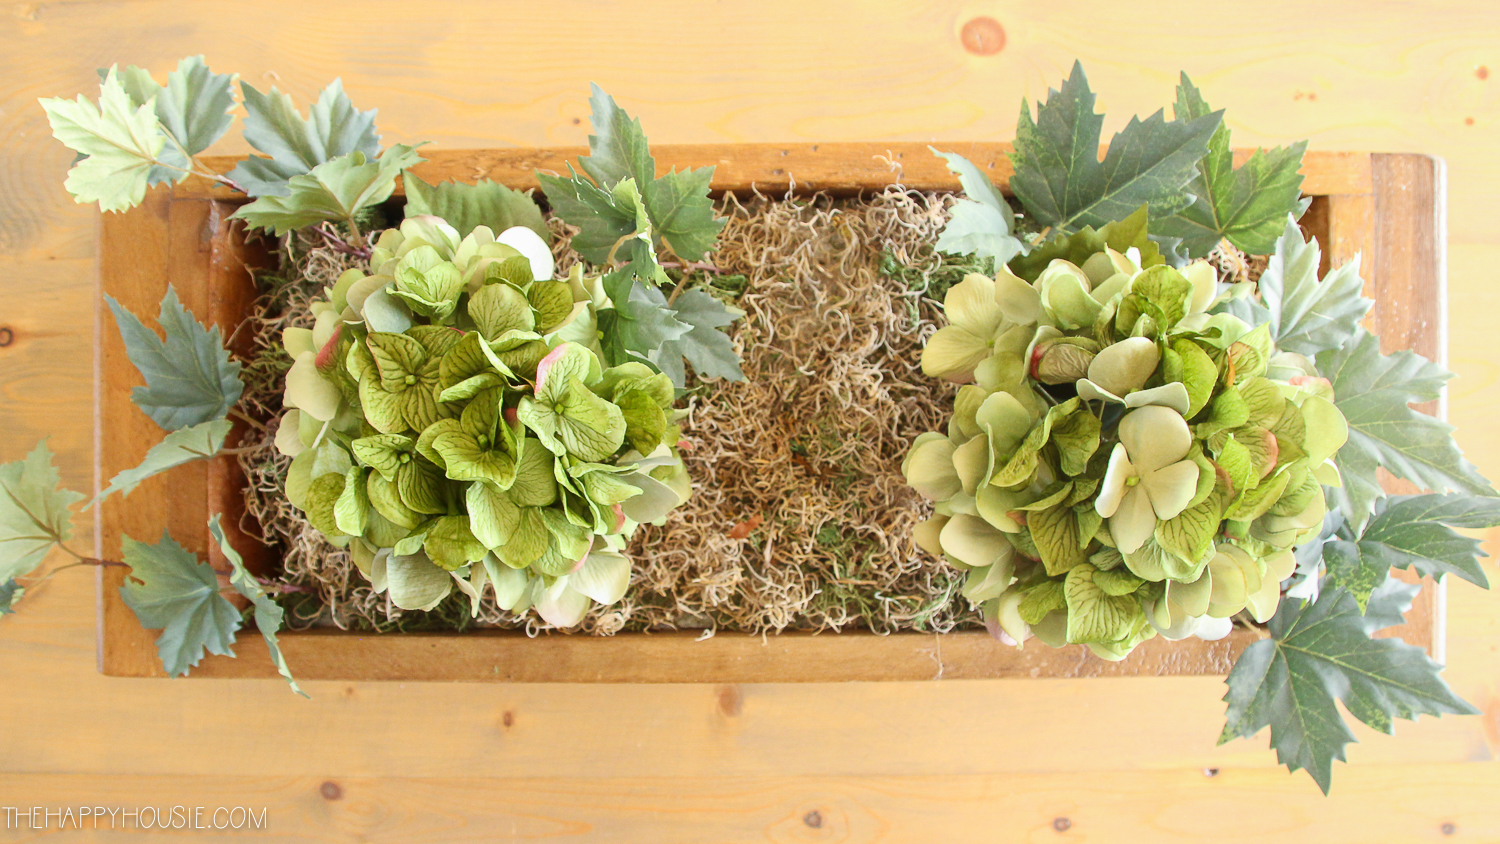

Five:
Add in the feature leaves and then the berries…
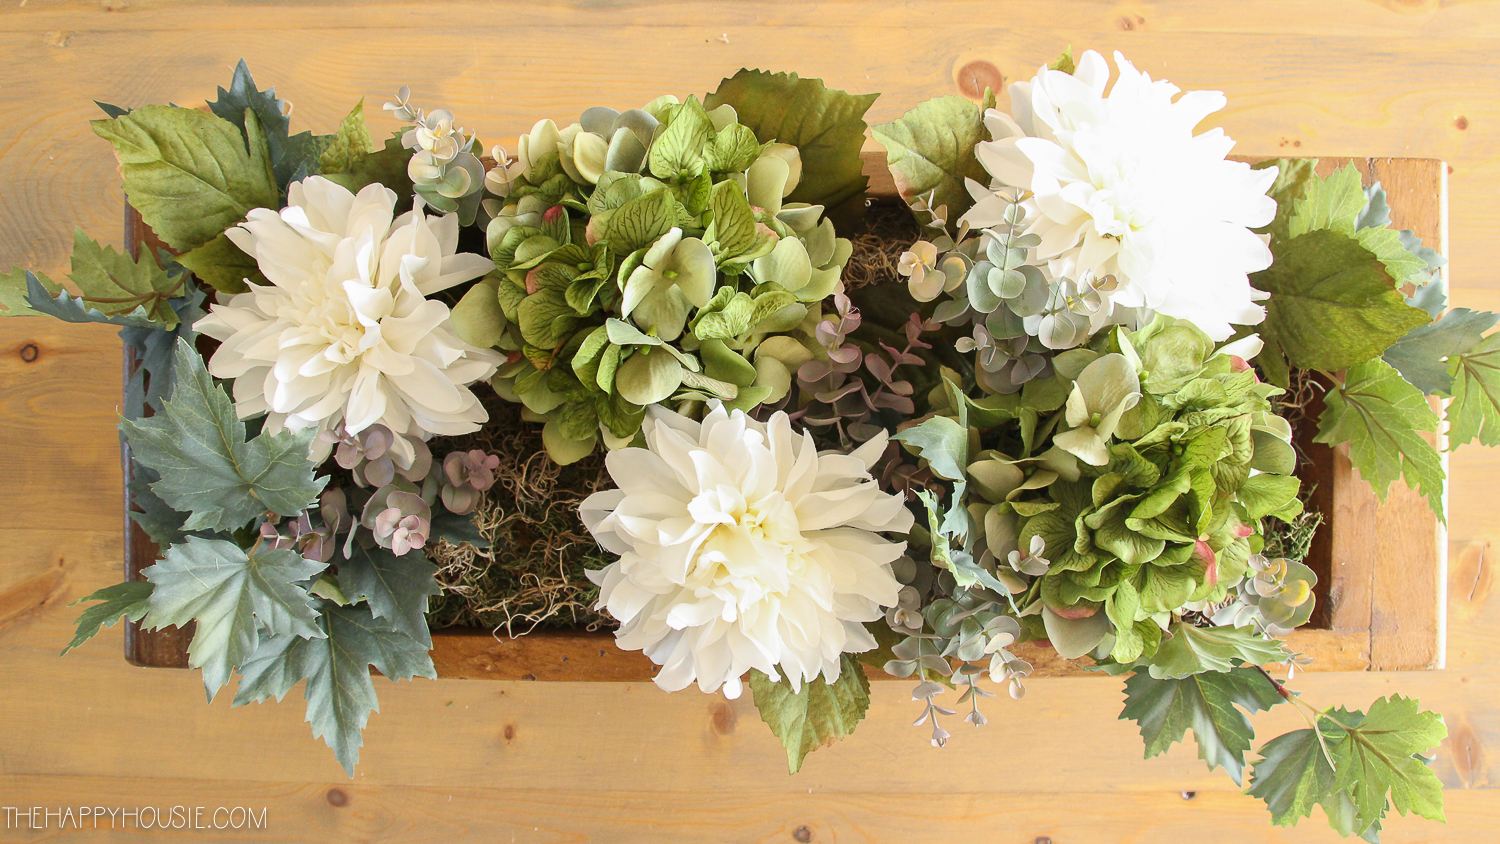

Six:
Finish it off with the extra decorative elements like faux pumpkins and pine cones…
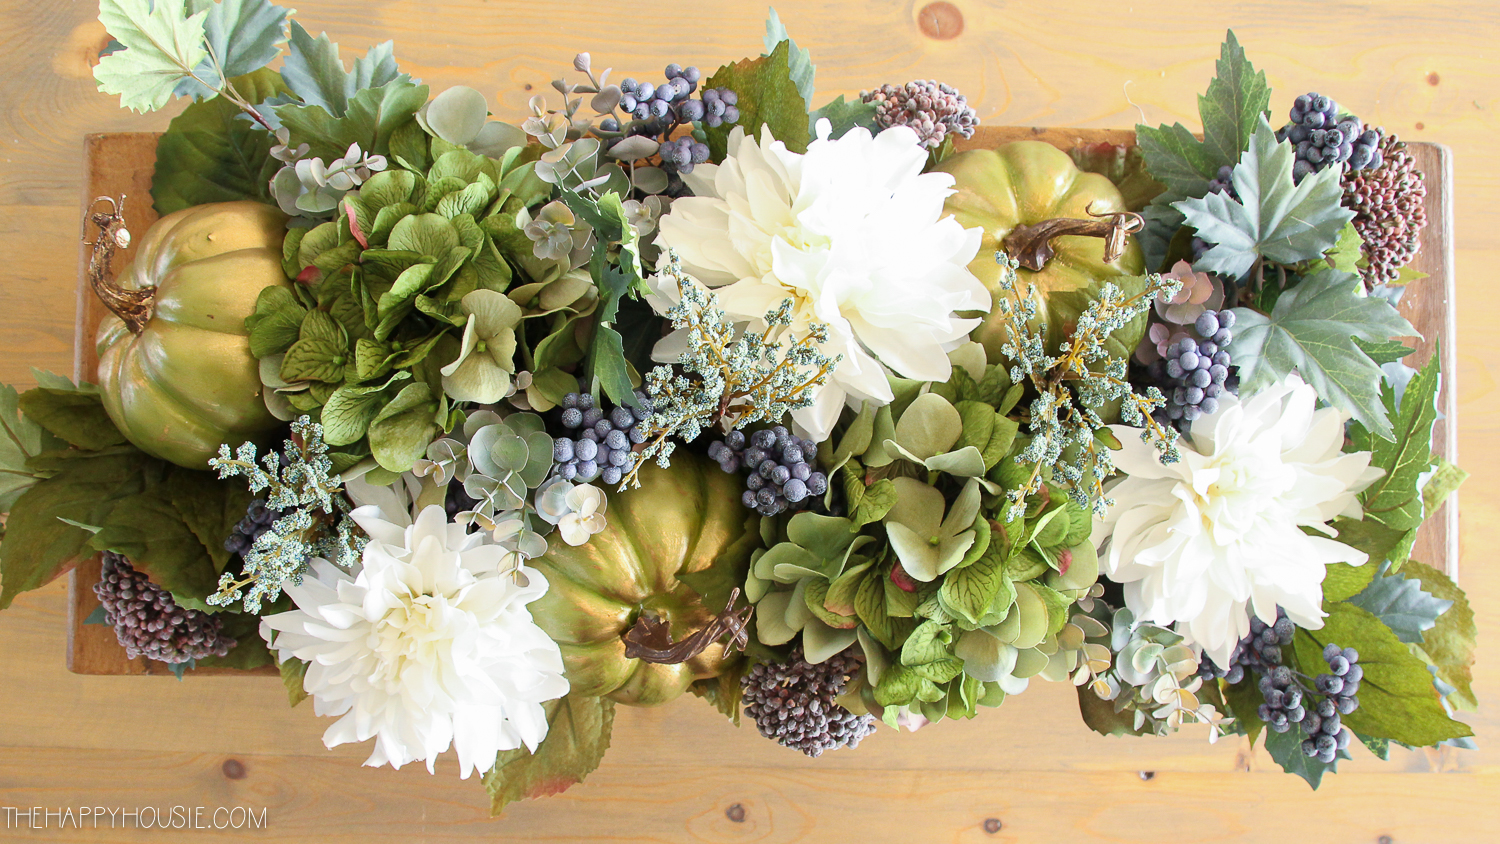
Done!
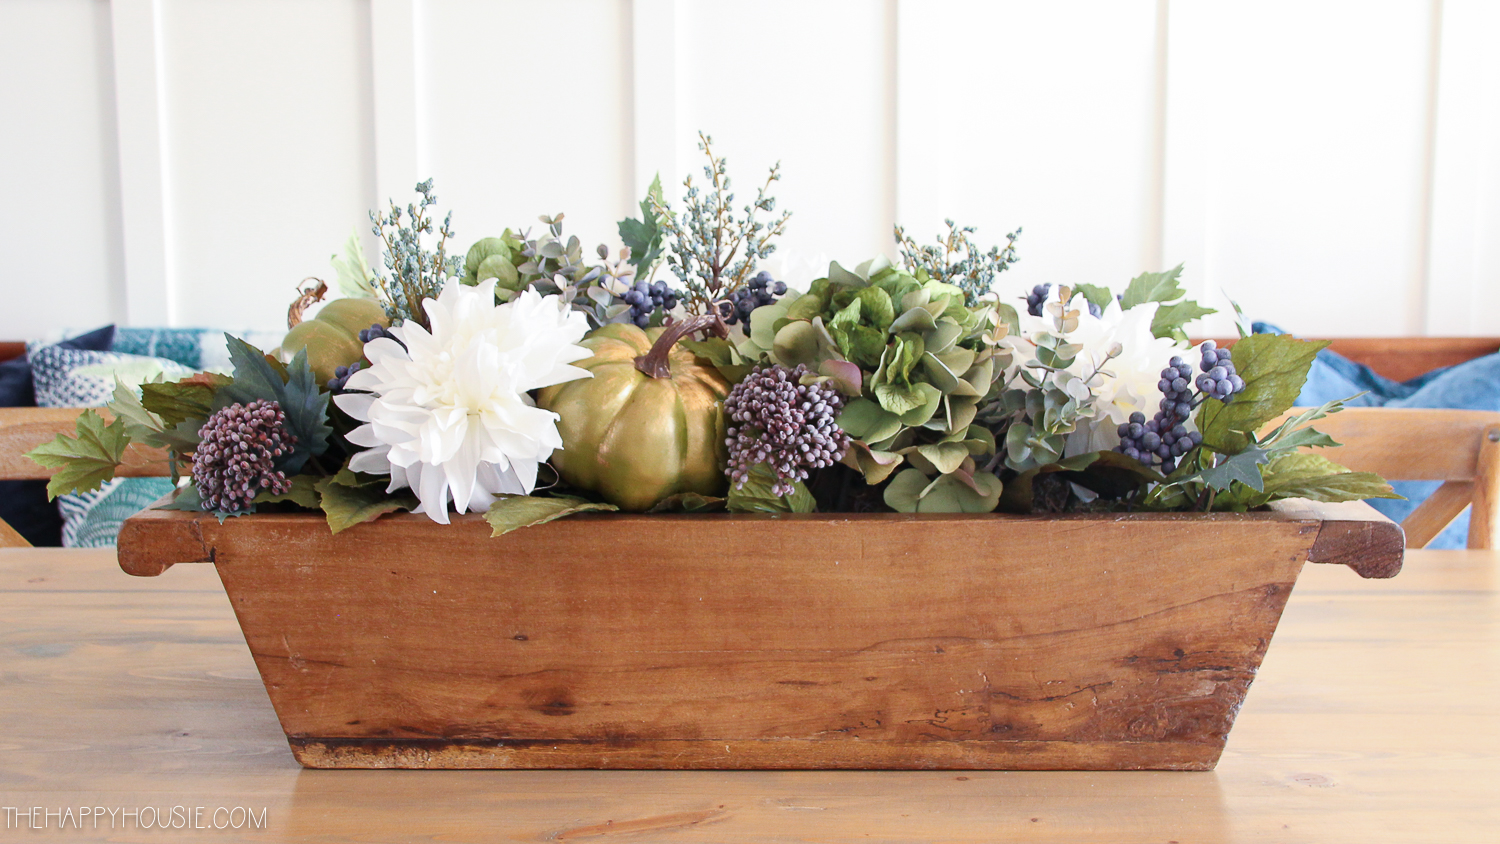
I’m SO THRILLED that I finally tackled this fall centerpiece project… and I love looking at it every day on our dining table. I feel like it just finishes off our whole space so perfectly.
We move it when we eat, so we have more space (because a centrepiece doesn’t actually need to be practical, right?!).

Want to remember this? Then Pin It!


This is beautiful! How would you go about storing this to reuse?
Hi Krista! I want to let you know that I have chosen your beautiful centerpiece for my feature at Totally Terrific Tuesday tonight. I love it! Thank you for linking up with us!
This is such a great project for fall. I am always on the lookout for cute dough bowls and I like your tip of using the mosses.
Shelley
Krista! I have been a huge fan of yours for years and you really inspired me to take a leap of faith and start my own blog a month ago. I live on a lake in Michigan and I love the way you capture the inviting and family nature of lake living.
I also have to say THANK YOU for this post! I helped out with a wedding a few weeks ago and received, from the bride, one of the beautiful centerpieces to take home. Anyway, the centerpiece was in a rectangular wooden box, similar to the dough bowl you have above. I took about a dozen photos of the flower arrangement before the flowers died, but I knew I wouldn’t be able to put the pieces back together again.
The breakdown you have of the photos is so incredibly helpful. I love fresh and quality fake flowers in my home and this is the perfect tutorial to help me recreate a seasonal look over and over with that base from the centerpiece.
Thanks again! Lauren