
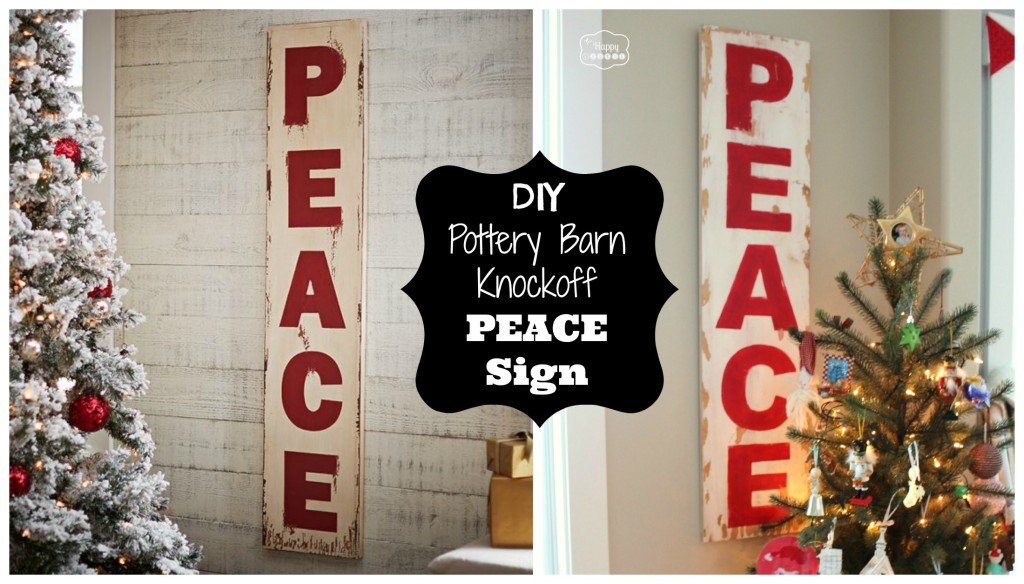
DIY Pottery Barn Knockoff PEACE Sign
I will show you how to make this beautiful wooden Peace sign that is a Pottery Barn knockoff!
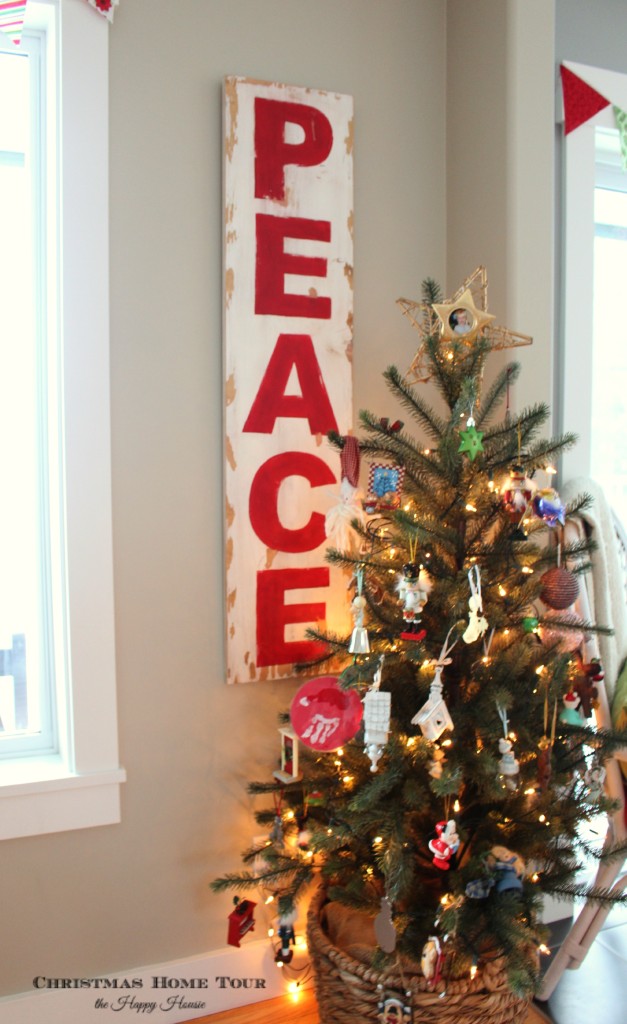
If you saw our Christmas House Tour the other day or our Christmas Living/Dining Room tour a few weeks back you may have noticed the large wooden PEACE sign in the corner of our dining room. Today I am here to share this fabulous Knockoff Wooden PEACE Sign that is the perfect addition to your walls for the upcoming Christmas season. The moment I saw this rustic sign on the Pottery Barn website I knew that I had to make my own and I am so thrilled with how it turned out.

I shared my tutorial a few weeks ago at Uncommon Designs, but I am back today for those of you who may have missed it then.
To make this you will need:
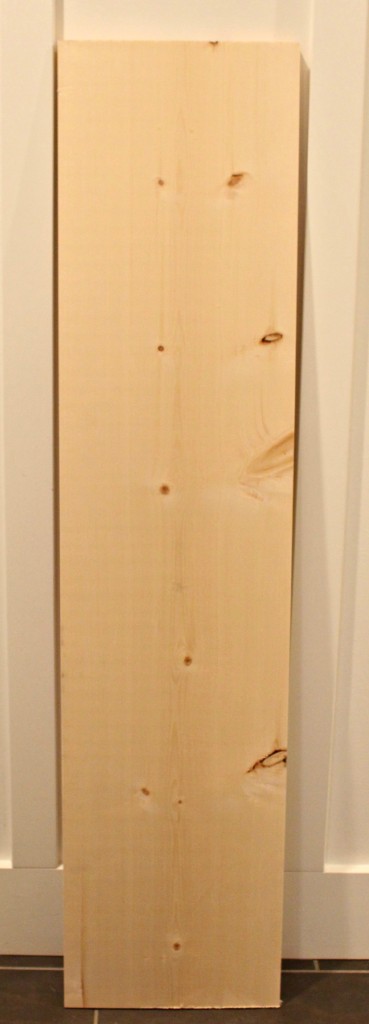
- wooden board (mine measured 12″ by 48″ – the pottery barn one is 12″ by 54″)
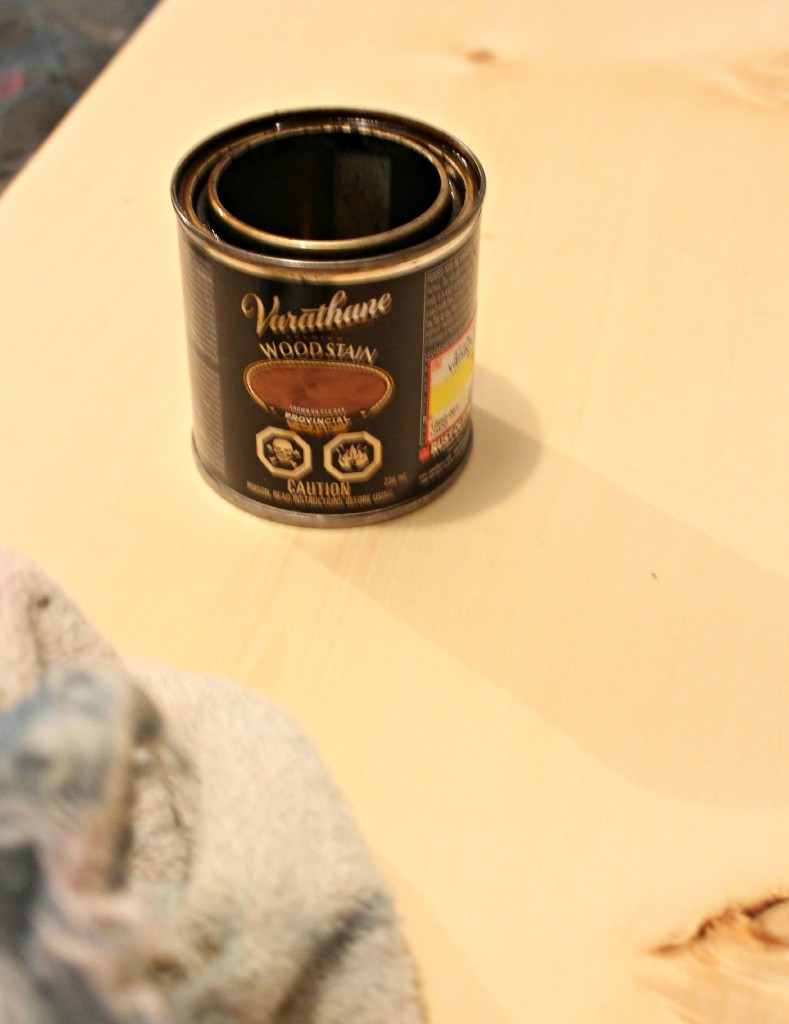
- wood stain (I used Varathane Provincial – but in retrospect I could have gone darker)
- white latex paint (I used some leftover trim paint – Benjamin Moore’s Cloud White)
- red craft paint (I used Martha Stewart Tartan)
- access to a photocopier to print your lettering on 11×17 paper
- Vaseline
- sanding block or sand paper
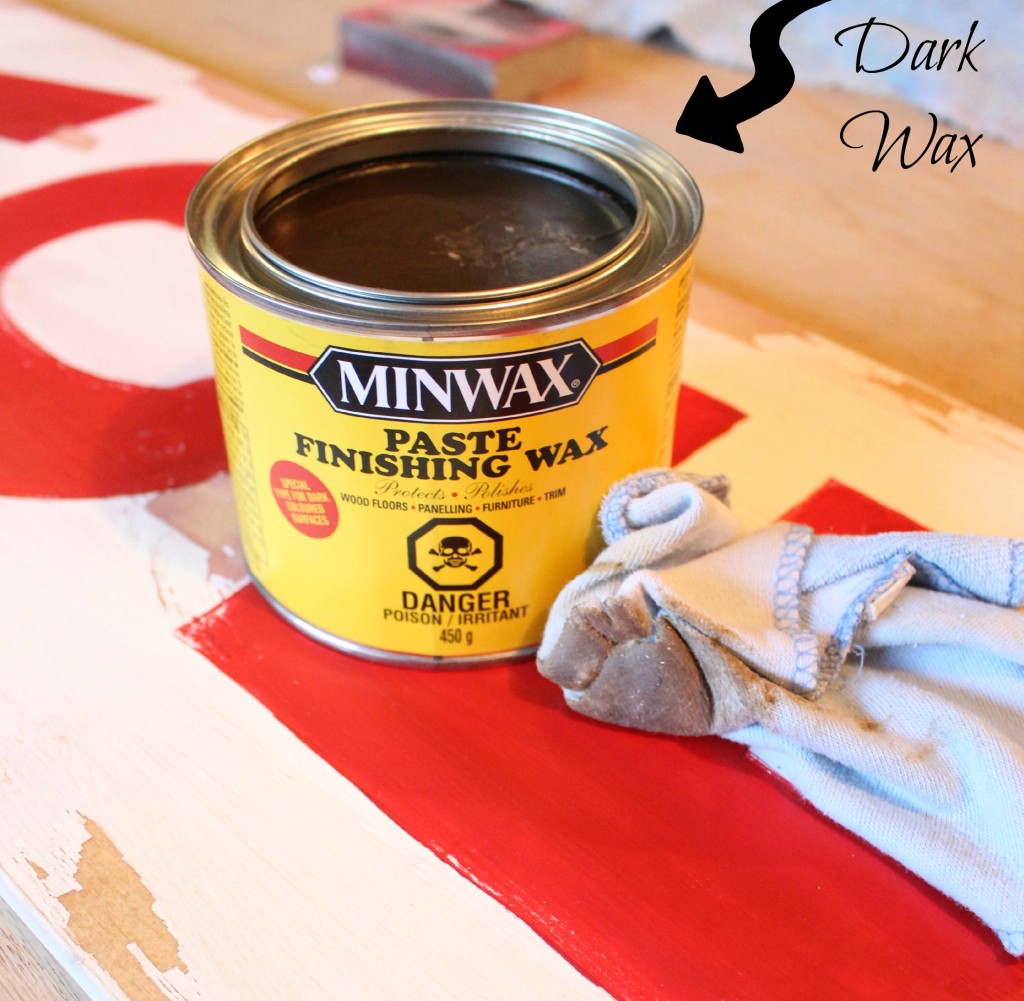
- dark wax (optional)
I started by having a piece of pine cut to size (I had mine cut to 12″ by 48″):
I gave it a coat of wood stain to darken the wood color… I used Varathane brand Provincial (color) but would use a darker stain colour if I were to repeat this project.
After letting it dry thoroughly I used a distressing technique with Vaseline in order to create a distressed paint finish. Before doing this I read a few online tutorials to get a basic idea of what to do- you can see these tutorial on my Pinterest Board DIY.
Now that I have tried it I would say it is a super effective technique- but I would apply it in thinner lines in order to make my distressing slightly closer to the style of the PB sign. Basically, you apply some Vaseline… paint over the whole thing… and you can see right away where the paint isn’t going to adhere.
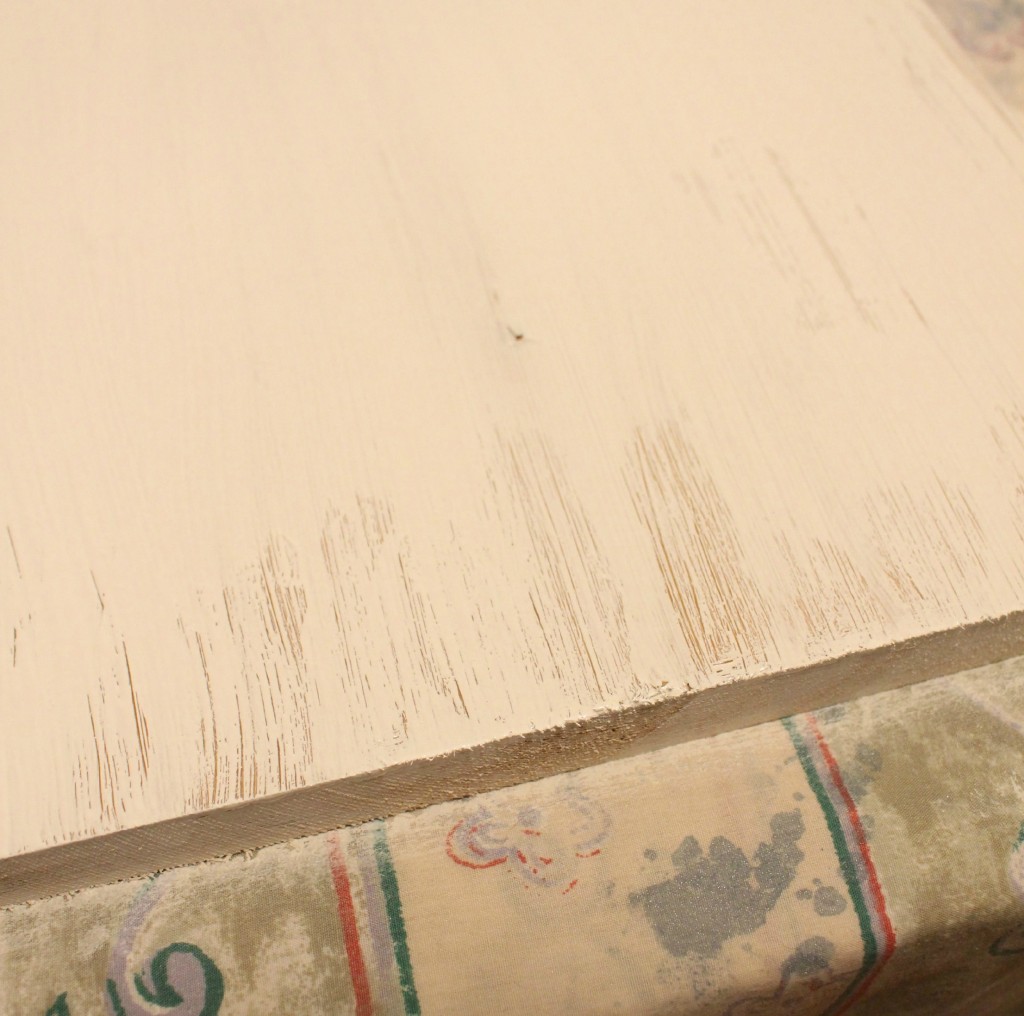
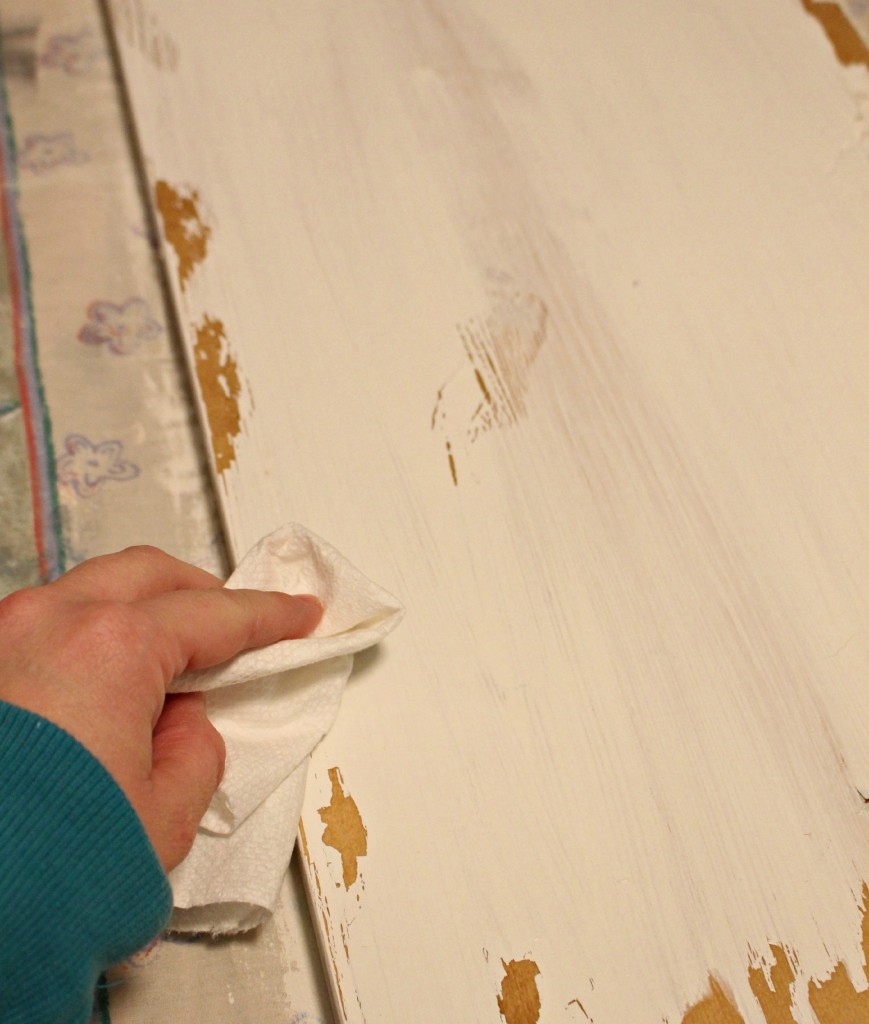
Let your paint dry overnight and then you can literally rub the paint right off… no arm injury from hours of sanding!
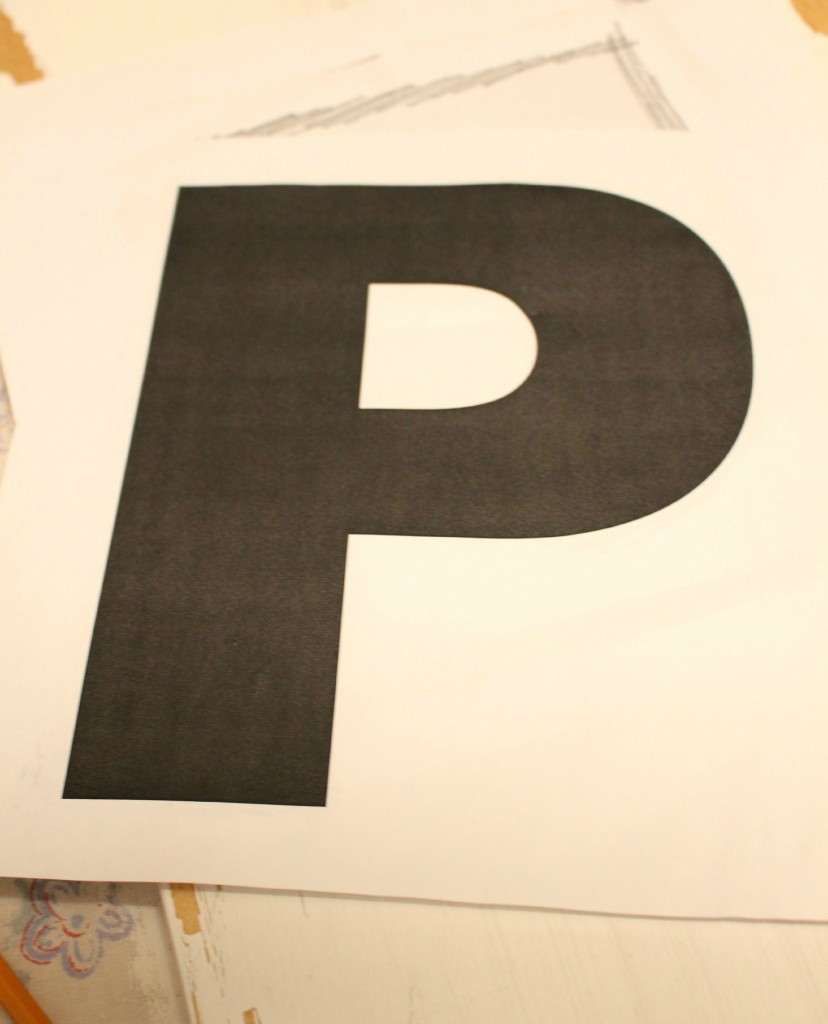
The next step was to print some lettering. I used MS Word to create the word PEACE and then had it printed on a photocopier on 11×17 sized paper. (Staples has inexpensive copies and you can bring this document in on a memory stick).
Here is my MS Word Document with the lettering peace if you wish to print this for yourself. Note that the A and C lose a small corner of themselves when printed but I simply used a ruler to fill that in.
I used the pencil transfer method to add my lettering to my sign – turn your letters over, pencil along the edges of the letters on the back of the paper…

And then flip them back over, adjust and measure for the correct placement, and then trace the edges of the lettering with your pencil.
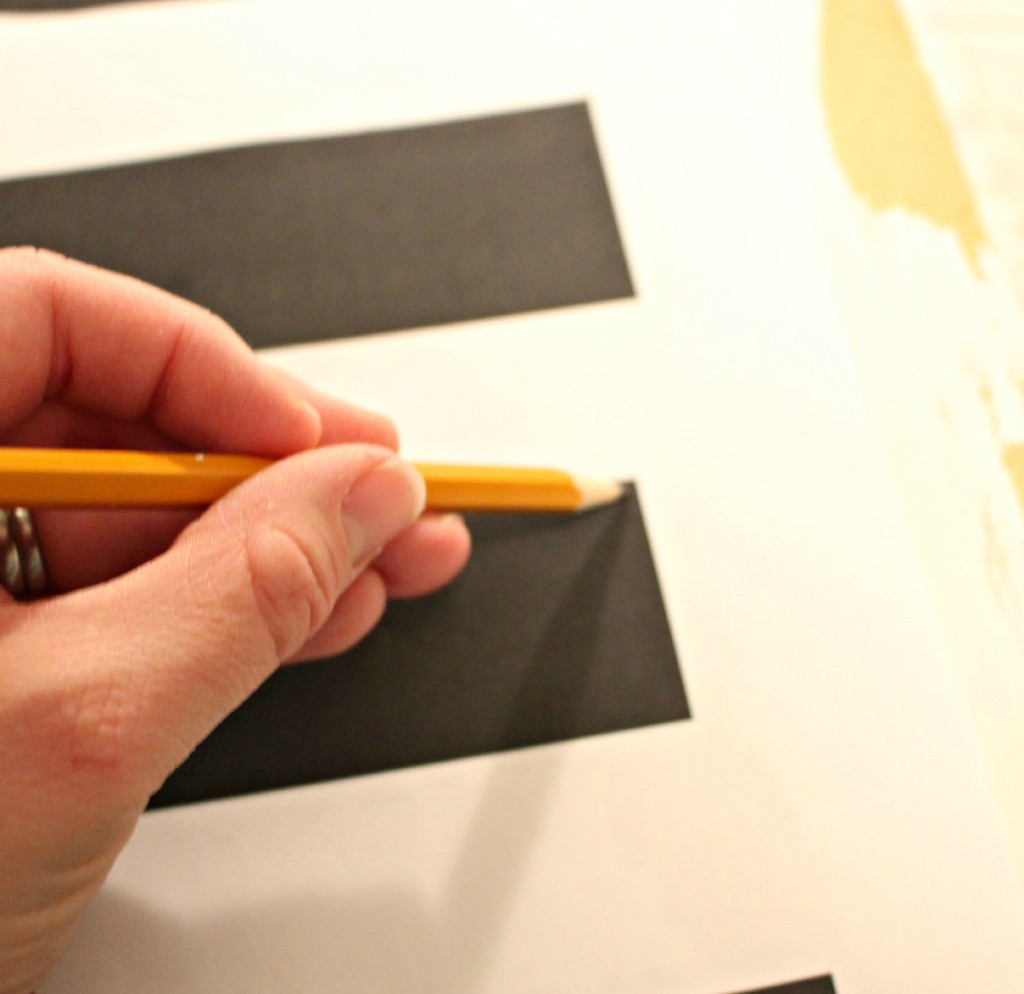
This transfers your lettering right onto your sign.
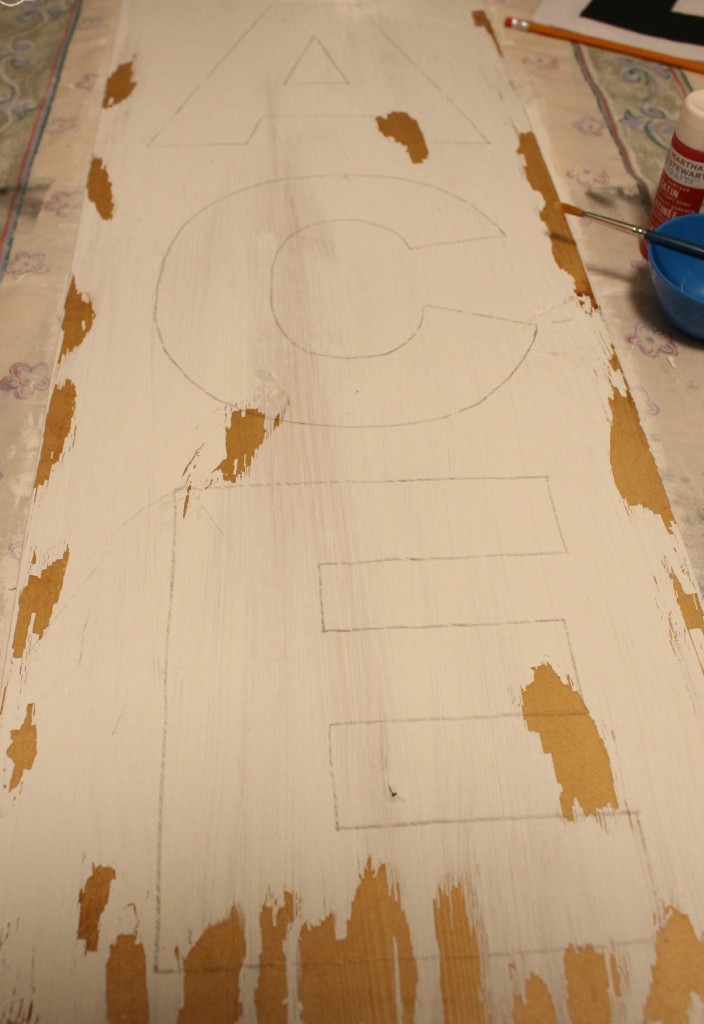
Now it is time to paint- I did three coats of bright red (Tartan) craft paint…
Once the paint was thoroughly dry I sanded the whole piece using a sanding block. You want to be careful when sanding the red lettering so that all the red dust doesn’t get stuck on your white paint – sand slowly and dust it off as you go.
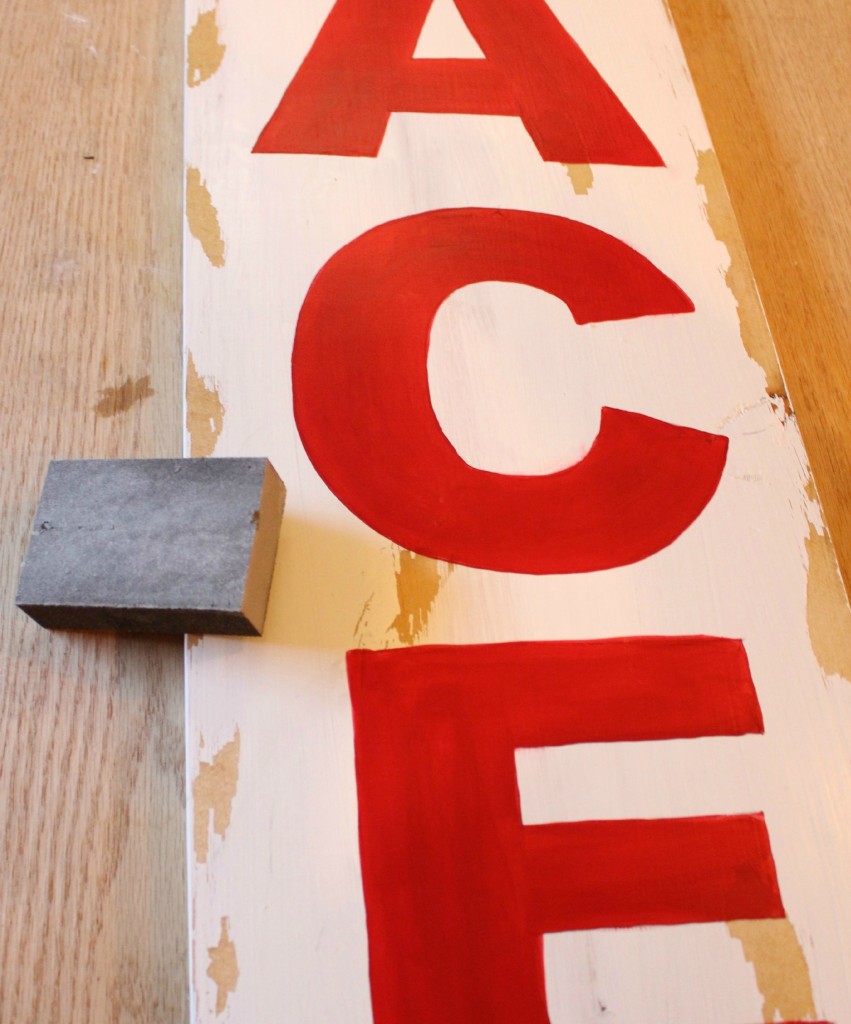
Lastly I finished it off with some dark wax to give it a further aged effect. If you don’t have dark wax you could try using a little bit of watered down wood stain or tea stain instead (testing it first in an inconspicuous area).
Done!
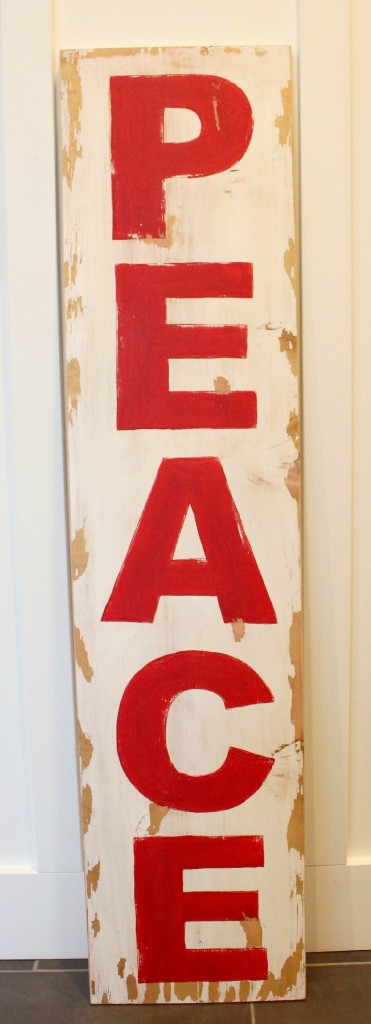
I am thrilled with how it turned out – it has found the perfect home in the corner of our festive dining room.
Budget Breakdown:
-
$10 for the Pine board from the hardware store
- $2 for the Craft Paint from Walmart
- Had already: white trim paint, paint brushes, wood stain, sanding block, Vaseline, wax
Nothing like a good seasonal knock off project…one of my favourite types of projects.
I may link up at some of these fabulous places below, for more info check out housie parties: Monday Funday , Inspiration Monday, Nifty Thrifty Tuesday, Project Inspire{d} , Inspire Me Tuesday, The Scoop, Hit Me With Your Best Shot, Wow Me Wednesday, Whimsy Wednesday , From Dream to Reality, The Inspiration Exchange, Wow Us Wednesday, Live Laugh Rowe Live Laugh Linky, Thursdays Are Your Days, Inspire Me Please, Catch as Catch Can, Fabulously Creative Friday, Party Junk, Pinworthy Projects , Link Party Palooza,, Weekend Bloggy Reading, Strut Your Stuff Saturday, Spotlight Saturday, Suburbs Mama , That DIY Party


What font was used?
Hi Susan – I will try to look that up today! Sorry I didn’t include that info:)
I love your Peace sign Krista!! Even better than the original 🙂
Merry Christmas!!
xo
Nancy
Aw thanks Nancy! The Vaseline technique worked better then I imagined so it distressed the edged more then I had planned, and I wish I had used a darker stain underneath and a darker shade of red paint for the lettering … but other then that (other then criticizing the entire thing -lol)… I love it too:) Hope you have a happy new year!!
Totally ROCKING!!! I’m going to make one!! Thanks for the step by step tutorial Krista!! xoxo
Thanks Christine- I was pretty happy with how it turned out, and was pretty easy too! Wishing you and your family a Merry Christmas!!
This looks great! I have this on my to do list but it might be for next Christmas at this point. Question: Did the Vaseline leave any greasy residue? I have never used this technique because I was afraid that would happen. But if it doesn’t then I am going to try it for sure. PS Found you on Tatertots and Jello Link up.
Hello! I wiped the Vaseline off with paper towel- I wouldn’t say there was a significant amount of greasy residue- I waxed the whole piece after so I think that sealed in anything greasy. So thrilled you came by to visit!! Wishing you and your family a Merry Christmas!!
Super cute sign. Love how you did your transfer method. I’ll have to try this.
Thank you Trish- I have done the same method on several signs now and it works amazingly well!! Thanks so much for your visit- Wishing you and your family a Merry Christmas!!
Love your simple transferring technique. I know I can do that! Looks beautiful with your adorable tree :).
Hi Amy!! The transfer method is easy- I know you can do it!! The tree is our ‘family ornament’ tree so the boys decorated it… not quite as polished as our living room tree (lol). Wishing you and your family a Merry Christmas!!
LOVE this!
Thank you Cindy- thanks for your visit:) Wishing you and your family a Merry Christmas!!
Great job and some great tips on distressed painting! Thanks so much for sharing!
Ashley Rane Sparks
Thanks Ashley- it was my first try with that method. I will have to give it another try- now I know how well it works!! Thank you for your visit – wishing you and your family a Merry Christmas!!
You did an amazing job with this! Love!
Thank you Sarah!! Wishing you and your family a Merry Christmas!!
awww so cute! Love this!!
Thank you Anne! Wishing you a Merry Christmas!!