
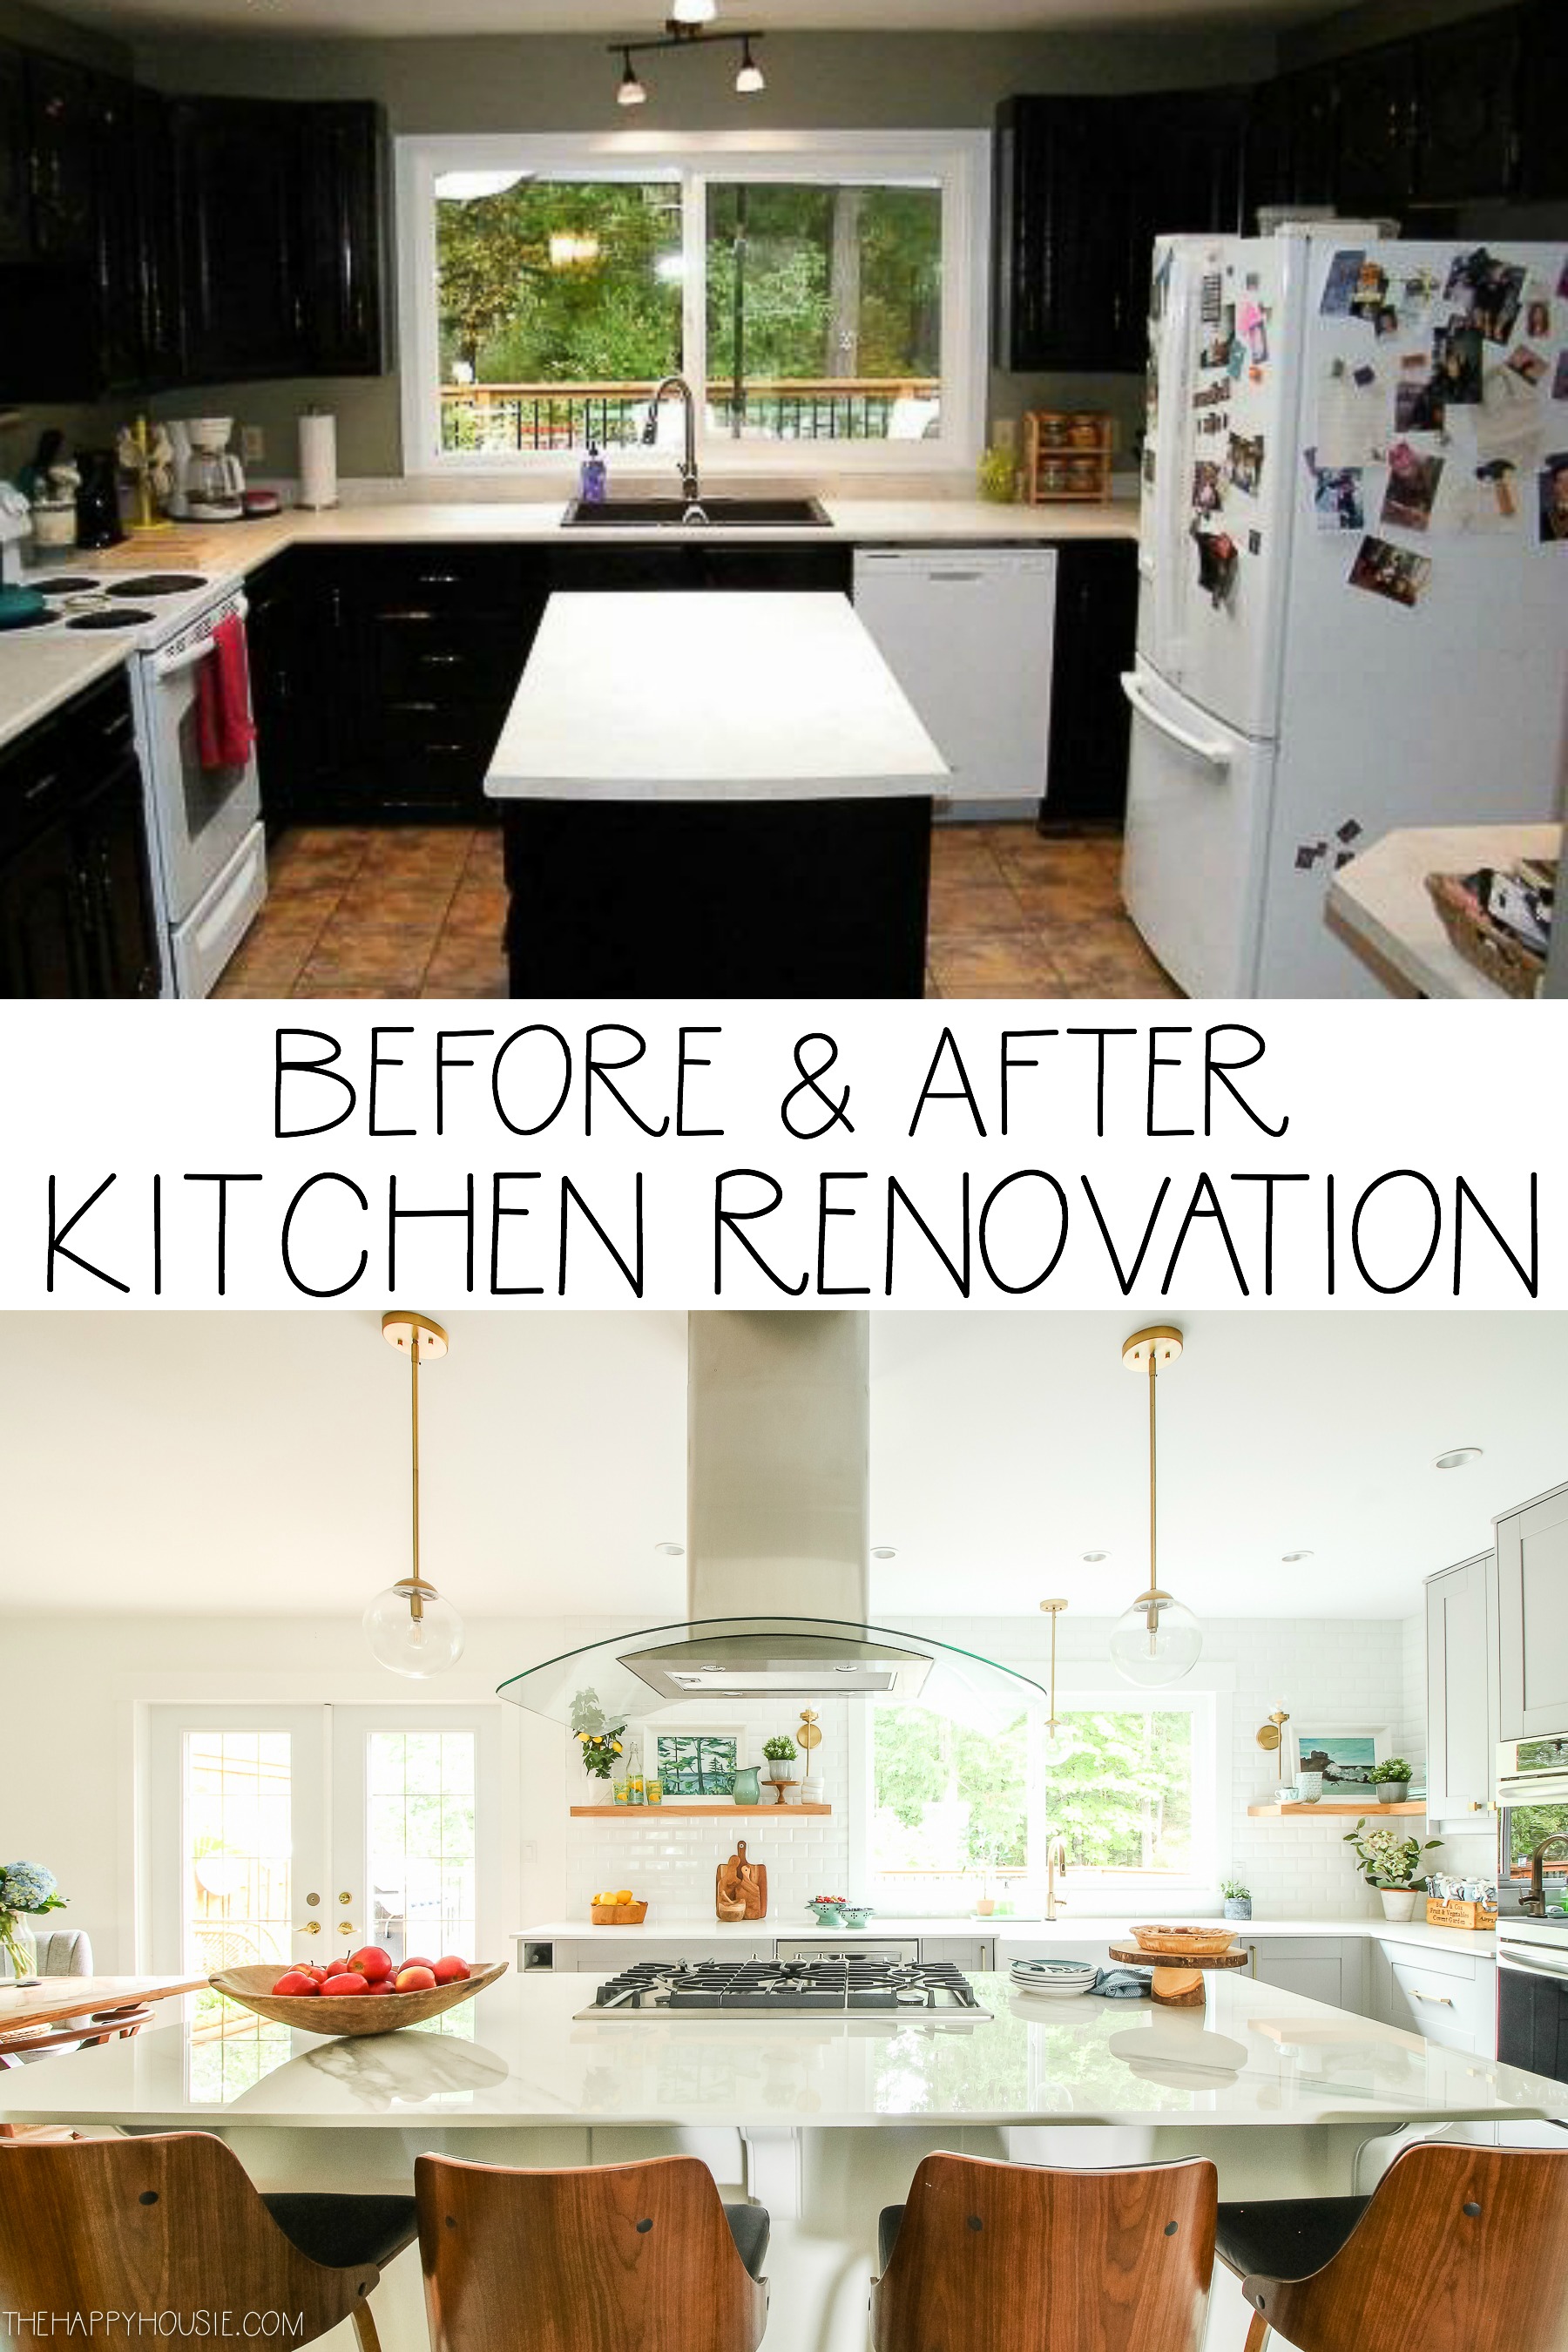
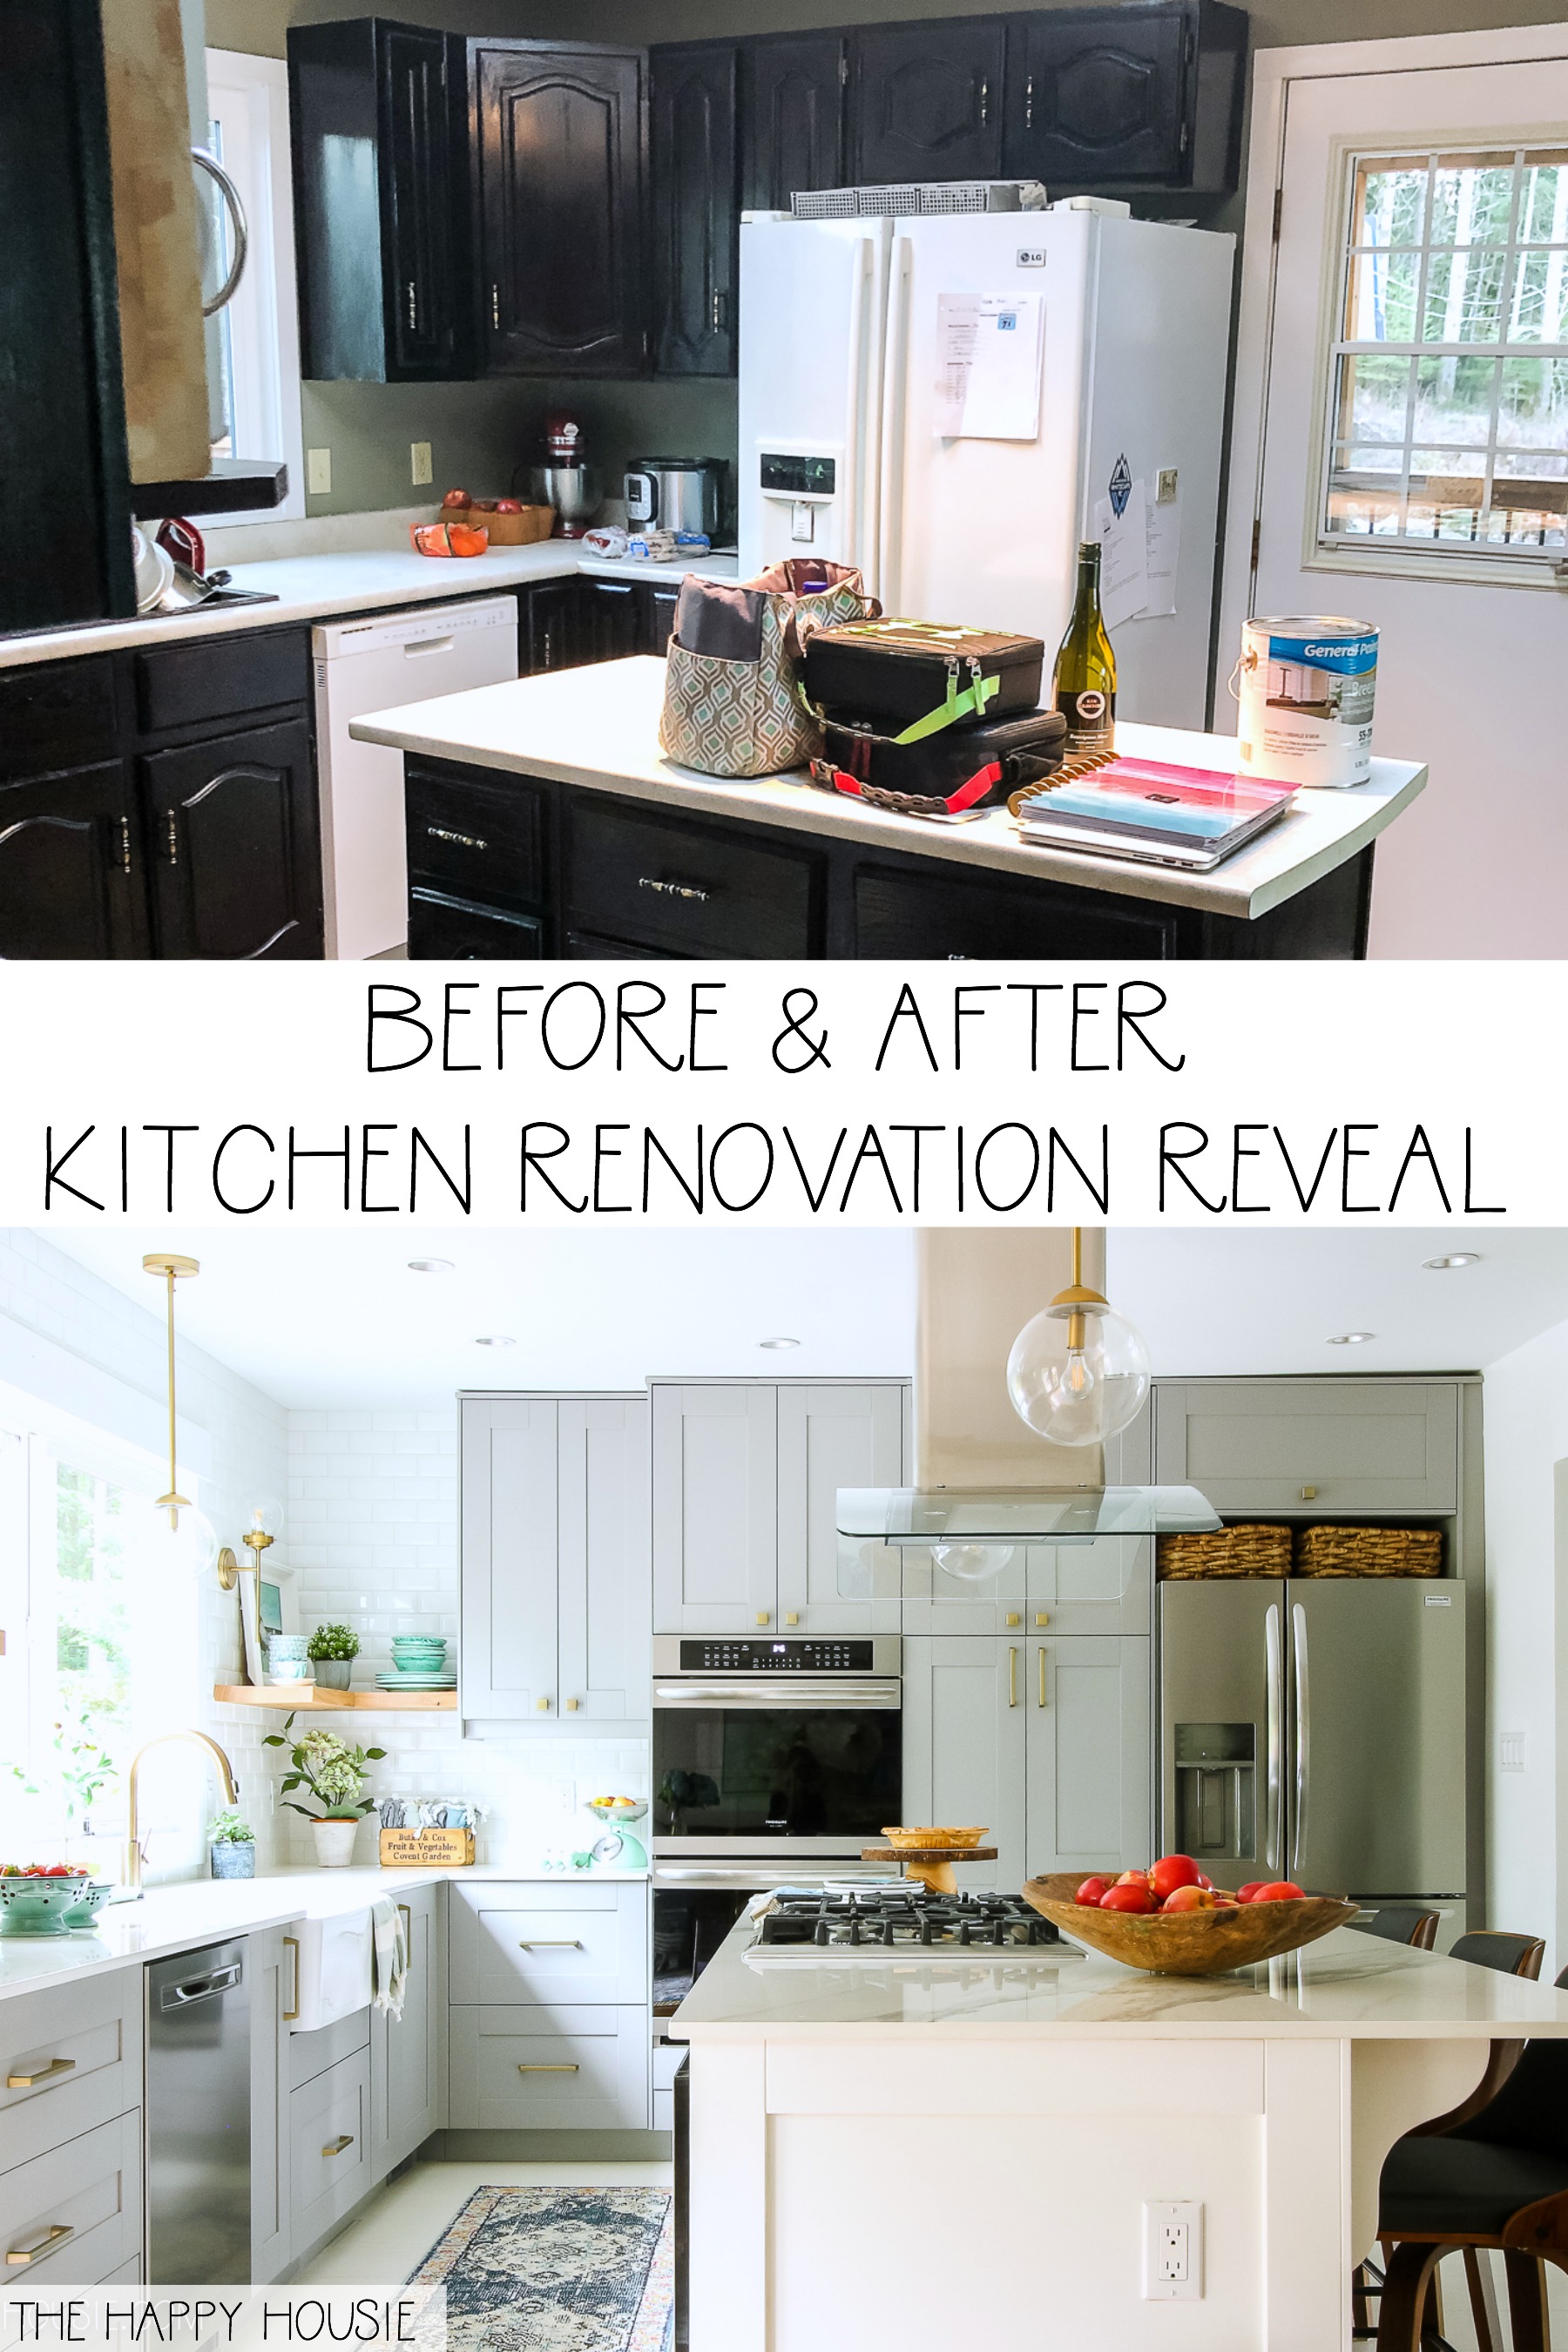
Kitchen Reveal Part Two: the Main Kitchen
Today I’m sharing the renovation reveal of our main kitchen featuring Ikea Grimslov Gray cabinets, Frigidaire Gallery Line appliances, Olimpo Dekton Countertops by Cosentino, Delta Trinsic faucets in champagne gold, and lighting and hardware sourced from build.com
It’s here! The BIG reveal day. The main event.
This kitchen is probably the biggest renovation that we have ever tackled, as far as the length of time it took and the sheer number of decisions and details that were involved. Last week I shared part one of our kitchen renovation makeover: the bar/beverage center and the build-in banquette eating nook plus extra pantry/office area that we created in the funny kind-of walk-through part of our kitchen. Or at least, it used to feel like a funny little walk-through area, but now having used this house for a larger gathering this past weekend, I really LOVE that we have that space!
Kitchen Renovation
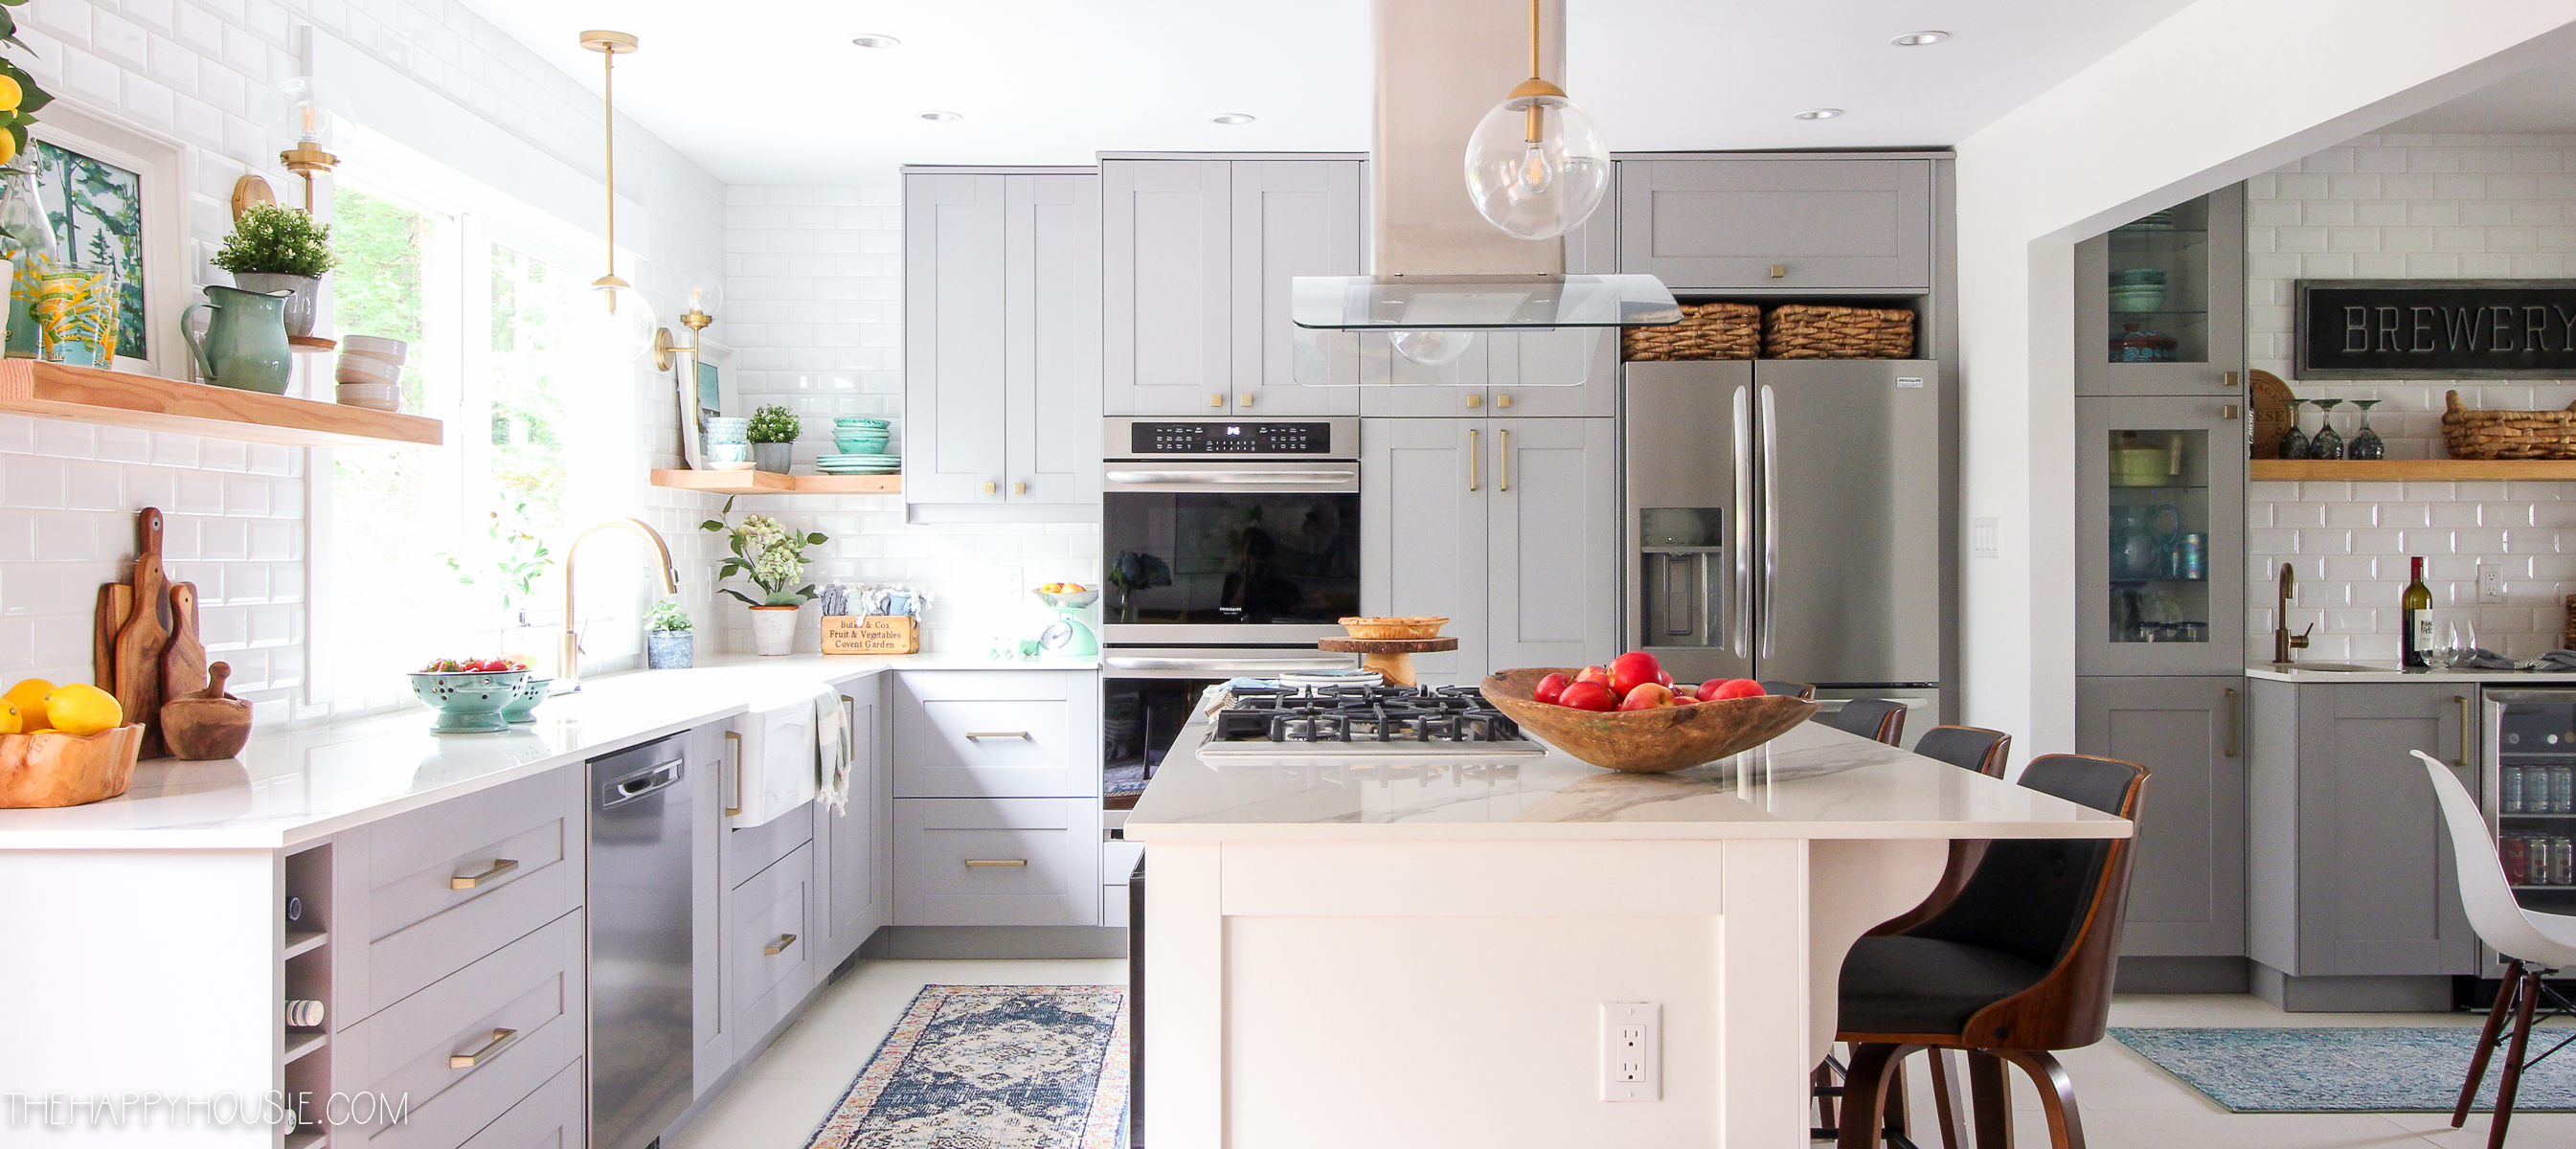
Our kitchen may not be a typical layout, but it’s definitely conducive to hosting a group and being able to have space to spread out and mix around and enjoy different conversations with a variety of people. The living room wasn’t even used until much later in the evening! The old saying holds true; the party always congregates in the kitchen. And we are thrilled with our newly renovated kitchen…
This post contains affiliate links for your shopping convenience. You can read my full disclosure policy here.
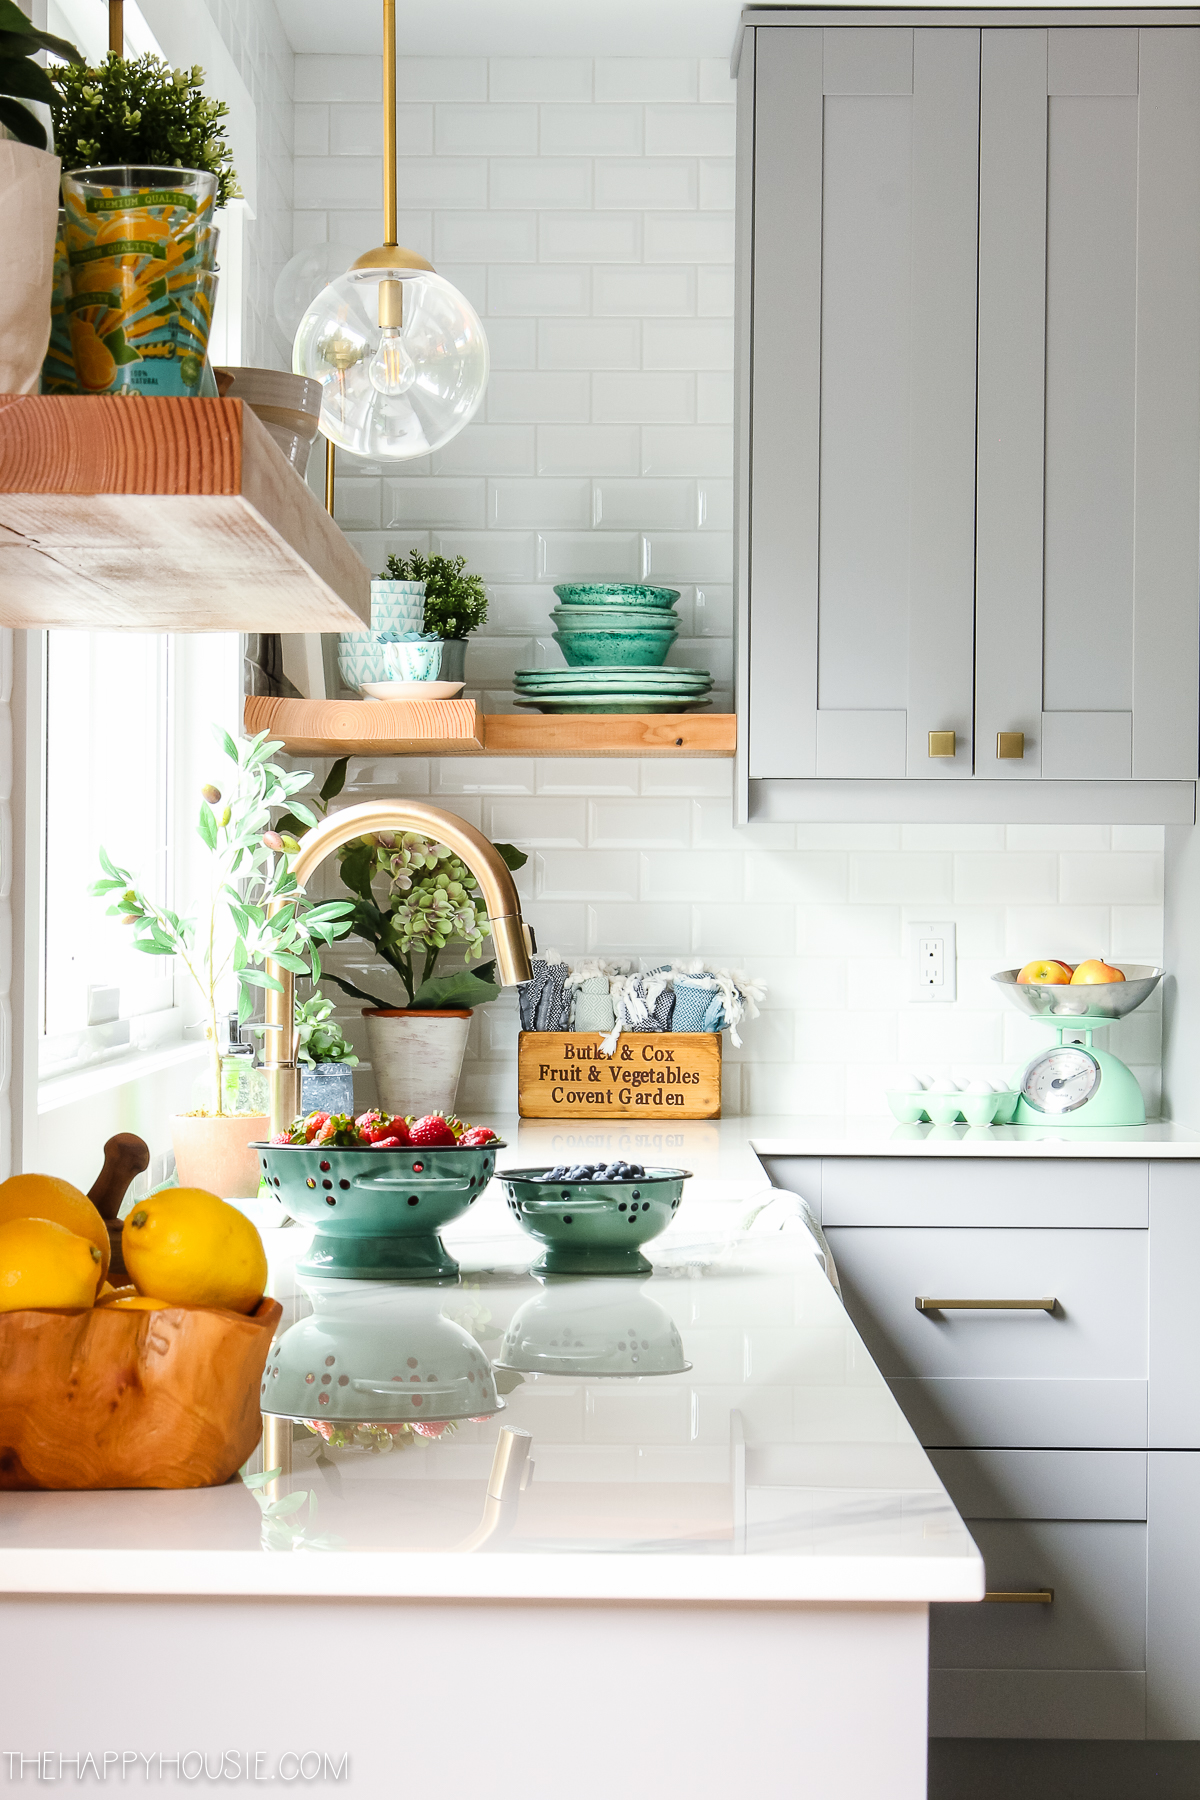
It’s hard to say what my favourite thing is about this kitchen renovation. Is it the stunning appliances from the Frigidaire Gallery line, including a 36″ gas cooktop and double wall ovens?! Talk about a dream! Or the gorgeous Olimpo Stonika Collection Countertops (it’s an ultra-compact solid surface material called Dekton by Cosentino – the makers of Silestone). Or perhaps it’s the gold lighting, faucets, and hardware from build.com that beautifully add a warm accent to the cooler finishes of the kitchen? Honestly, I really just love how ALL of it works together to create such an awesome kitchen space that we are thrilled that we get to use every. single. day.
Okay, let’s start back at the beginning and talk a bit more about the 6 month long journey that it took to get to this point.
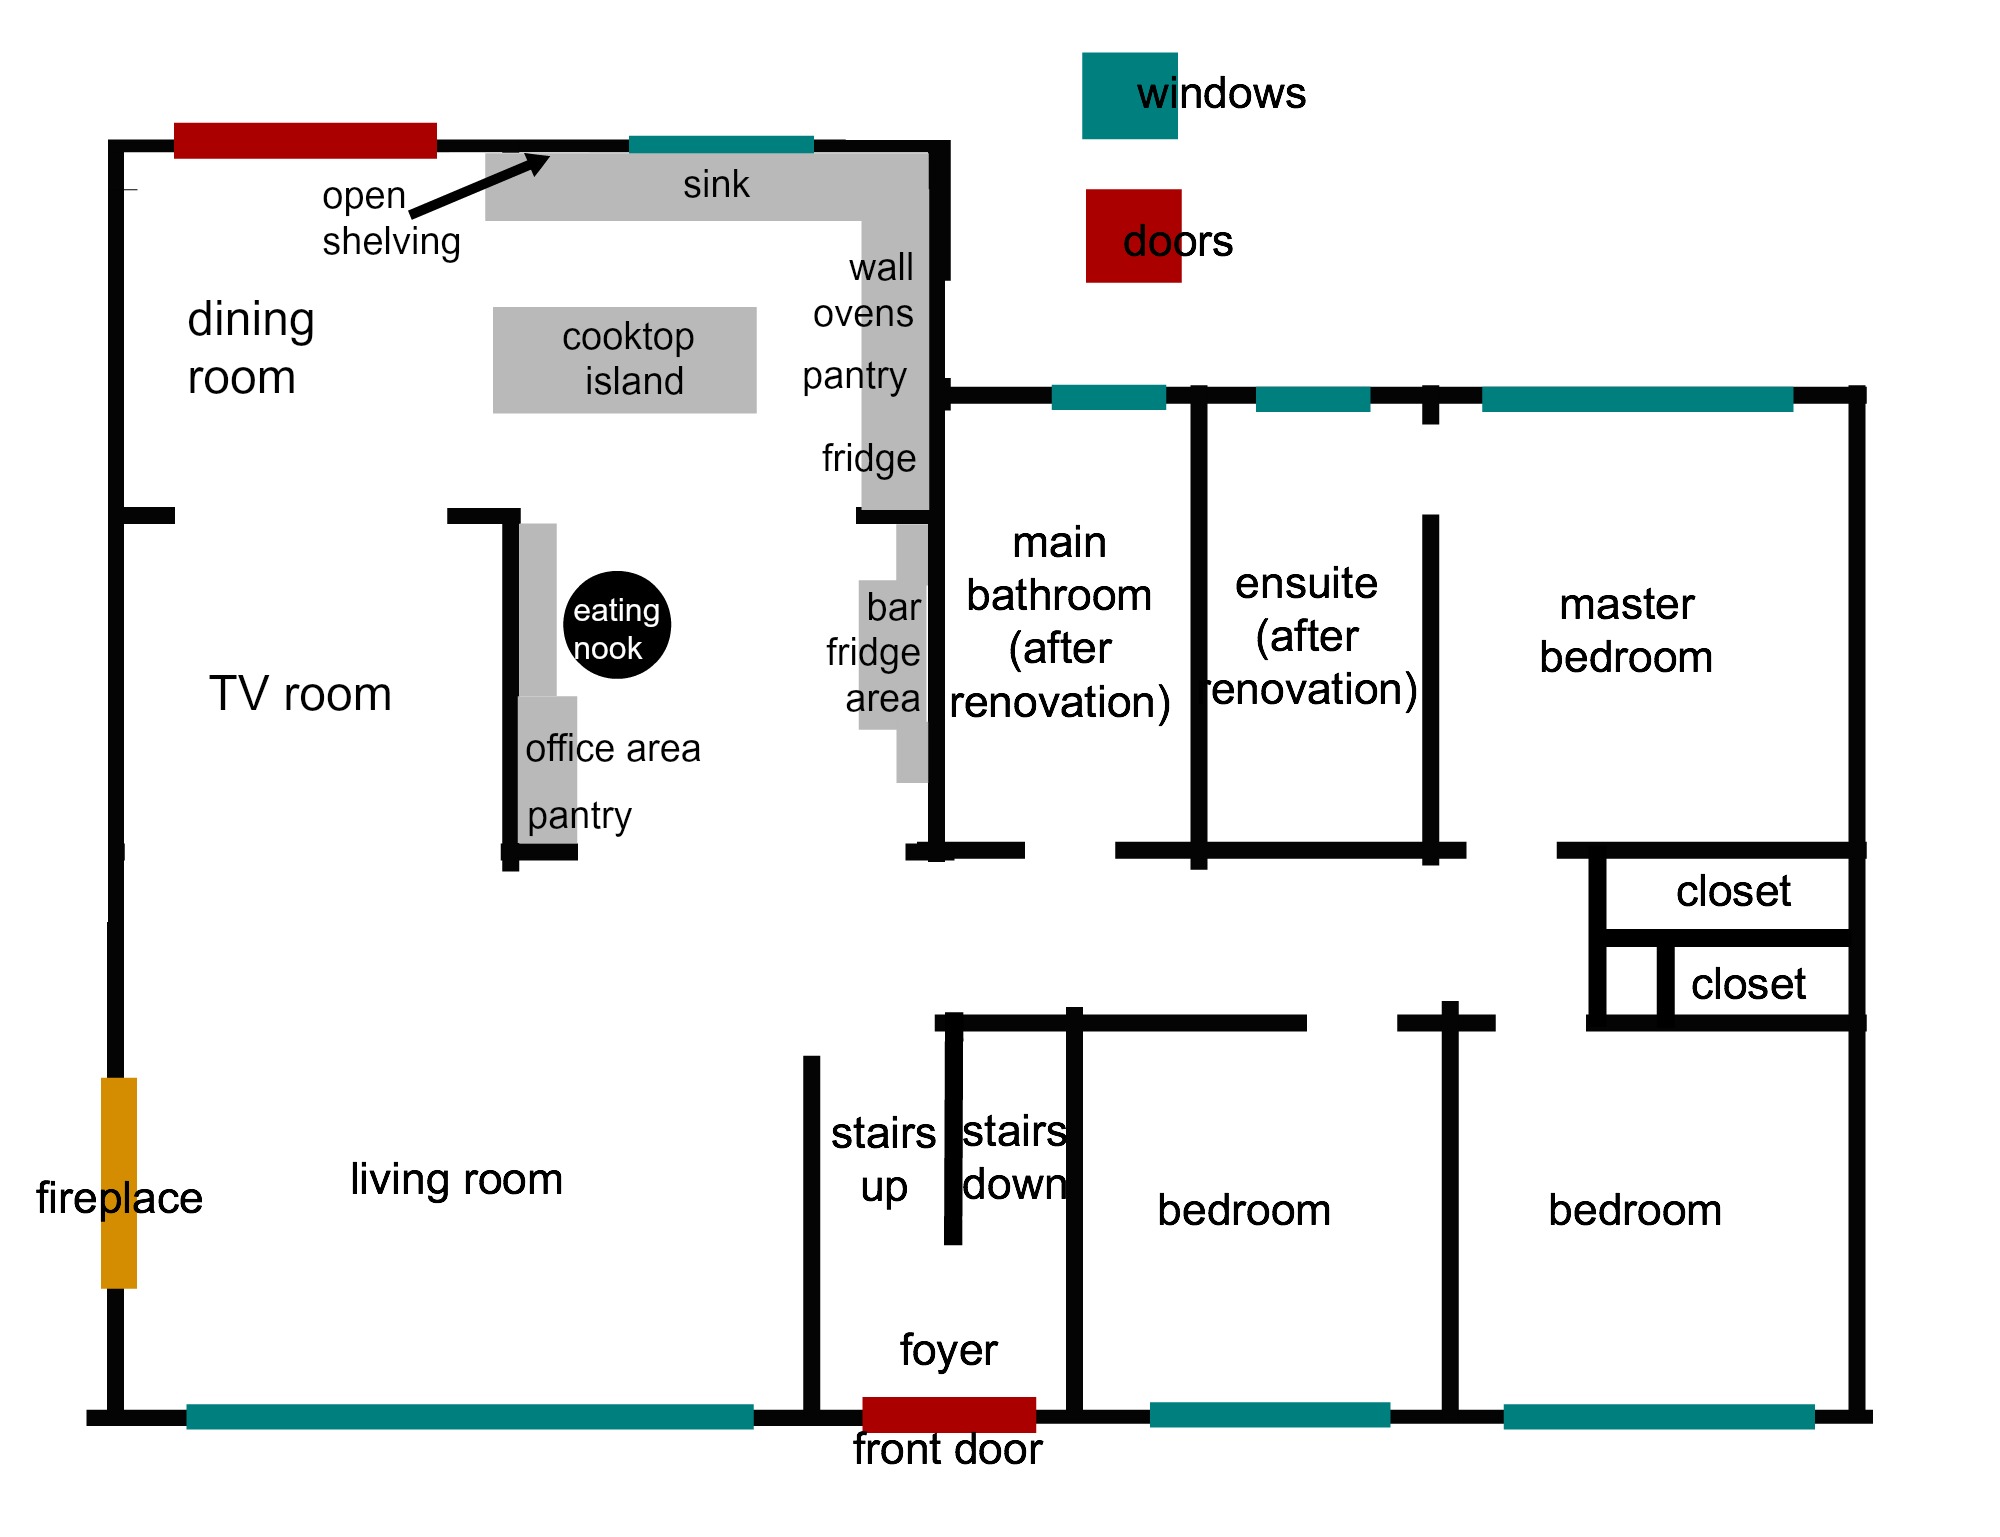
I shared a full before with lots of pictures and construction details in this post, including this diagram of the previous floor plan and the changes that we made to it:
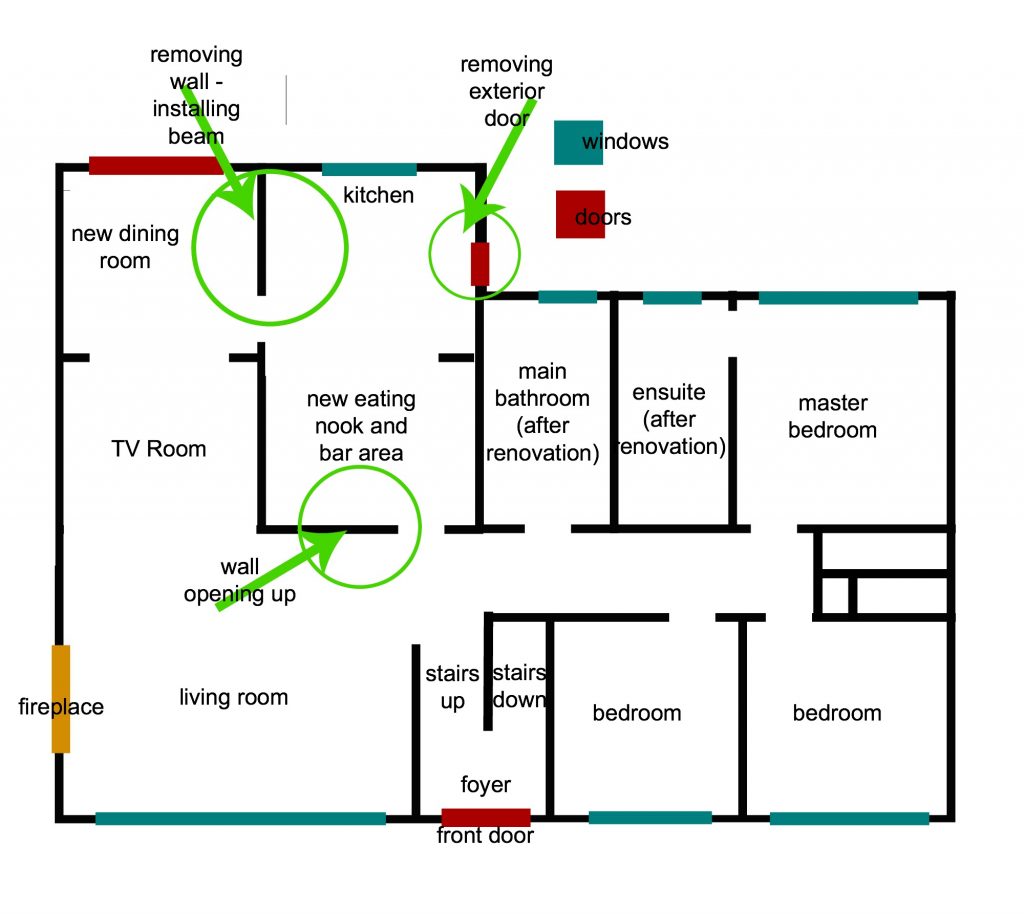
As you can see, we opened up the wall between the living room and the kitchen (eating nook/bar area) to create better flow through the space. We removed a wall between the kitchen and our dining room area so that we ended up with a large open space that is approximately 12.5′ wide by 24′ long. We also removed a door that used to lead from the back kitchen wall out onto our covered deck area. Because we were removing the wall to the dining room, we realized that we had double glass doors that would suffice for accessing the deck, as having a full wall for the oven/fridge/pantry was more important to us then having an additional door to the deck.
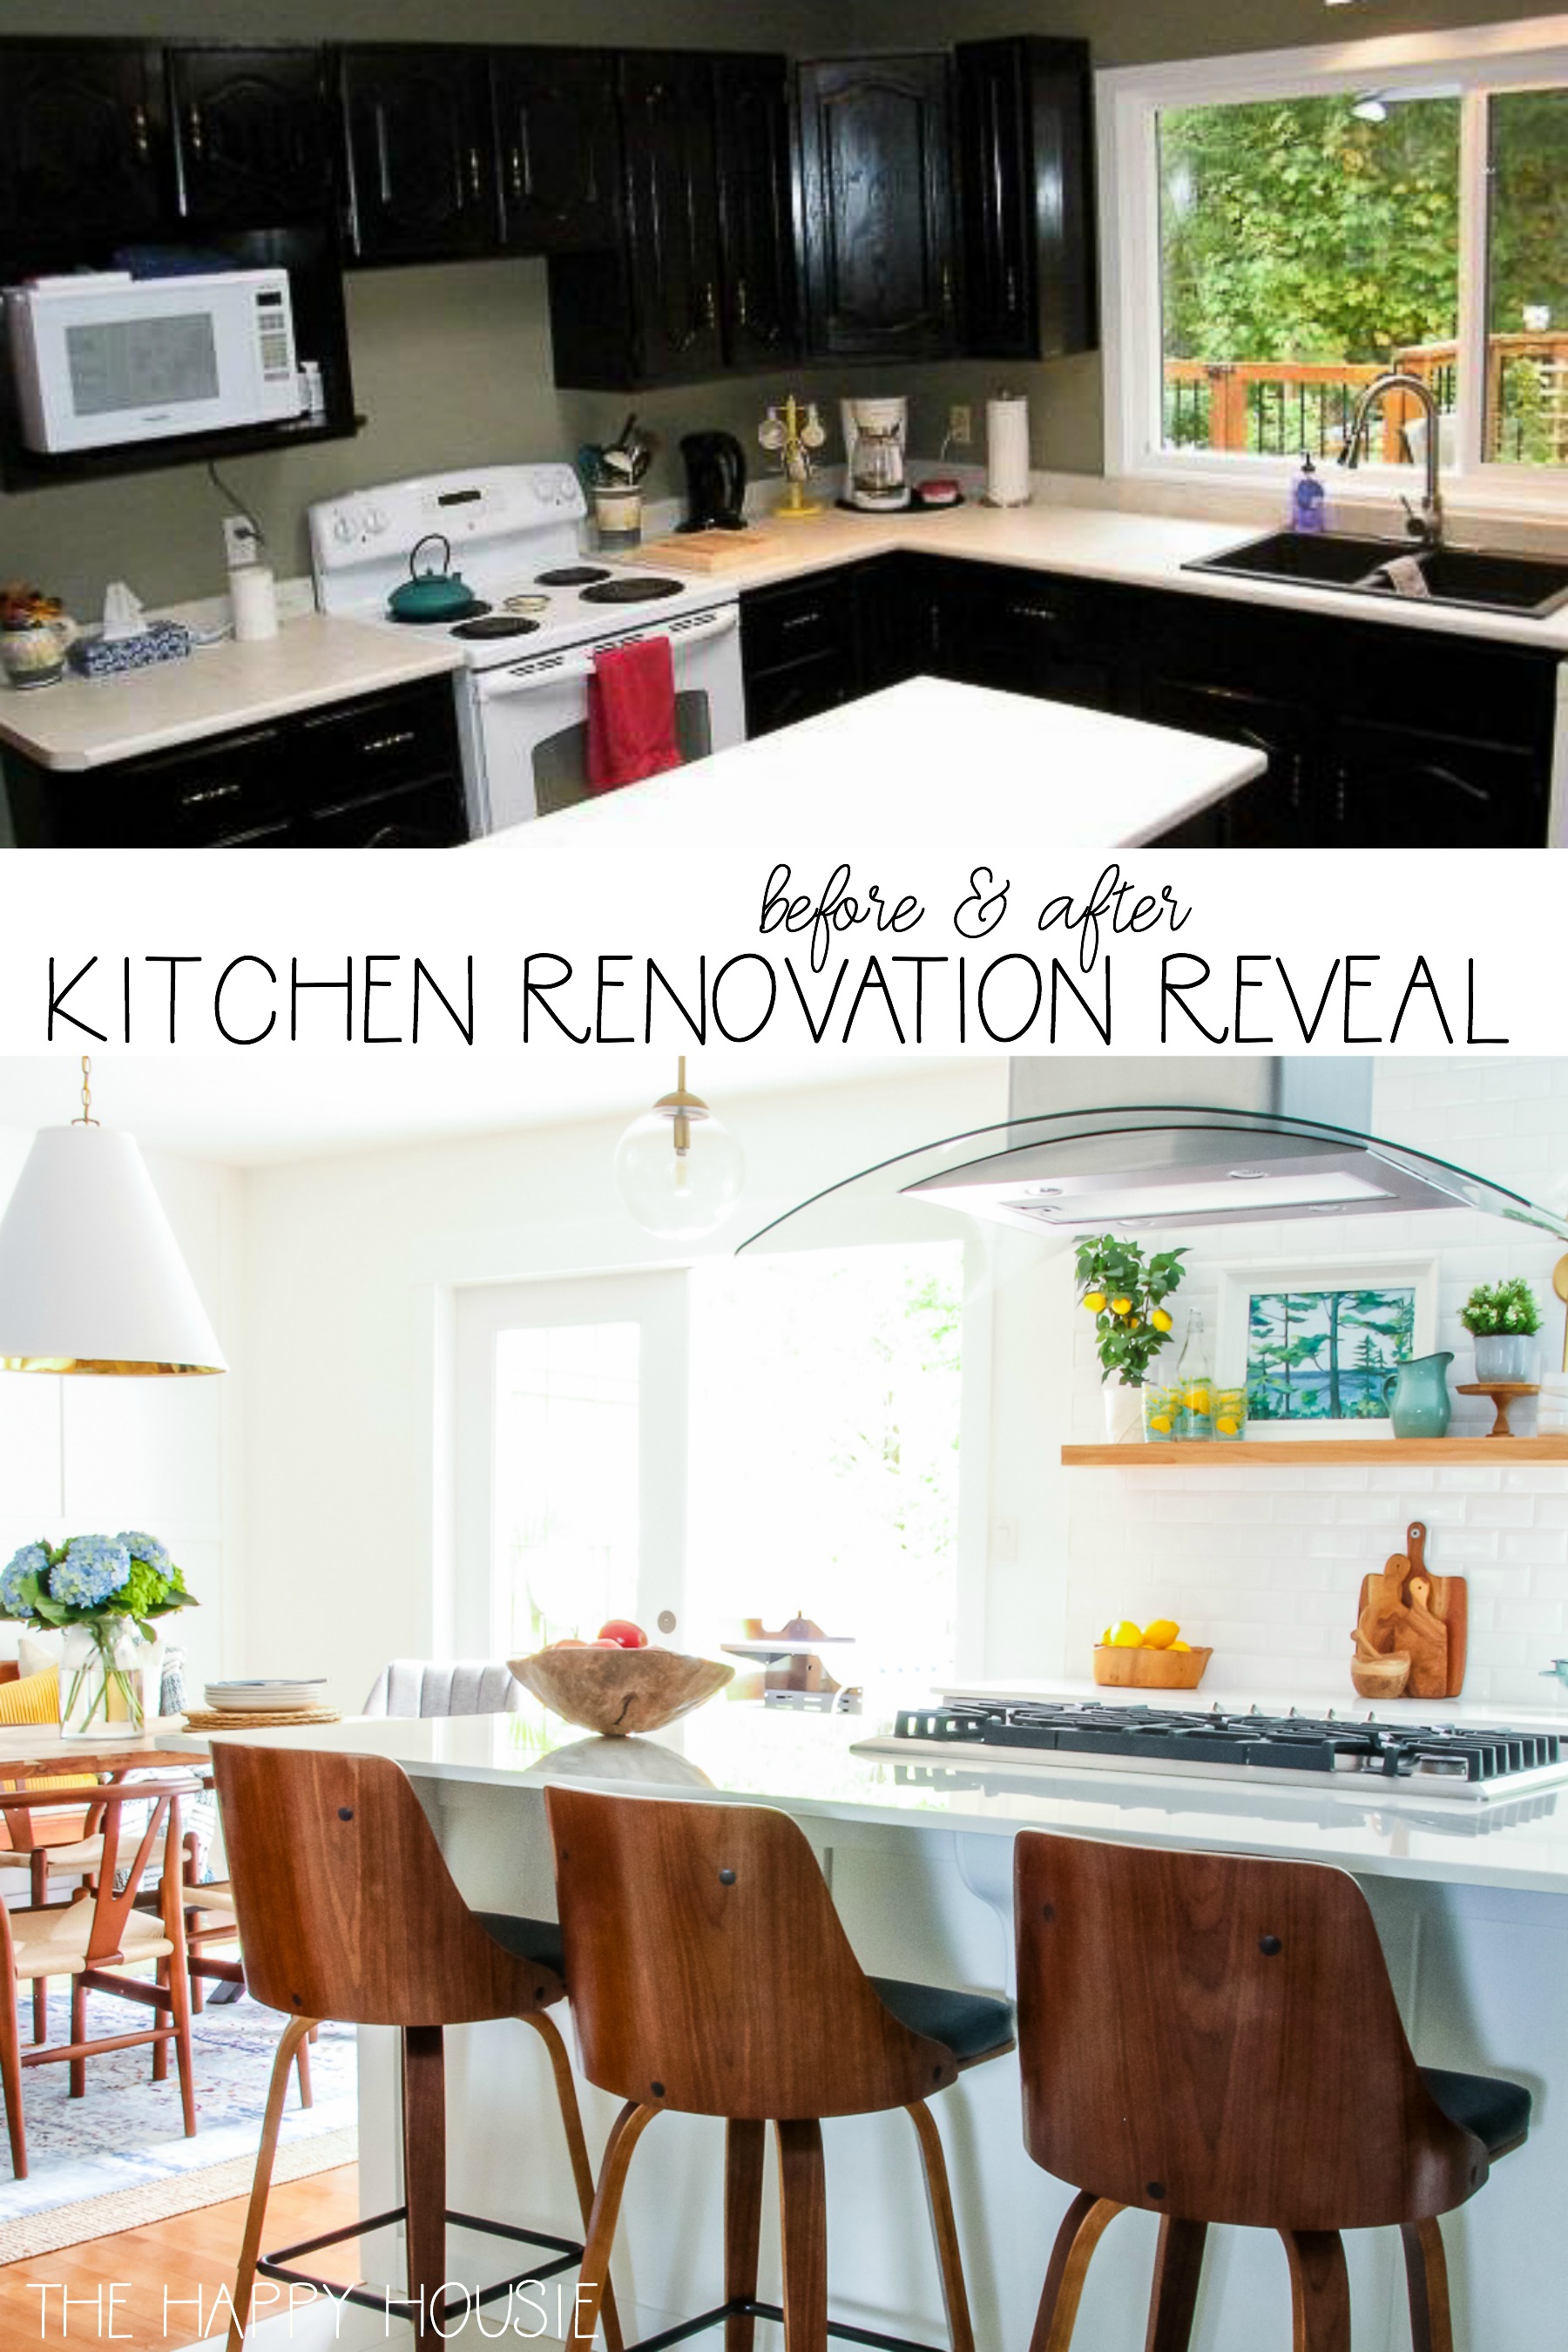
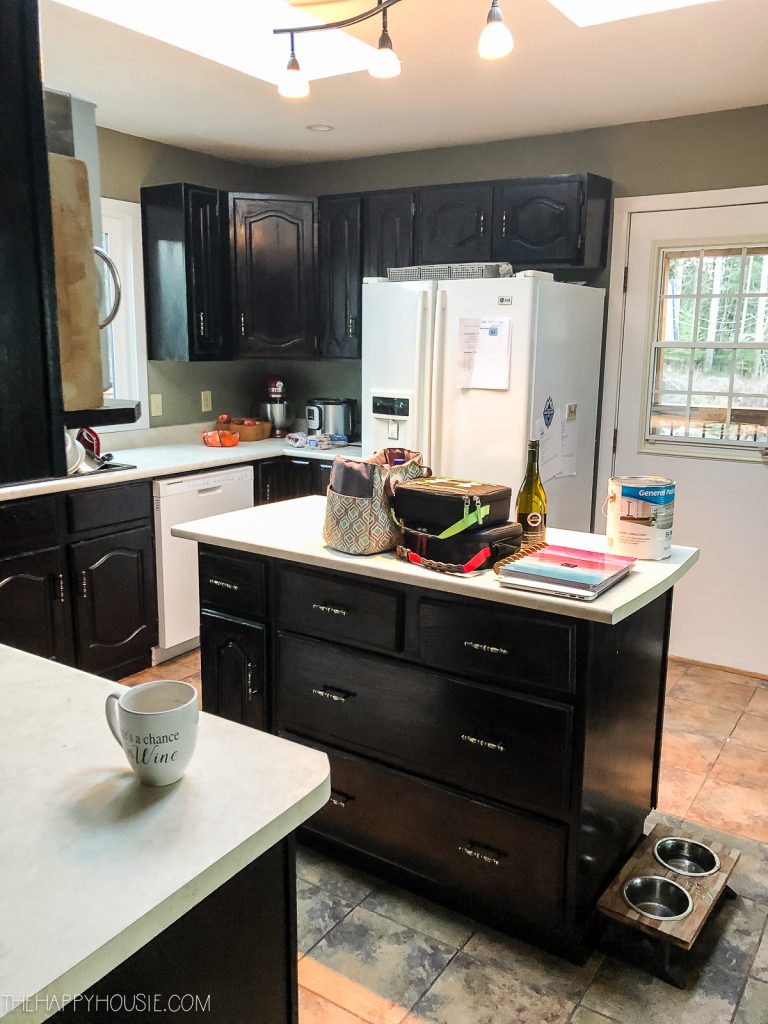
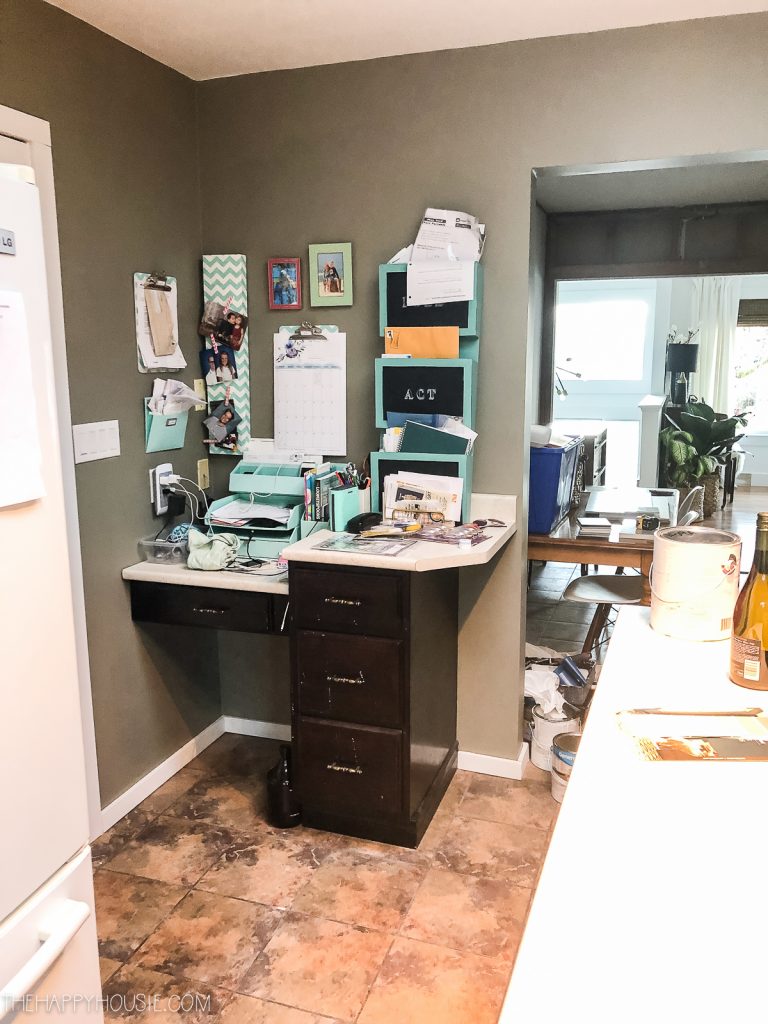
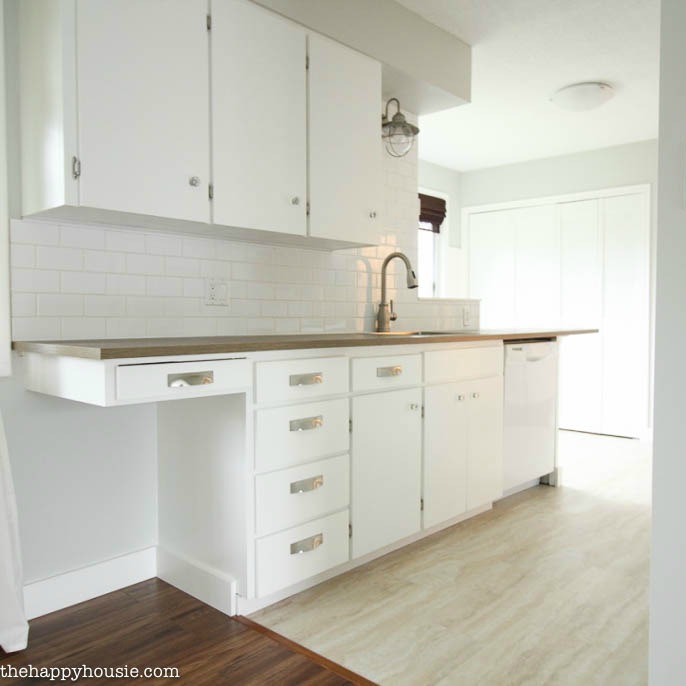
Do you remember how our kitchen looked when we first moved into this house?
Of course it’s a mess in all these photographs because we were in the process of painting the interior of the house and then ripping apart the bathrooms and our bedroom to create those two brand new bathrooms (see our main bathroom reveal here and our master bedroom/ensuite reveal here). But you’ll get the idea of the space that we started out with…
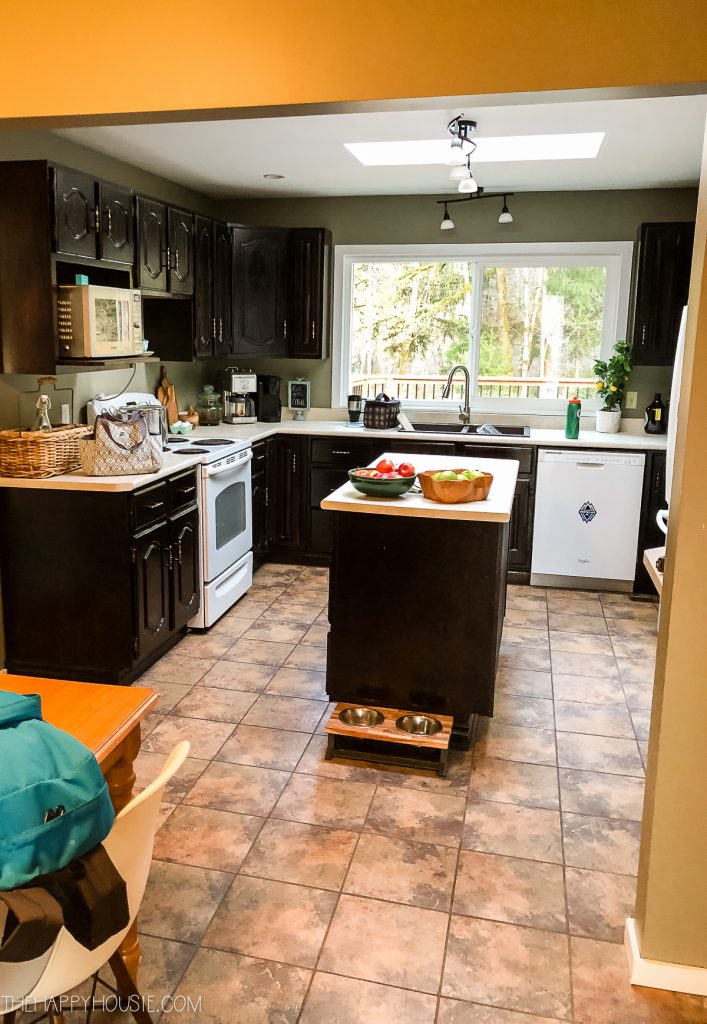
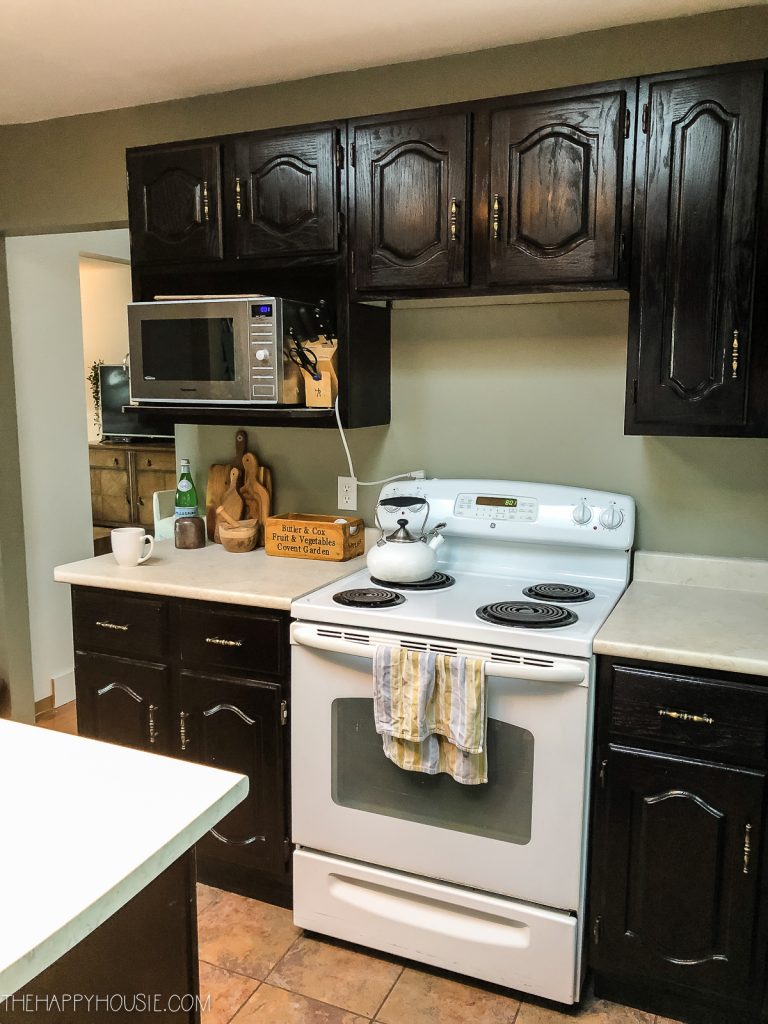
You can see the wall (above) that we removed on the left hand side of the kitchen – the wall that the stove used it back onto.
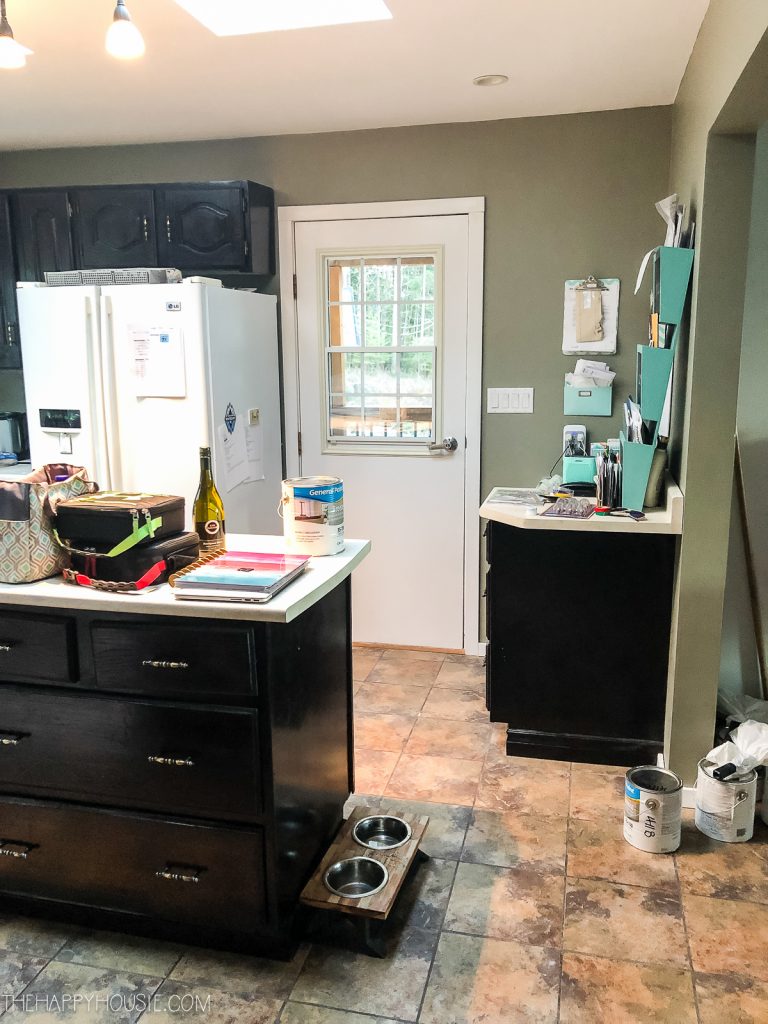
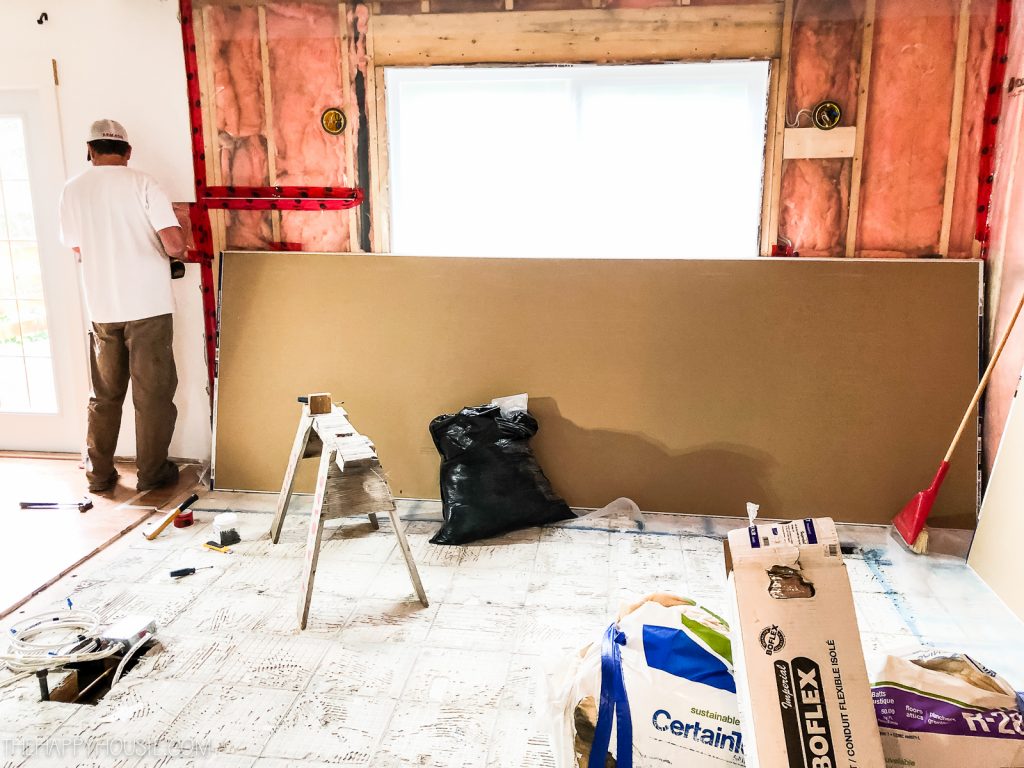
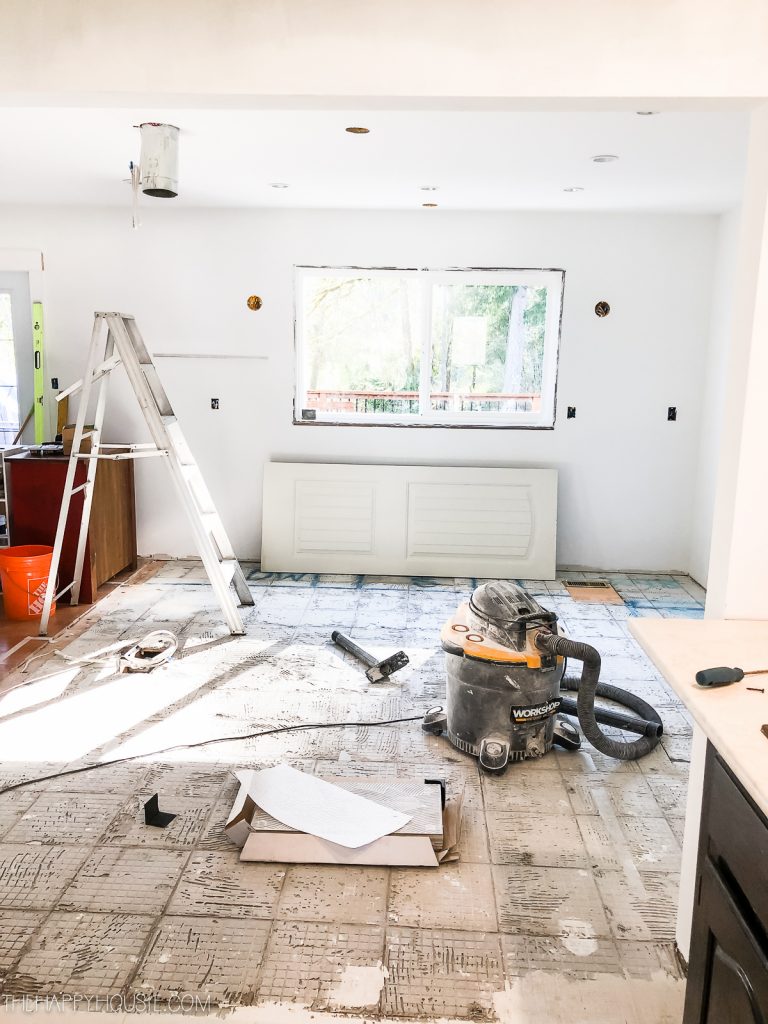
And there (above) is the exterior door that we removed because we thought more cabinet space would be better for us than having two exterior doors in the room (once the wall was opened up).
That’s the wall that was removed – of course all the electrical had to be moved as well in the whole kitchen. Good thing we were taking it down to the studs, anyhow.
Obviously, there was a LOT of construction that went into this space and we hired experts for many of these big jobs. We also had a super talented friend help us with the majority of the kitchen construction details, so it wasn’t a go-it-alone DIY type of renovation though we were actively involved in almost every aspect of the project and it was still a ton of DIY work. The big changes include:
-Taking down a wall and opening up another wall
-Hanging/finishing new drywall and joining up the ceilings with skim coating over the whole surface
-Rewiring both the main kitchen and bar area and installing new pot lights and boxes for the new light fixtures
-New plumbing to the fridge, dishwasher, and for the bar sink
-Having a gas line and venting installed for the cooktop/hoodfan in the island
-Removing a door (and having the siding fixed on the exterior)
-Switching out which door opens on the french doors
-Tearing out and installing new floor tile
-Building and installing all the cabinets
-Building a pony wall to support the island and weight of the countertops
-Installing cabinets to use as a banquette seating area
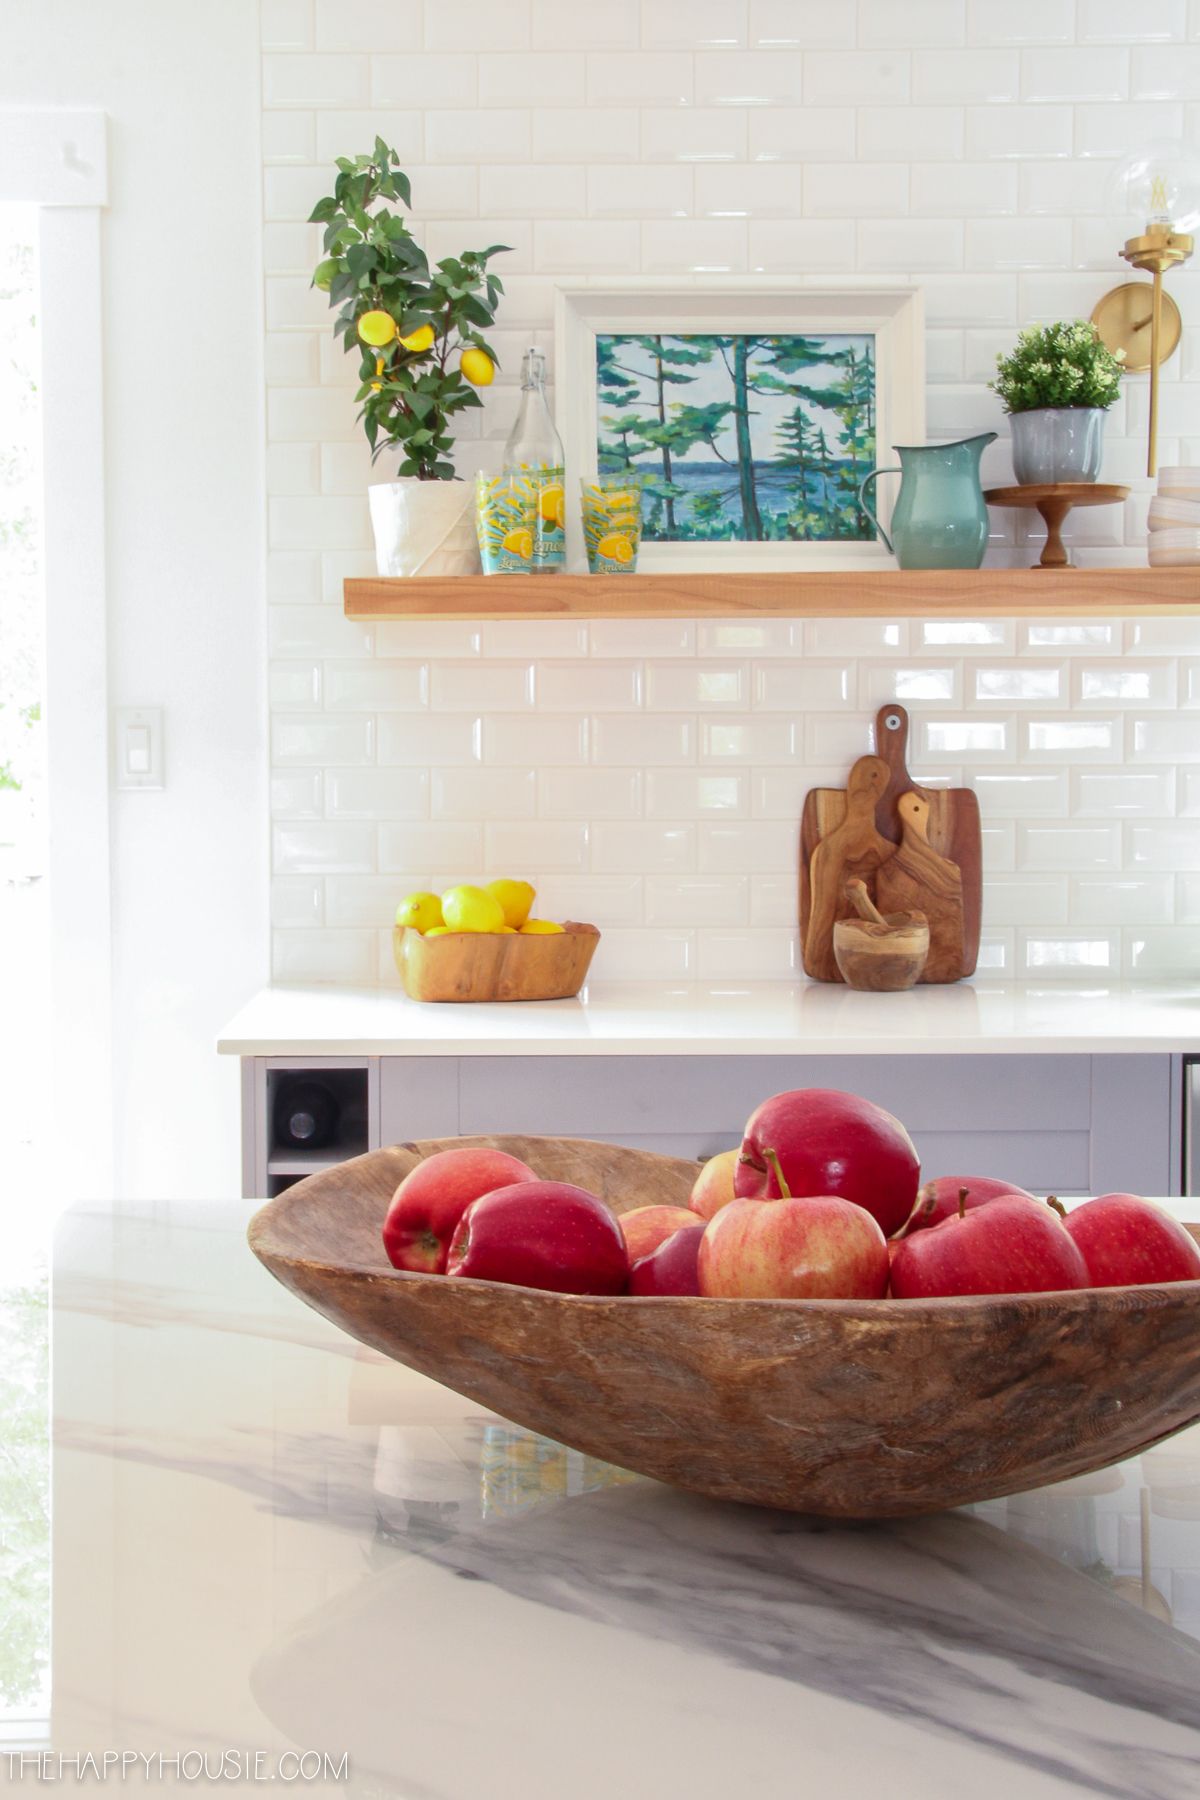
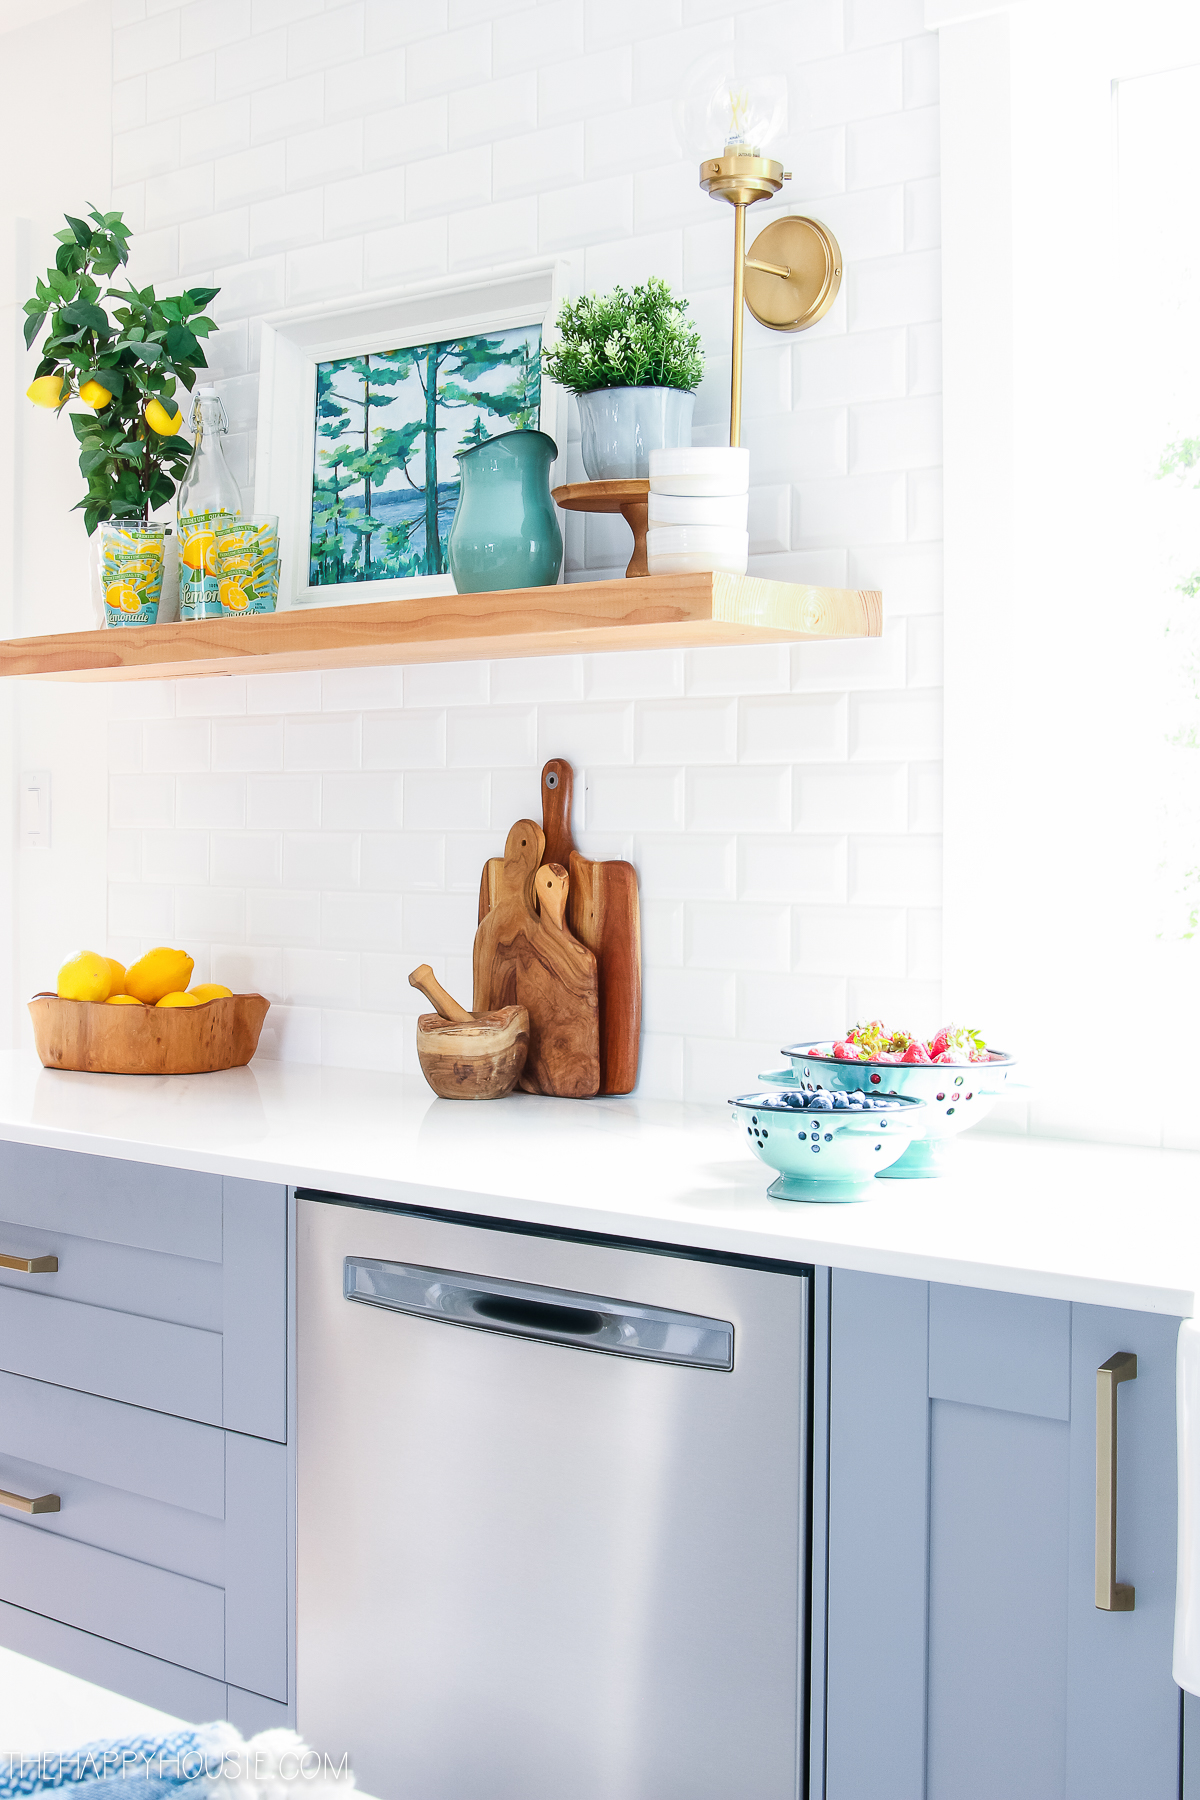
-Installing the backsplash tile and building/installing solid fir floating shelves
-Planking and then painting the back and sides of the island with box moulding
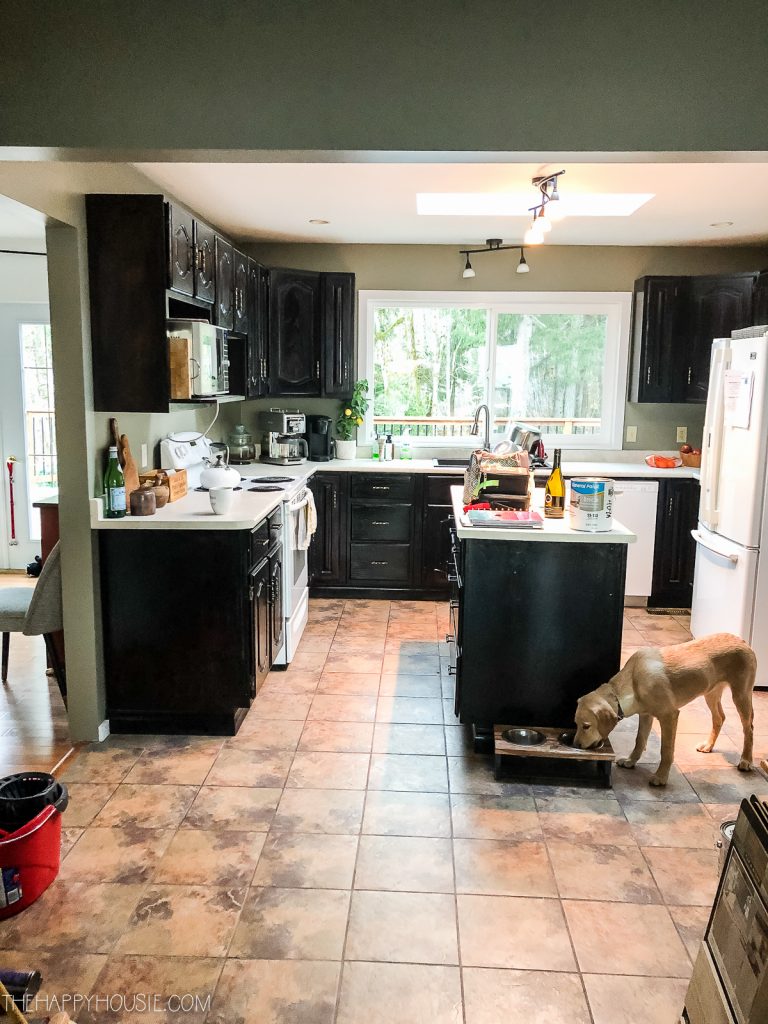
Here are a couple in-process pics (if you want to see more, then check out this post):
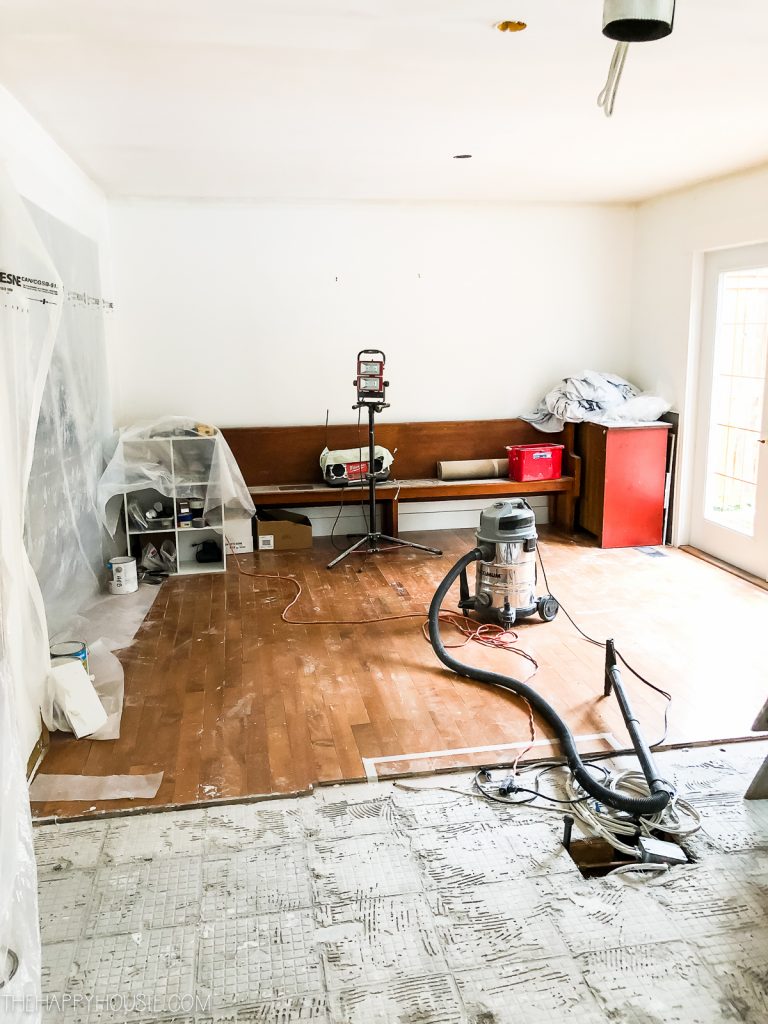
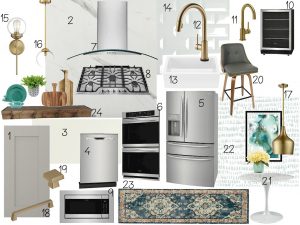
Okay… so it was a BIG, LONG job. But we got there. I’ll be sharing more detailed posts soon about each of the varied elements in this space (the appliances, the countertops, the faucets and lighting, how we built the island, how we built the banquette etc.). I also shared an inspiration board and source guide in this post, and all our kitchen renovation sources can be found at the bottom of this post.
And now, let’s take an overall look at how this space turned out!
Here is the layout of the kitchen, as it stands now that the renovation is complete:
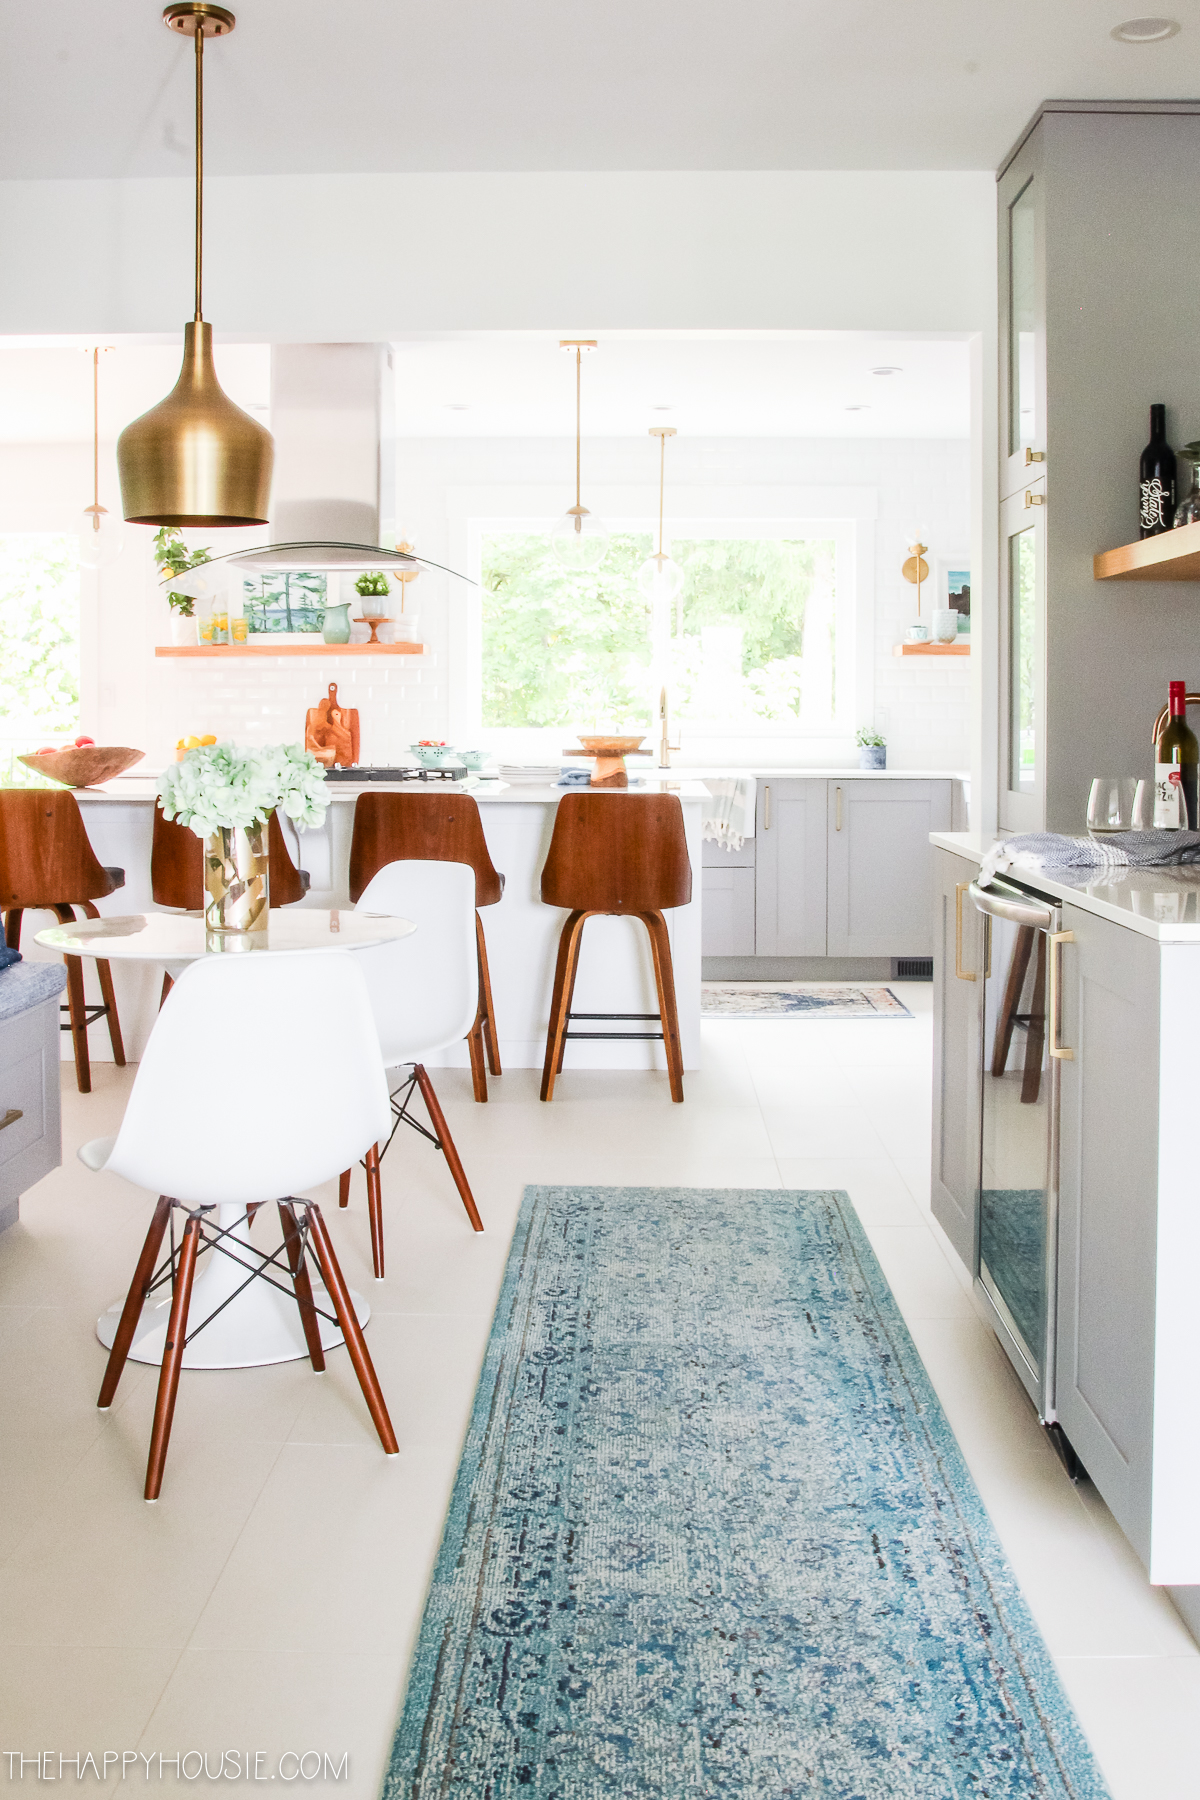
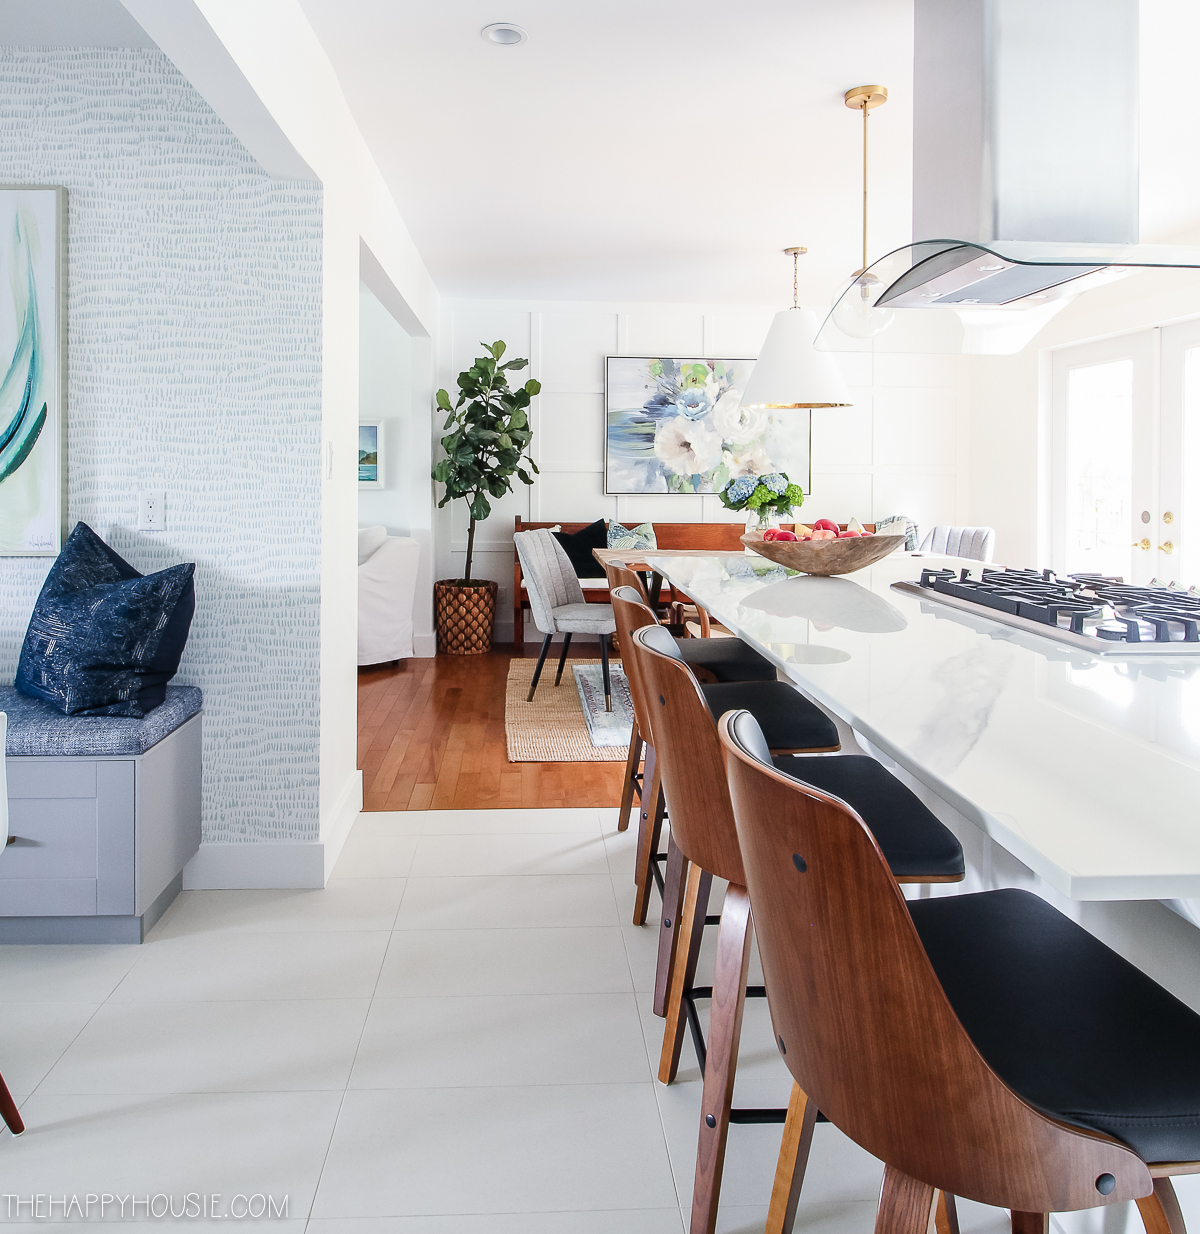
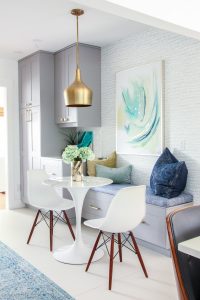
I shared the reveal of our bar/beverage center and eating nook last week. You walk up the stairs and through this space to make your way into the main kitchen…
Pendant over the Tulip Table
Blue Runner Rug
Frigidaire Gallery Beverage Centre Bar Fridge
Tulip Table
Modern Chairs
Bar Stools
Hardware – Pulls
Champagne Gold Delta Trinsic Touch Faucet
Bar Stools
Pendant Lights over island and sink
Wall sconces on either side of sink

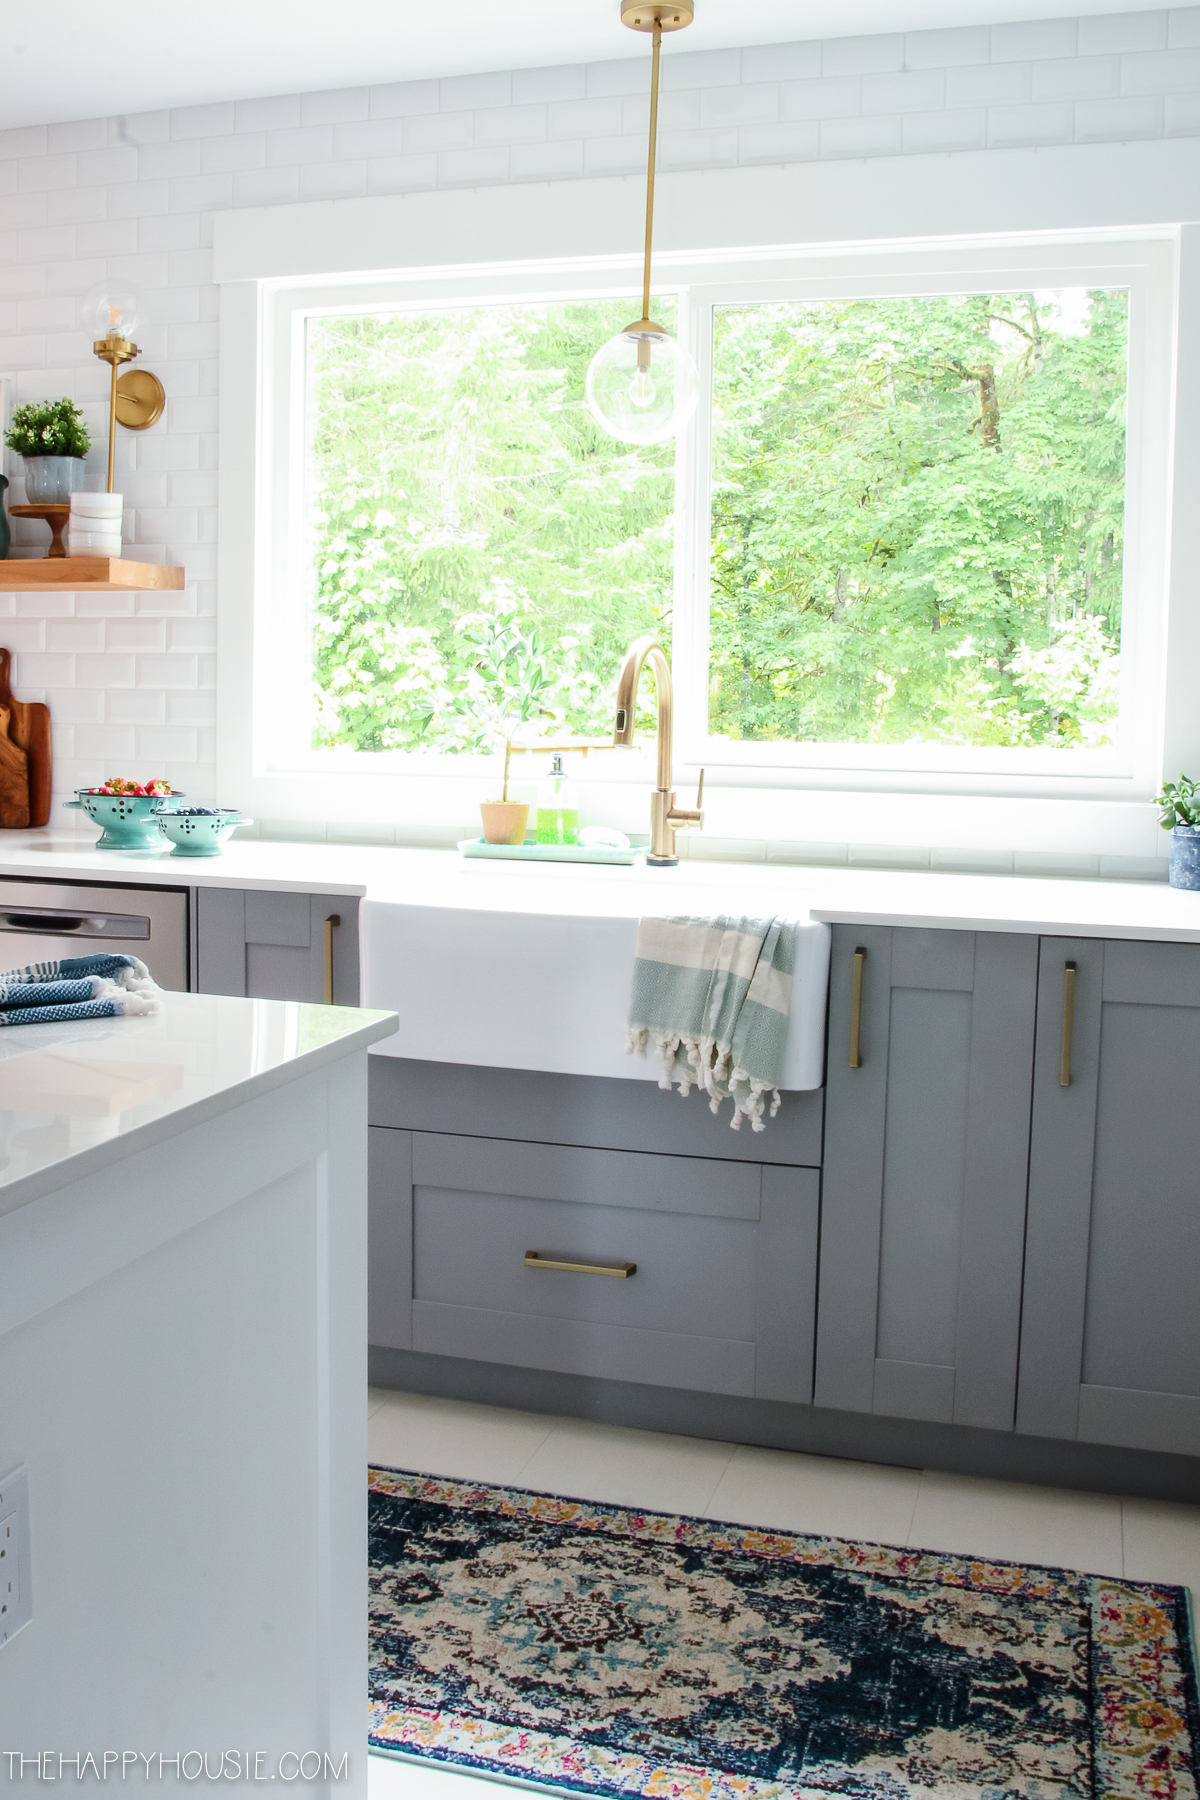
Dark Blue Runner Rug
Turkish Towels

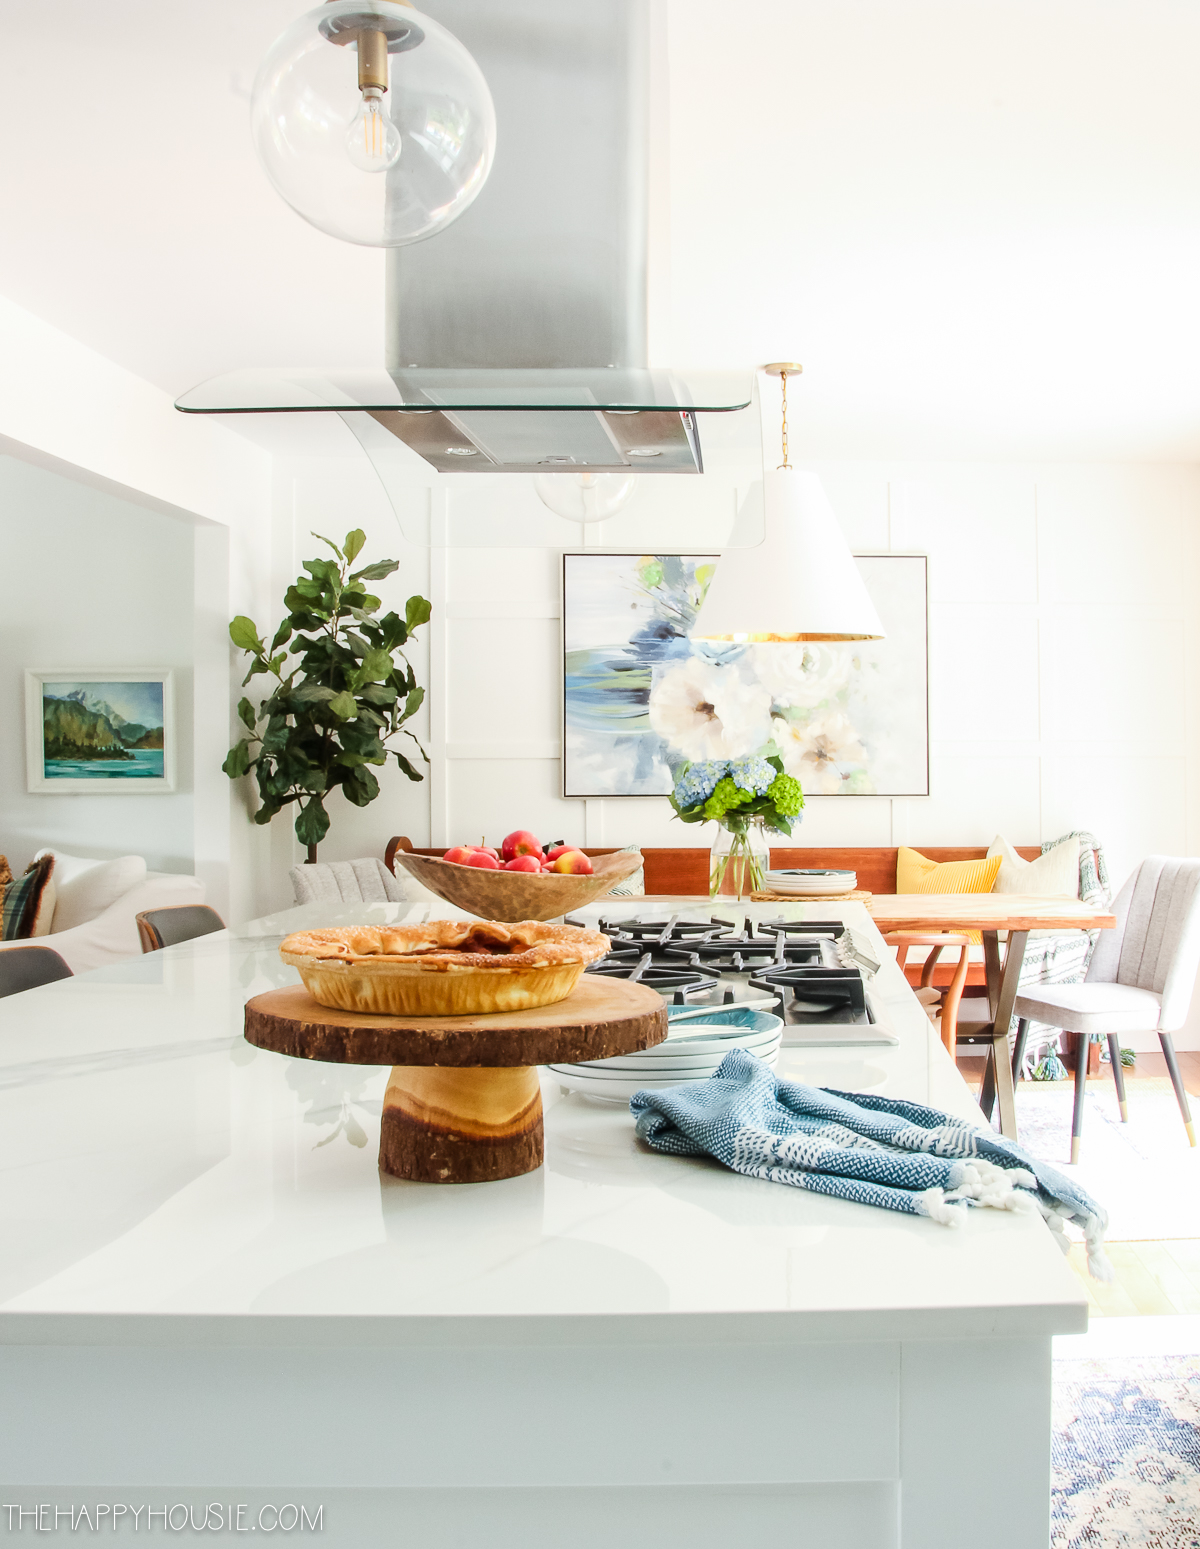
Frigidaire Gallery 36″ Gas Cooktop
Frigidaire Gallery 42″ Island Hood Fan
Dining Room Pendant Light
Dekton Olimpo Countertops

We had this wine rack built from Ikea cover panels in order to create an extra 6″ of length on the cabinets, as Ikea kitchen’s don’t come with an cabinetry smaller than 9-12″ wide. I’ll share a post about some other ways that we customized our Ikea cabinets to give them a much more high end feel.
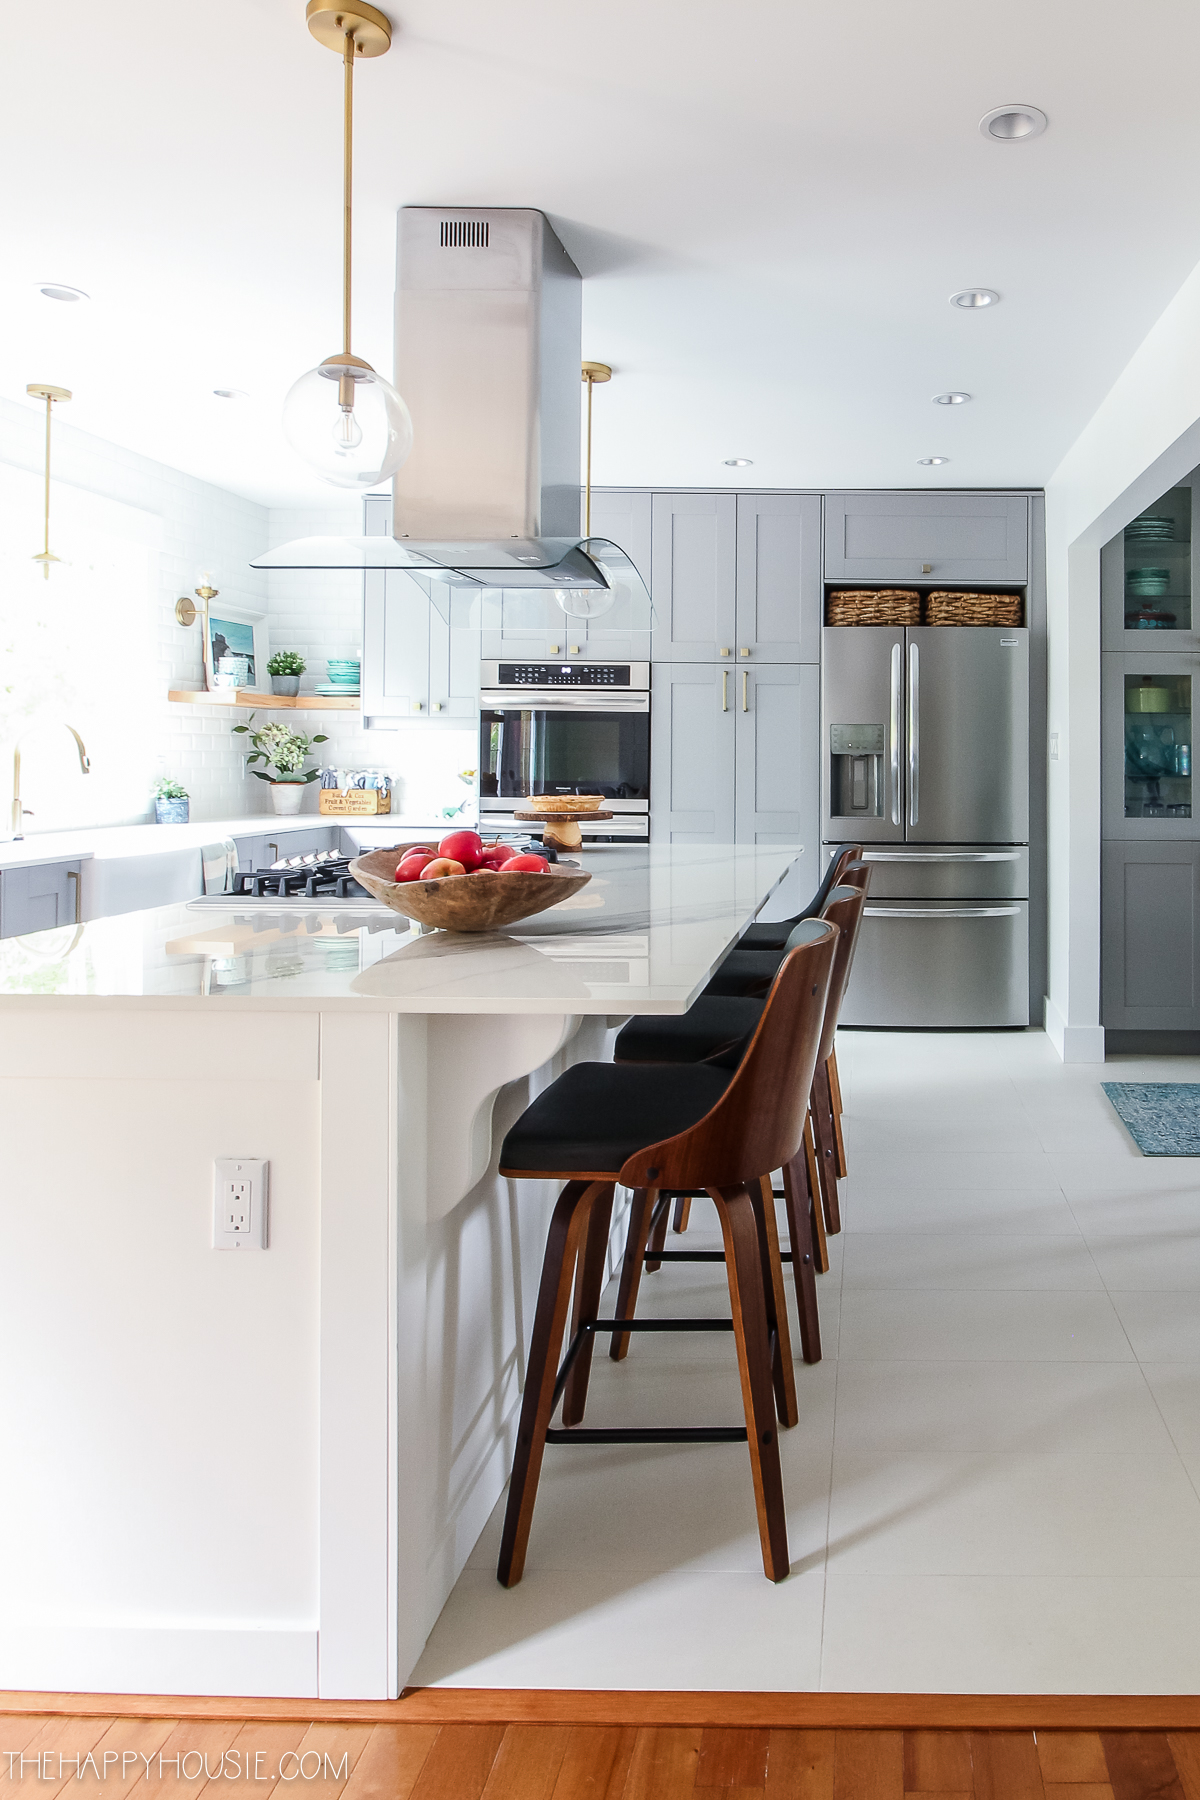
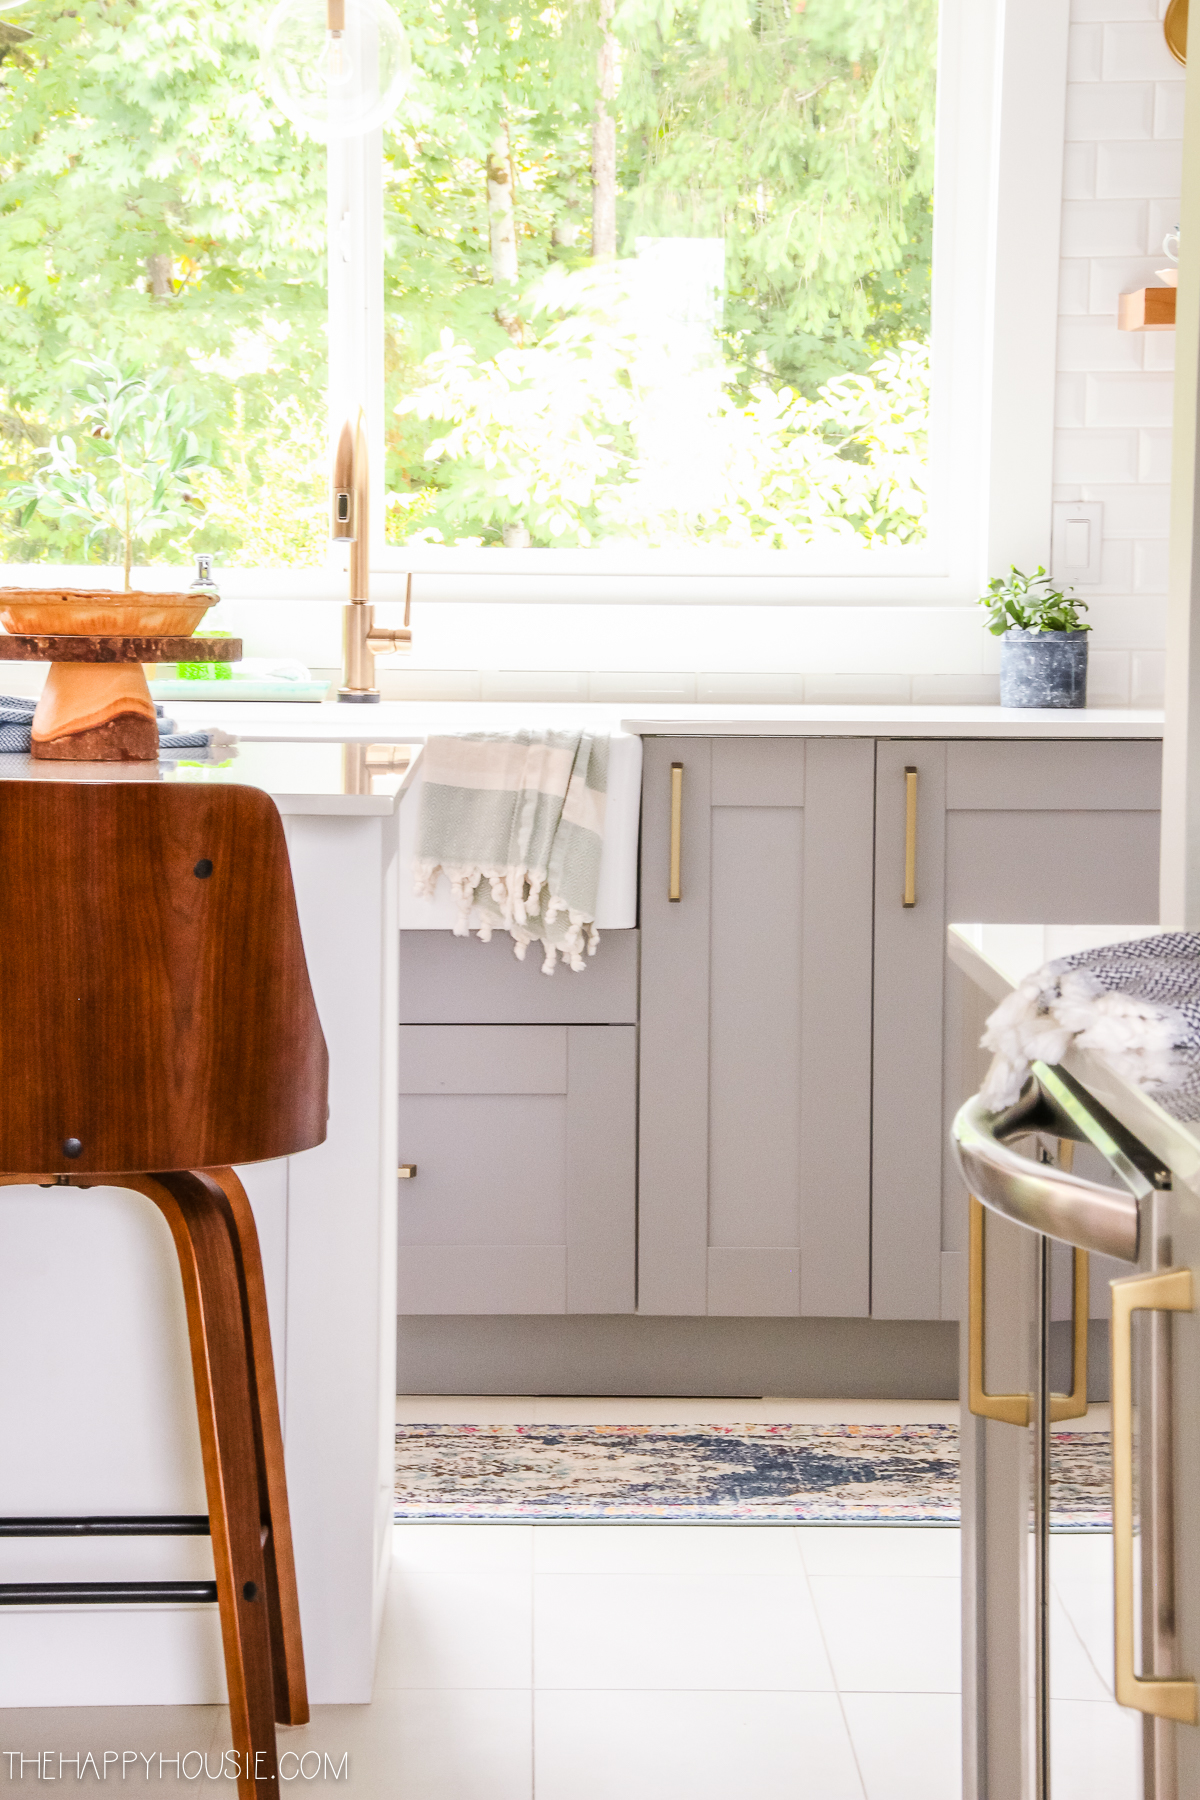
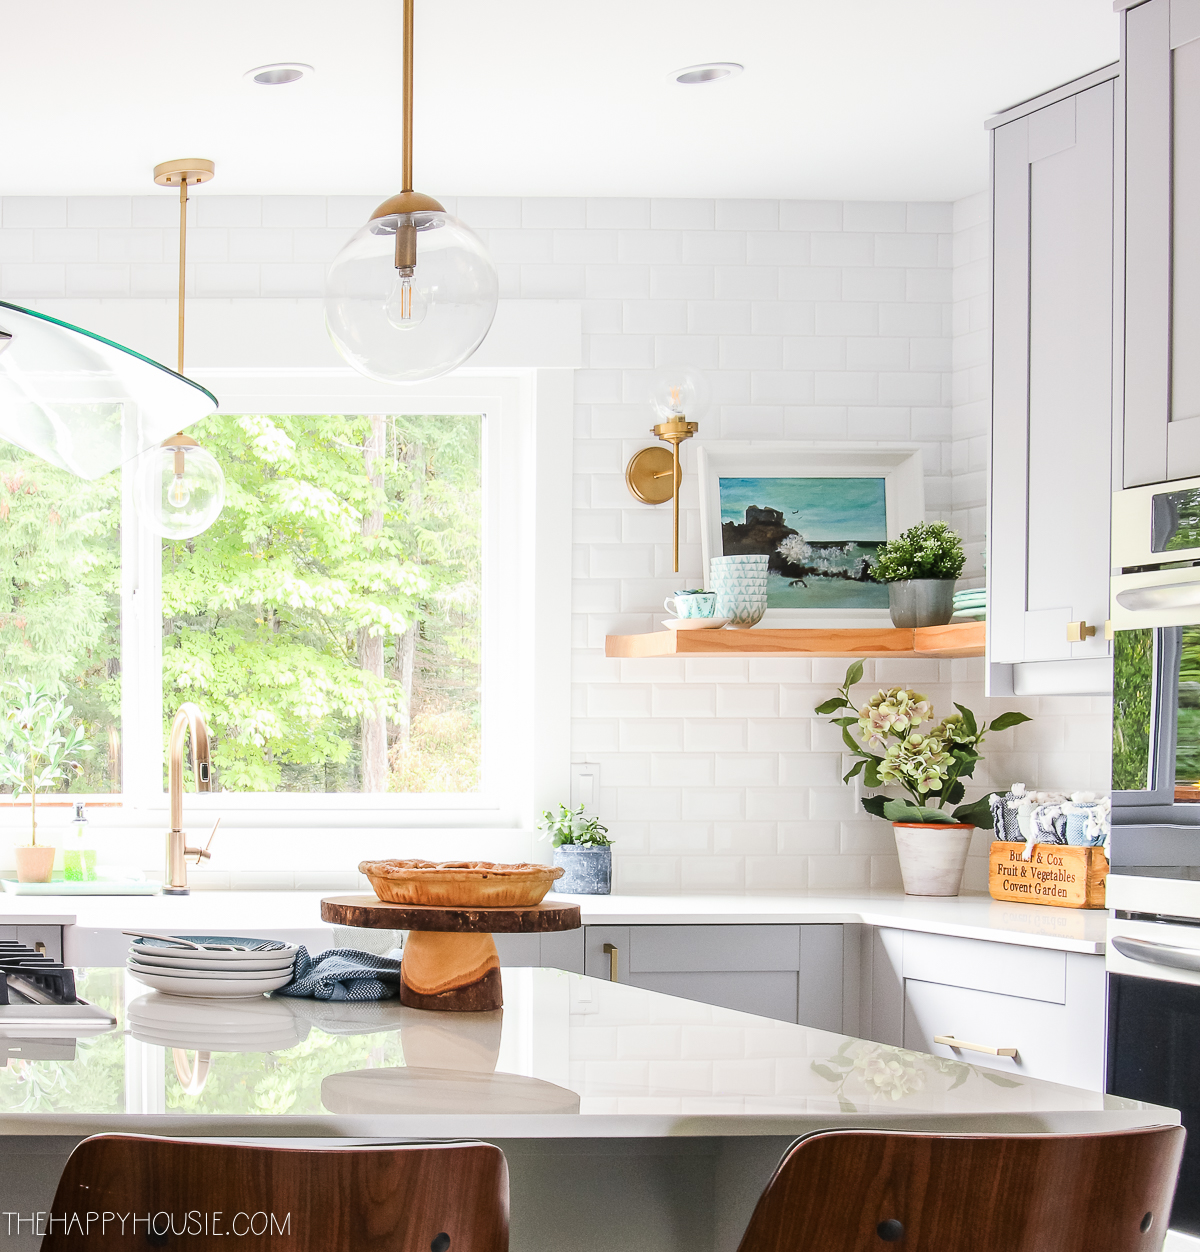
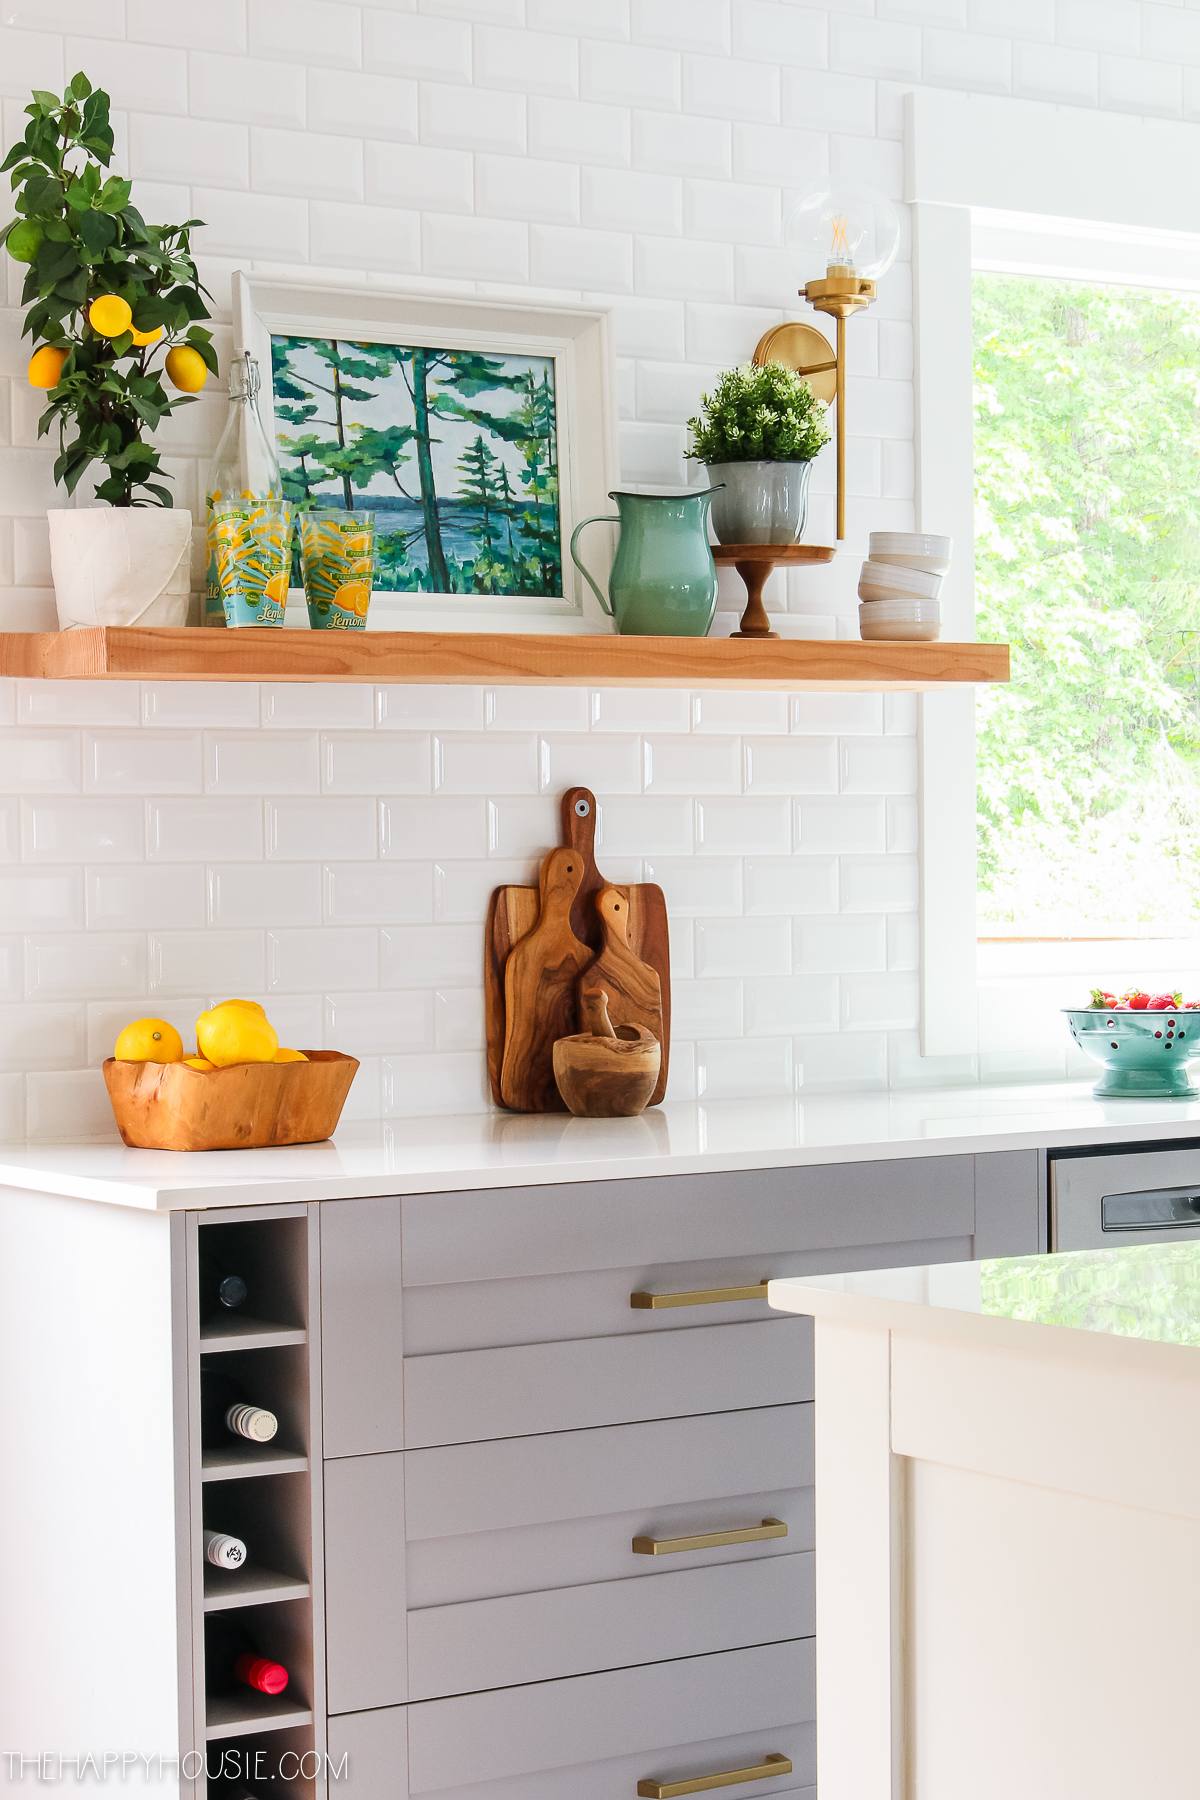
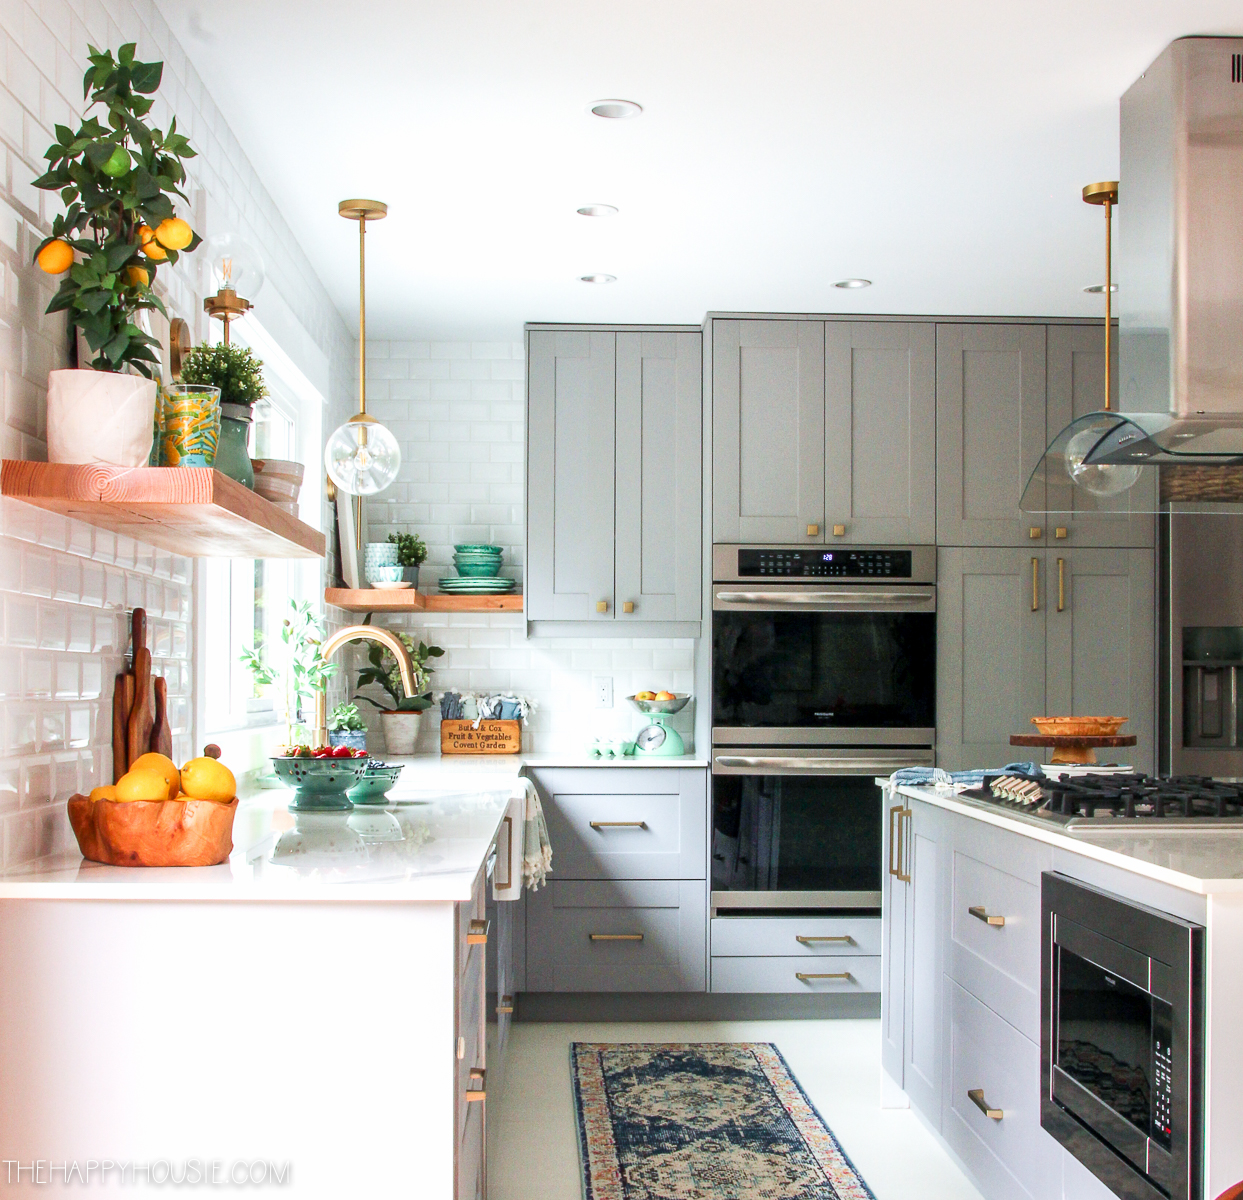
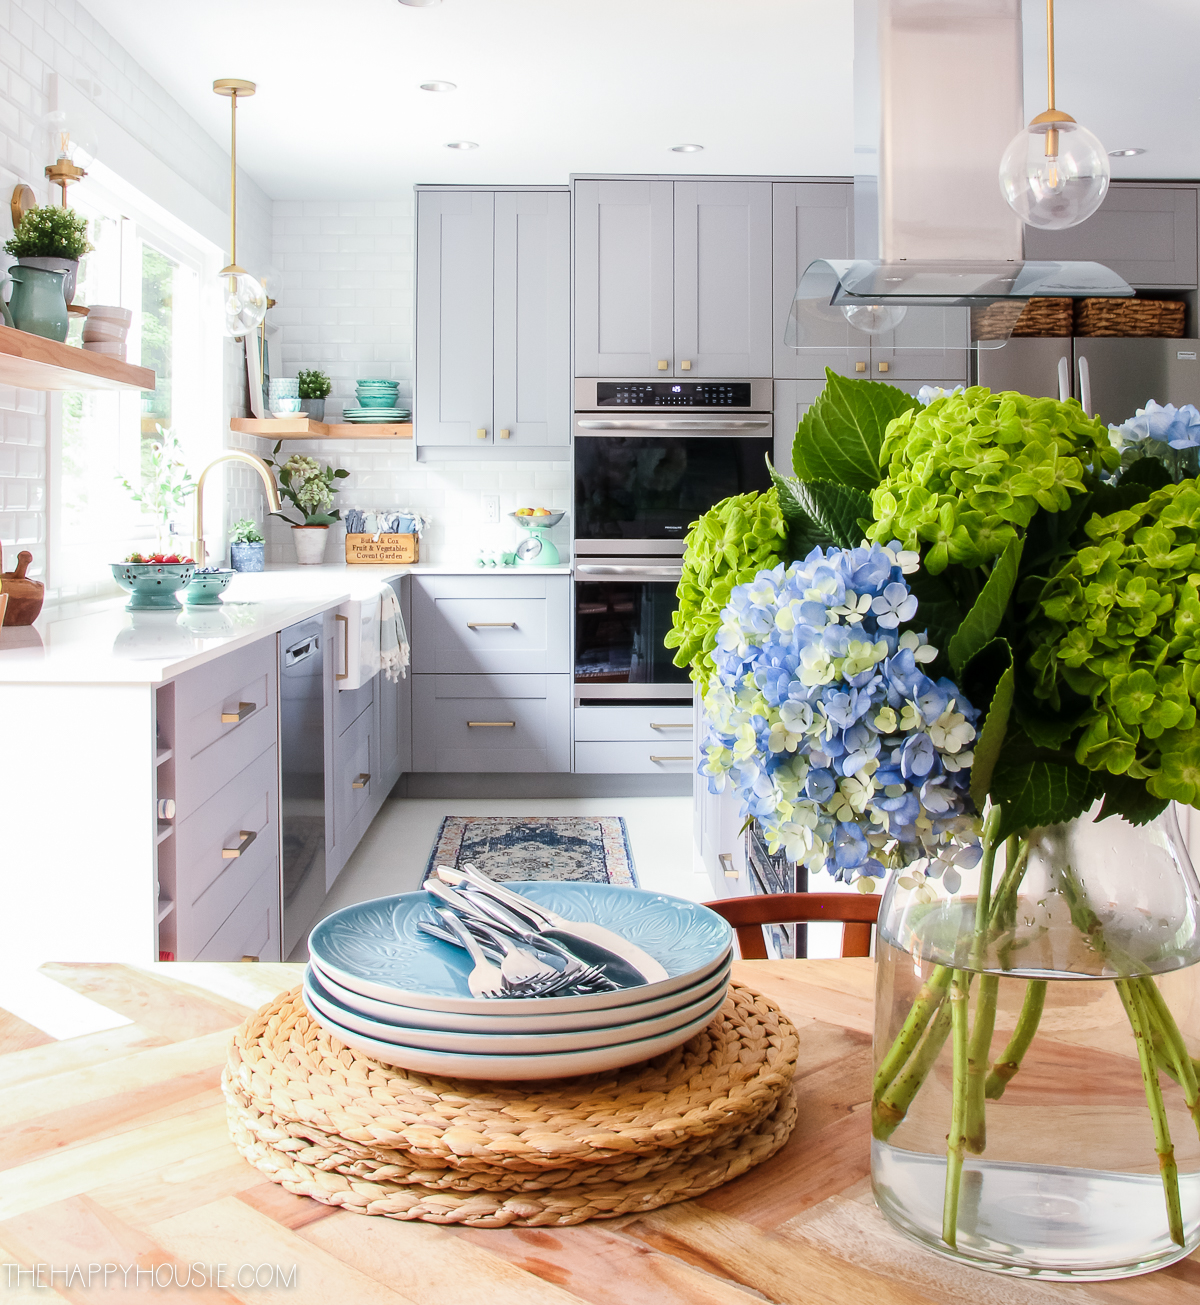
The back wall, now that the door has been removed is so much more functional! It houses our gorgeous 36″ Frigidaire Gallery fridge, a 30″ pantry, and the dream-of-all-dreams, my Frigidaire Gallery double wall ovens. It’s also the only wall where we incorporate some upper/taller cabinetry as I really wanted the back/window wall to have counter to ceiling tile and open shelves for display.
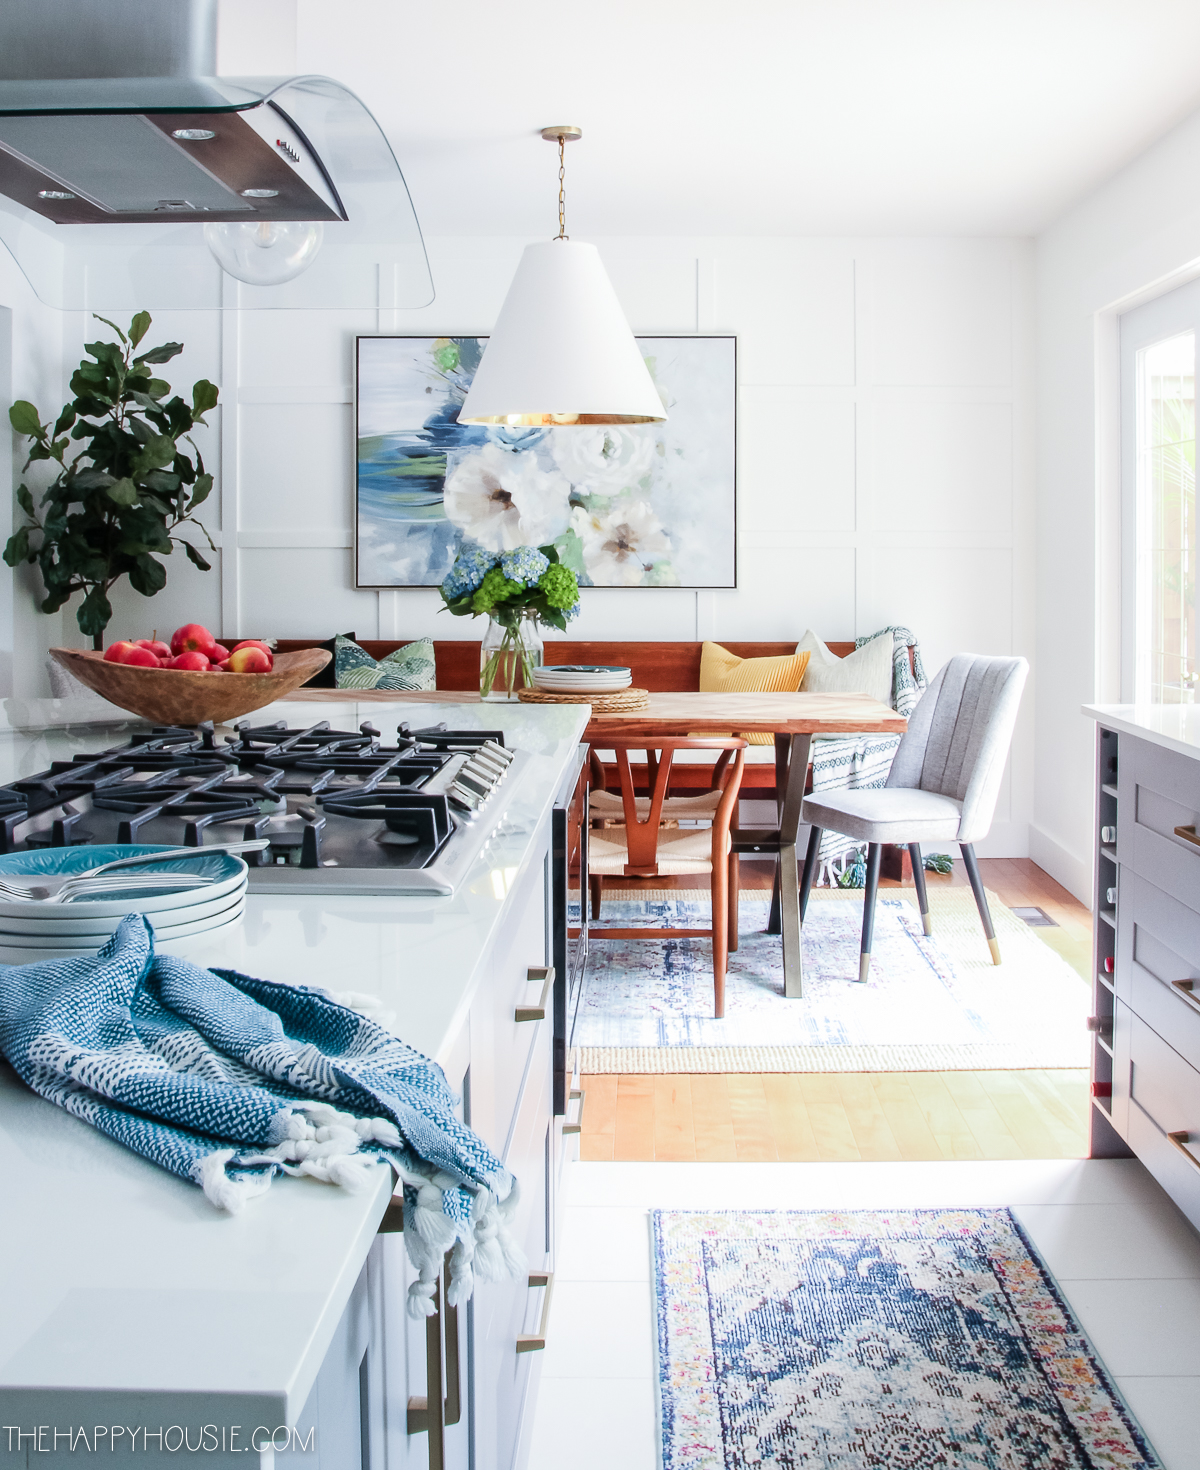
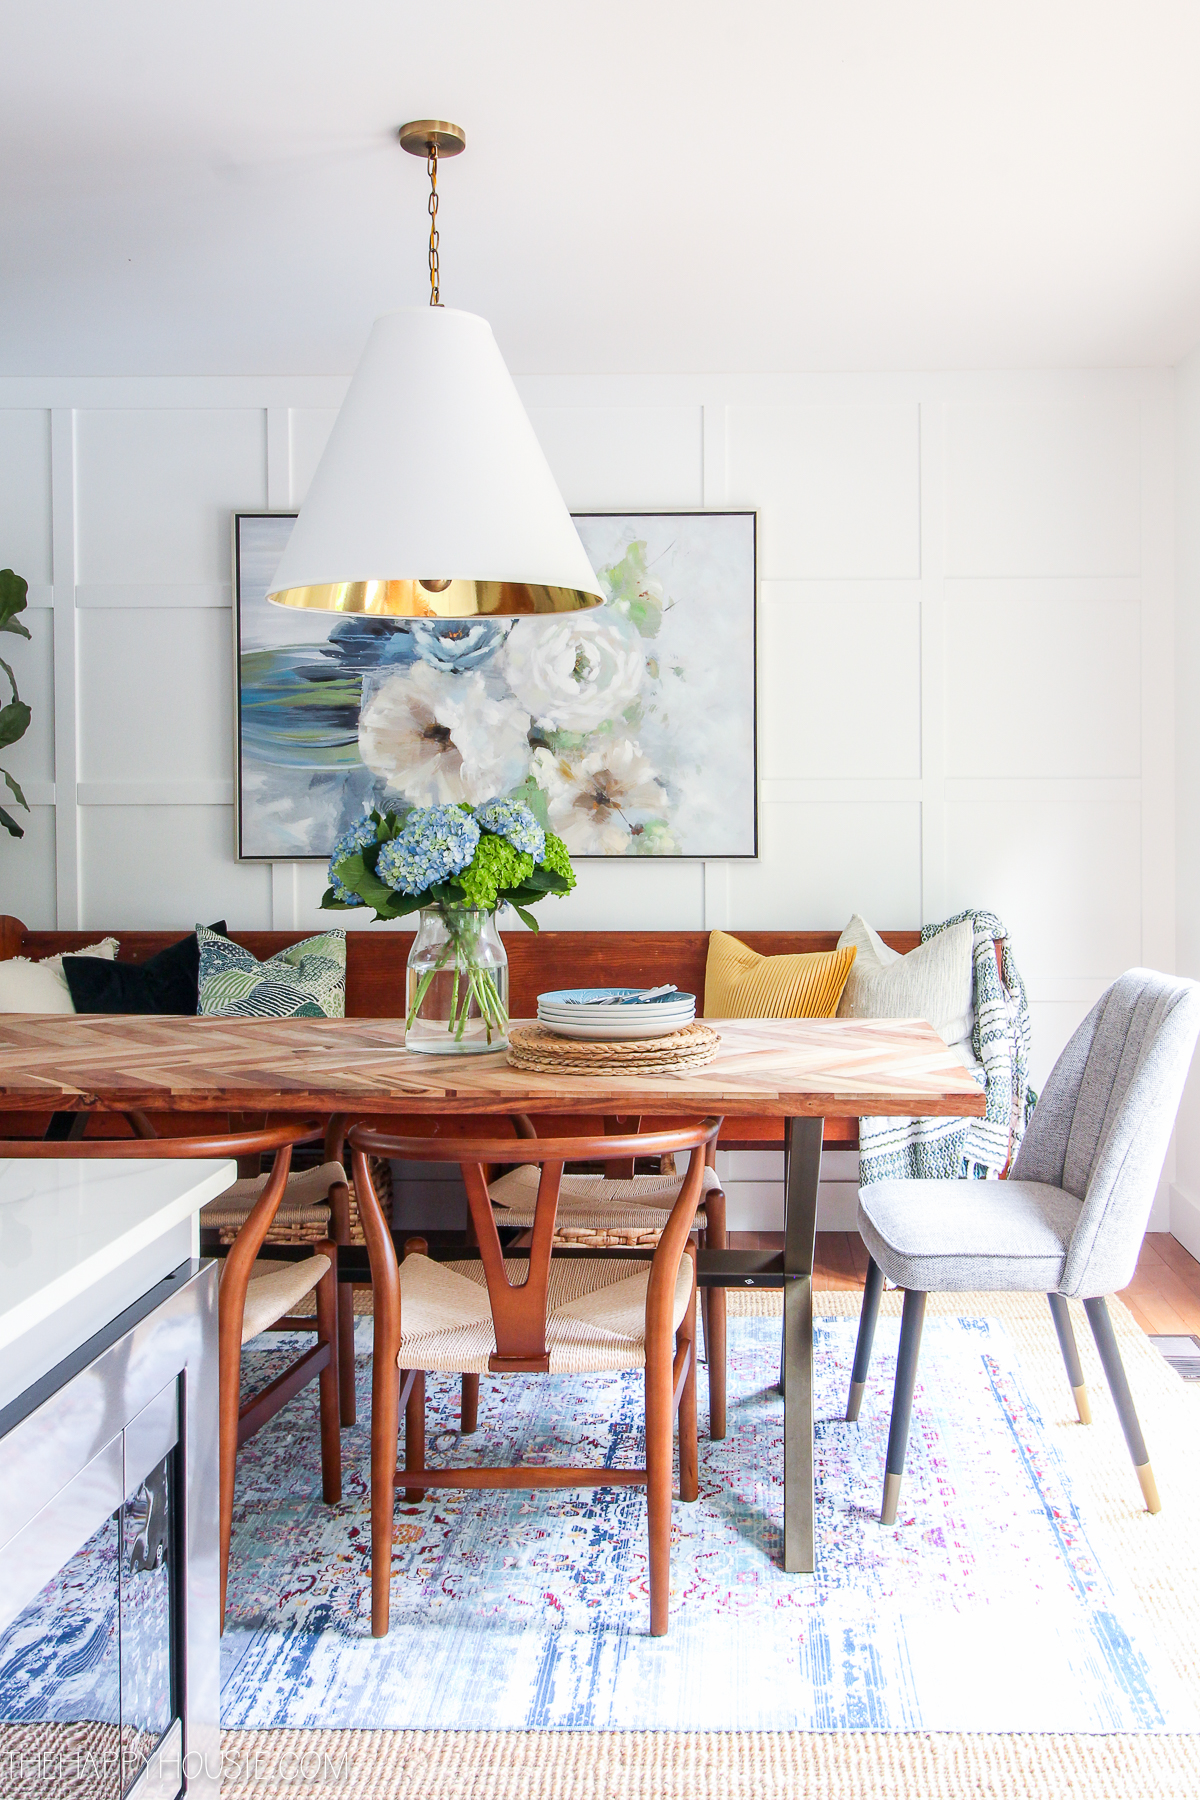
Here is a view to the kitchen from our dining room area…
I love having our built into the island, instead of on the countertop or up in a higher cabinet – it’s actually super convenient! And the trim kit on our Frigidaire Gallery Built-in Microwave gives it such a seamless and custom look.
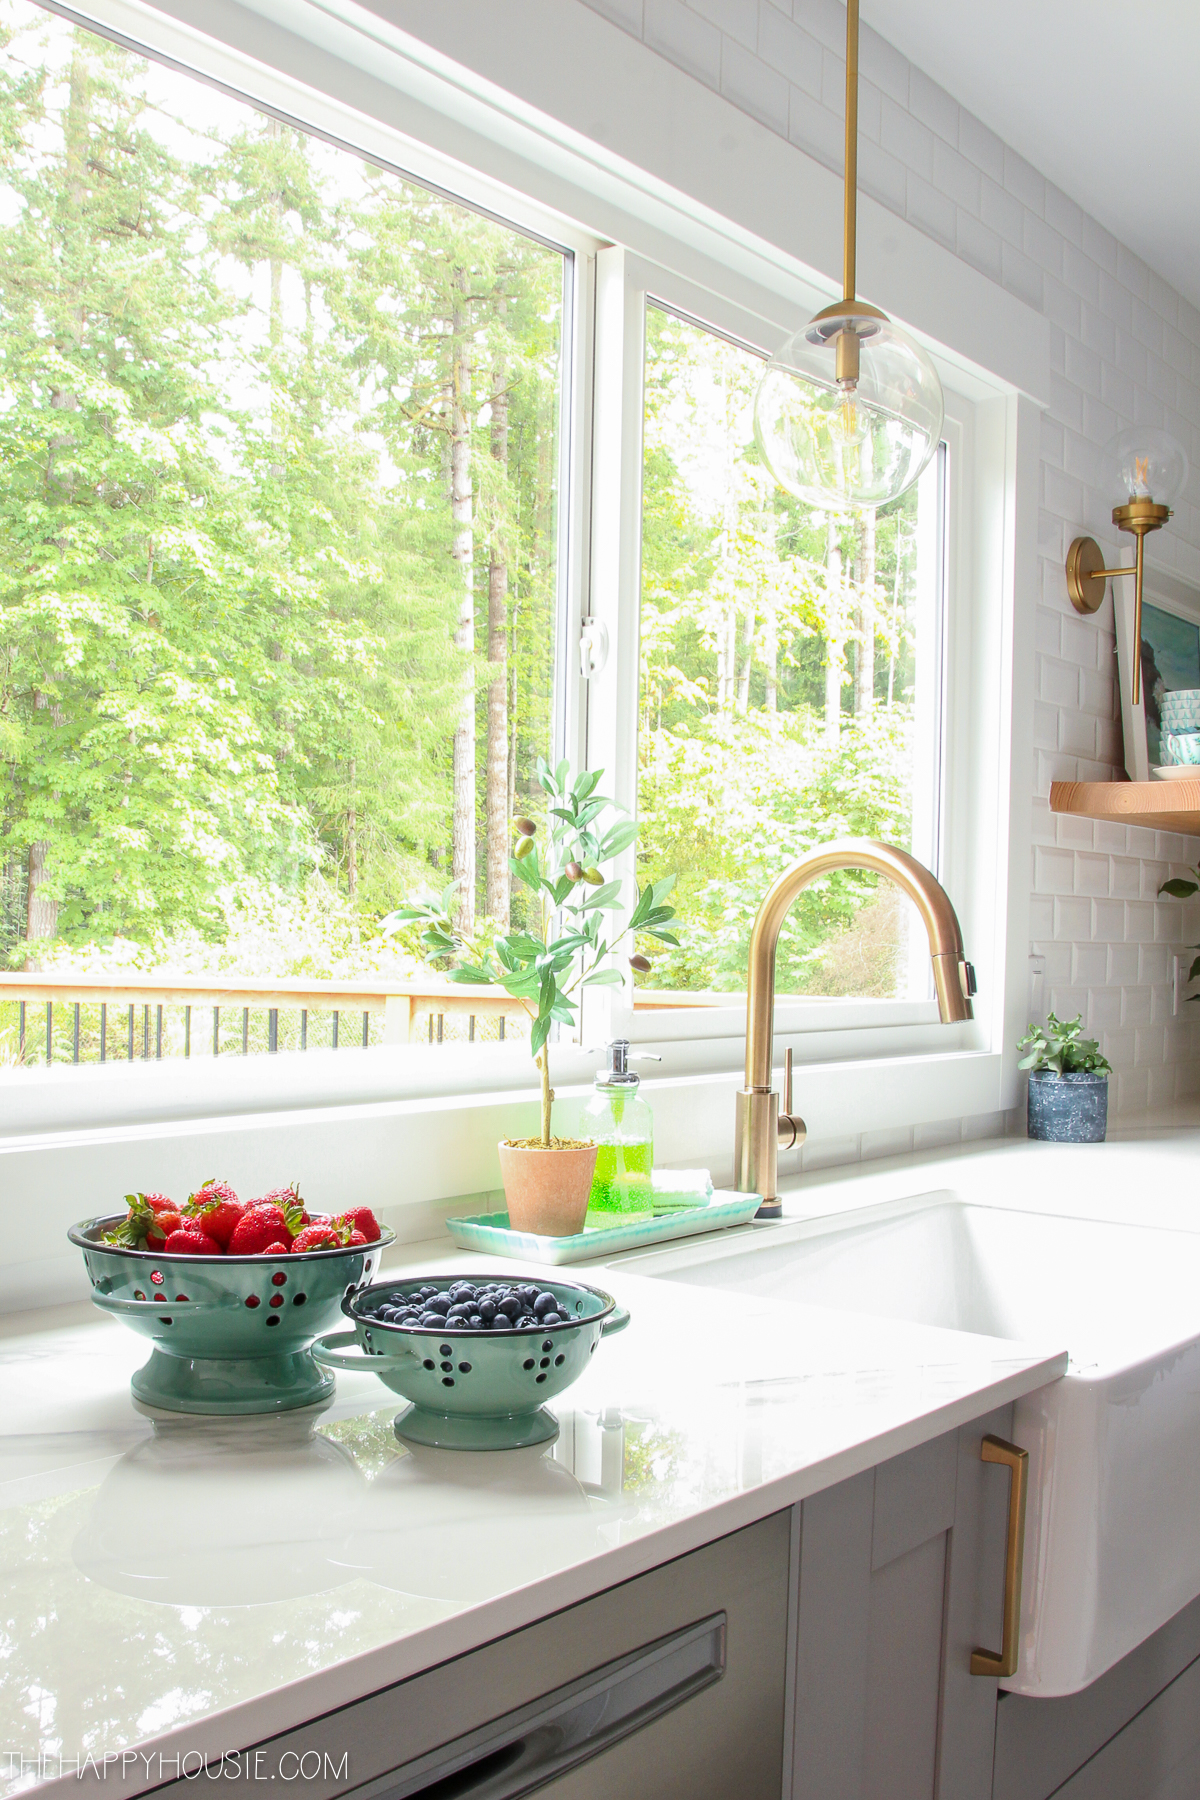
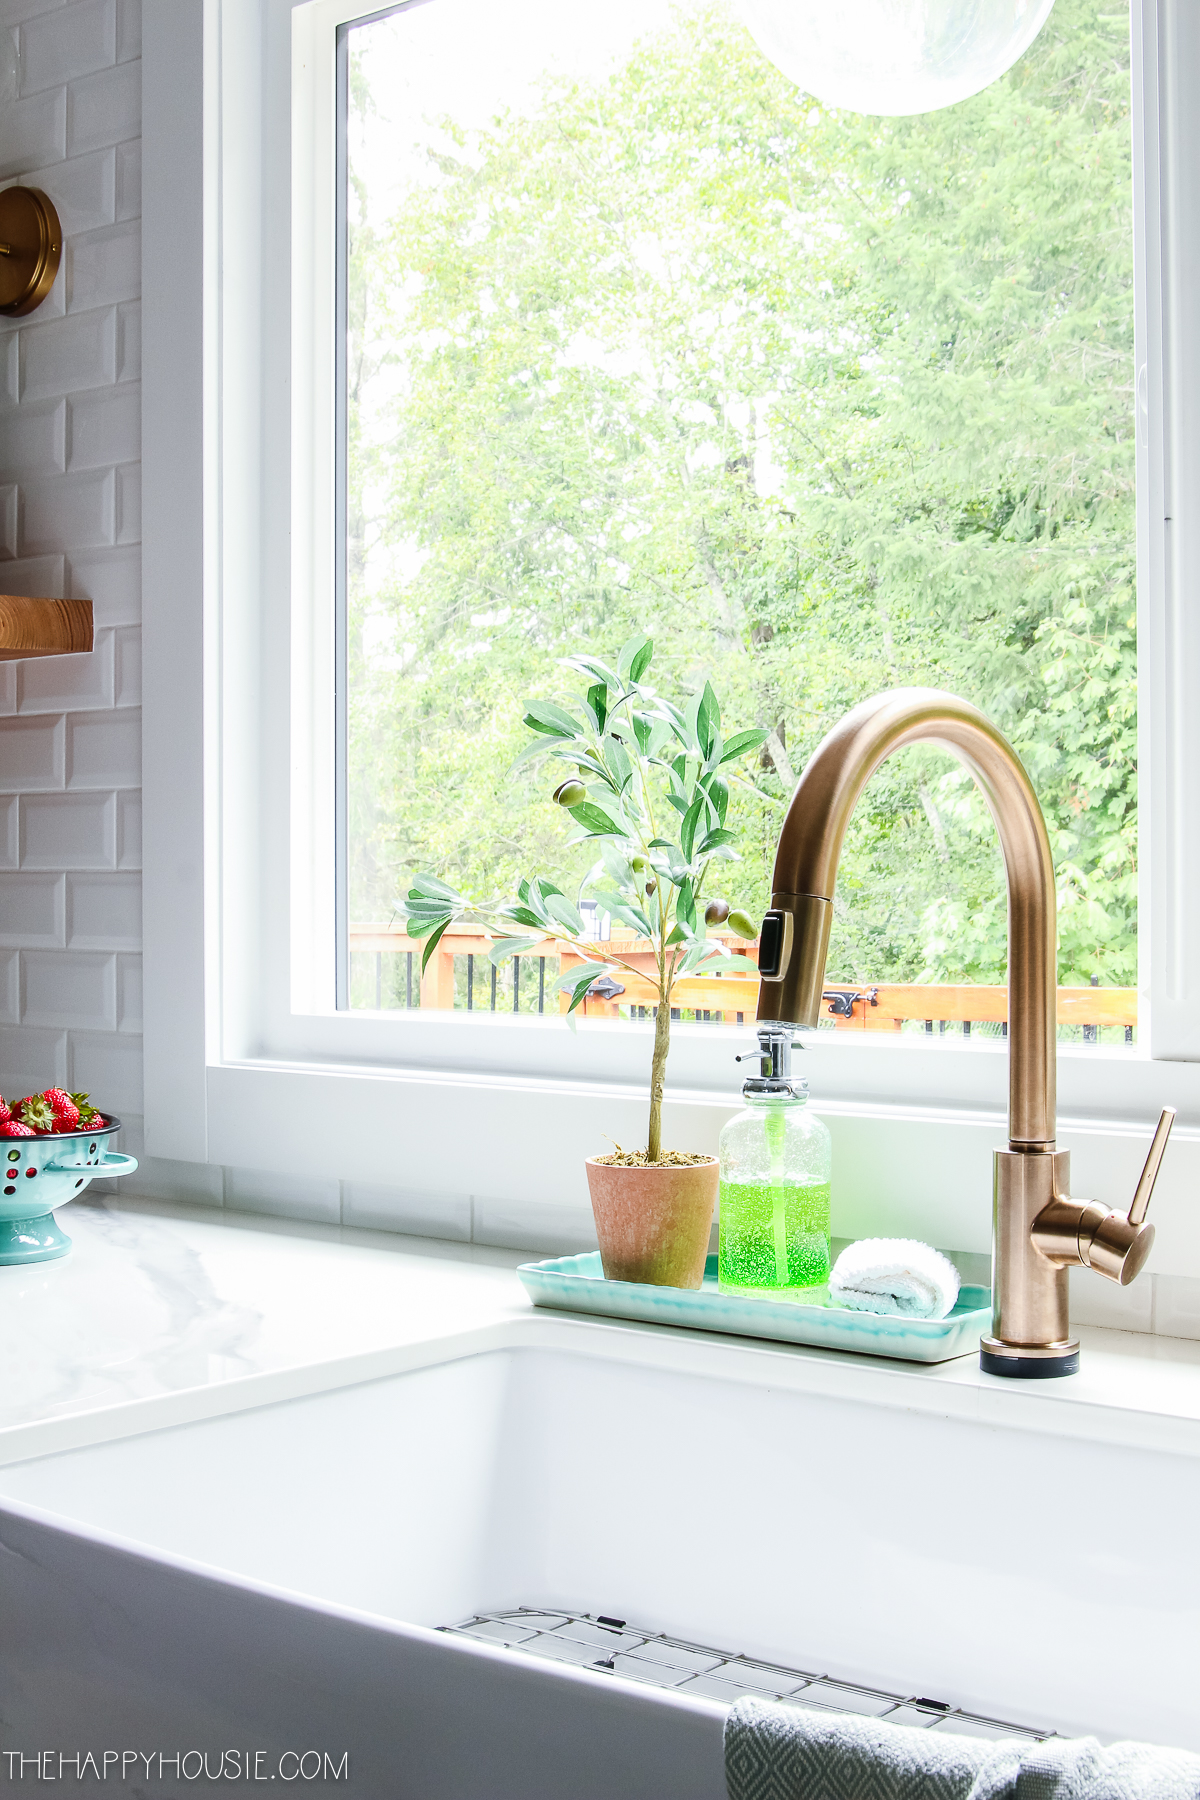
Delta Trinsic Champagne Gold Pulldown Touch Faucet
Pendant Light over Sink
30″ One Bowl Farmhouse Sink
Hardware – Pulls
Hardware – Knobs
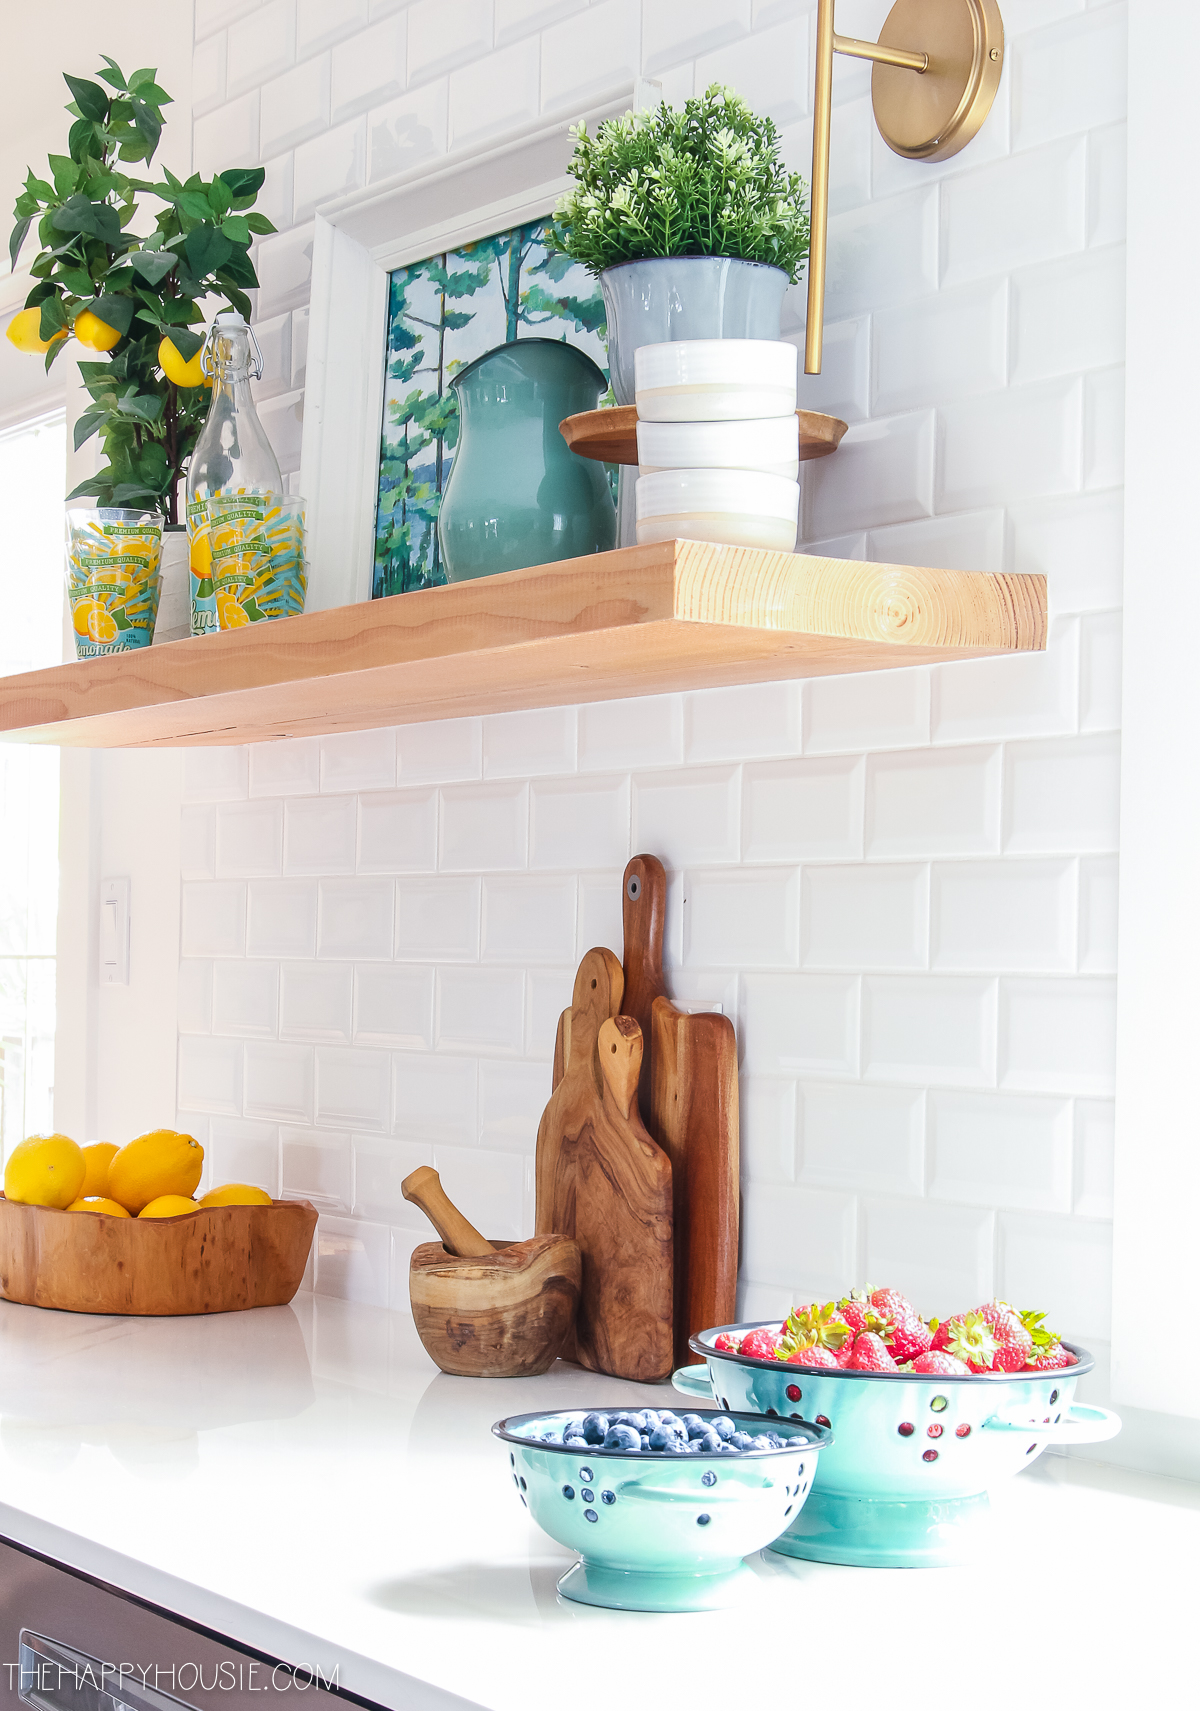
I love these shelves! Our talented friend built them for us out of a solid piece of fir, and we just clear coated them with a sealer to protect them while keeping the natural warmth coming through.
We moved our dishwasher location over a foot so that we had room to flank the sink with 12″ storage cabinets on either side. I like how this give a feeling of symmetry around the sink and also creates a bit more room to use the dishwasher. It is a Frigidaire Gallery Dishwasher, like the rest of our appliances, and we love how quiet it is!
Frigidaire Gallery 24″ Dishwasher
I’ll share some more details about our dining room area in another post – I’ve had SO many emails about the art and table and plan to share a collection of similar sources for you all.
Park Harbour Dining Room Pendant Light
We’re pretty thrilled with how it came out! I’ll definitely share some more details about each of the various aspects of this space in dedicated posts coming up over the next month.
Here is what I’ve shared so far…
Kitchen Reveal: Bar & Banquette
Kitchen Inspiration Board & Sources

Kitchen Before & Construction
Kitchen Renovation Sources:
Cabinetry: Ikea Grimslov Grey Sektion Series
Countertops: Cosentino Dekton Stonika XGloss Collection in Olimpo
Tile: Off-White Matte Porcelain Tile in 12×24 size (purchased from a local tile store)
Dishwasher: Frigidaire Gallery 24” Built-In Dishwasher
Refrigerator: Frigidaire Gallery 21.8 Cu. Ft. Counter-Depth 4-Door French Door Refrigerator
Double Wall Ovens: Frigidaire Gallery 30” Double Electric Wall Oven
Hood/Vent Fan: Frigidaire Gallery 42” Island Hood
Cooktop: Frigidaire Gallery 36” Gas Cooktop
Microwave: Frigidaire Gallery 2.2 Cu. Ft. Built-In Microwave
Bar Fridge: Frigidaire Gallery 5.3 Cu. Ft. Built-In Beverage Center
Bar Sink Faucet: Delta Trinsic Single Handle Bar Faucet with Swivel Spout
Main Sink Faucet: Delta Trinsic Pull-Down Kitchen Faucet with On/Off Touch Activation and Magnetic Docking Spray Head
Apron Front Farmhouse Sink: Single Basin Farmhouse Sink with Smooth Apron Front
Wall Tile: 3×6 Beveled Subway Rectangular Wall Tile
Wall Scones: Bellevue Single Light 18″ Tall Wall Sconce in Natural Brass
Island/Sink Pendants: Bellevue 8″ Single Pendant in Natural Brass
Eating Nook Pendant: Bellevue Single Light 11″ Wide Pendant in Natural Brass
Cabinet Pulls: Amerock Blackrock 6 1/4 ” Cabinet Pull in Golden Champagne
Cabinet Knobs: Amerock Blackrock Square Cabinet Knob in Golden Champagne
Bar Stools: Alexa 26″ Swivel Bar Stools
Tulip Table: Julien Artificial Marble Dining Table
Wallpaper: Gaudet Brushstrokes in Seafoam
Long Kitchen Runner in front of main sink: Annabel Navy Light Blue Area Rug 2’2″ x 10′
Long Runner in Bar Area: Mistanta Charleena Light Blue Runner Rug
Want to remember this? Just PIN it!


Lots of talent and lots of work. Beautiful job.
This kitchen is beautiful! We are in the process of remodeling our kitchen and are seriously considering IKEA after reading your post. Did you get your island through Ikea or was that purchased elsewhere? Thanks!
Hi Lisa,
We built it with Ikea cabinetry and built a 6″ pony wall along the back for extra support for the weight of the stone countertop. We also placed the island cabinets on a 2×4 base instead of the legs that Ikea includes for their cabinets. Then we planked the back and sides of the island and painted it out in white. I plan to share a post on the process in the New Year, as it is a question I get quite often. Hope that helps!
Krista
Hi Krista,
This is like my dream kitchen! WOWOWOWOW!!! I will be using it for so much inspo on my upcoming kitchen reno. Do you mind sharing more of the dimensions? Specifically, how wide/long is your island and what is the overhang of the countertop where people sit? We’re looking to build a similar island with a range hood over it, and I love how you’ve also incorporated the pendant lights on either side. I’m curious if I’ll have enough space to do the same.
Thank you in advance!
Hello Paula, Thanks for your kind comments! The island was just under 4′ deep by 8′ long. The overhang was about 15″ – we built a 6″ stud wall behind the kitchen cabinetry to support the weight of countertop and because I wanted the island to be deep enough that the cooktop didn’t feel too close to where you were seated on the barstools. Hope that helps!
Krista
Love it! Every detail. Would you share your thoughts on not having countertop right next to frig?
Debating placement in my own kitchen remodel, your input would be appreciated!
Very beautiful, cozy and bright kitchen. I do not like dark kitchens. The kitchen should be warm.
Absolutely stunning. I searched your post and “shop our house” section but cannot find where you purchased the flower painting that is above the bench. Please help me find it!!!
Hi Maya – I purchased it from HomeSense, so it’s a “one off” but I did write a post with my dining room sources where I found similar items: Modern Boho Farmhouse Dining Room Before & After Makeover Reveal & Source Guide
Beautiful transformation Krista and really Love the cabinet choice and color!
Love this renovation!!! Can you tell me where you purchased the abstract artwork on the wall above the bench in the bar/office area? I love the colors!
Now THAT is an amazing transformation, Krista! I bet you are SO blessed and look SO forward to going into your kitchen each morning! I’m jus shakin’ my head over here on how gorgeous it is! Congrats! And congrats on your feature at All About Home. We would love to have you link-up at Tuesday Turn About today at 5pm CST… Hope to see you there! (Pinned!)
Aw thank you so much for your sweet words and for hosting!
Wowza what a gorgeous transformation! Thank you so much for sharing with us at All About Home. I am delighted to feature you at this week’s party. Enjoy that beautiful kitchen!
https://followtheyellowbrickhome.com/all-about-home-link-party-12/
Thank you so much, Amber!
Krista what an amazing transformation! I know you must smile every time you go in there.
Wow, what a gorgeous renovation!! You did a fantastic job. I absolutely love your new floor plan.
Holy guacamole! That is a stunner and I can see why you’re thrilled. It’s amazing – so bright and airy! Perfectly styled too. Now I need to go pick my jaw up from the floor.
What an amazing transformation! It’s absolutely stunning, I love everything about it. You must be in heaven.
How much?
Wow! Wow! Wow! That is an amazing kitchen. I love how light and airy it is.
Wow Krista, an amazing transformation. Love the new look with the walls gone. Your kitchen is bright and sunny with everything updated. I know you are enjoying this new look. Thanks for sharing this lovely transformation at “Love Your Creativity.” I shall be featuring your new kitchen next Sunday. Enjoy this week.
Thank you! I love the openness with the wall gone, and how it allowed us to totally change the layout. We love the new layout and design. Thank you so much for the feature!
Stunning kitchen makeover!!!! It does not look like the same house!
Bright and beautiful!
Happy fall,
Kippi
Hi Kippi! I love looking back at the before pics because I had forgotten exactly where we started in all the months of renos:)
I love it. You have great taste and style.
Aw thank you Elizabeth! It was really fun to choose everything for this project:)
Beautiful! want to see the bar area too! Lovely job!
Thank you! I shared all the details and before/after of the eating nook and bar area in this post: https://thehappyhousie.porch.com/kitchen-reveal-part-one/
I would love to know where you got your chairs for the dining room table. Also want to say that your kitchen is awesome, my favorite is the sink and the awesome window over the sink. I am sure you and your family will make lots and lots of great memories in this new addition to your home.
Thank you! We do love it:) I have just posted a source guide (and before/after reveal) for the dining room and linked similar sources for you! See it here: https://thehappyhousie.porch.com/modern-boho-farmhouse-dining-room-before-after-makeover-reveal-source-guide/
How do you feel about the distance of your fridge to your sink and/or island?
I love your layout , colors , everything looks so amazing !
Hi Michelle – we are happy with it. There is 44″ between the island and the wall oven/pantry bank of cabinets. There is about 40″ between the sink and island. It was the best we could do in the space but we find it functional. I think 42-48″ is the ideal spread if you have the space.
Even with the peak earlier in the week, I cannot get over the transformation! Awesome job–worth every penny!
Thank you, Linda! It wasn’t a cheap project but we love how it turned out!
Would you be willing to share your budget? We are in the planning stages of a very similar plan, and are getting crazy quotes from contractors! Would love to know how your decisions broke down.
Hi Rebecca,
Okay…I don’t mind sharing. I just haven’t even added it all up yet myself (eek!). For materials, the Ikea cabinets were 9-10k, appliances were about 7k, countertops around 12k, hardware/lighting/faucets 2k, floor and wall tile 1k – so about $32,000. Then labour for construction/electrical/drywall/plumbing probably came in around 10-12 more. So it was definitely not cheap… but we do feel like we have a brand new, high-end feeling kitchen now. Keep in mind that we are in Canada so my pricing is probably higher for both materials and labour then you would find if you are in the US.
Amazing transformation!! I am so happy for you and your family! WOW!!
Thank you Heather! So glad to be finished with all the construction and not living in chaos and mess -plus we love the new kitchen!
What an amazing transformation. Wow… wow… wow! Every inch is fabulous.
Aw, thank you Diane! It was certainly a big job to “get here” but we love our new kitchen!