
My “Free” Mint Chalky Painted Chair {it’s in print!}
My mint chalky painted chair made it into print!
So I have some exciting news to share with you today.
I’m in print!
Well, not me exactly, but one of my painting projects.
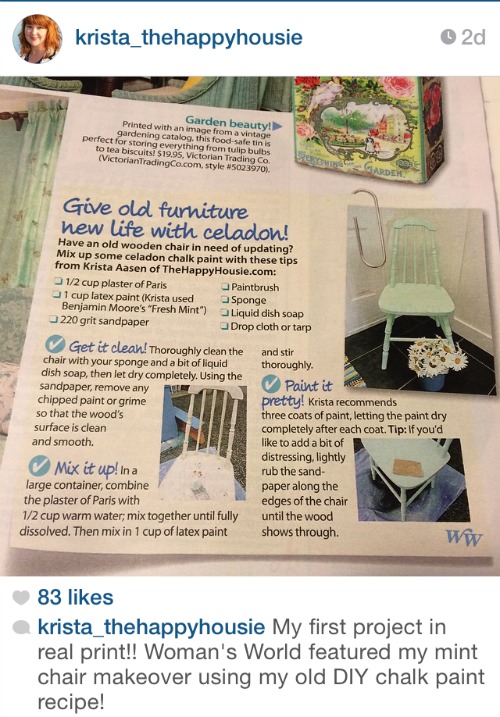
Featured in the latest issue of Woman’s World magazine. Page 37.
Dr. Oz made the front cover.
Maybe you saw me share this on Instagram the other day?
Or perhaps my Facebook post made it onto your feed?
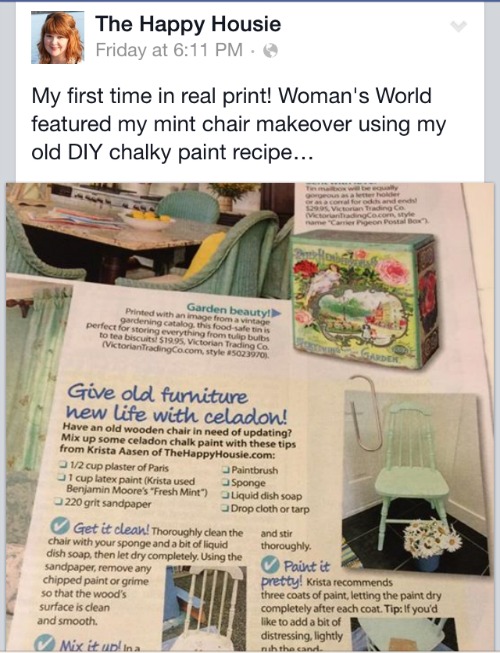
Anyhow, seeing something you made in real flesh-and-magazine-paper is pretty exciting.
But then I got to thinking… that I have never actually shared this project on my blog The Happy Housie.
I shared it on my friend Christine’s blog, and then on my friend Abby’s blog… but never right here, at home.
So I figured it was about time to change that…
So here it is: my homemade chalky paint free mint chair makeover.

It is definitely an oldy.
It is from a couple of years ago before I started doing most of my painting with Country Chic Chalk-based paint – “back in the day” I used to make my own chalky paint to refinish my thrifted furniture finds.
And this one, literally, was a find!
It was FREE! I was literally driving down the road on my way to work and I saw it out on the curb with this sign:
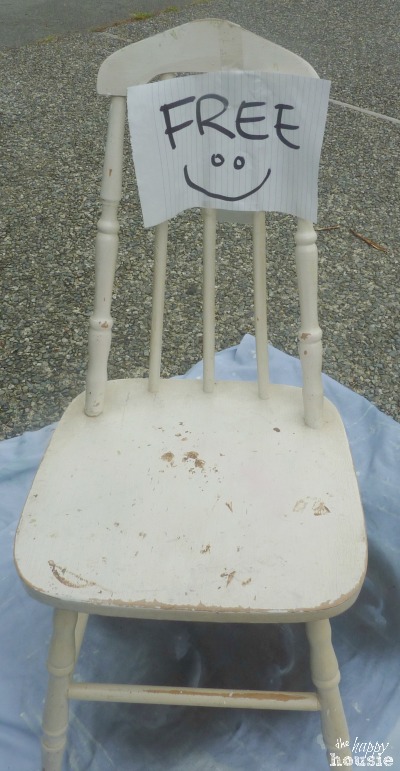
That’s a great way to start your day, am I right?
Of course I immediately hustled it into the trunk of my car and sped off down the road to ensure my little detour wouldn’t make me late for work…
When I got it home, I took a closer look and was still thrilled. It had such pretty lines… perfect for distressing.
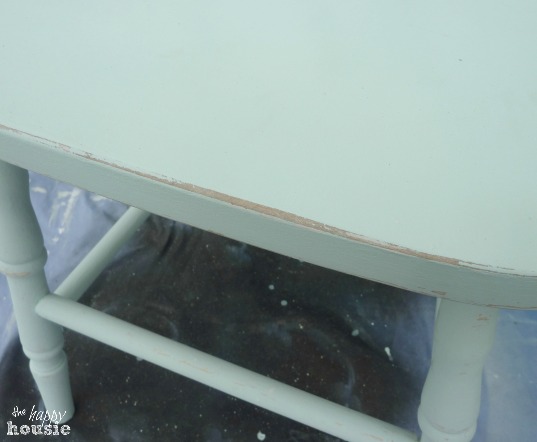
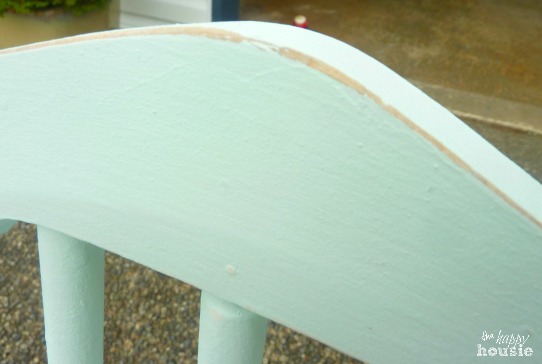
First I gave it a good cleaning and sanded it down to get off some of the chippy paint and grime. Even though it already had that ‘distressed’ look it was a little too rough and distressed for me. So I mixed up some DIY homemade chalky paint. Yes, I really did use my Magic Bullet. I wanted my paint really smooth-with no undissolved plaster of paris bits floating around. You don’t necessarily need to use a blender, but my plaster was a little old so it wasn’t dissolving as smoothly as I would have liked:)
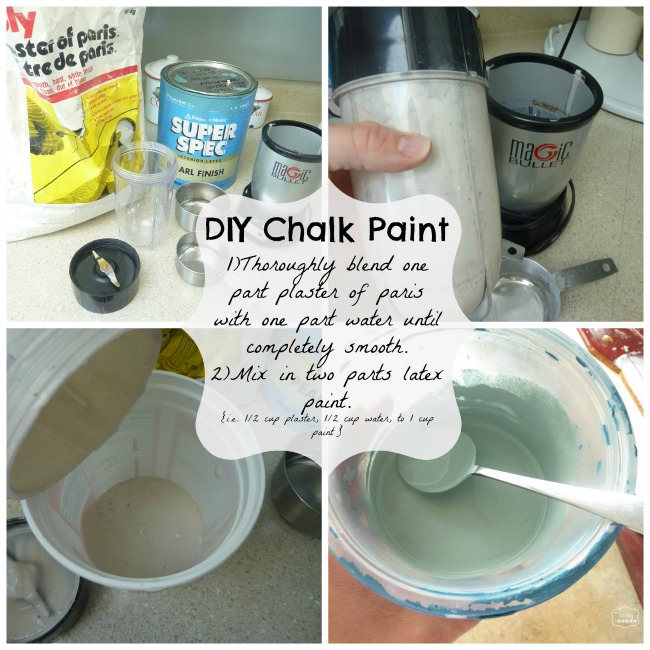
Chalky paint is perfect for DIY projects where you want to distress your piece because it sands off really nicely and it doesn’t require priming before – so you can reveal some of the original wood or color rather than revealing a coat of white primer.
I gave it three coats of mint green chalky paint (colour: Fresh Mint by Benjamin Moore) letting it dry thoroughly between each coat. Once it was dry it was… ready to be sanded smooth and distressed (or re-distressed)…
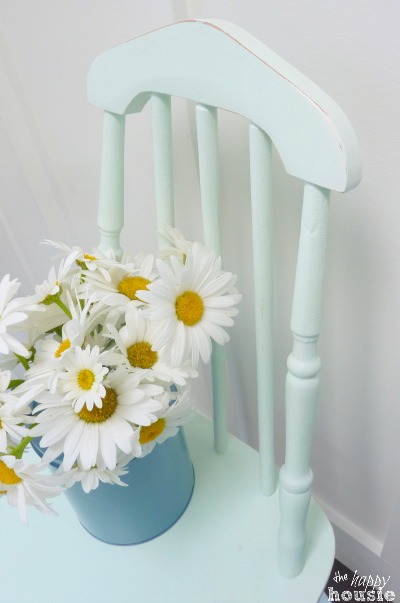
I am really thrilled with the results… I love the freshness of the mint green…
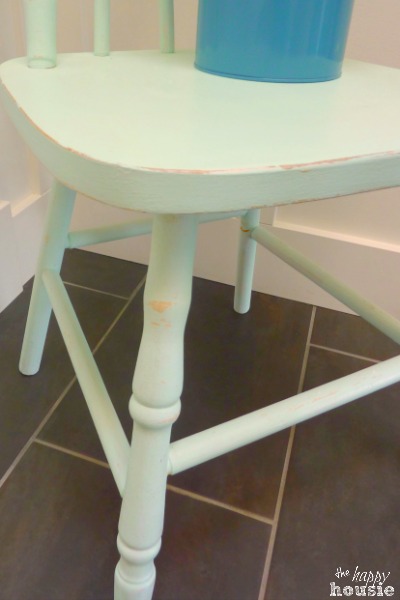
This little beauty still graces our entry hall… perhaps you noticed it during our Christmas Home Tour?
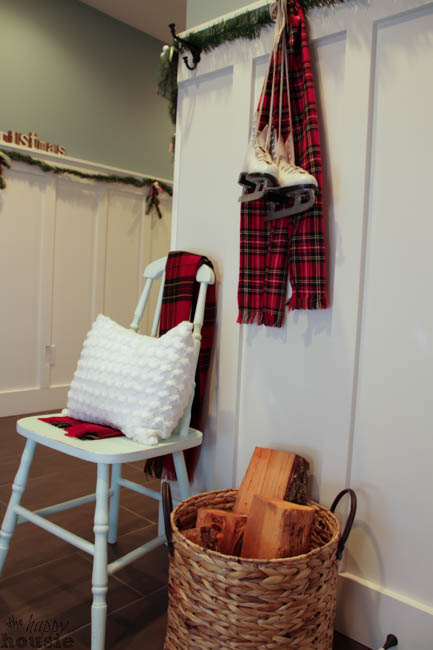
Or maybe last summer, during our summer home tour??
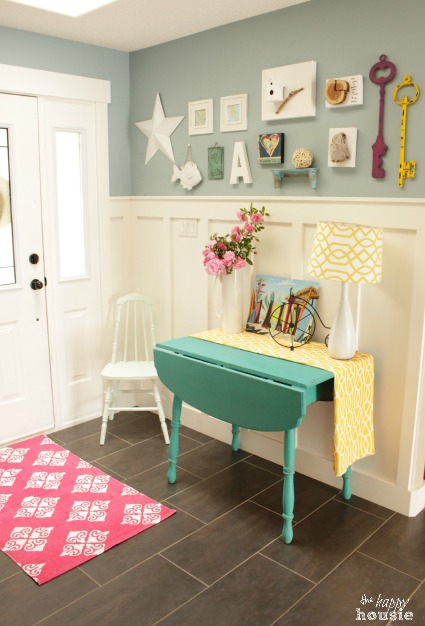 I love how the mint green is so transitional that it can work with a lot of different colors and seasons.
Always important when you like to change things up as regularly as I do.

![]()
![]()
![]()
![]()
![]()
![]()
![]()


What a fantastic freebie! Your touch made it fresh and pretty again. When I started reading this post, I thought I must have missed it lol. Congratulations on your feature! That is SO exciting!!! XO
Thank you Christy! It was just happenstance… the lady found my project when looking for mint inspiration I guess:)
This color makes me smile, love it.
Thanks Diana… I love it too. Something about it reminds me of summer (maybe it is the color of chocolate mint icecream??).