
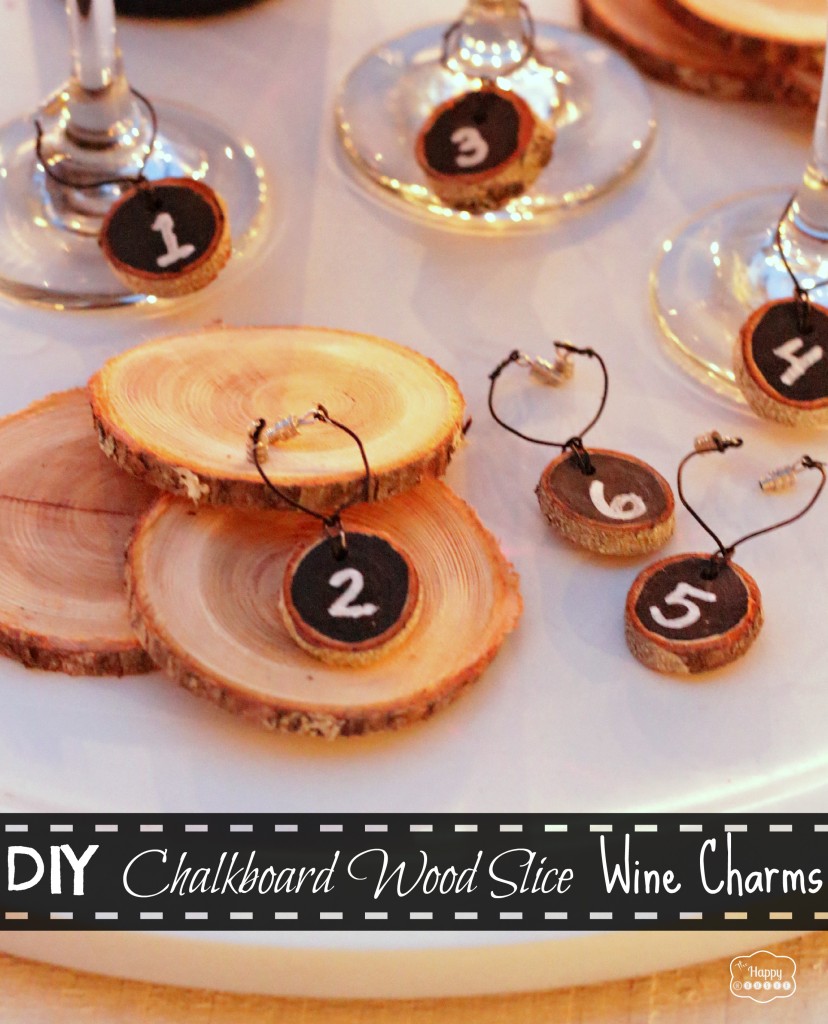
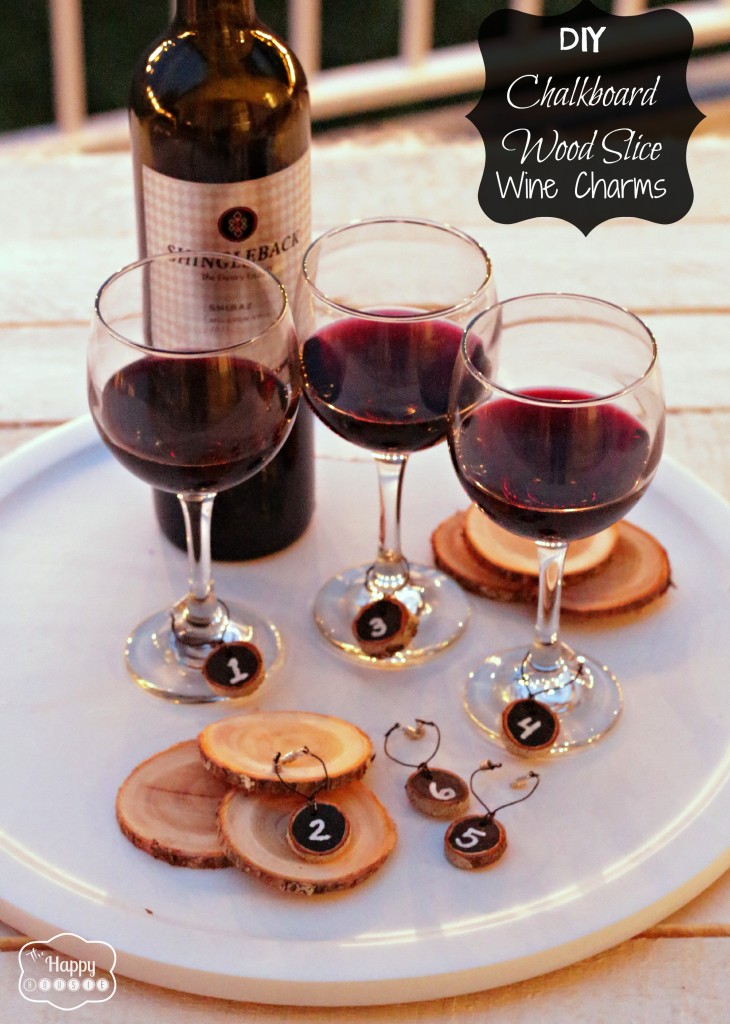
DIY Chalkboard Wood Slice Wine Charms {don’t lose your glass!}
Create your own DIY chalkboard wood slices for wine charms! They make excellent presents to!
Hello! I hope everyone had a wonderful Christmas- it is hard to believe that it is all over and that tomorrow is already New Years Eve!
Today I can’t wait to share this easy and practical idea for whipping up some DIY Chalkboard Wood Slice Wine Charms- just in time for New Years Eve.
It can be pretty tough to keep track of your wine glass at big dinners and events- you put it down for a second to do something and suddenly there are three other wine glasses that look exactly the same as yours in the general vicinity of where you think you placed yours. What to do? Risk drinking someone else’s wine… or use a wine charm??
These are fast and easy to make.
Here is what you need:

Materials:
Wood slices, craft/jewelry wire, jewelry clasps, wire cutters and needle nose pliers, chalkboard paint (see my homemade recipe below), and a chalk paint pen (or a real paint pen if you don’t want to make them permanent).
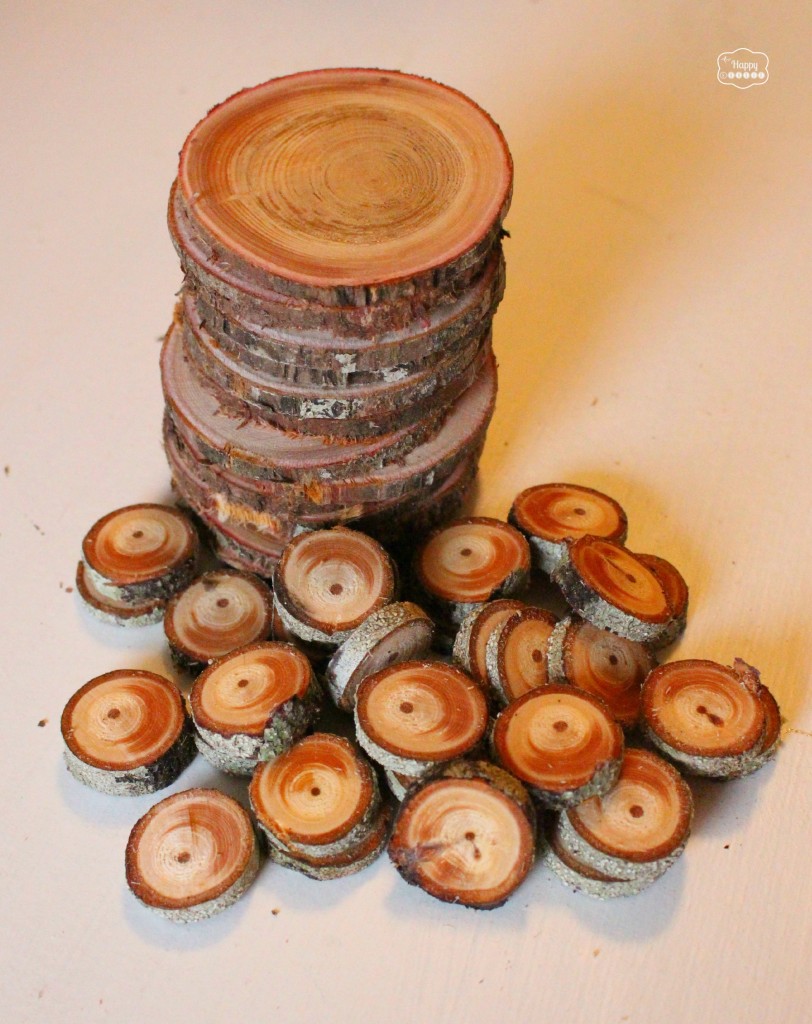
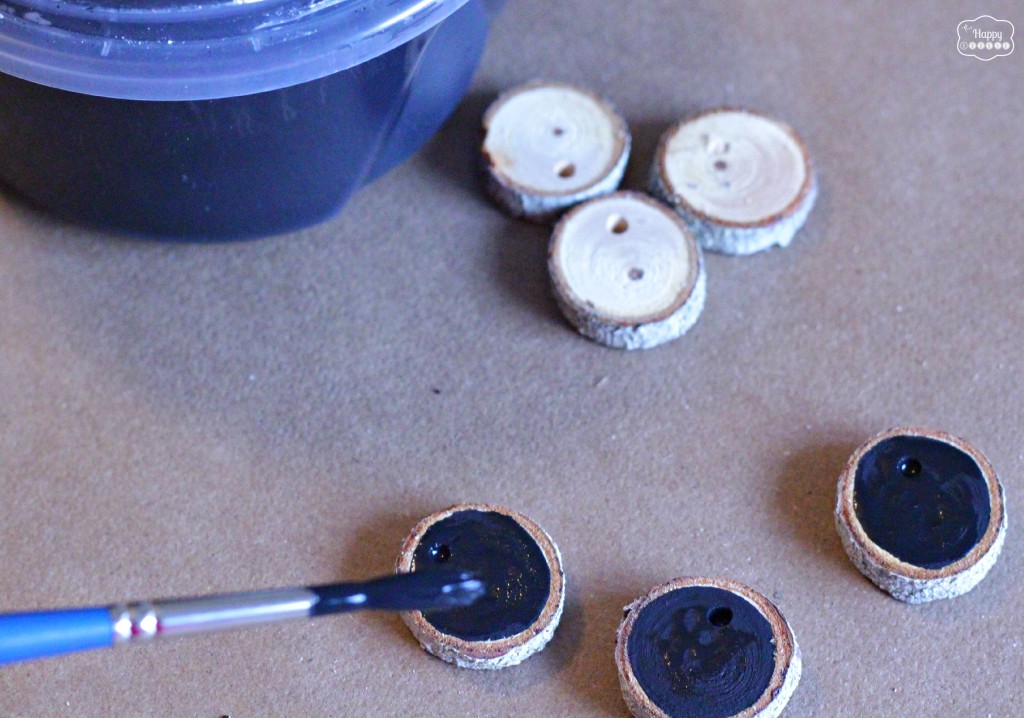
Start by drilling a small hole in your wood slices (we placed our holes 1/4-1/3 of the way down from the ‘top’ of the slice).
I used some wood slices that my husband kindly cut for me out of some branches in our yard- but you can pick up packages of little wood slices at your local craft store as well.
Then use some chalkboard paint….
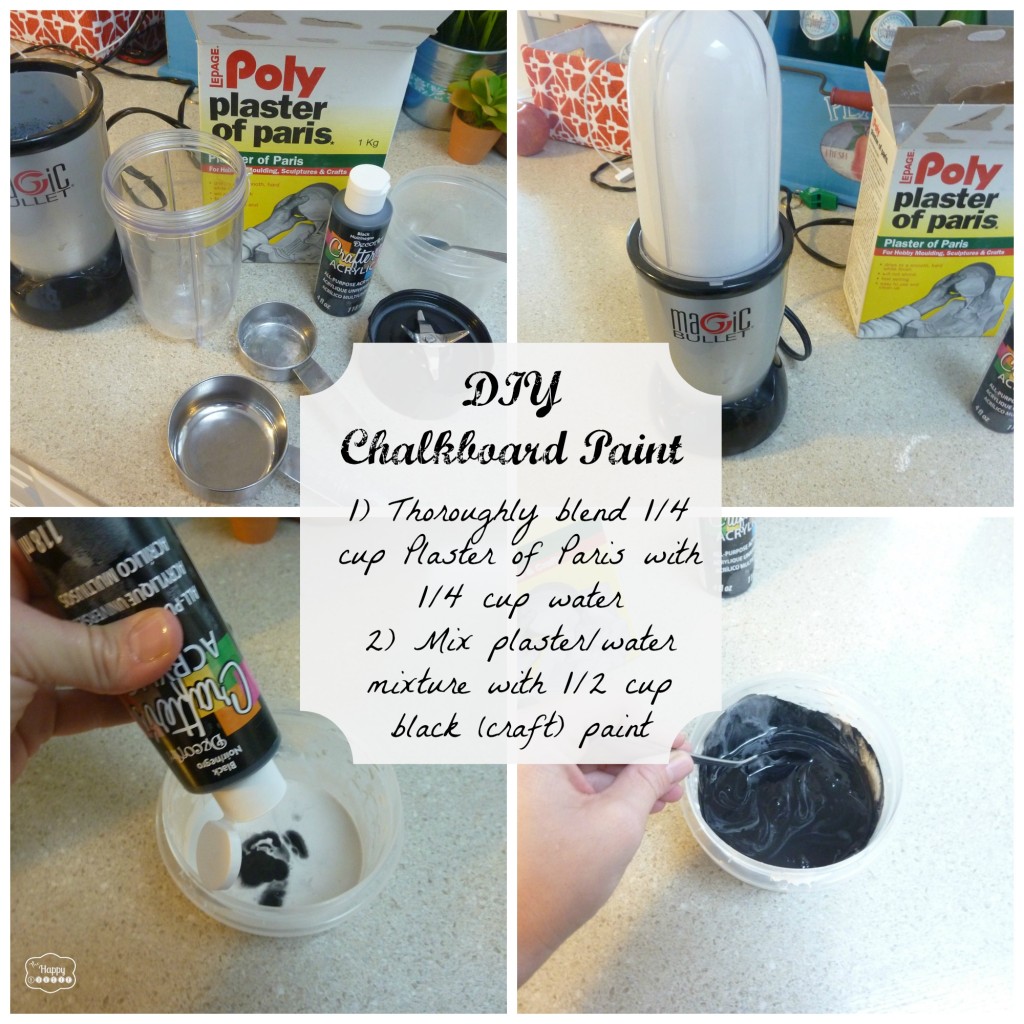
And paint the inner part of the wood round using the chalkboard paint…
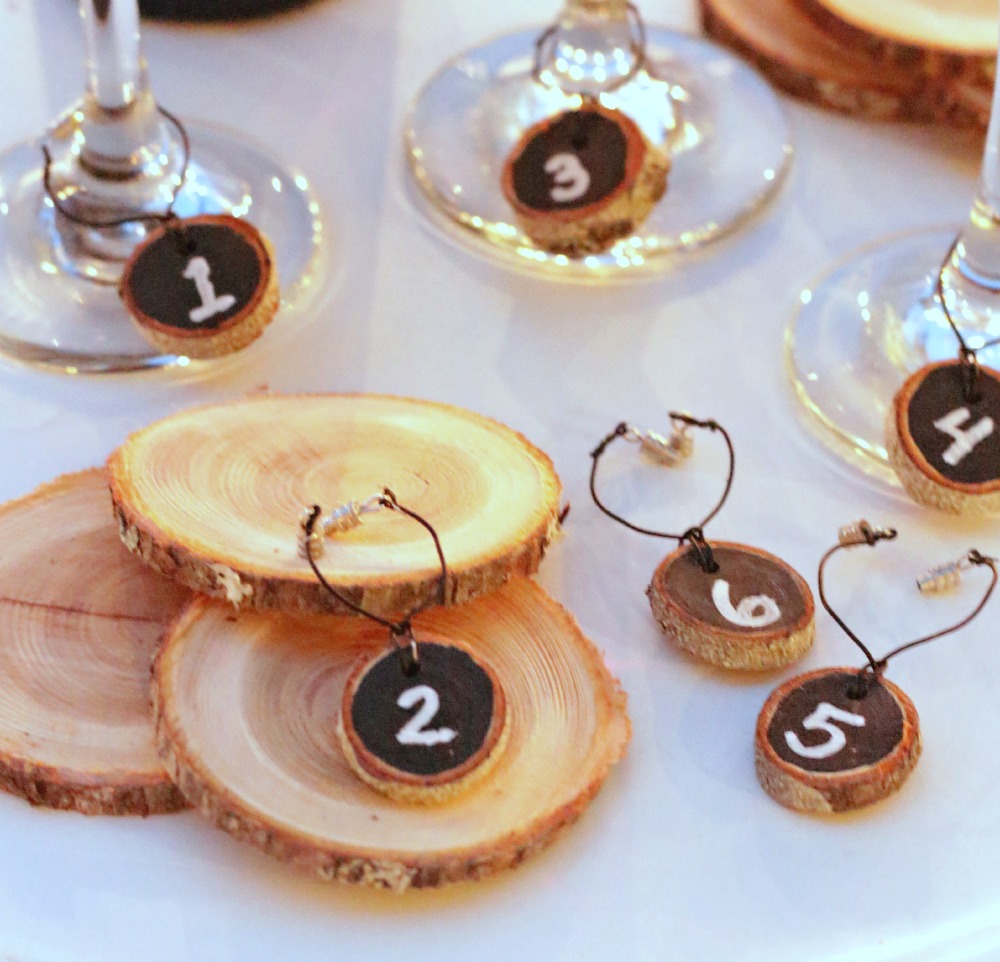
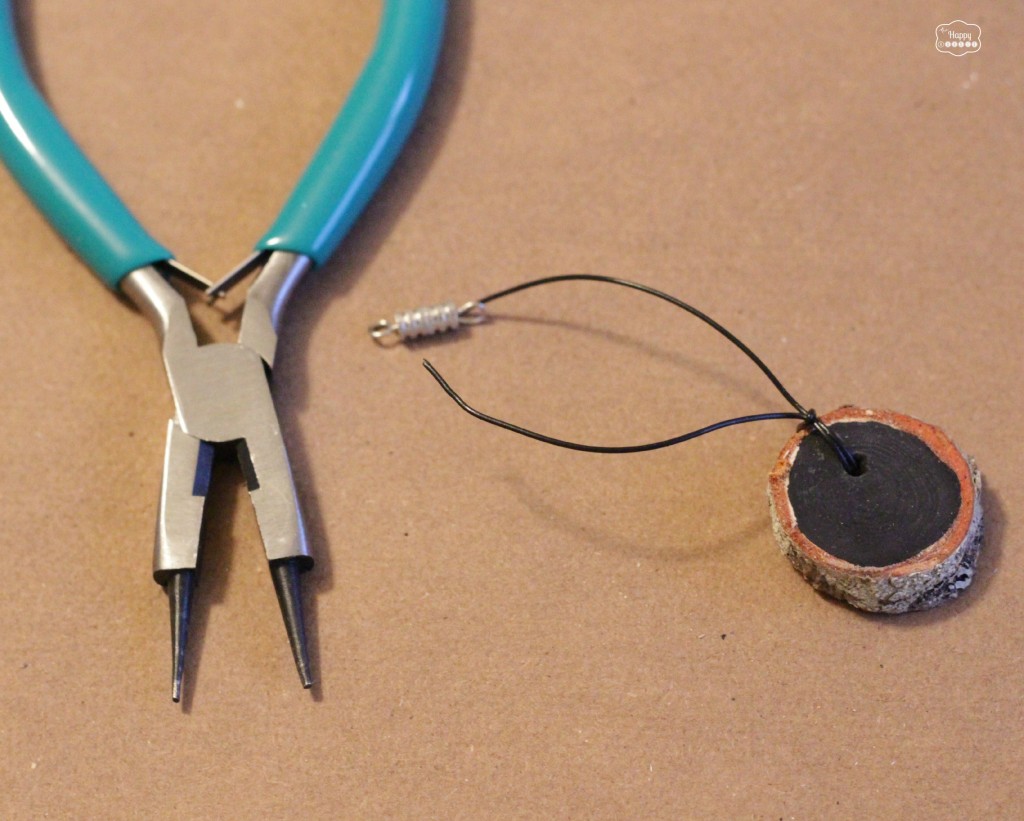
Once dry, string through some jewelry wire and add jewelry clasps…
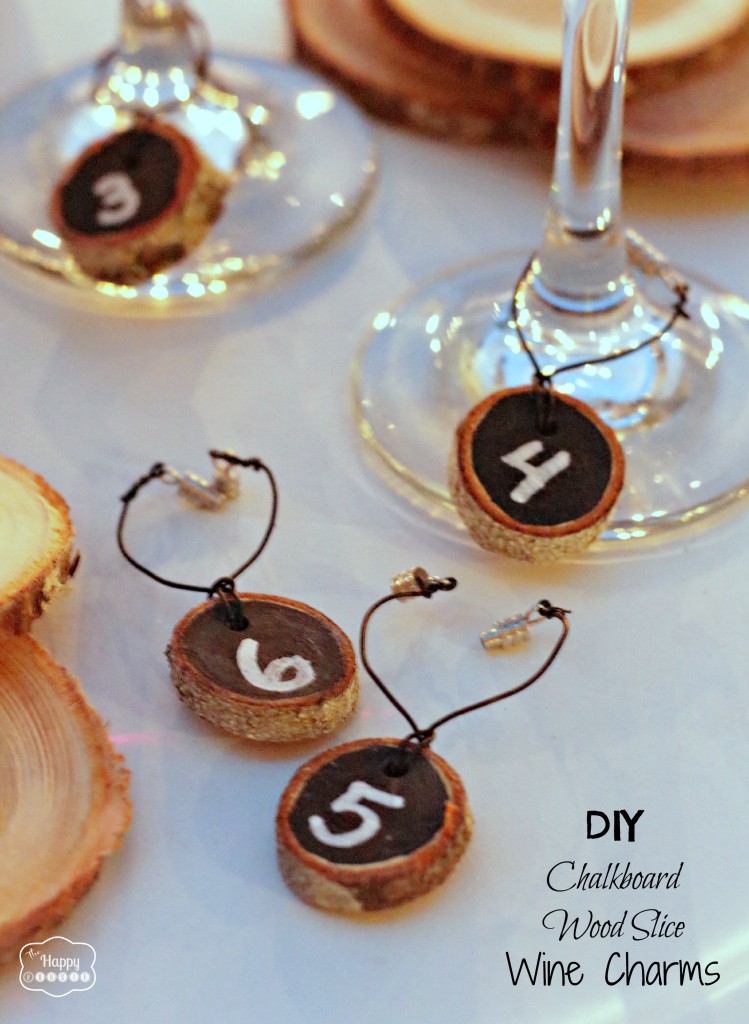
Label them as you choose- I used a chalk paint pen to number mine- but you could also use a white paint pen if you want yours to be more permanent.
The chalk paint pen is washable and gives a finer more durable finish then using regular chalk. I bought mine at Michaels.
Quick, easy, and practical -never lose your wine glass again!
Do you like to go out and really celebrate on New Years Eve? Or have a quiet evening and stay in?
Whatever you decide- I hope you have a fabulous end to 2013! See you again in 2014:)
Oh- and did you get a chance to enter the $400 Cash Giveaway (pay off your holiday bills!!) – if not, hop over here to enter.

Thanks for reading. And remember my housie friends, HOME isn’t built in a day. Enjoy the journey!


This was featured at!

I may link up at some of these fabulous places below, for more info check out housie parties:
Make the Scene Monday , Monday Funday , Give Me the Goods Monday , Inspiration Monday, Craft-o-Maniac Monday, Nifty Thrifty Tuesday, Project Inspire{d} , Inspire Me Tuesday, The Scoop, Wow Me Wednesday Whimsy Wednesday , Fall Into Fall , From Dream to Reality, The Inspiration Exchange, Live Laugh Rowe Live Laugh Linky, Thursdays Are Your Days, The Weekly Creative , The Creative Connection, Inspire Me Please, Fabulously Creative Friday, Party Junk, Pinworthy Projects , Link Party Palooza,, Weekend Bloggy Reading, Strut Your Stuff Saturday, Spotlight Saturday, Get Schooled Saturday, Overflowing With Creativity , , Suburbs Mama , That DIY Party
Quick question- does the chalk paint pen or the paint pen make them permanent? I was confused when reading about the pens- I would think the paint pen would be permanent. Thanks for clarifying. I enjoy reading all your posts!
Hi Karen! Sorry, I probably didn’t explain it very clearly- I would use a paint pen if you want the labels to be permanent. You can use a chalk paint pen if you want to be able to wash it off with water and a cloth- though if you were planning to label and re-label frequently I would probably use a regular piece of chalk because the chalk paint pen takes a little more scrubbing. Good luck with your project – and thanks for your kind comments!!
What a great idea. These are needed for every dinner party. Thanks for your tutorial. Would you be willing to share this at our Making Monday link party? We would love it and think our readers will, too. Thanks. Have a great day. Lori @ A Bright and Beautiful Life. http://www.abrightandbeautifullife.com/making-monday-22/
Thanks so much for the invitation and super kind comments Lori!!
i love these!
looks so pretty
to bring in natural elements
from outside
and thrifty too!
Alison
Nancherrow
Thank you so much Alison! I agree- I love bringing in and using natural elements – it adds so much warmth:)
These are so NIFTY THRIFTY…so with that said…thanks for sharing at my party today.
Blessings,
Linda
Thank you Linda! Almost free certainly is thrifty!! Thank you for hosting your party each week:)
Love these!the best wine charms I’ve ever seen
I would love it if you would share these on my weekly link party – Serenity Saturday at http://www.serenityyou.com/2014/01/serenity-saturday-117.html
Natasha @ Serenity You
Thank you Natasha!! And thanks so much for the invitation!
Love these! The best part is you used a branch from outside. So cute!
Thank you Kelly! I am just thrilled that my husband was ‘game’ to cut it up for me!!
Has anyone told you yet how cute these are??? Love them, Krista. They’d also make great little party favors too.
Happy New Year!
Hi Amy!! I totally agree- I wanted to get to them before Christmas because I thought they would make a great hostess gift idea as well… but you know how busy everyone got before the holidays!! They would be good for anytime of year though anyhow:) Happy New Year to you as well!!
Great Idea! Have a very happy New Years Krista thanks for all the ideas in 2013.
Thank you Diana!! I totally appreciate your comments and support of my blog this year- more than you can know!! I hope you have a great New Years Eve:)
These are FABULOUS Krista! If you haven’t figured it out already, I am totally obsessed with all things chalkboard 🙂 Happy new year!
Thanks Tasha! I have a few similar ideas up my sleeve that I plan to share soon- I am a bit gaga for chalkboards these days too:) Happy New Year!
I LOVE these! I want some. Will your hubby cut me some wood slices, too?
Hi Tara!! Sure- no problem:) Happy New Year!!
I love this idea! I’ve got a bunch of extra little birch slices too:)
Thanks Katie! I have wanted to do wine charms for a long while… glad I finally got around to it! Happy New Year!
These are sooo cute Krista! Very clever 🙂
Thank you Emily!! Happy New Year:)
I would buy these if you sold them! Love it Krista! So glad to have discovered you and your blog! CHEERS to 2013 and 2014 dear!
Ah, thanks Vel! Glad to have discovered you and your blog as well! Happy New Year!!
Super cute idea! Happy New Year! Melissa
Thank you Melissa:) Happy New Years to you as well!!