
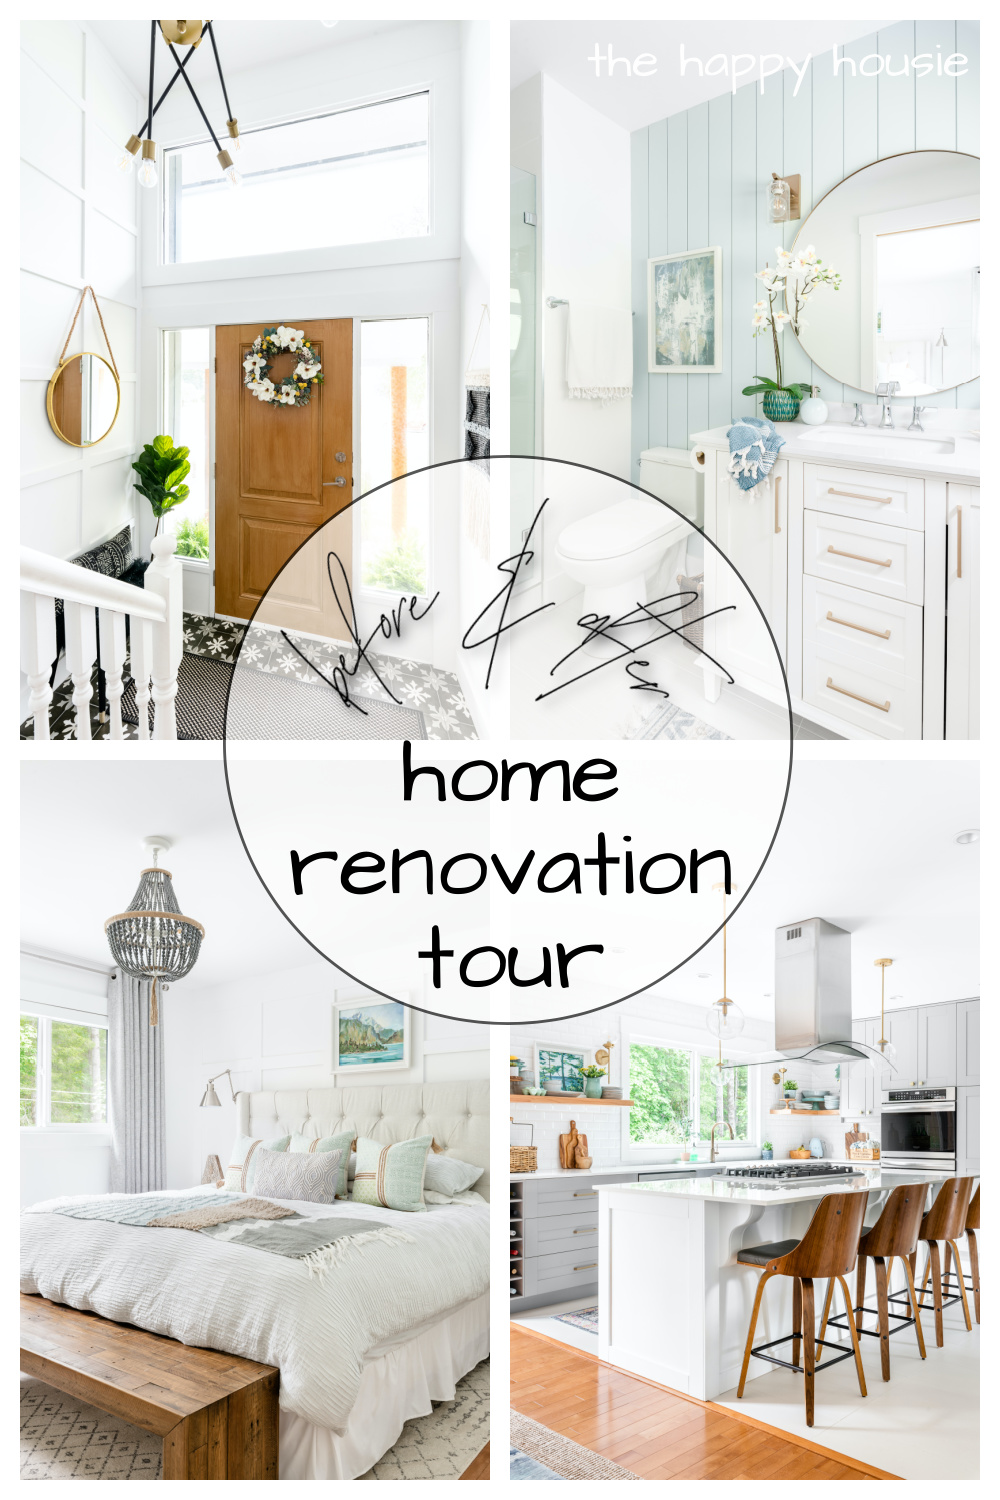
Full Before and After Home Renovation Tour of Our Forest House
Have you ever tackled a large home renovation project? Then you know what a big job it can be! Today I’m sharing the full before and after home renovation tour of our forest house.
It’s a smidge over two years since we moved out of our lake house and into what I called our “forest house” in town. We did major renovations on this home while we lived there and it was definitely one of the largest renovation projects that we’ve ever tackled in our eight different houses. While stressful to live through at first, we turned that home into a beautiful space that we loved and enjoyed living in. If the enticement of building from scratch hadn’t been so strong, we could have easily lived there for several years.
Our renovations and updates touched nearly every room in the forest house. We jumped right in and began repainting the main floor living spaces immediately upon moving in as well as updated the entry way with new tile and box panel moulding. Next, we took out a wall between the kitchen and dining area, opened up the wall between the kitchen and living area, moved walls around to create more functional bathrooms and added a shower to the ensuite. We added new trim, and feature walls of either paneling, shiplap or wallpaper throughout. The flooring in most of the basement was replaced as well as new tile installed in the bathrooms, kitchen, and foyer. We had electricians update some electrical and added pot lights in many rooms, as well as new light fixtures in the other spaces. The drop-tile ceiling in the basement was replaced and both fireplaces freshen up and updated. Outside, we redid the landscaping, painted the exterior and added paint and rock work, redid the entire driveway and front stairs/sidewalk, refreshed the pool deck with paint, restrained the deck, and added a new fence in the back. And this was all within 18 months. I’m tired just writing all this!
Today I’m finally sharing the final before and after of all the renovated spaces in that house, along with links to the individual posts that share more of the details and back story for each of these renovations.
When we moved in our exterior looked like this…
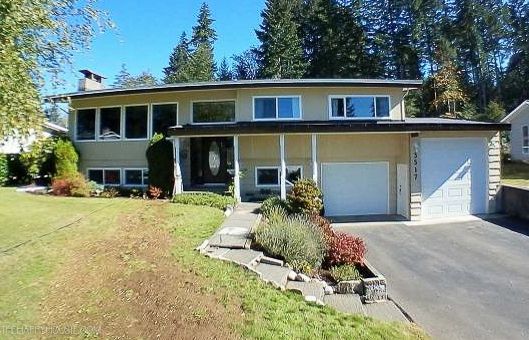
But the day before we took possession, we arrived to (and were completely blindsided by) this…
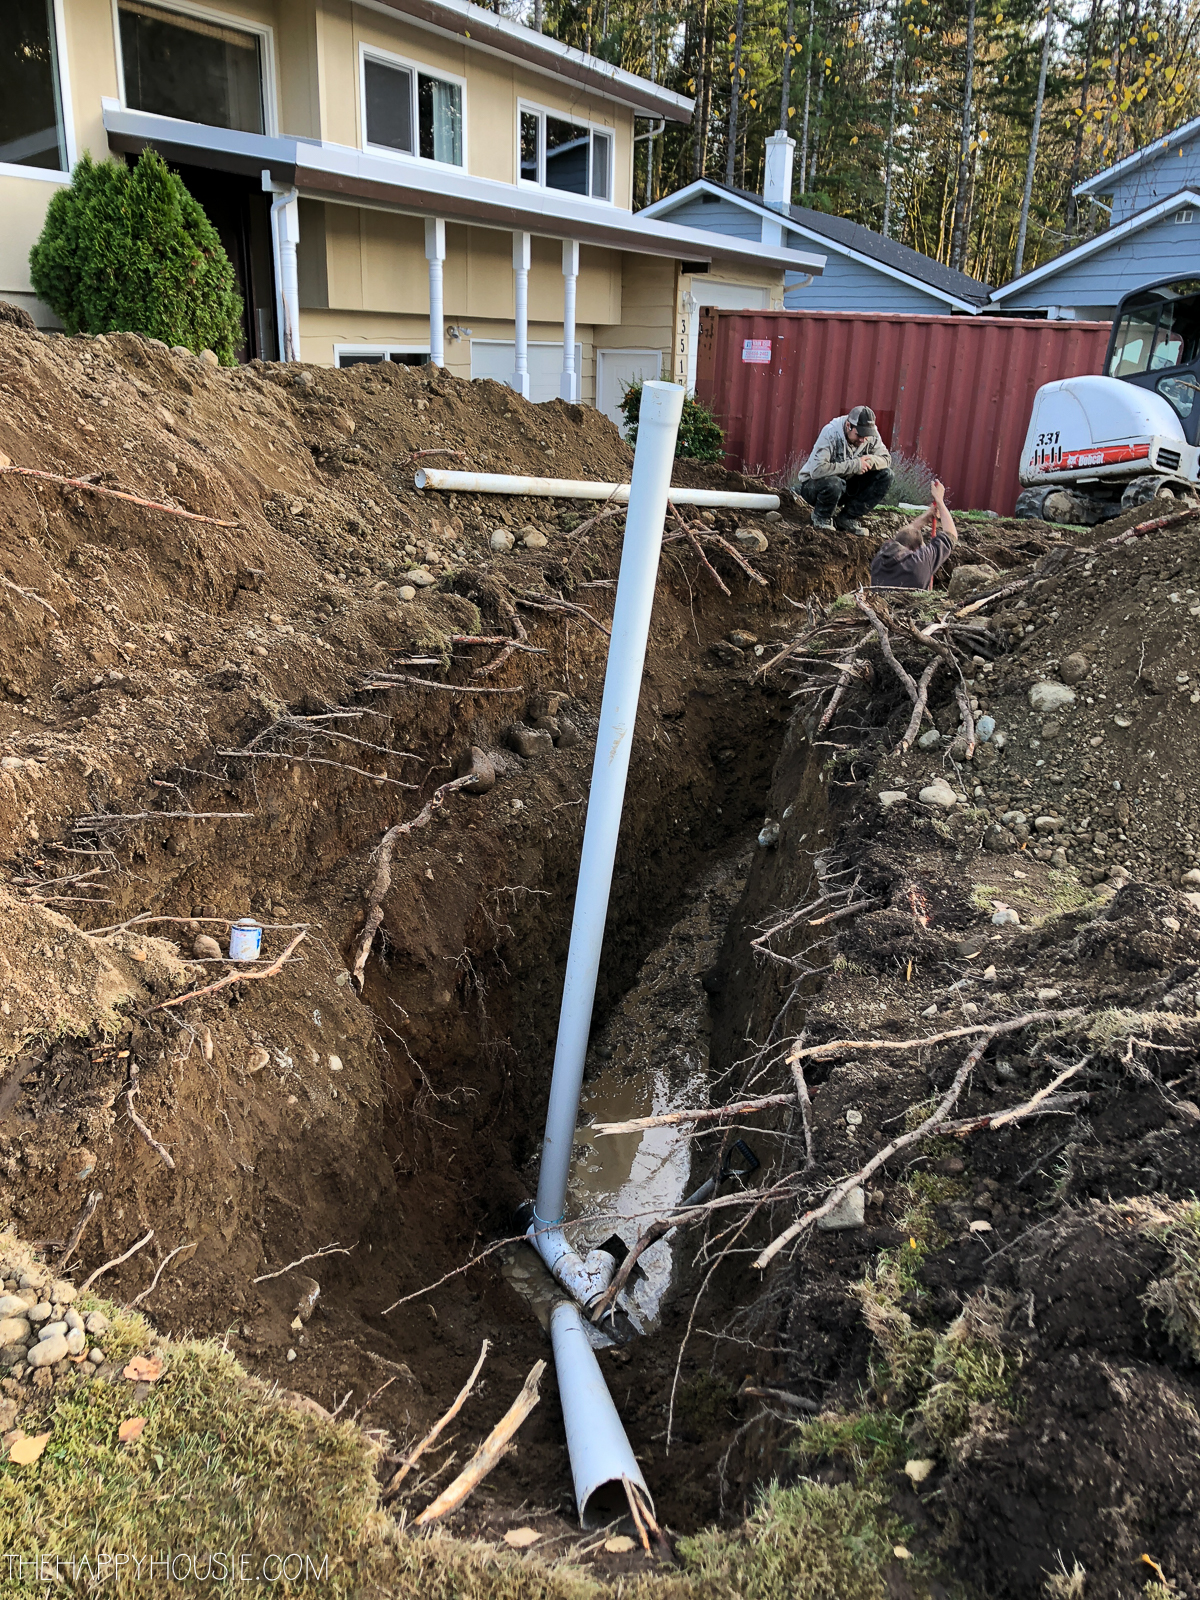
Yes, that is a six foot deep hole in our new front yard. Some drainage issues were being re-repaired by the previous owners, which was wonderful, but it left the yard in a bit of a state. The driveway and sidewalk were both damaged, so we added the exterior of the house to our list of things to tackle come spring…
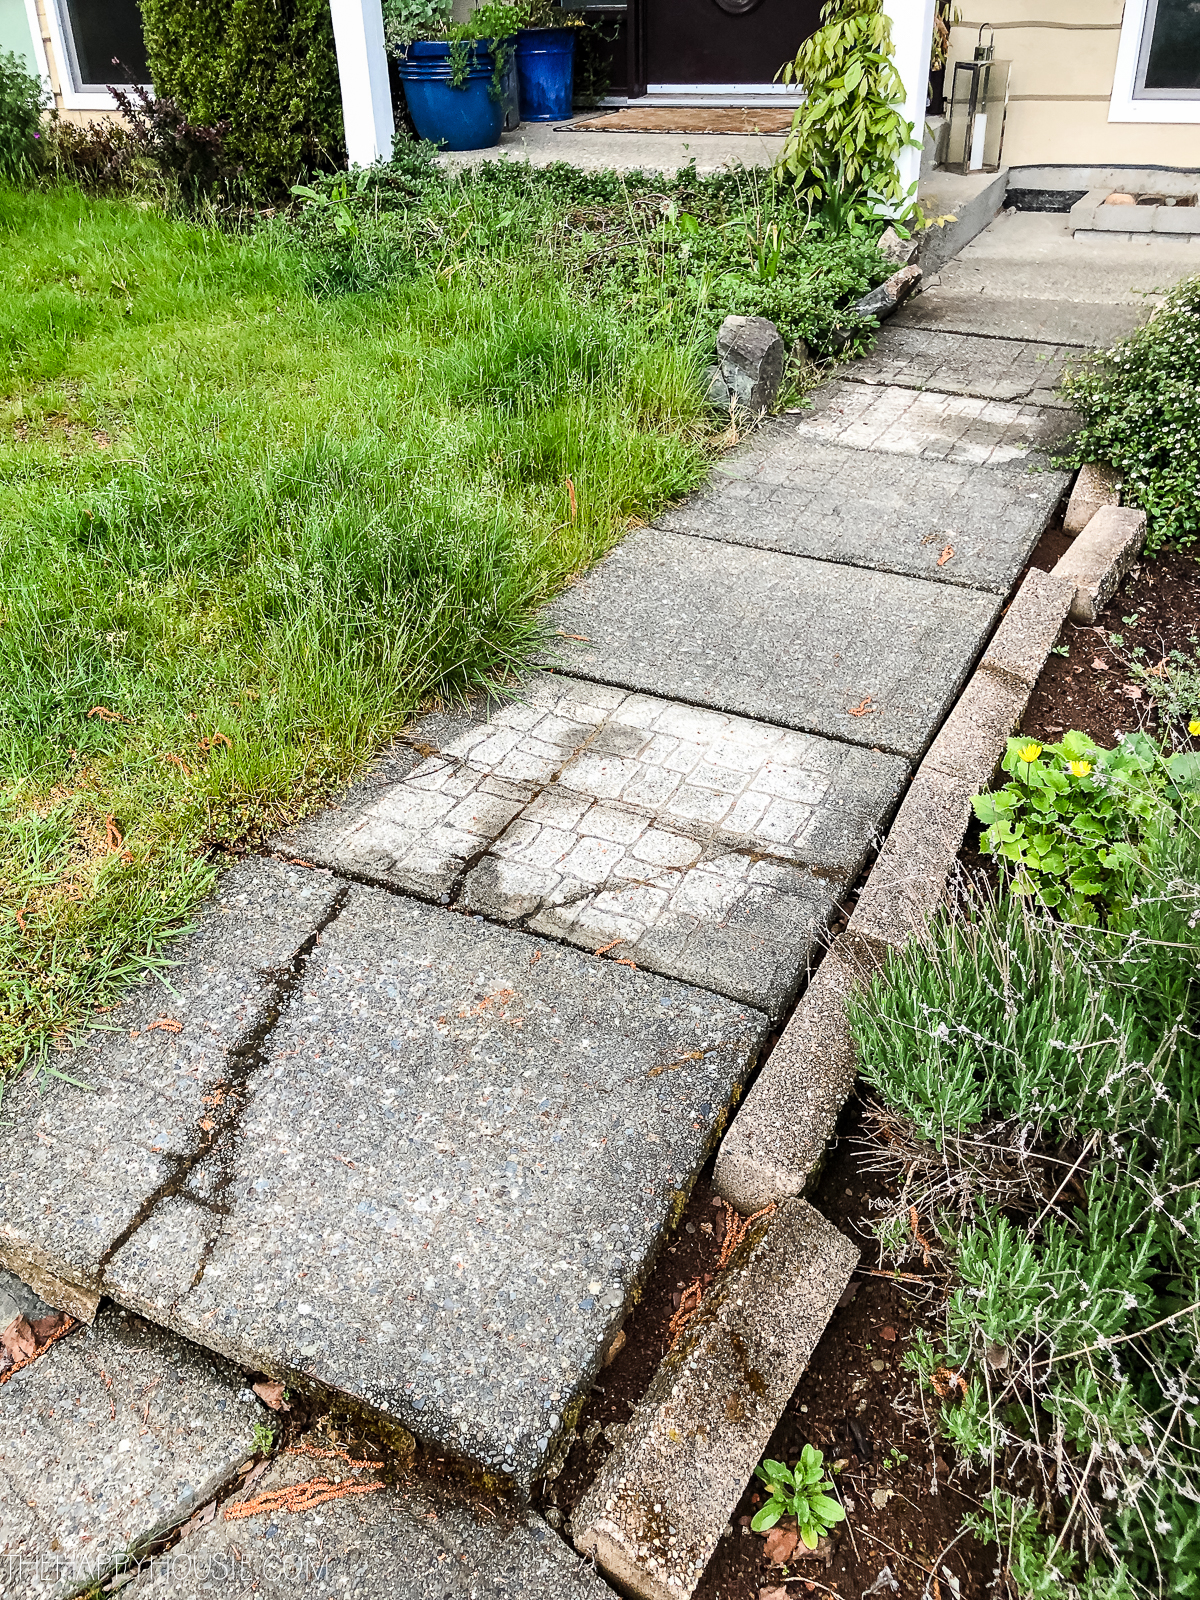
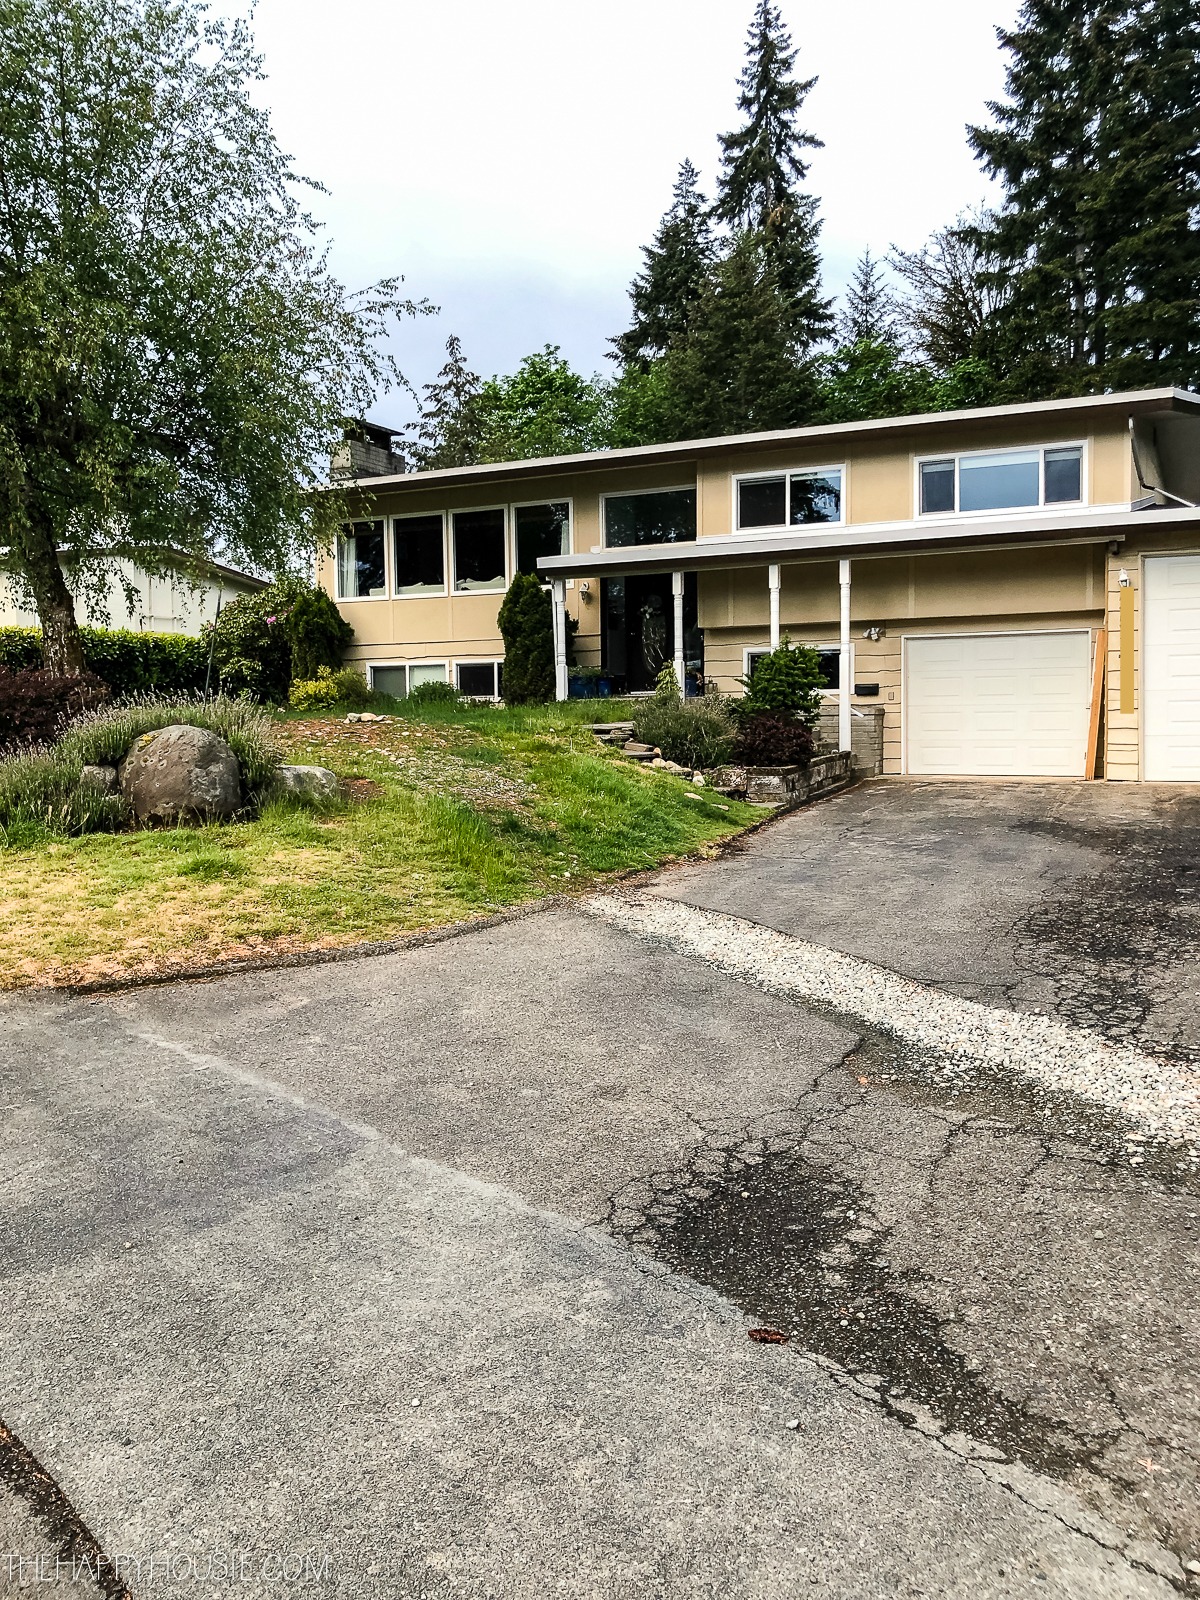
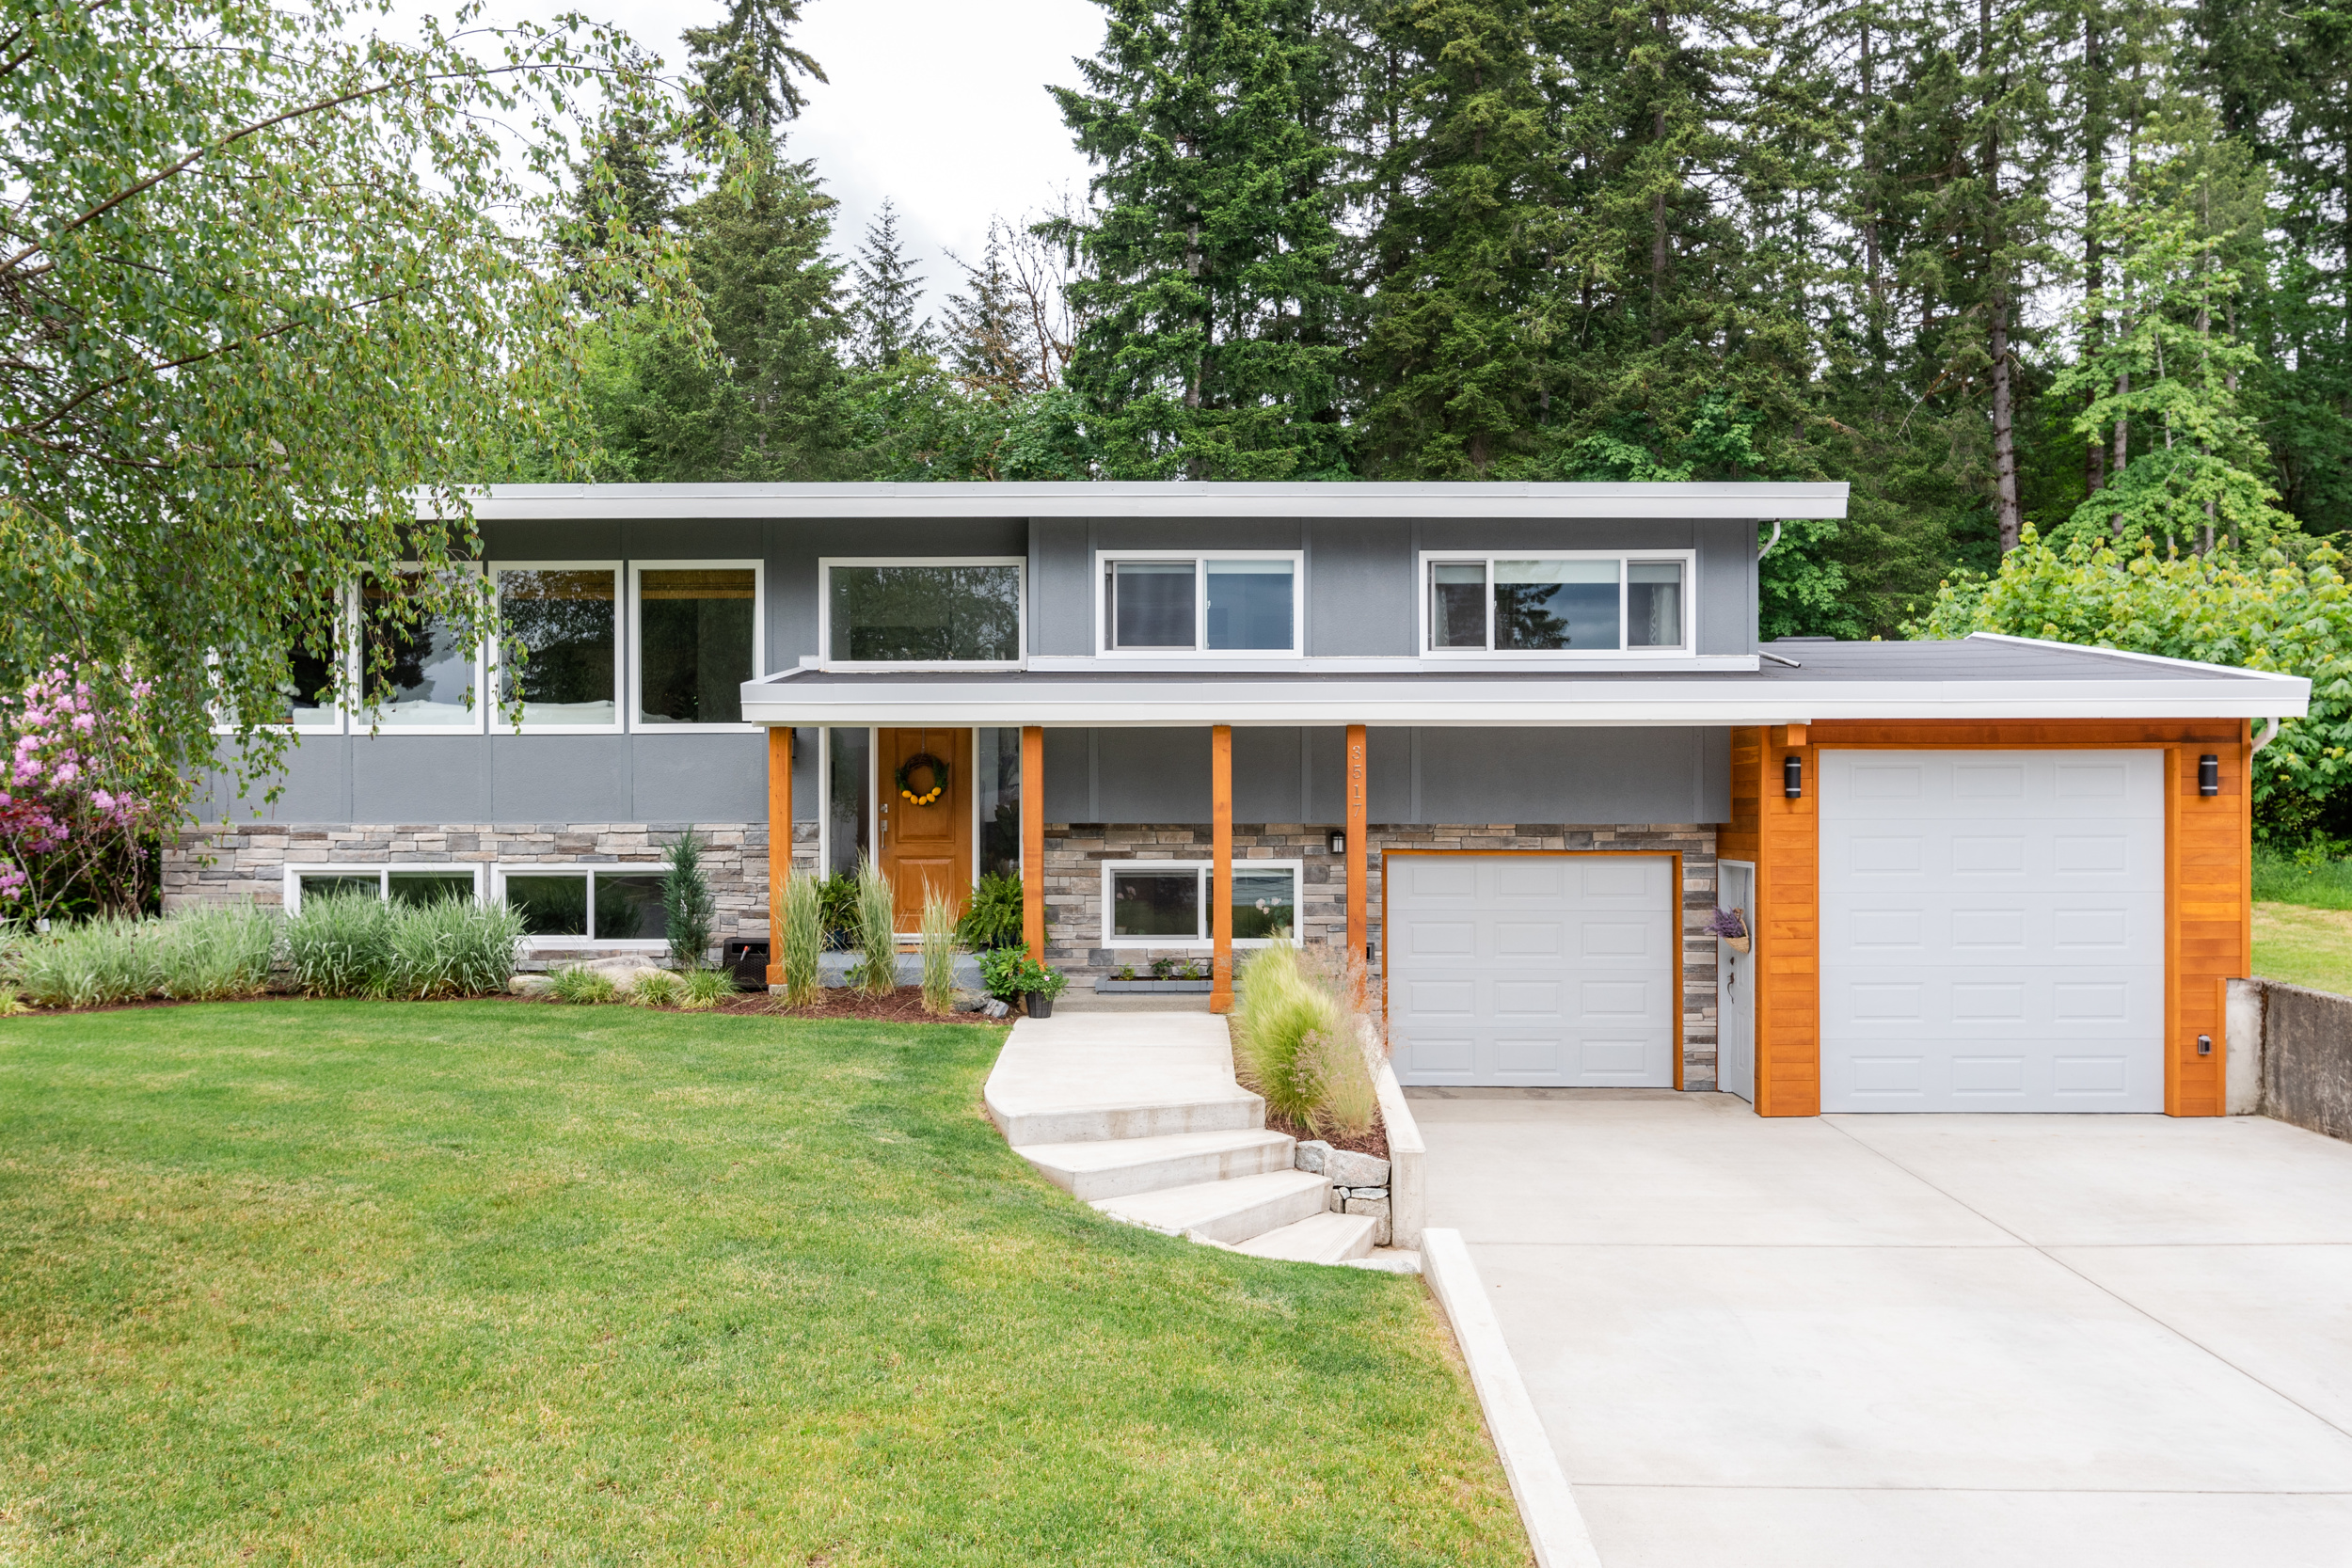
To update the exterior we had the driveway, retaining wall and sidewalk replaced by professionals. We then painted the entire house ourselves and our friend helped us with replacing the posts, adding a new front door, and installing the beautiful tongue and groove cedar on the tall garage. We also hired a local contractor to install some rock work on the front of the house to update it and add texture. We redid the landscaping ourselves and planted a fresh lawn from scratch.
And after our renovations, here is how she looked…
You can read all the details about our exterior makeover in these posts:
Front Yard & Exterior Before & After Makeover Reveal
How to Paint Your House Quickly & Easily
How to Seed a New Lawn from Scratch
How to Use Ornamental Grasses in Your Landscaping
Front Yard Makeover Before & Plans
The Foyer
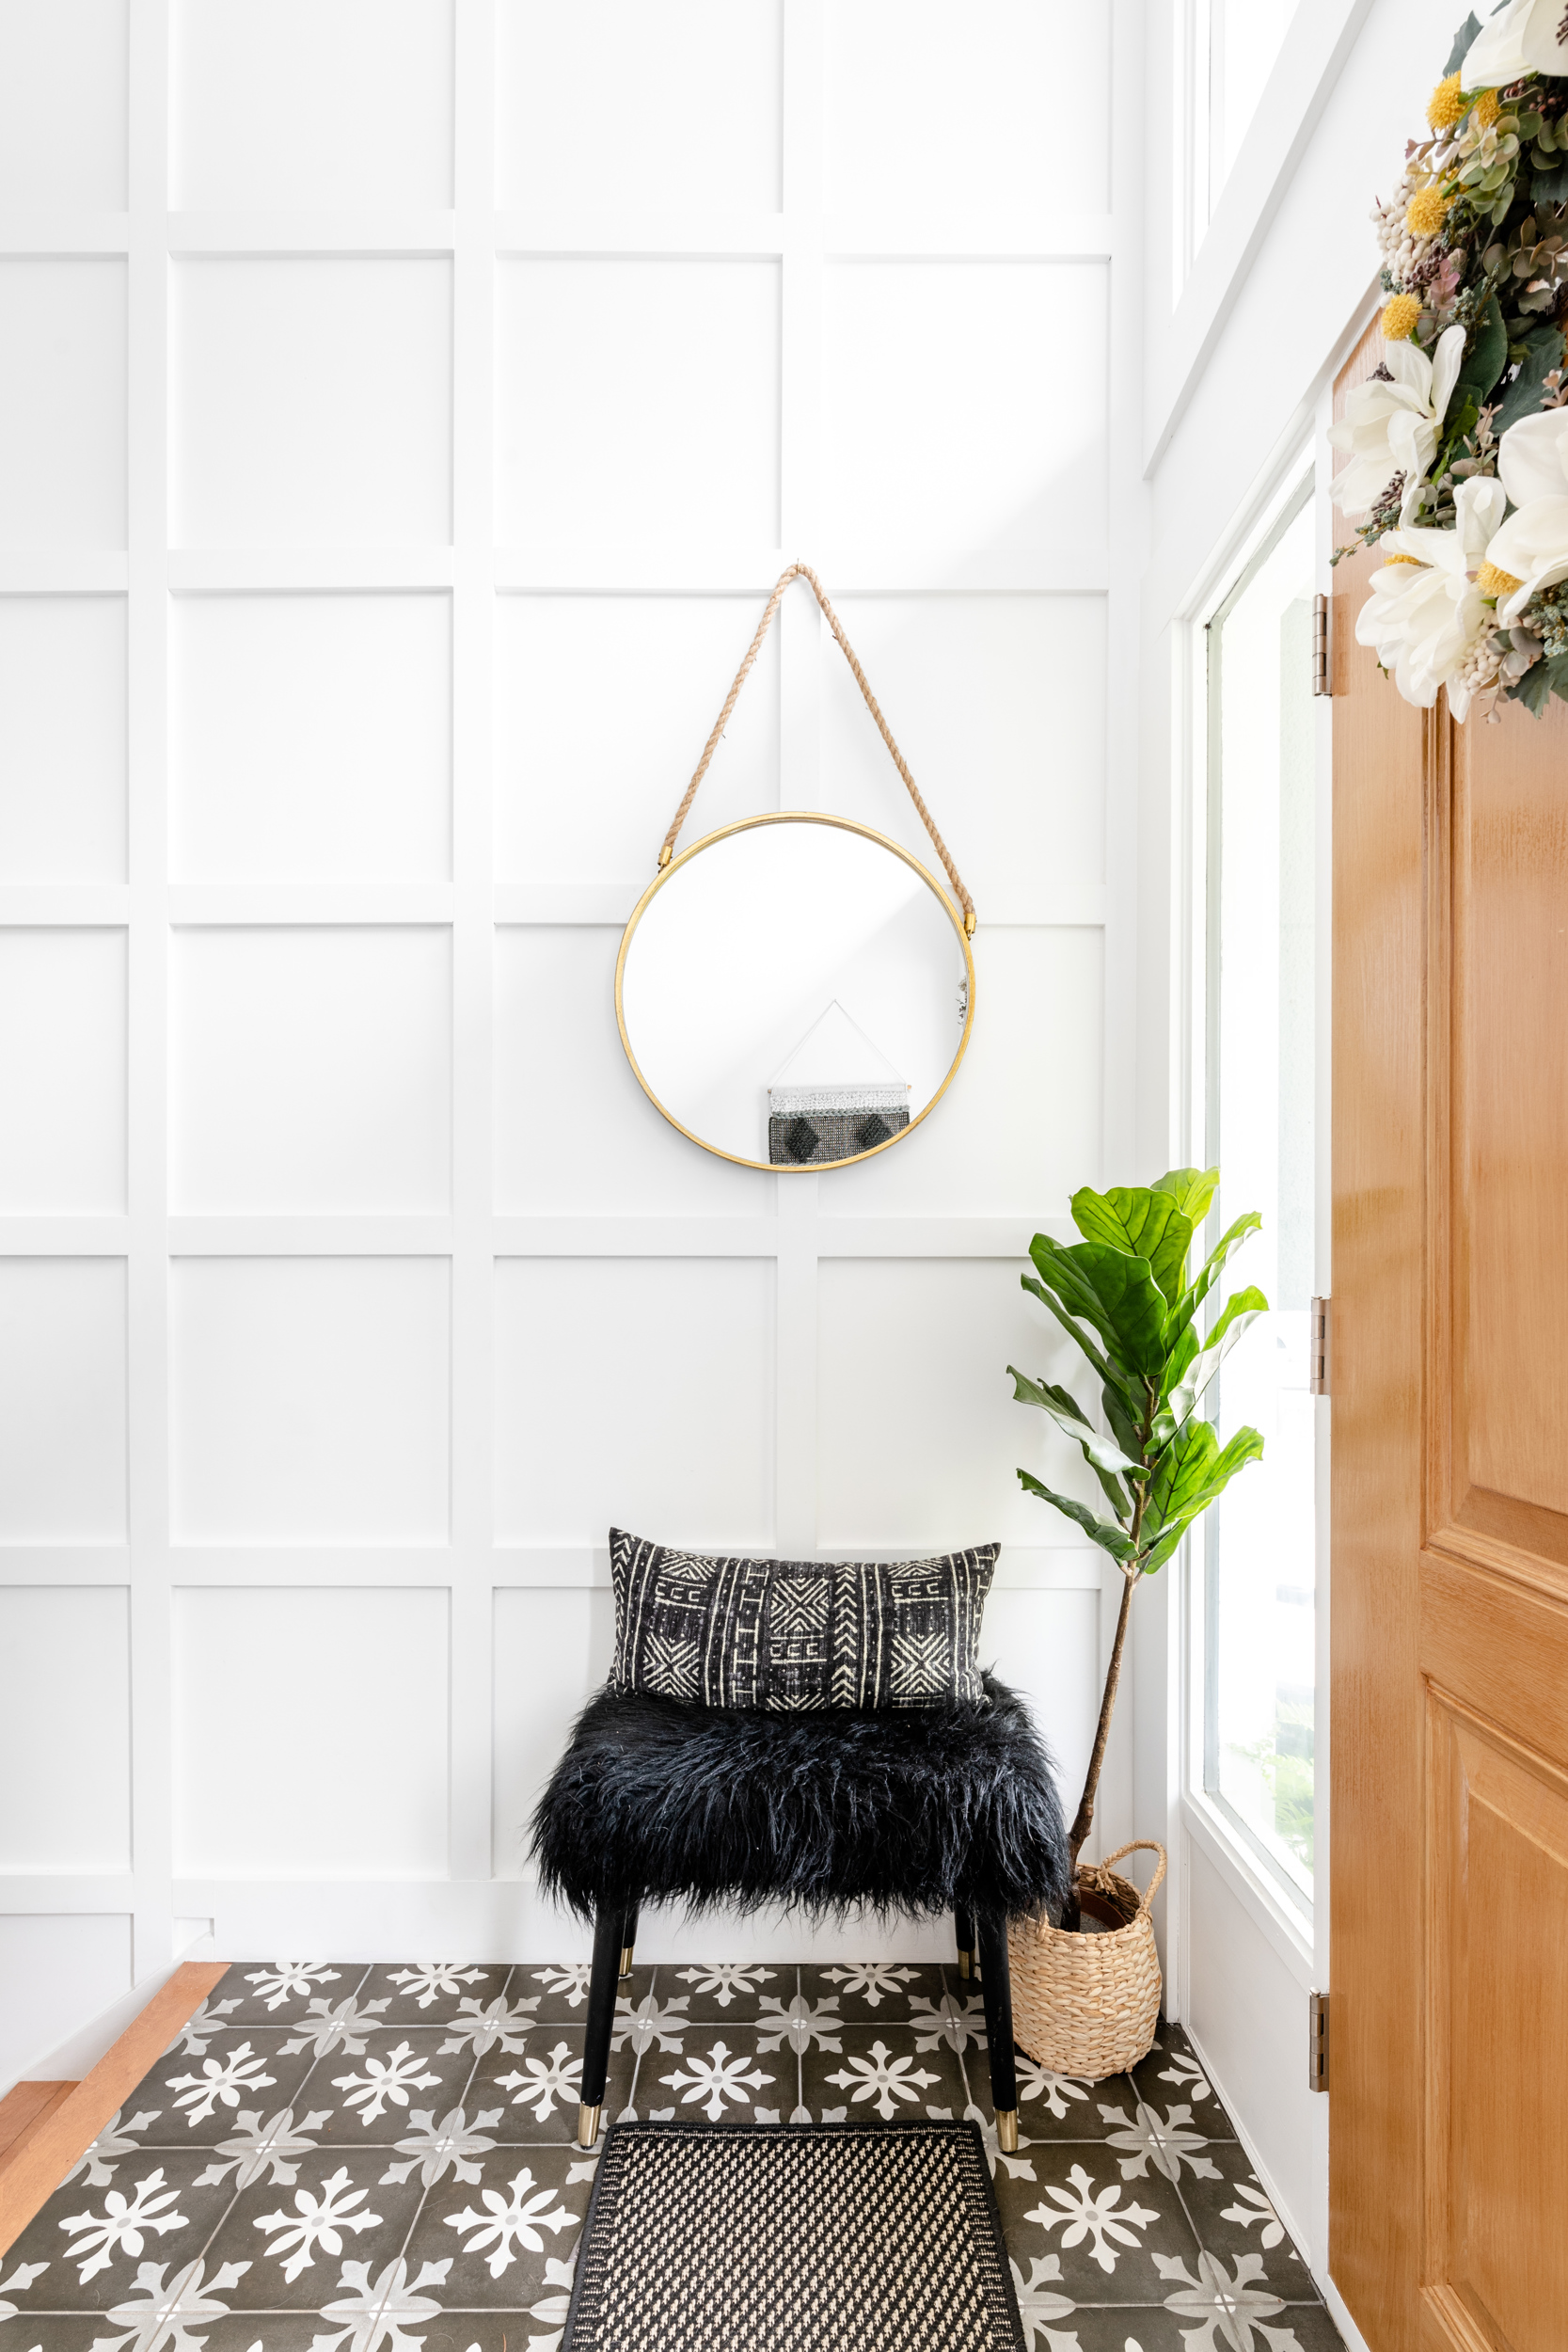
The front entry was one of the first things we tackled when we moved in. We immediately got started on painting it and had a local carpenter add the box panel moulding for us. Although we’d done a ton of paneling in our previous house, my husband felt less confident about installing paneling on a ladder that high and I really can’t blame him.
Here is a pic of the entry way just after we began that project – there is one coat of white on the tall wall at this point.
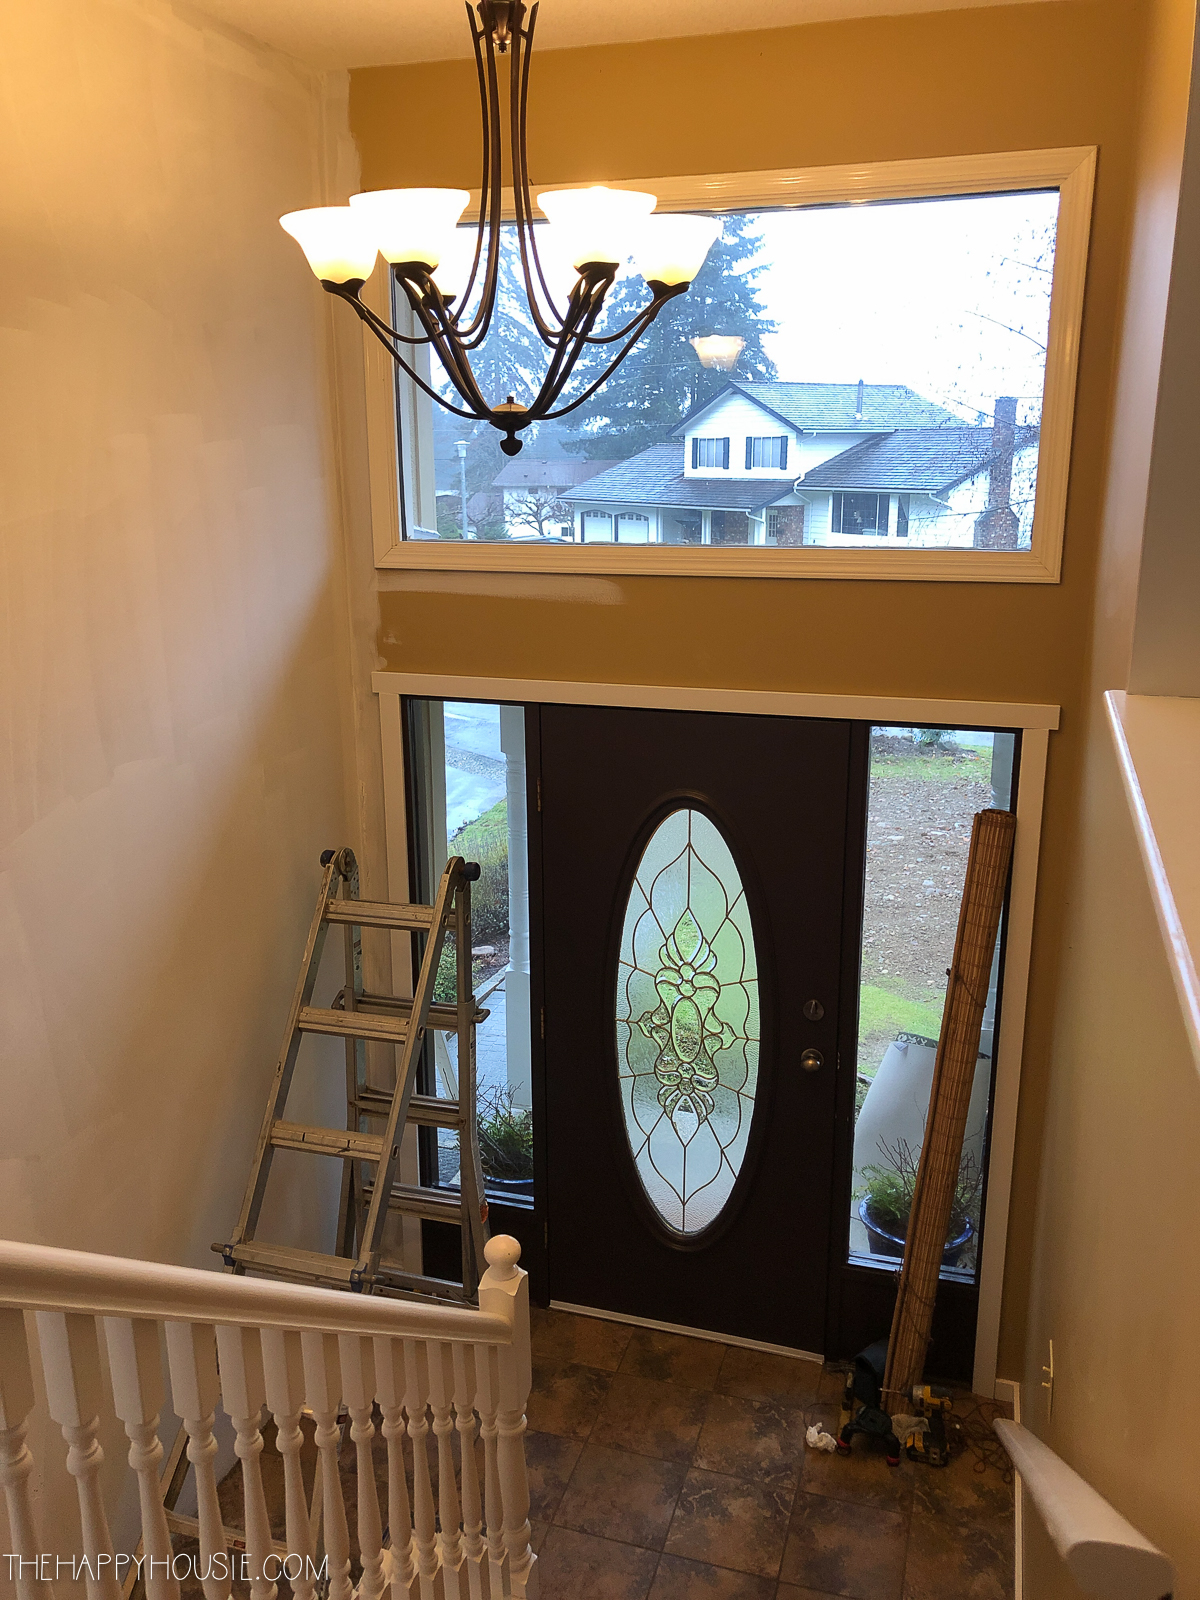
In addition to adding the moulding and painting the whole foyer area out white, we installed a new light fixture and had some new tile installed in the foyer. We added the new door in the spring when we tackled the exterior of the house, and I stained it with a cedar stain on both the exterior and interior.
Here is how our foyer looked after the updates…

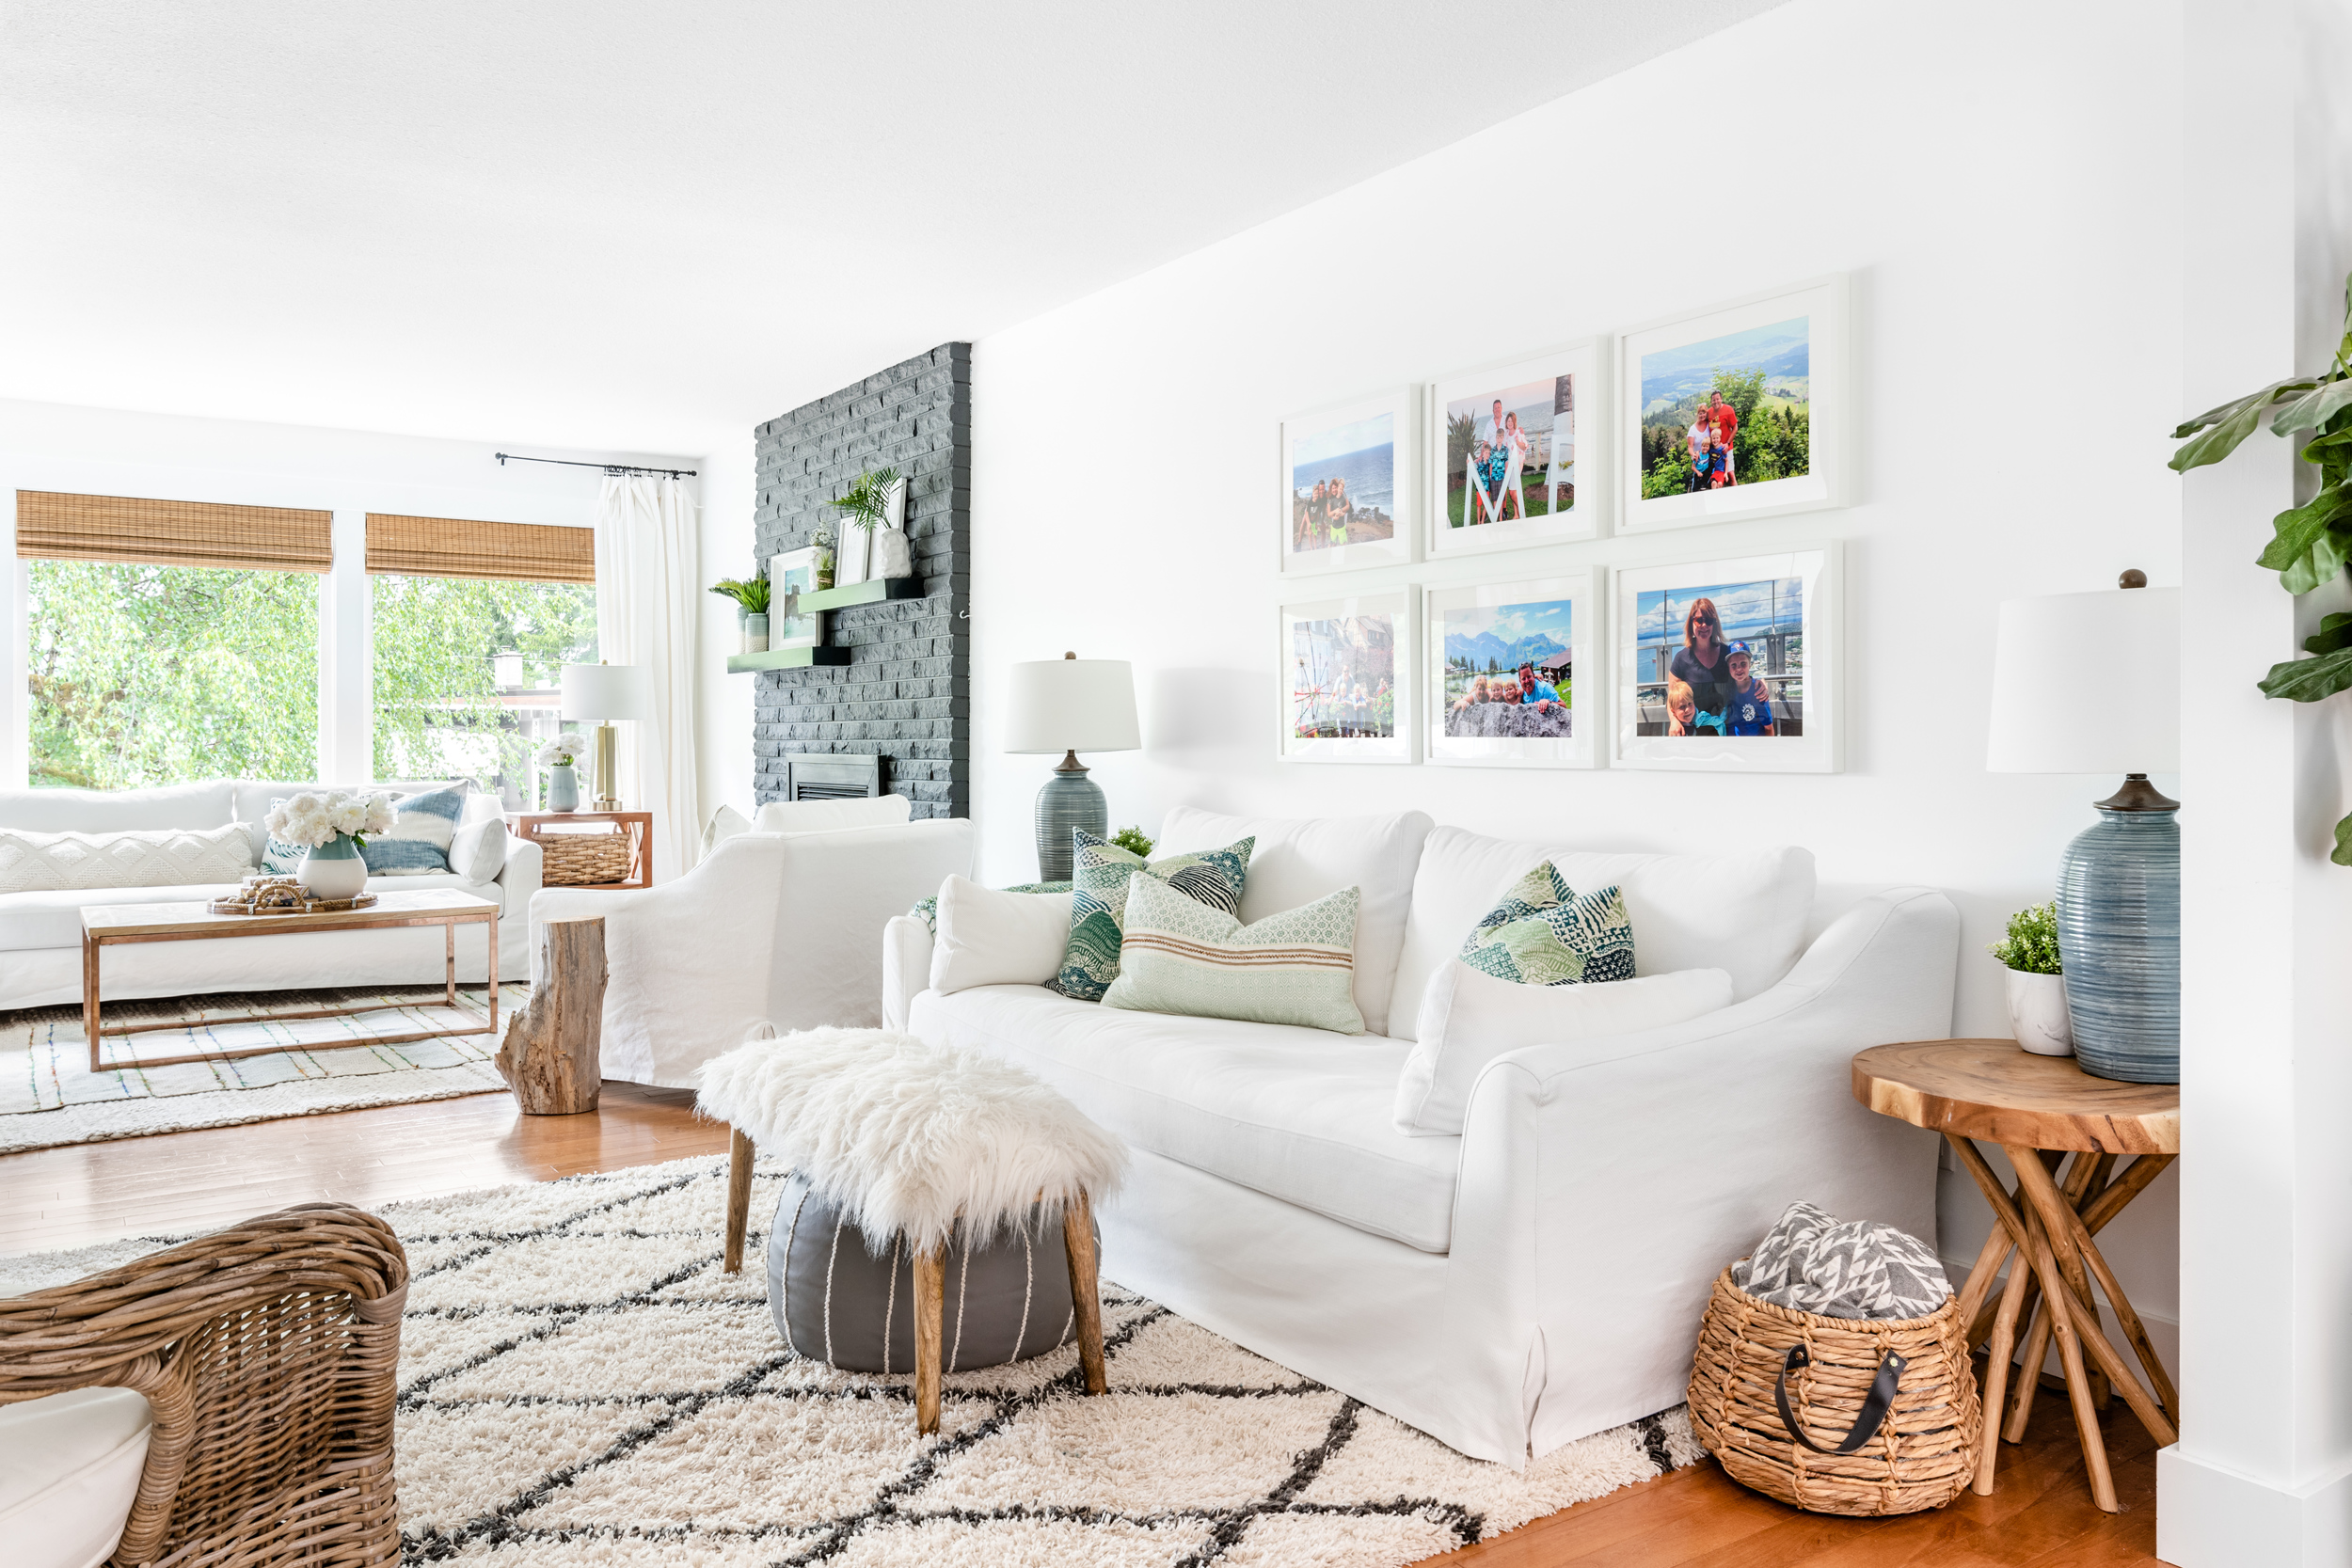
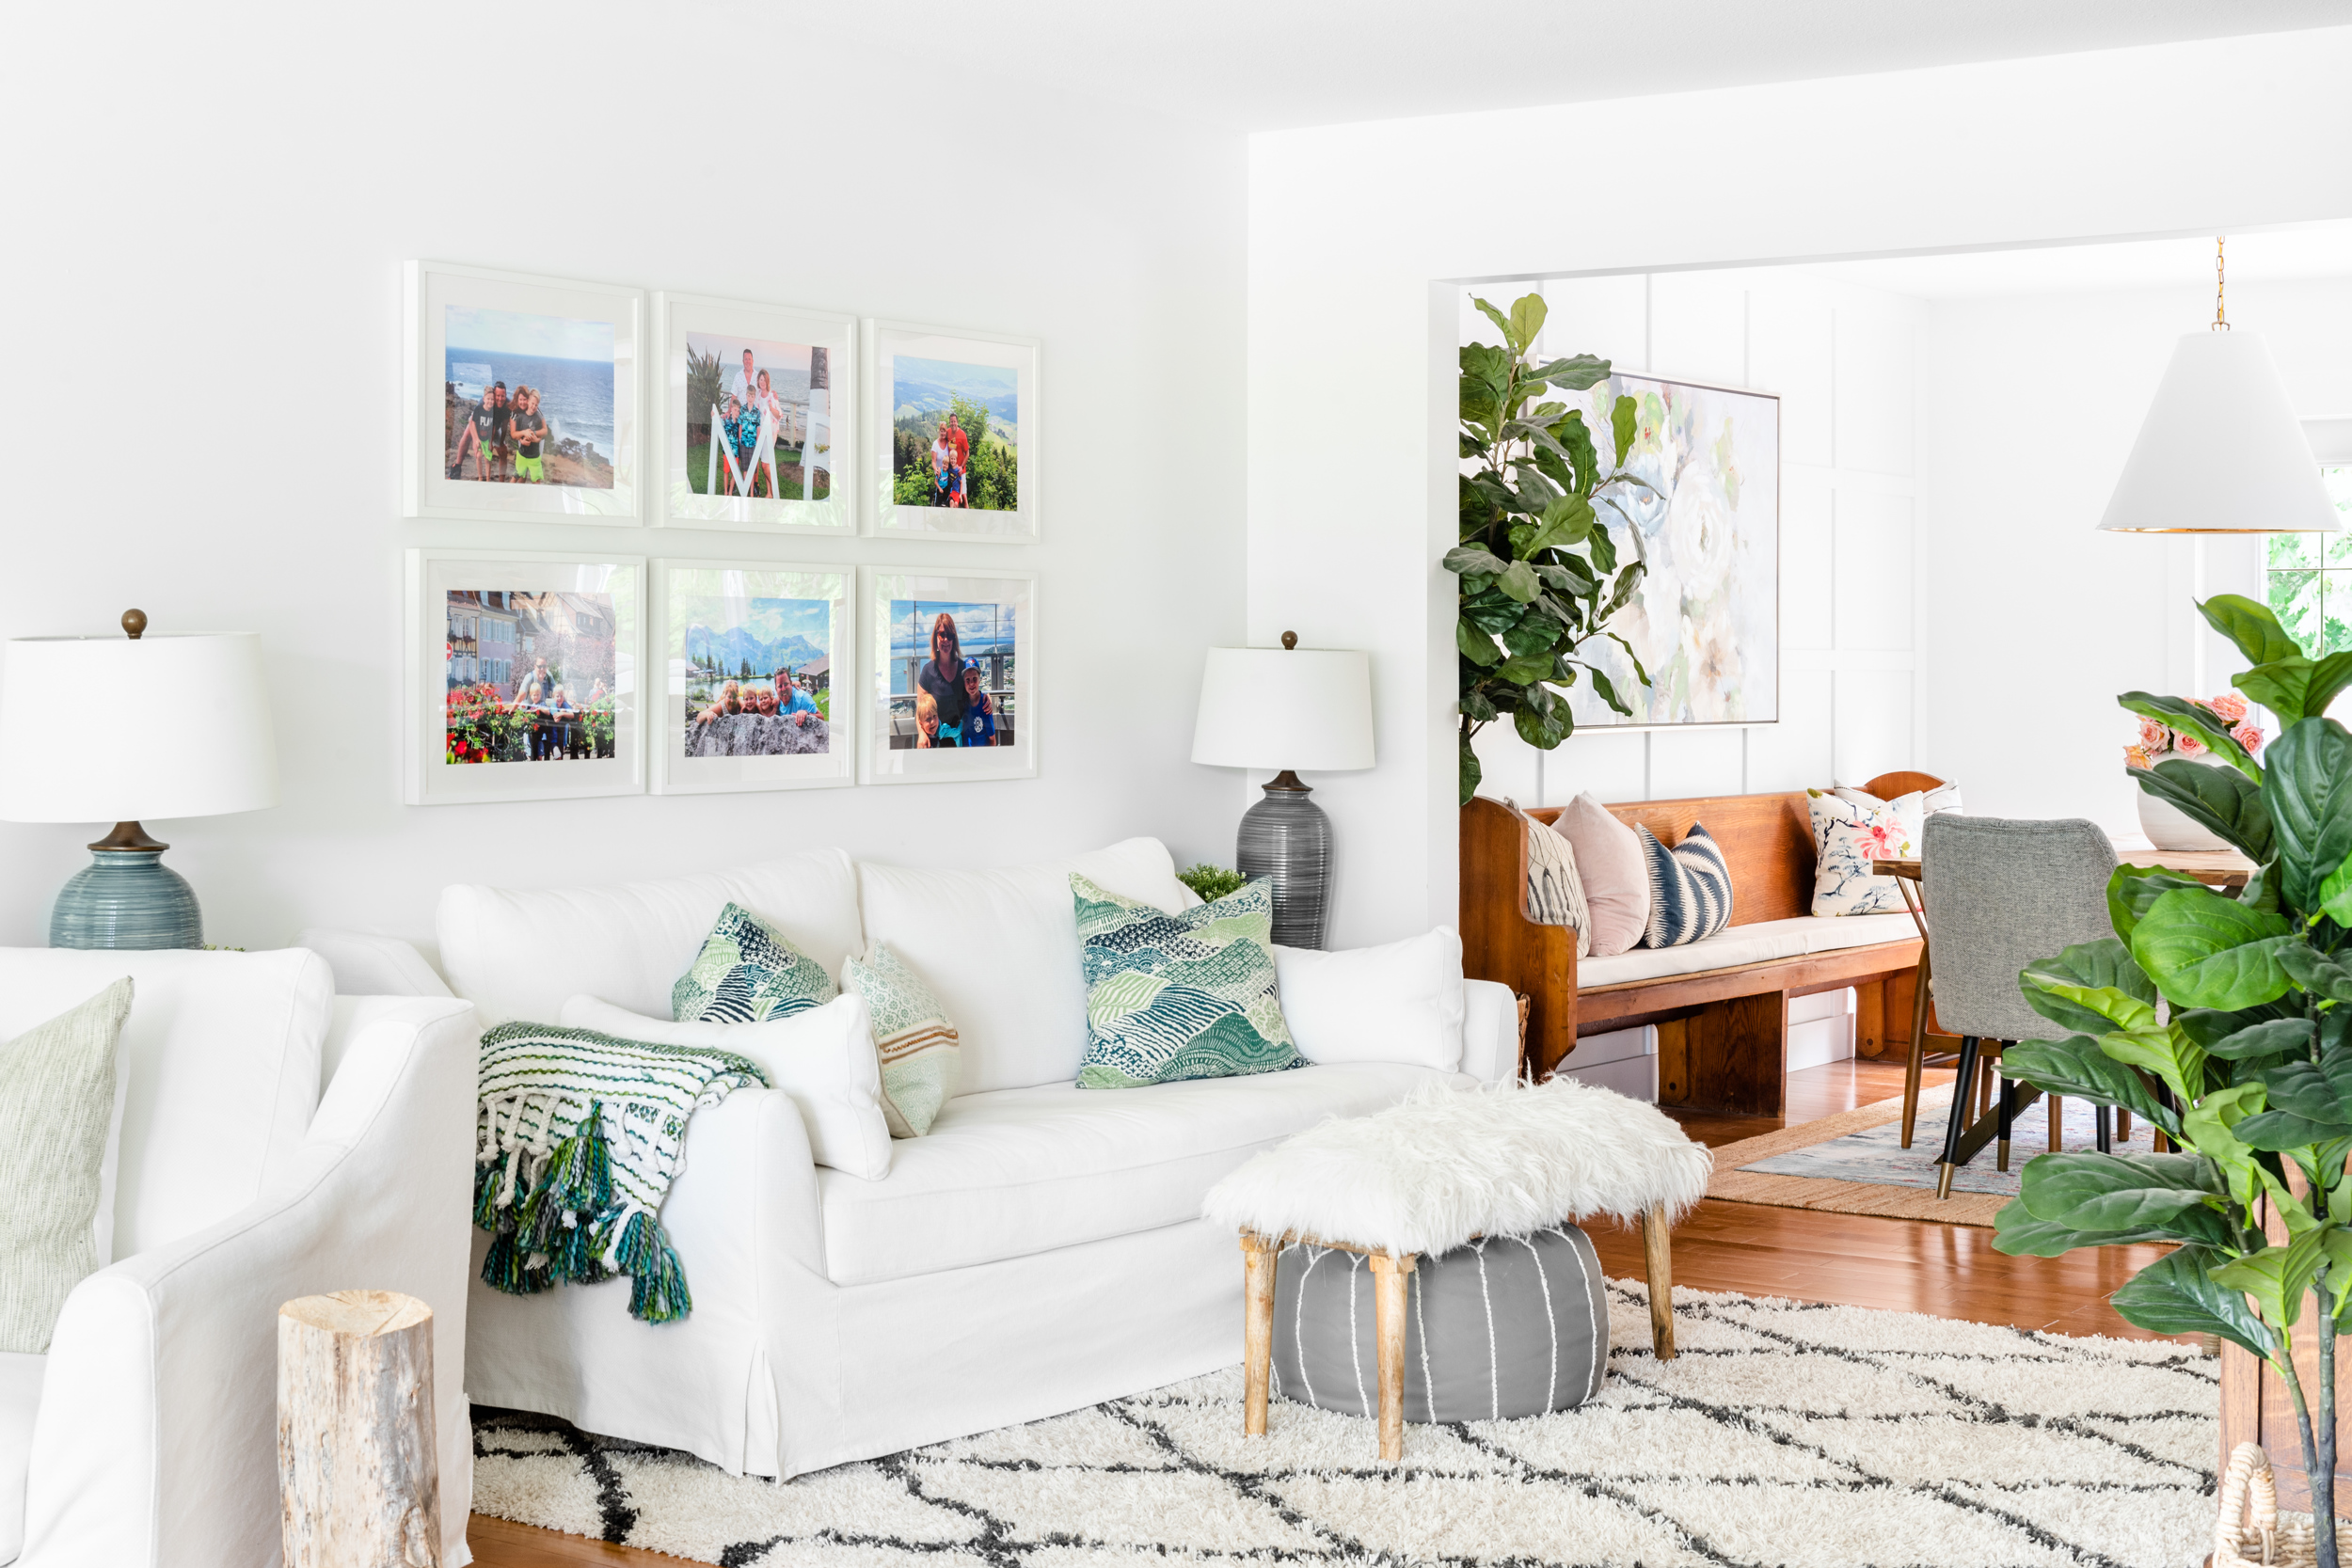
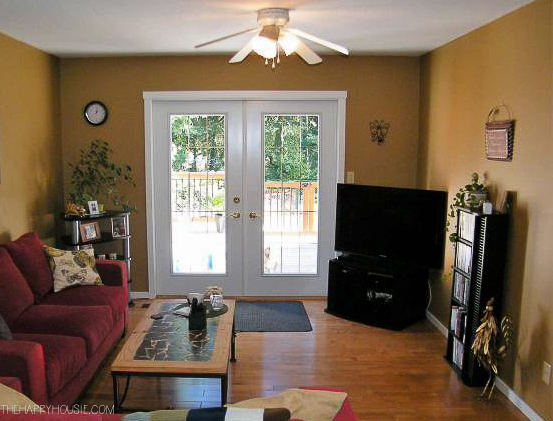
The Living Room
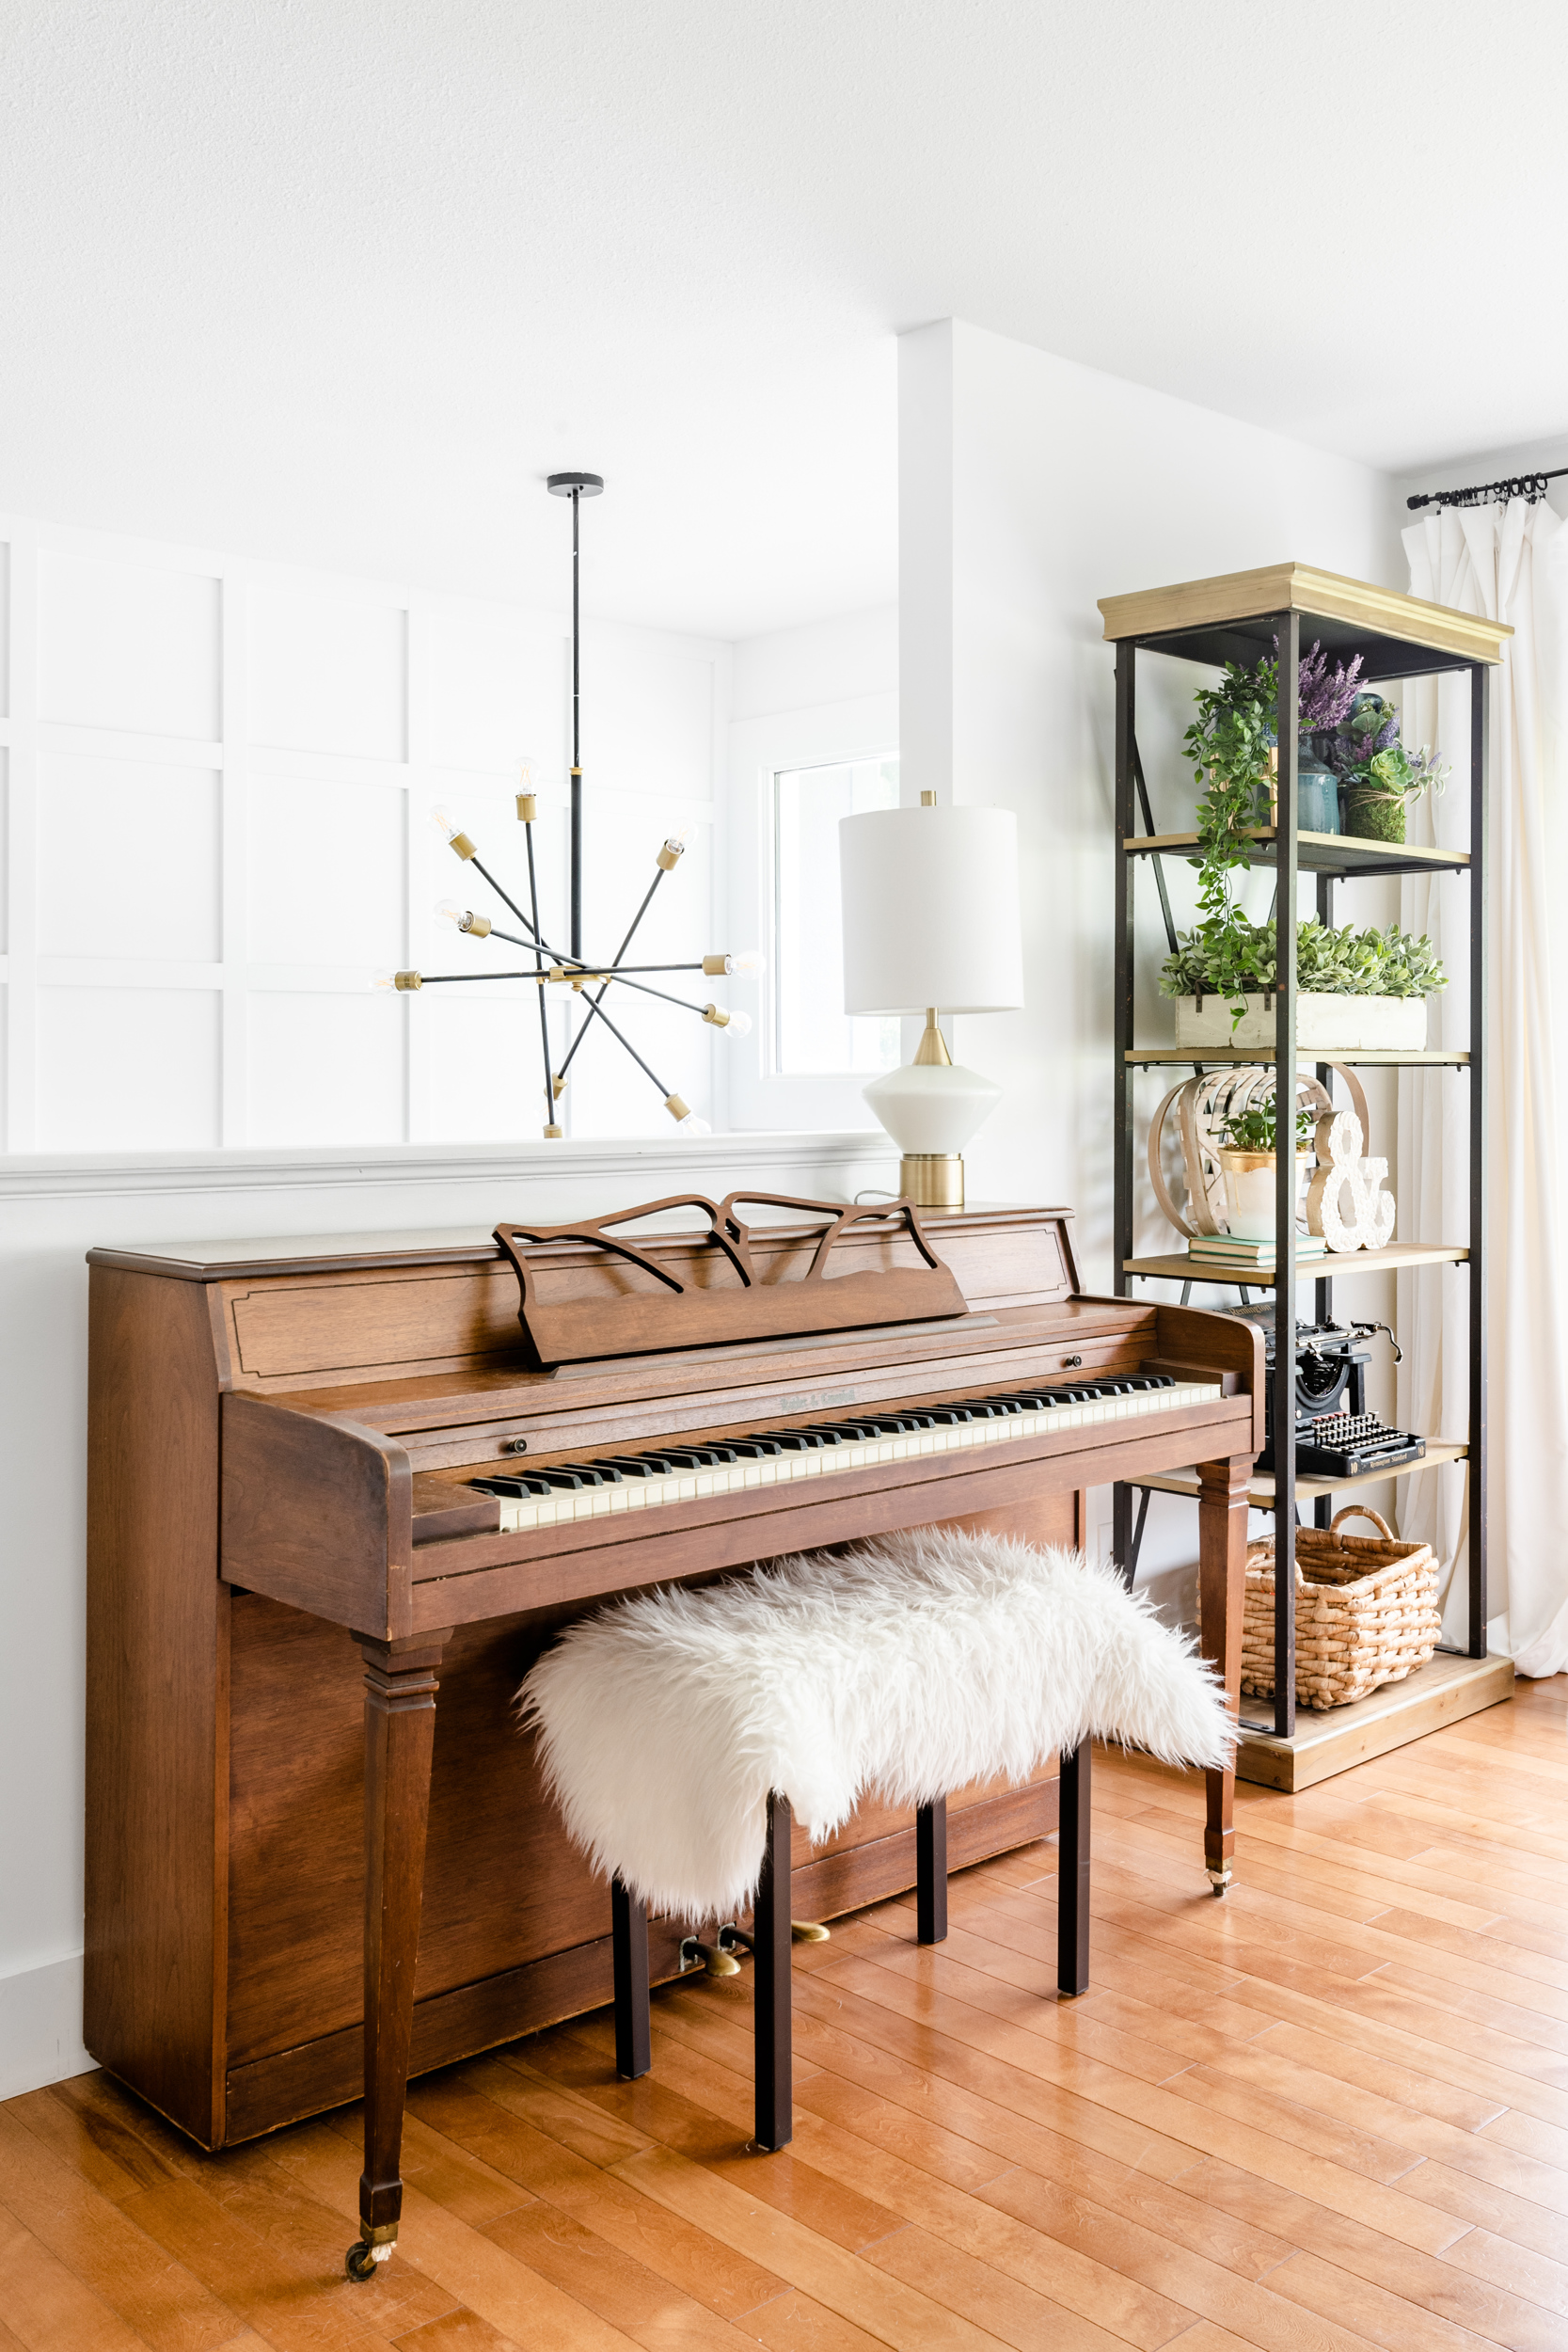
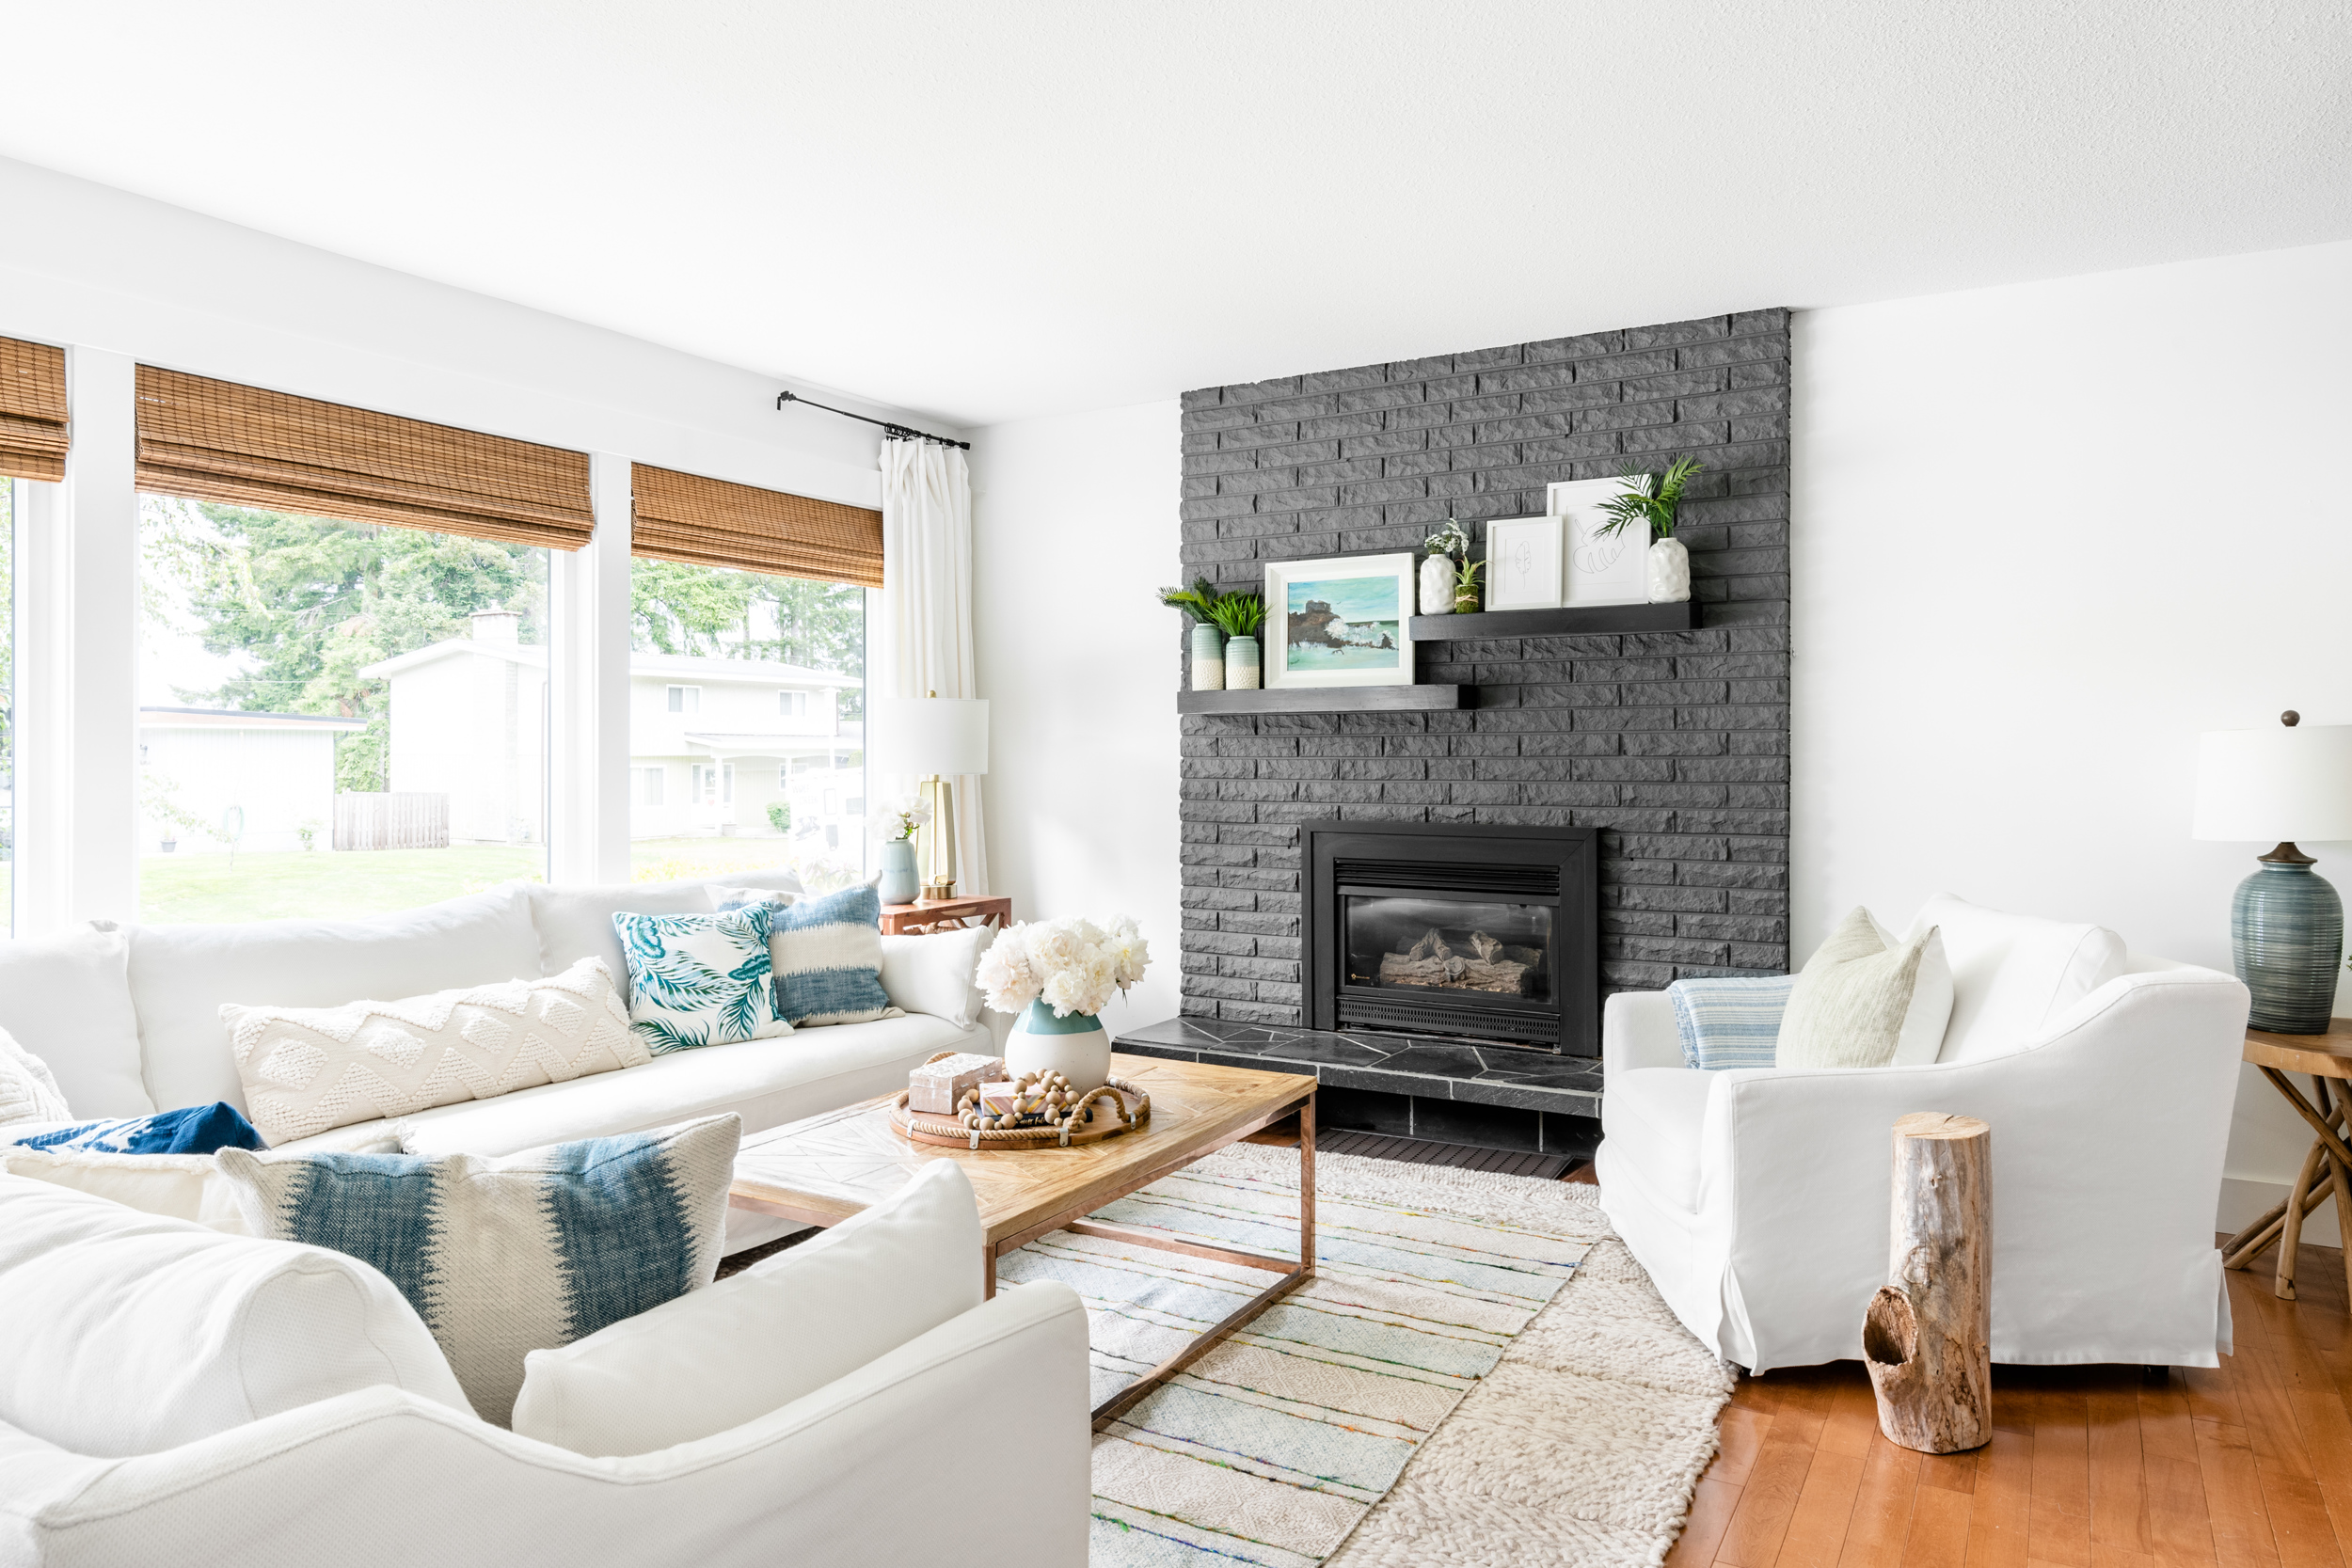
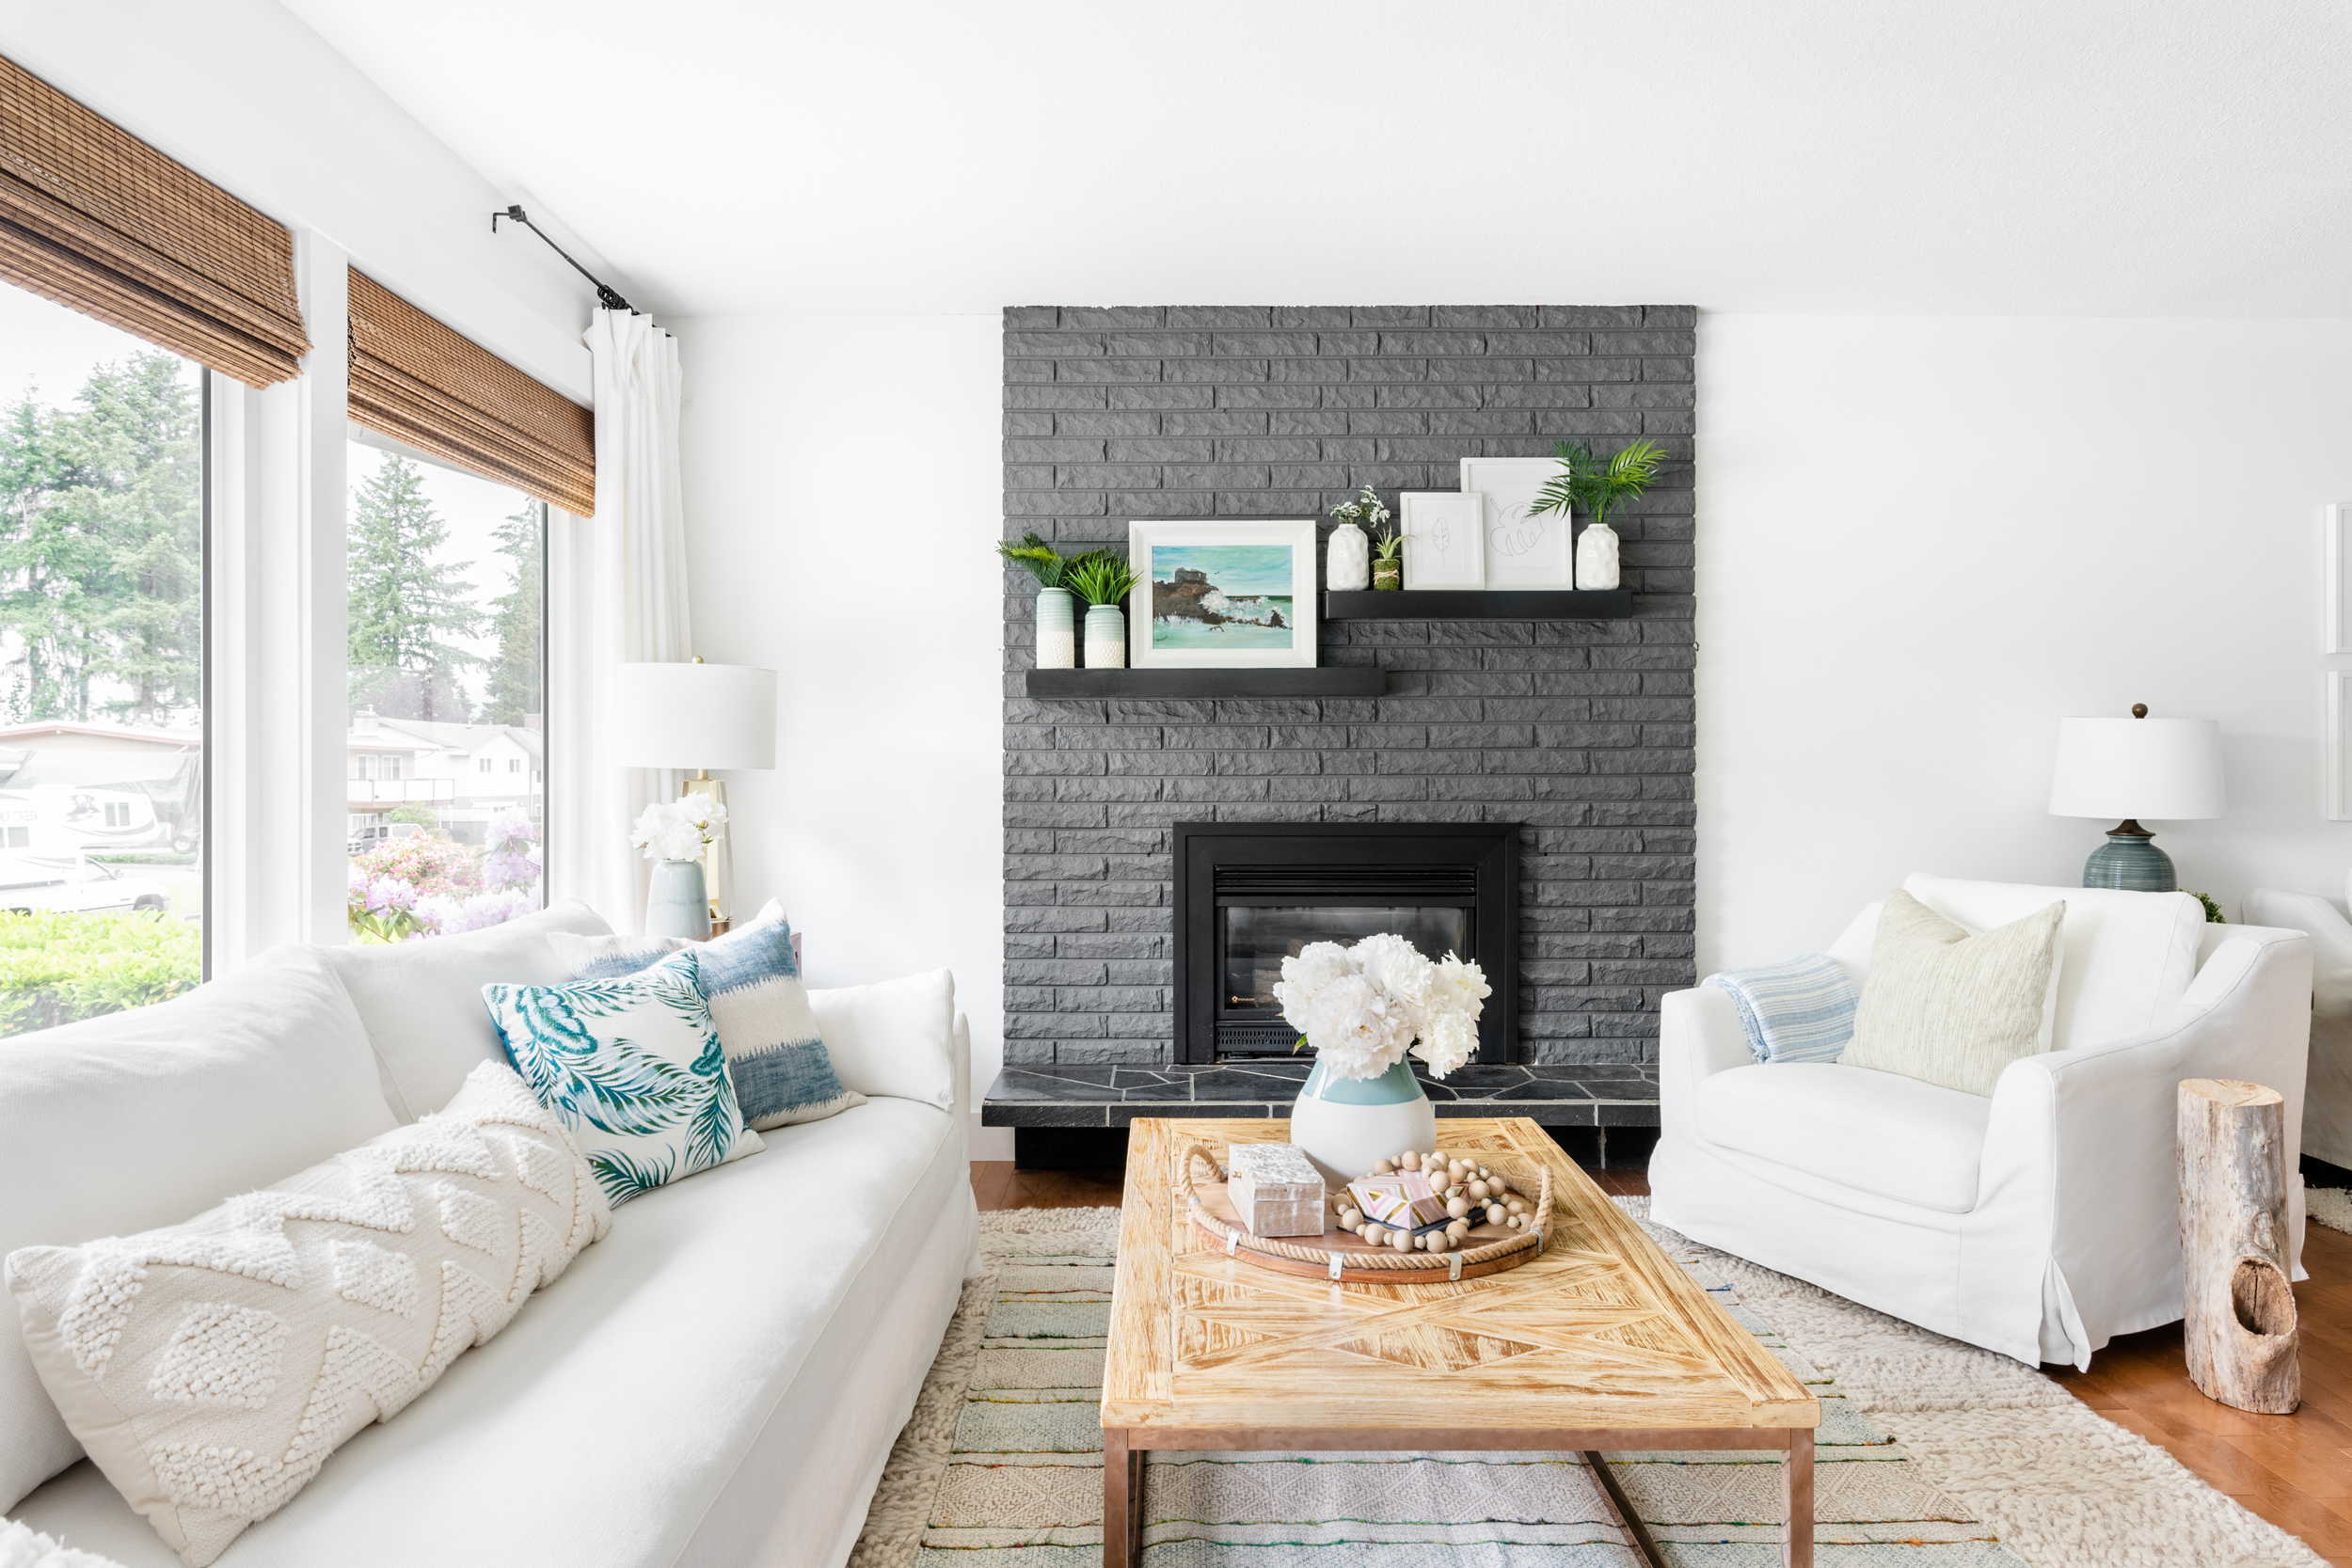
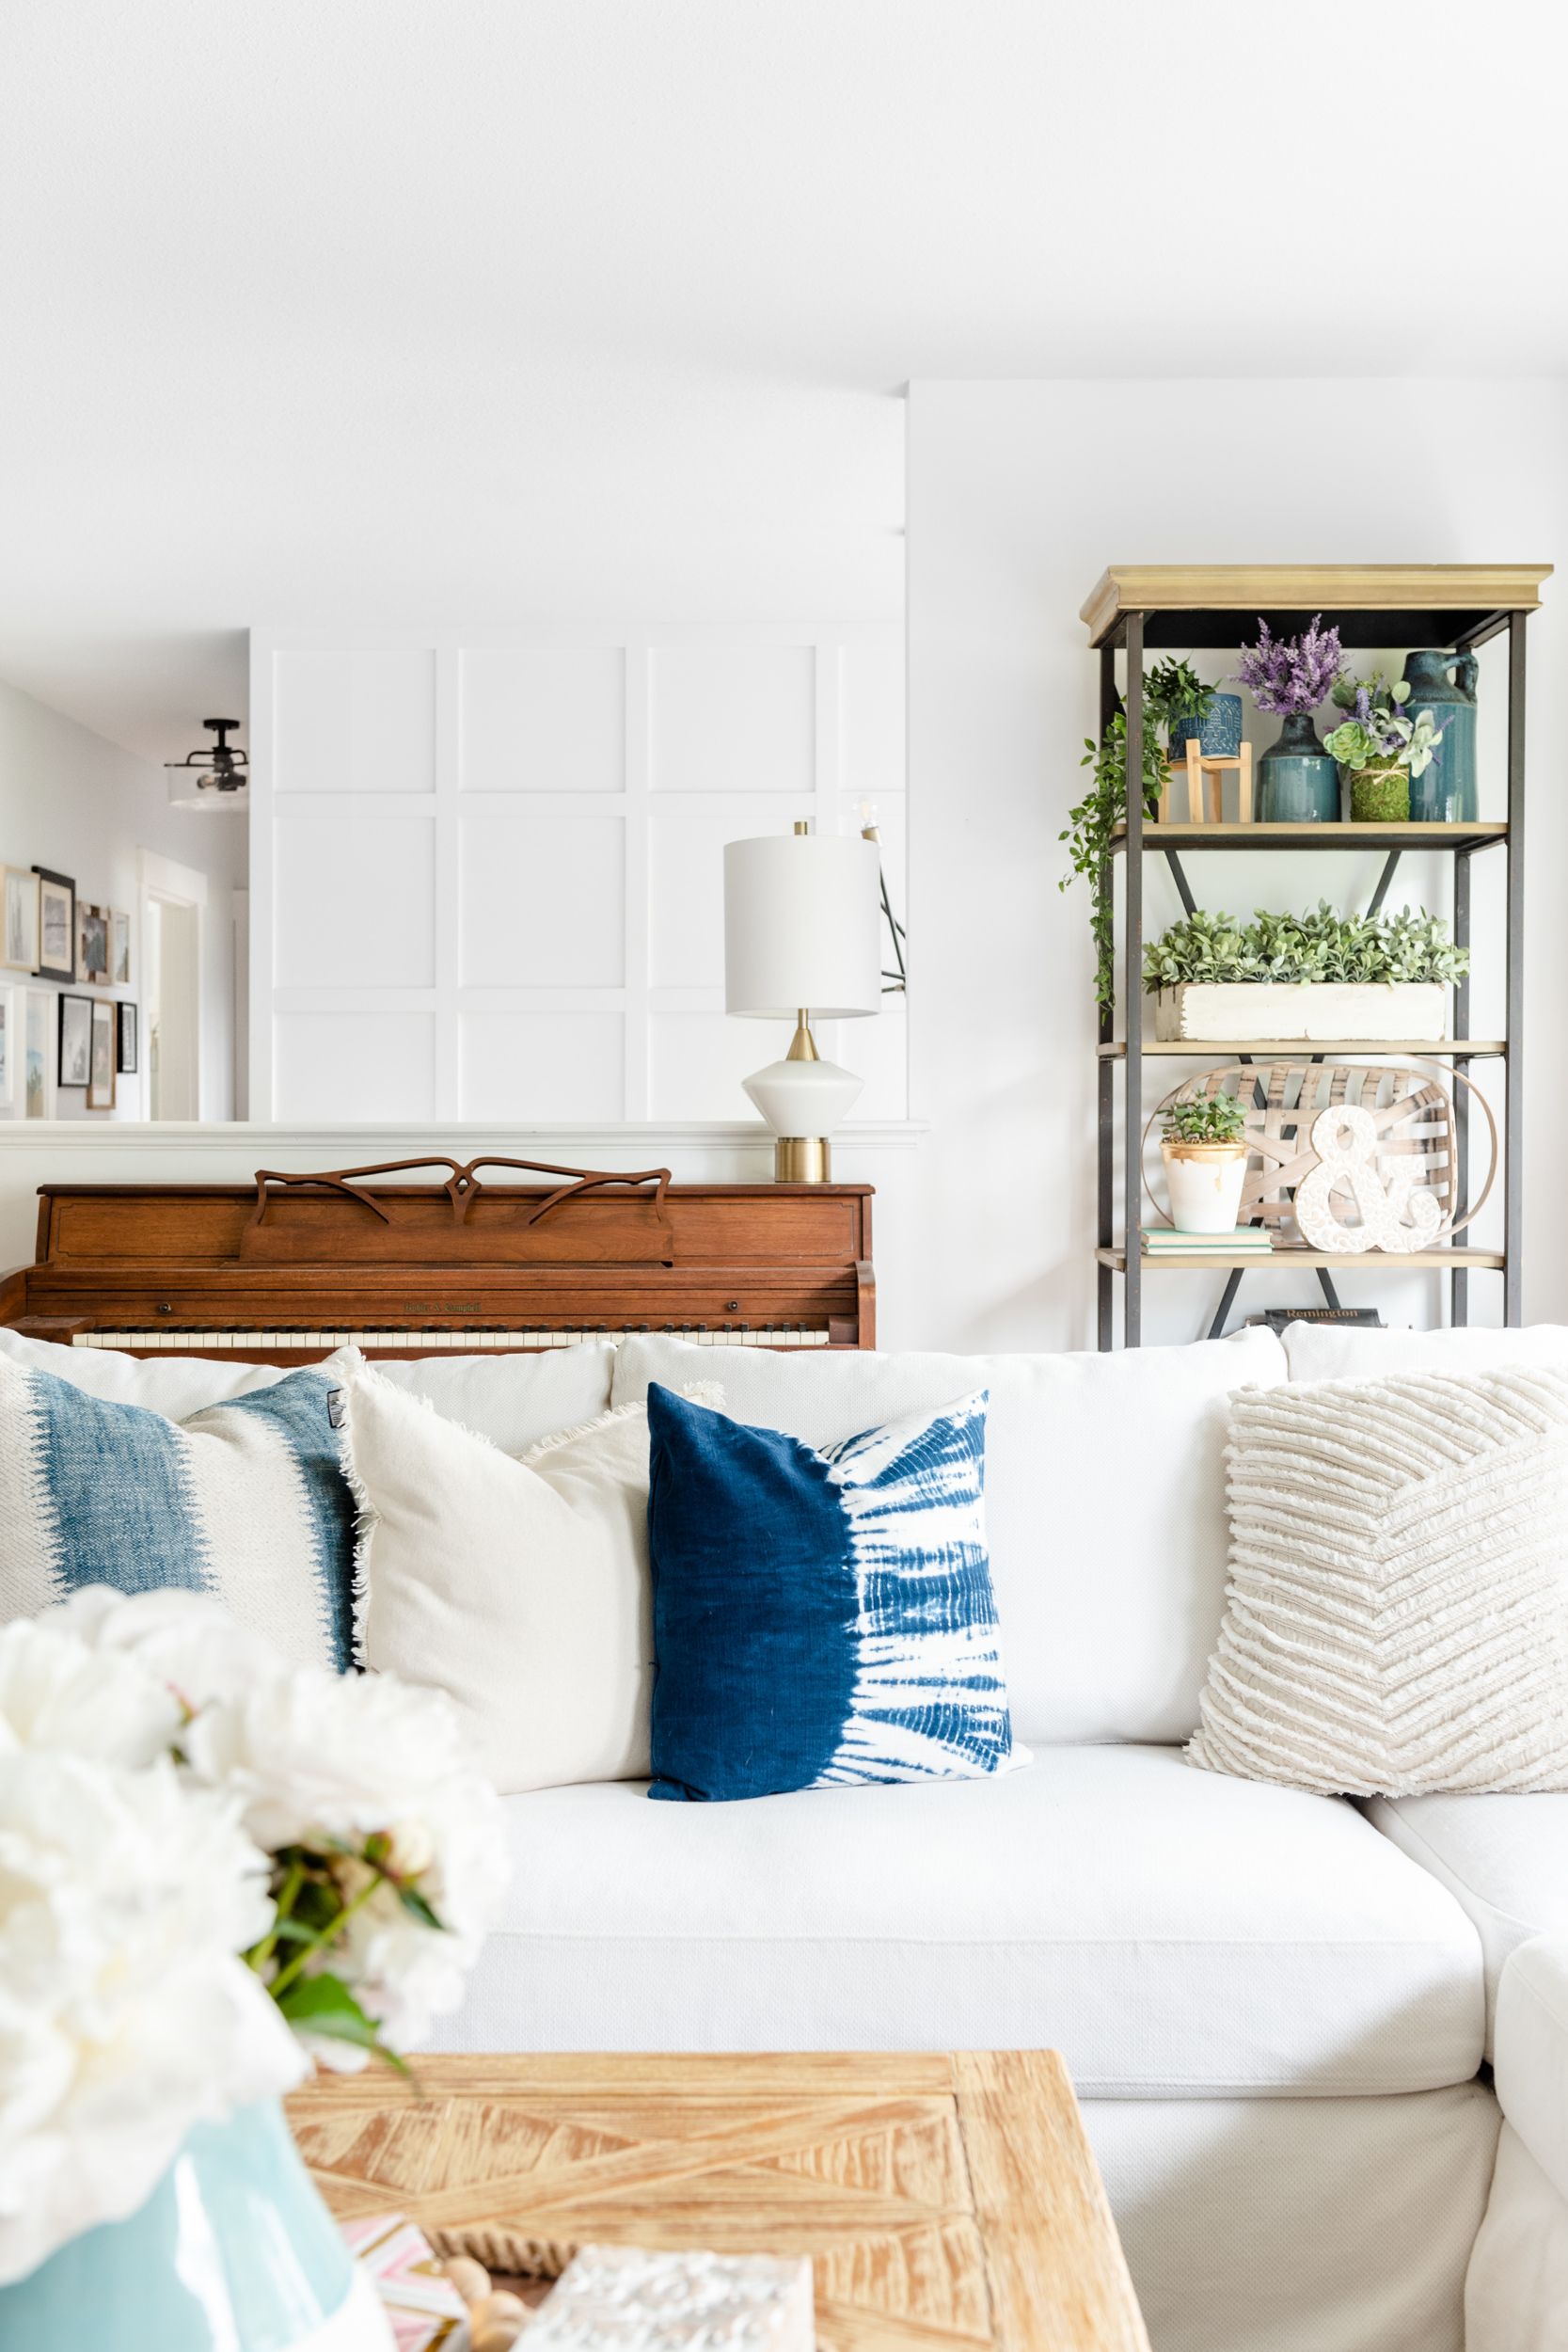
This house had a long living room with a side area off of it that we used as a TV space. We painted out the whole space in white except for a feature of charcoal grey paint on the fireplace and on one wall in the TV area of this space. The wood flooring was in decent condition still and was spread throughout most of the main floor, so we elected to keep it. The previous owners left us that piano, which was a sweet little treat! Below is how the house looked after renovations, looking from the living room back towards the foyer and staircase.
When we first viewed the house the main living room space looked like this…

And, as I said, we basically freshened it up with white paint, charcoal on the fireplace, and new thick trim throughout. I also added some woven roman shades and kept a lot of our wooden furniture in the same warm tones as the flooring and blinds. The sectional, chair, and sofa (in the TV area) are all part of the Farlov line from Ikea – you can read my review of the Farlov Sofa series here.
Looking in the other direction, here is how the house looked when we first viewed it…

And after…
Such great windows, right?! They were one of my favourite features about the house when we viewed it.

I also love that sneaky view of the box panel moulding from the angle below. You can also see down the hallway from this view, towards the bathroom and bedrooms.
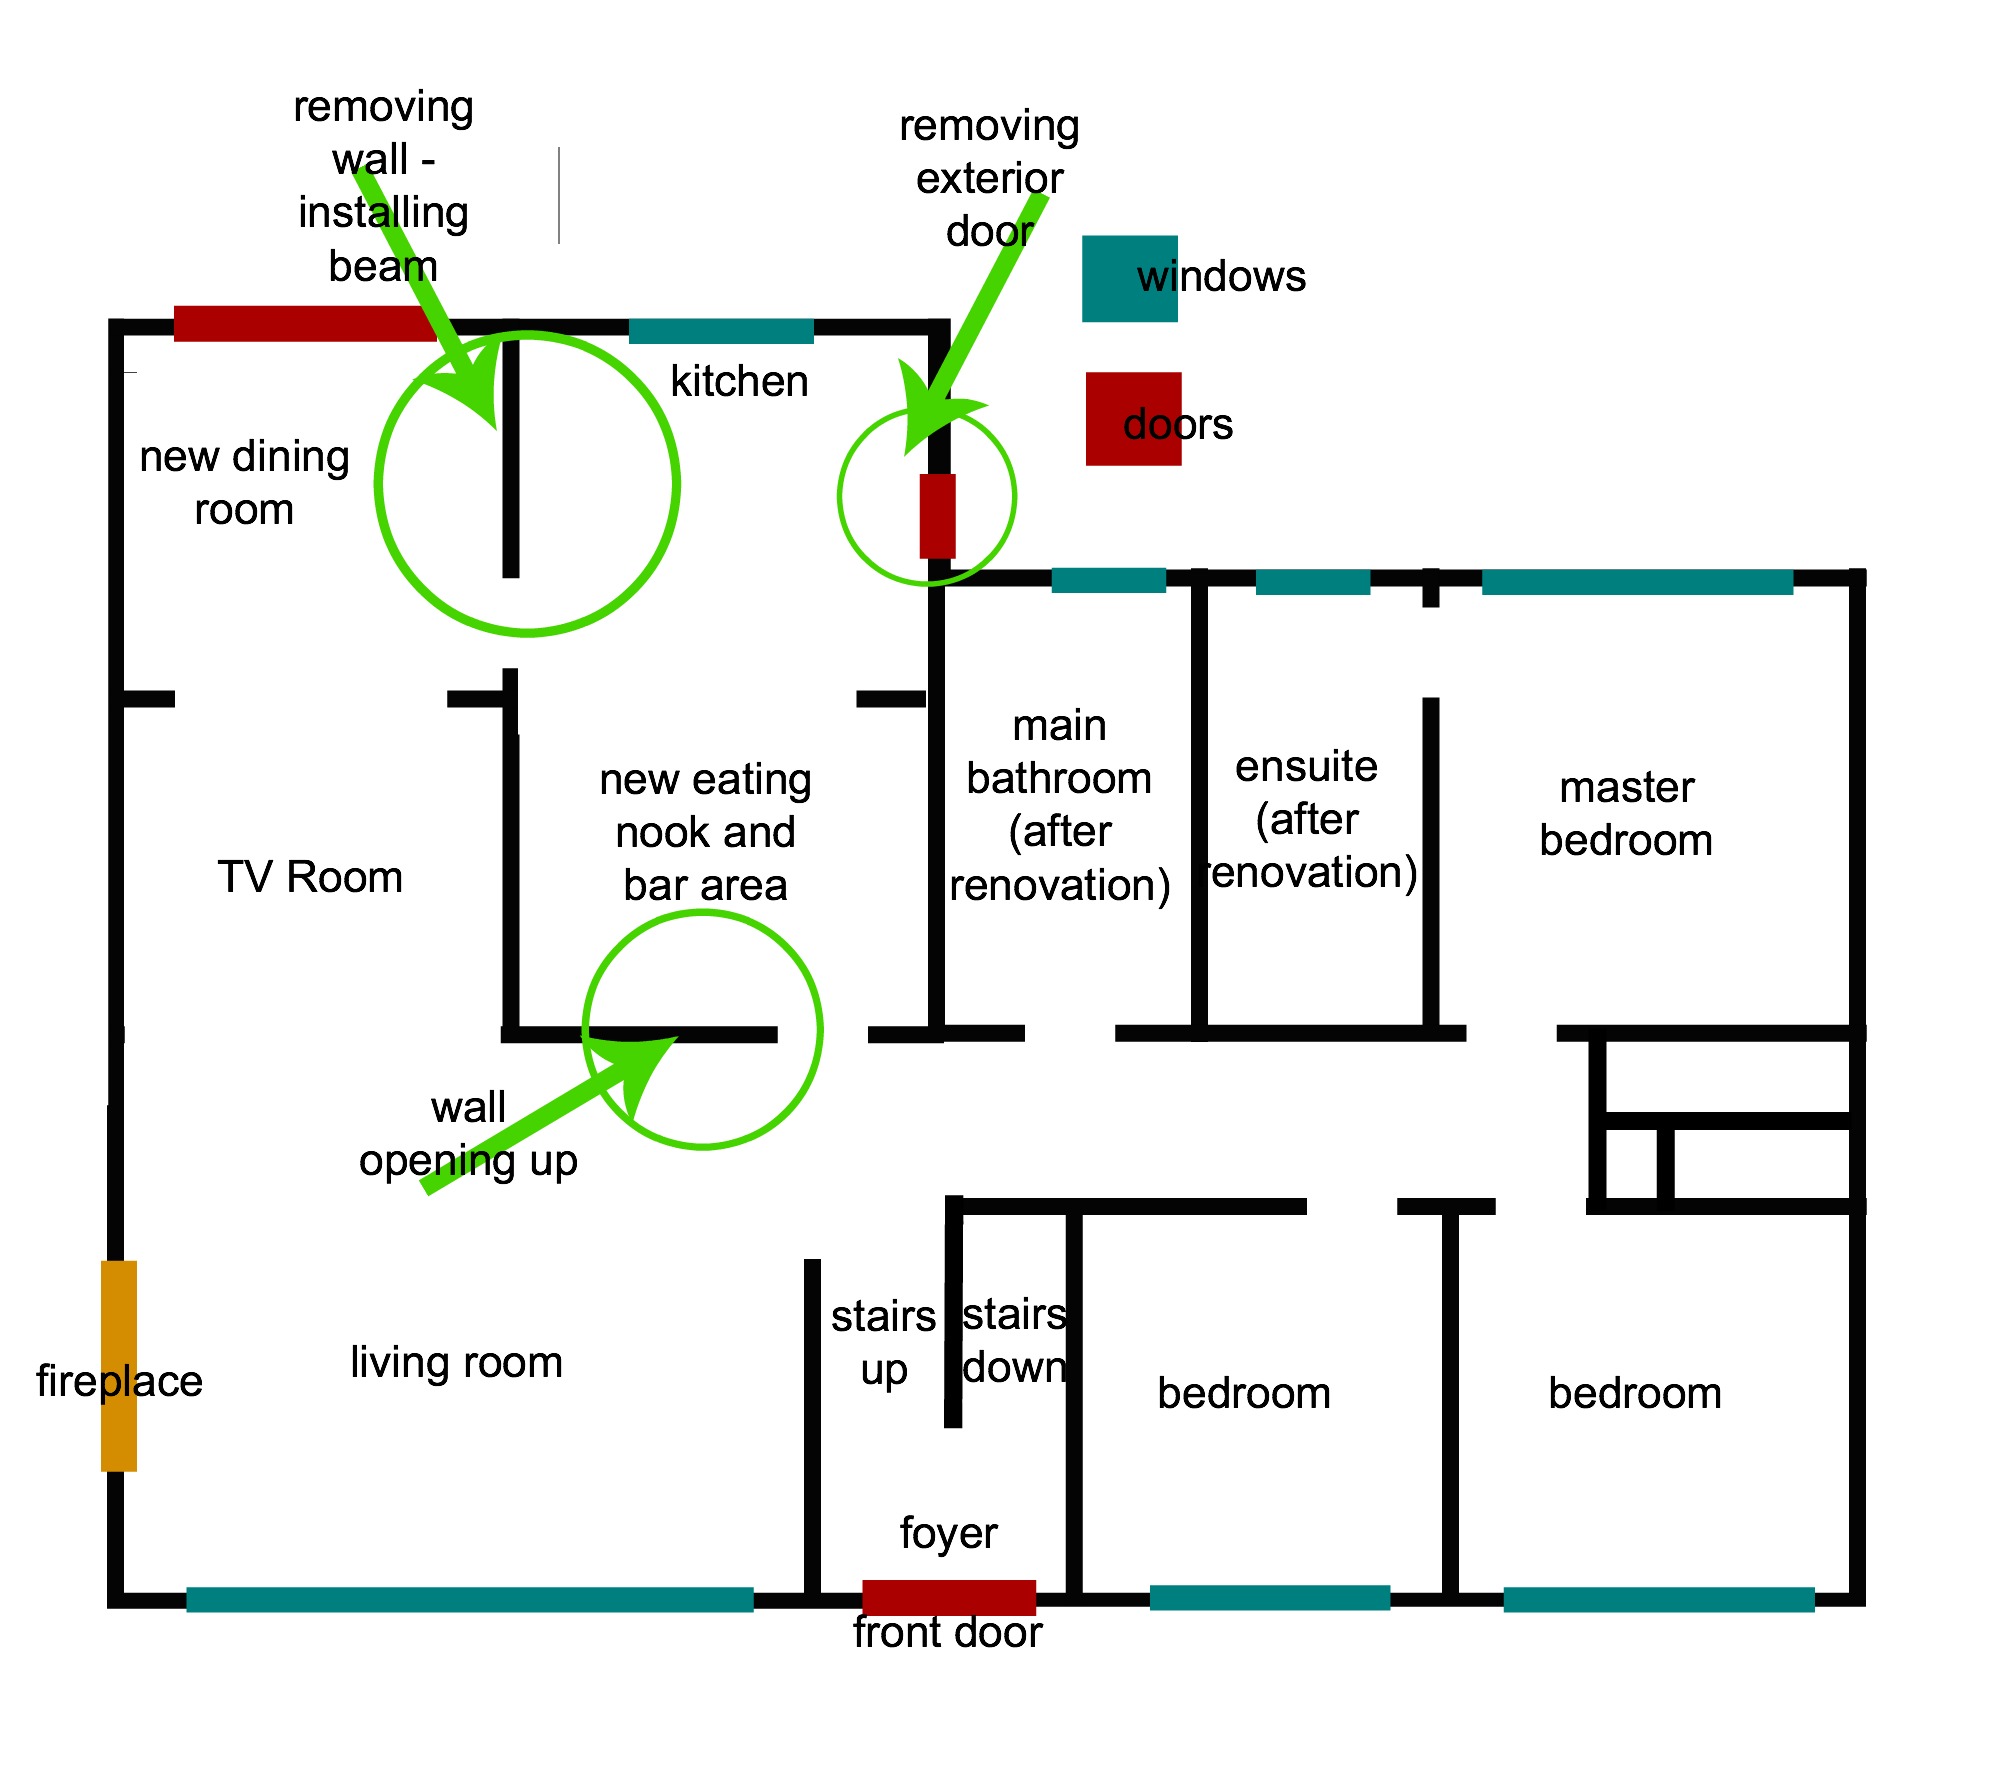
When we renovated we discovered that our forest house had been added onto at one point in the past. We hadn’t know that because they added a basement below the addition so it seemed like it was all part of the original build. But we found framing for a window and some exterior materials on one wall in the kitchen, so we were able to see that there had been a large addition at one point. That’s why this house doesn’t have exactly the typical late 60’s/early 70’s layout that many houses of this era have – the entire back section had been added on. Below is a floor plan of the house prior to most of the renovations (aside from the bathrooms)…
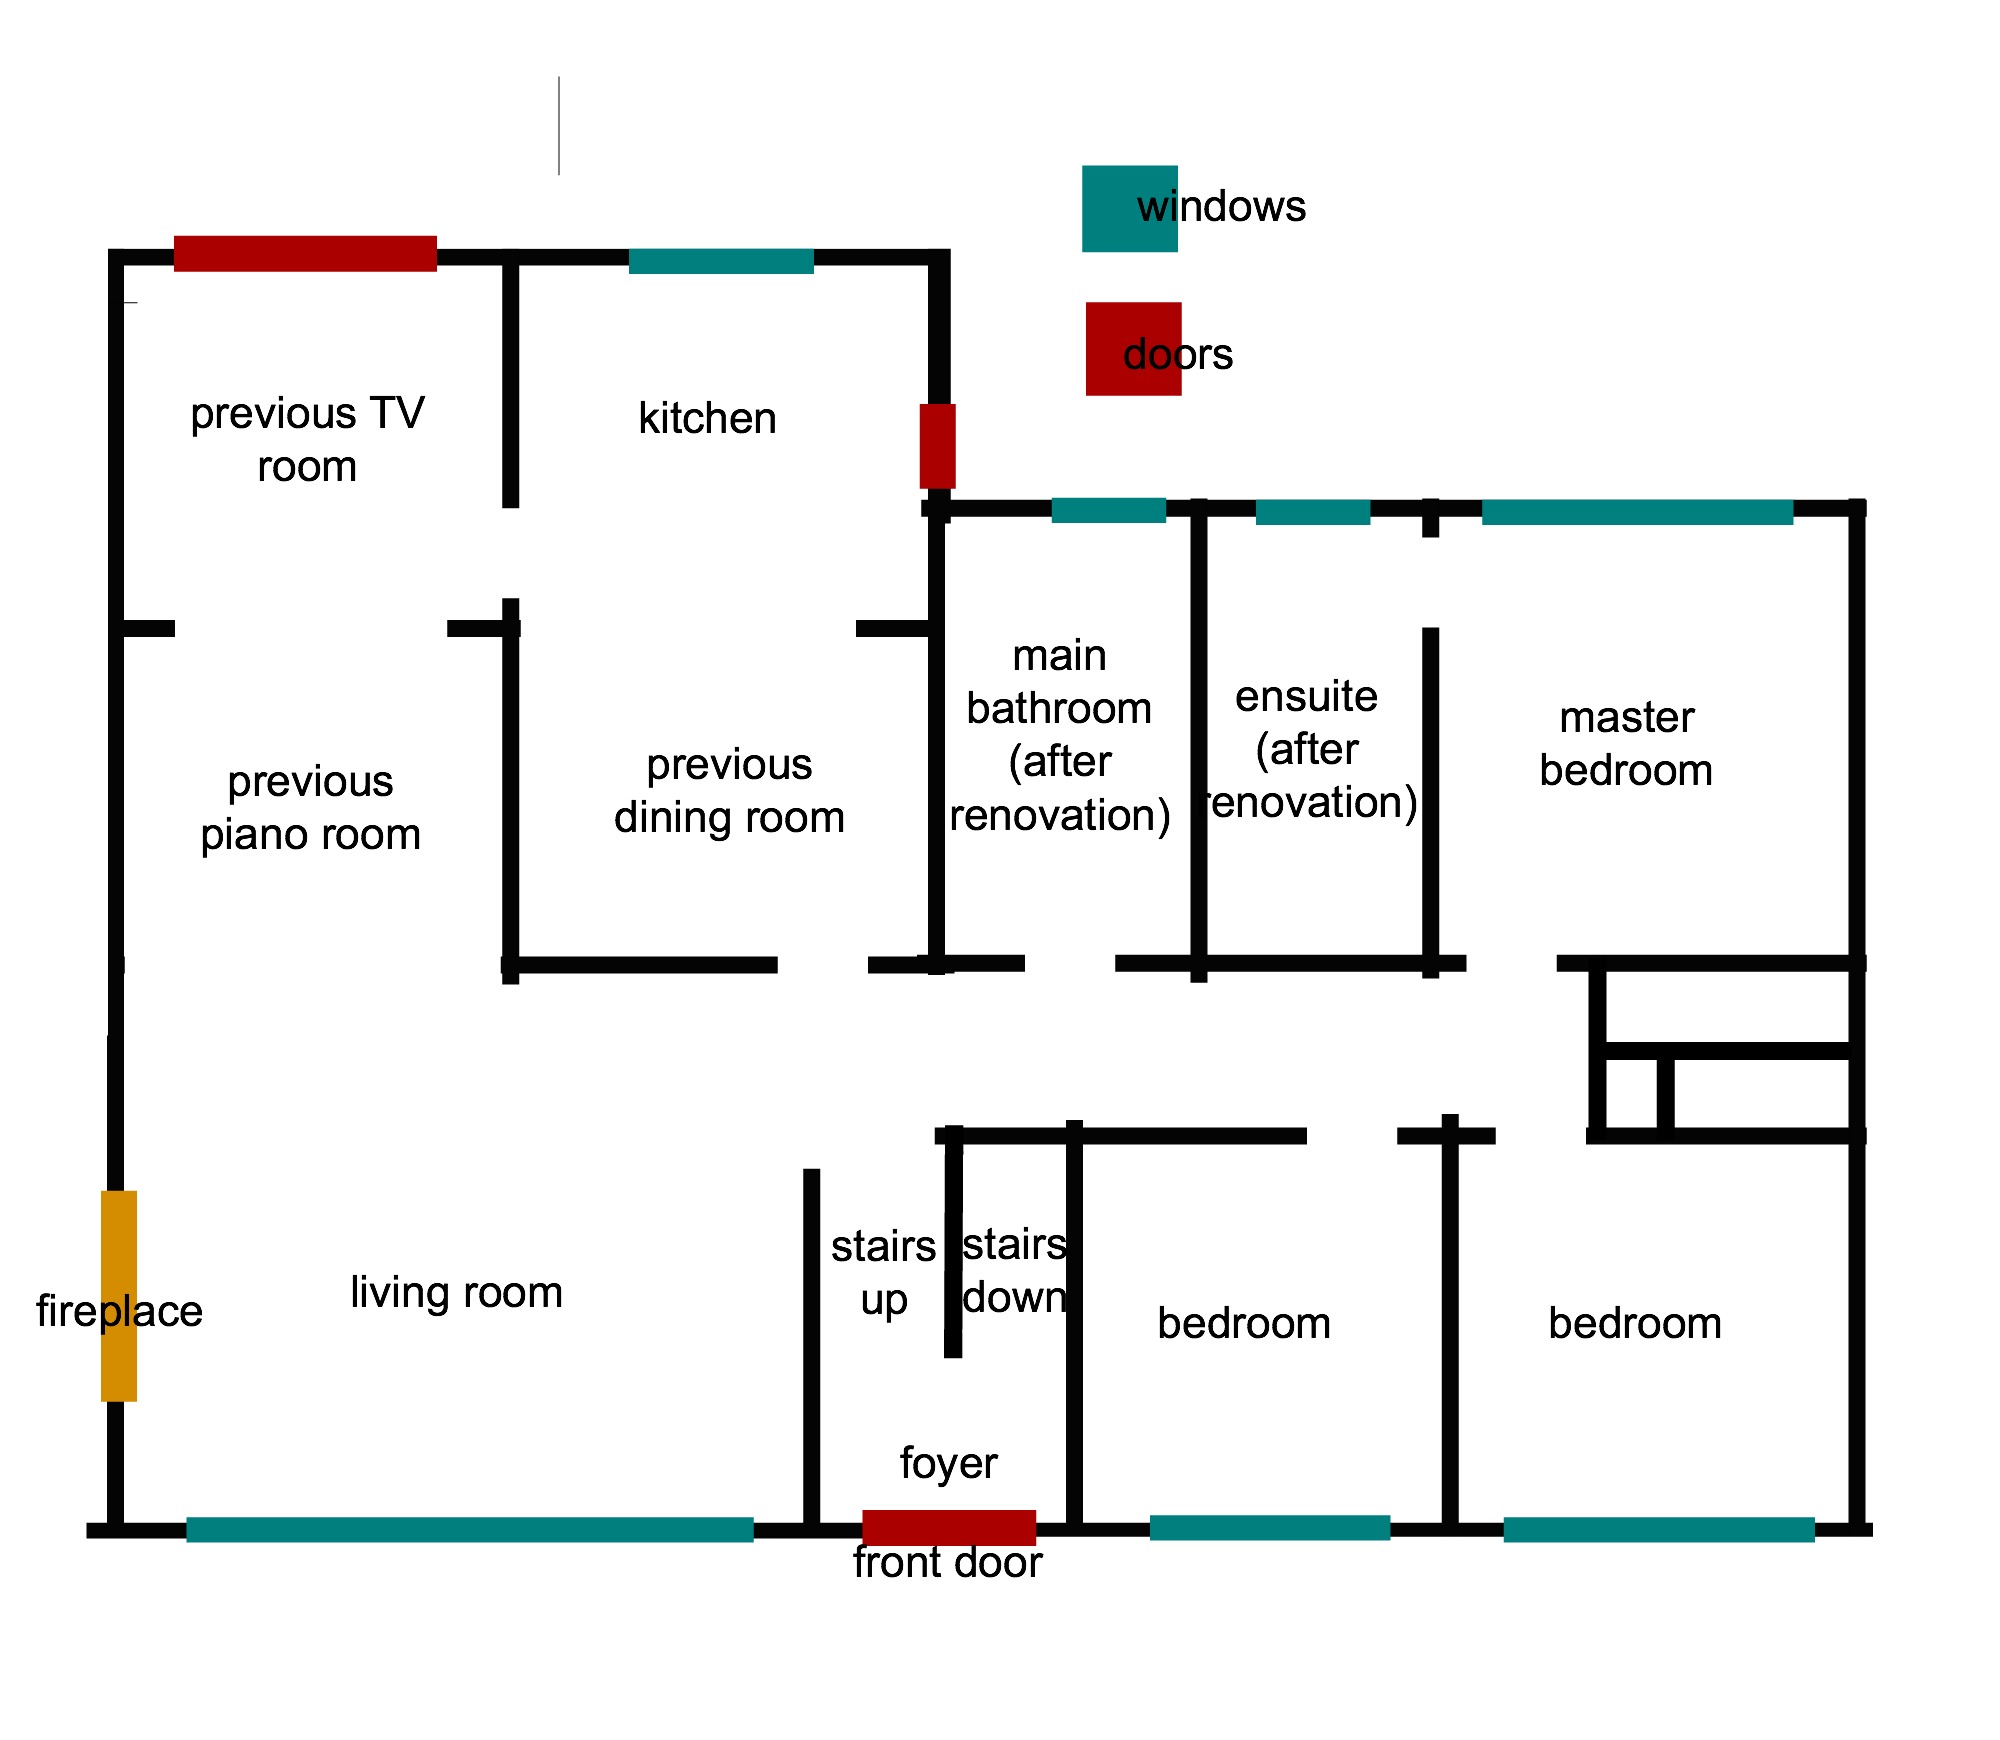 You can see what we called the “previous piano room” was probably originally the dining room, and the rooms labeled “previous TV room” and “kitchen” were the rooms we think were added on.
Here is how the “previous piano room” looked when we viewed the house…

And after the renovations…
We turned it into a TV space just off the main living room – it was actually a little interior room sandwiched by the living room and dining room.
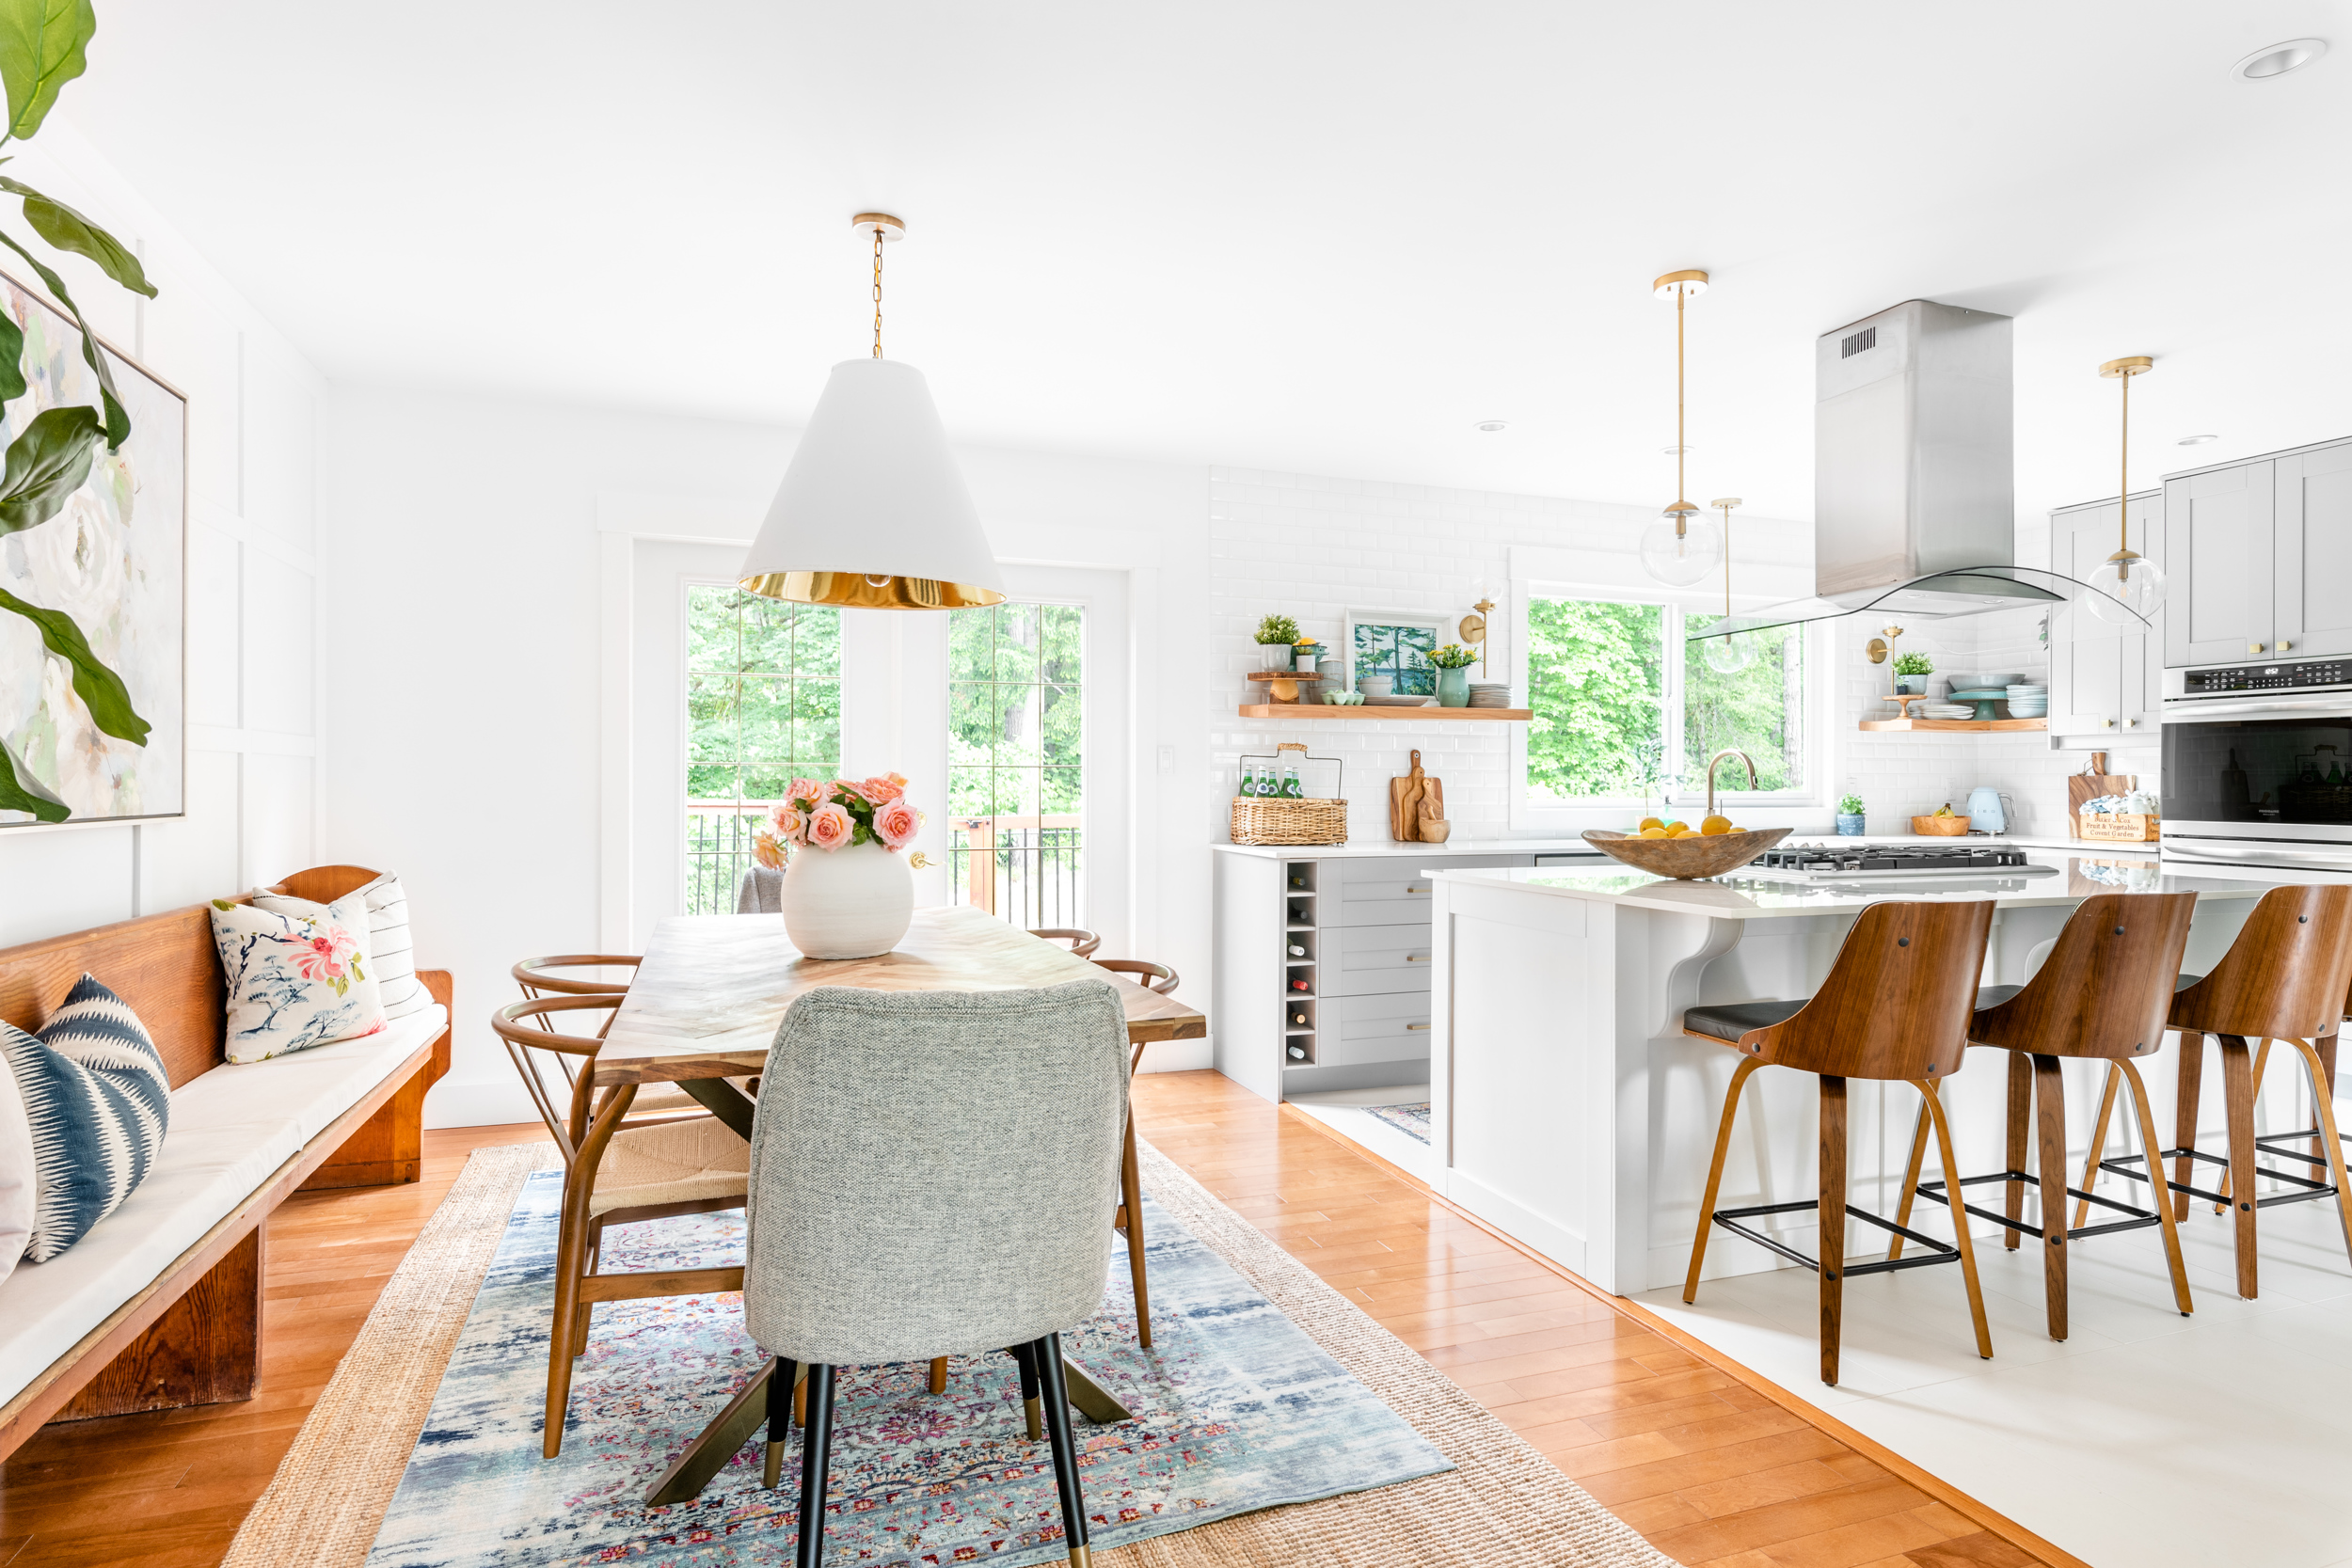
The Dining Room
As I mentioned, we opened up the wall between the kitchen and the future dining room, which is actually what the previous owners had used as a TV room.
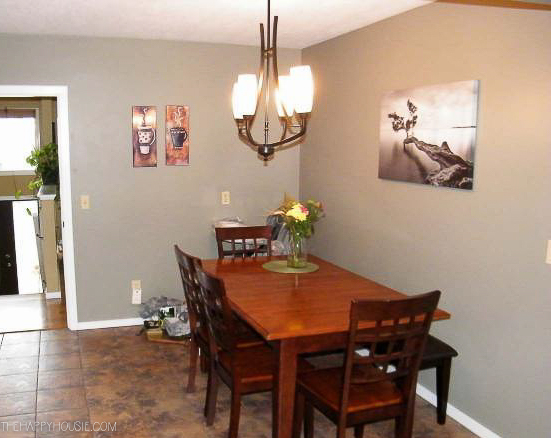
Here is how it looked when we viewed the house…
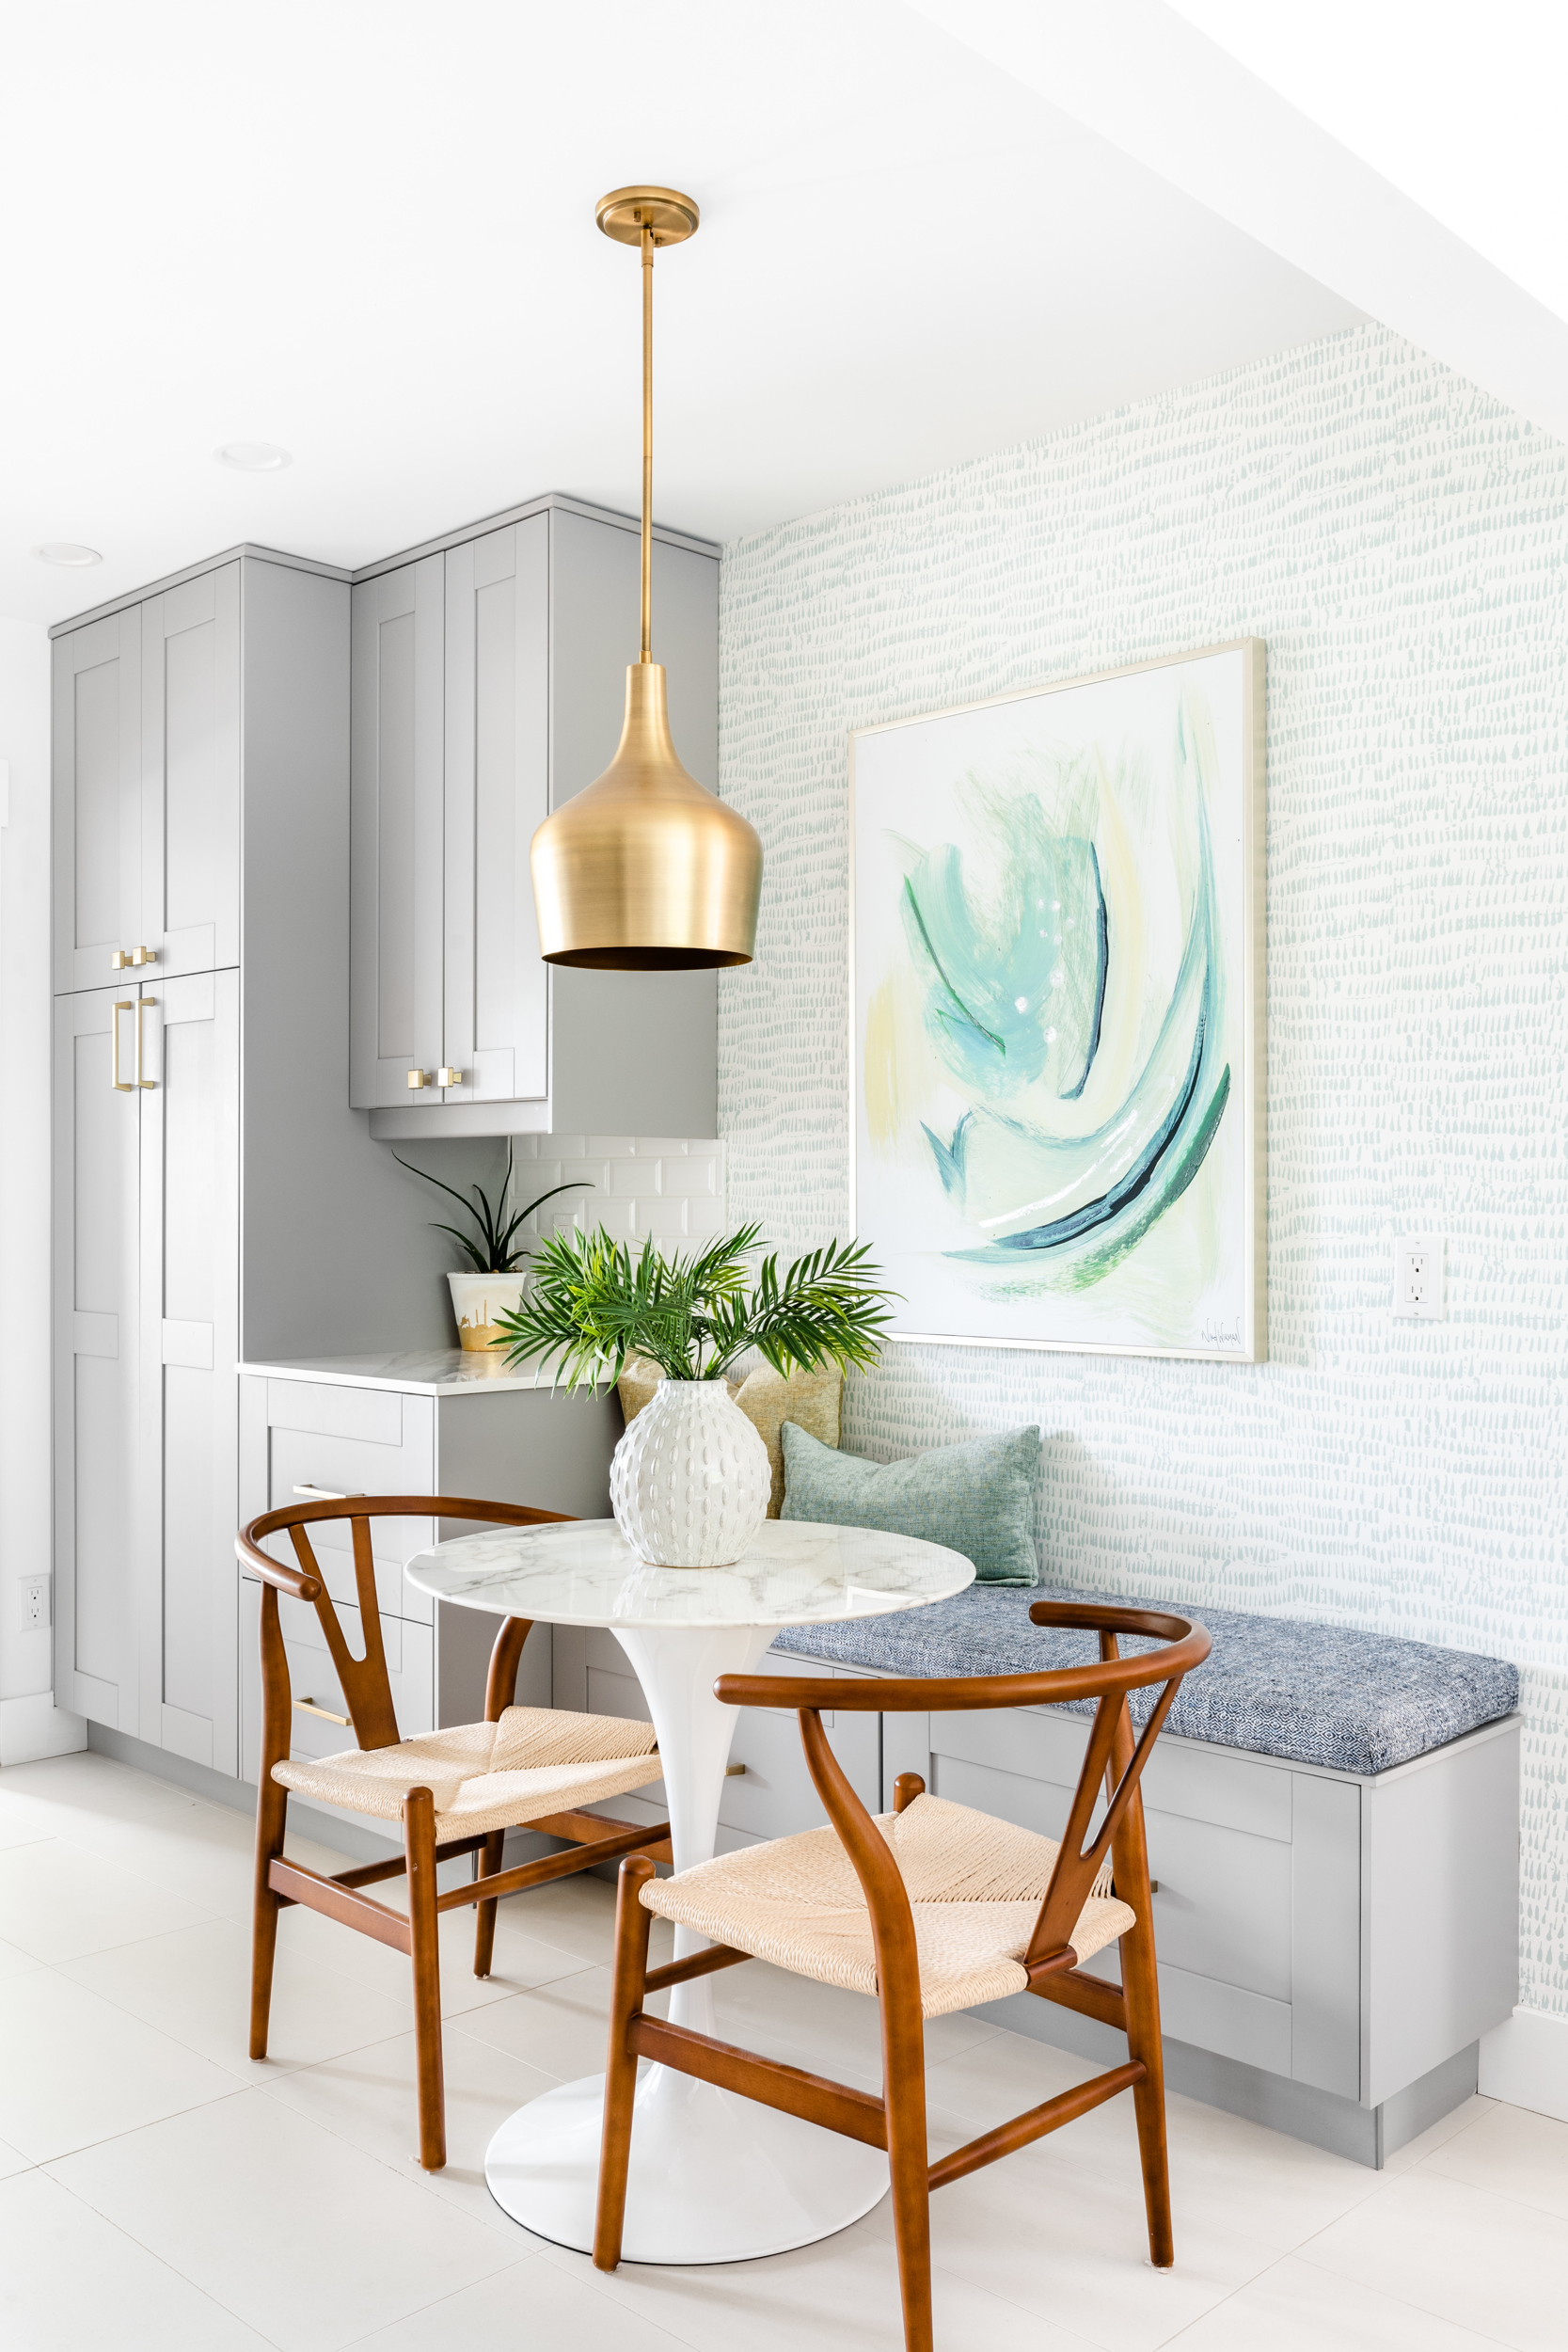
And after the project was complete, with the wall opened up and the whole space renovated…
Read all about our dining room here:
Dining Room Before & After Makeover Reveal and Source Guide
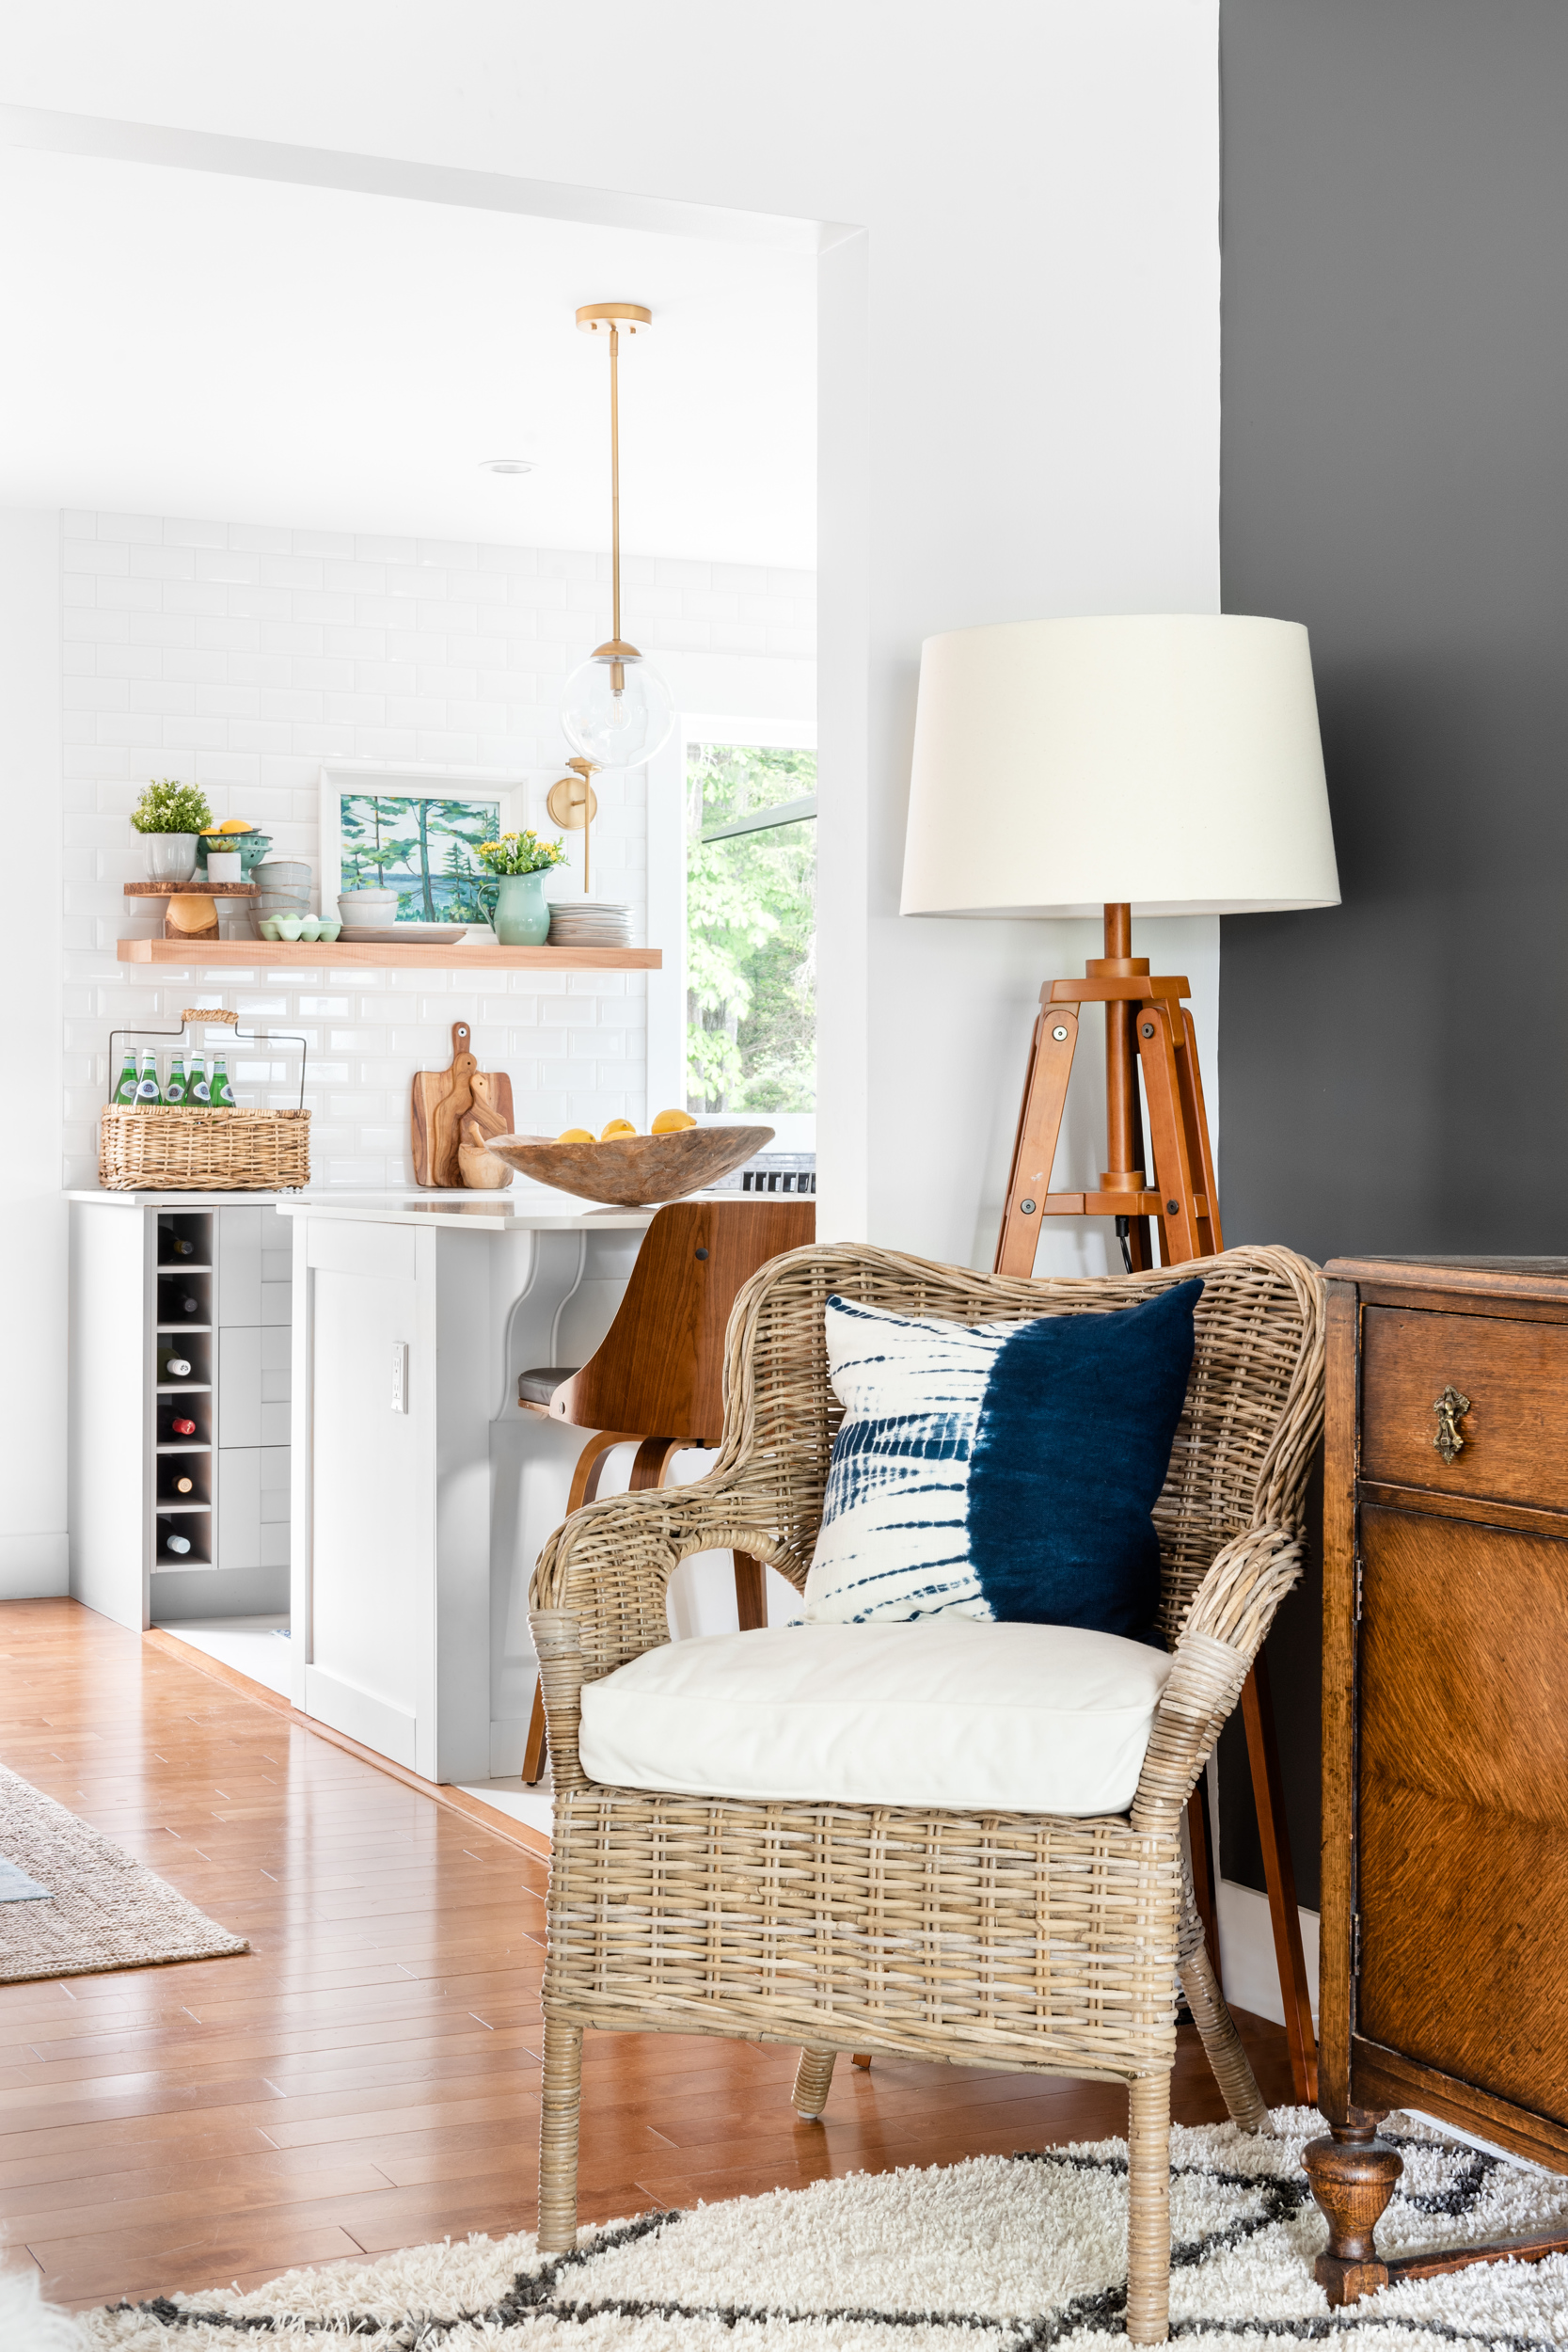
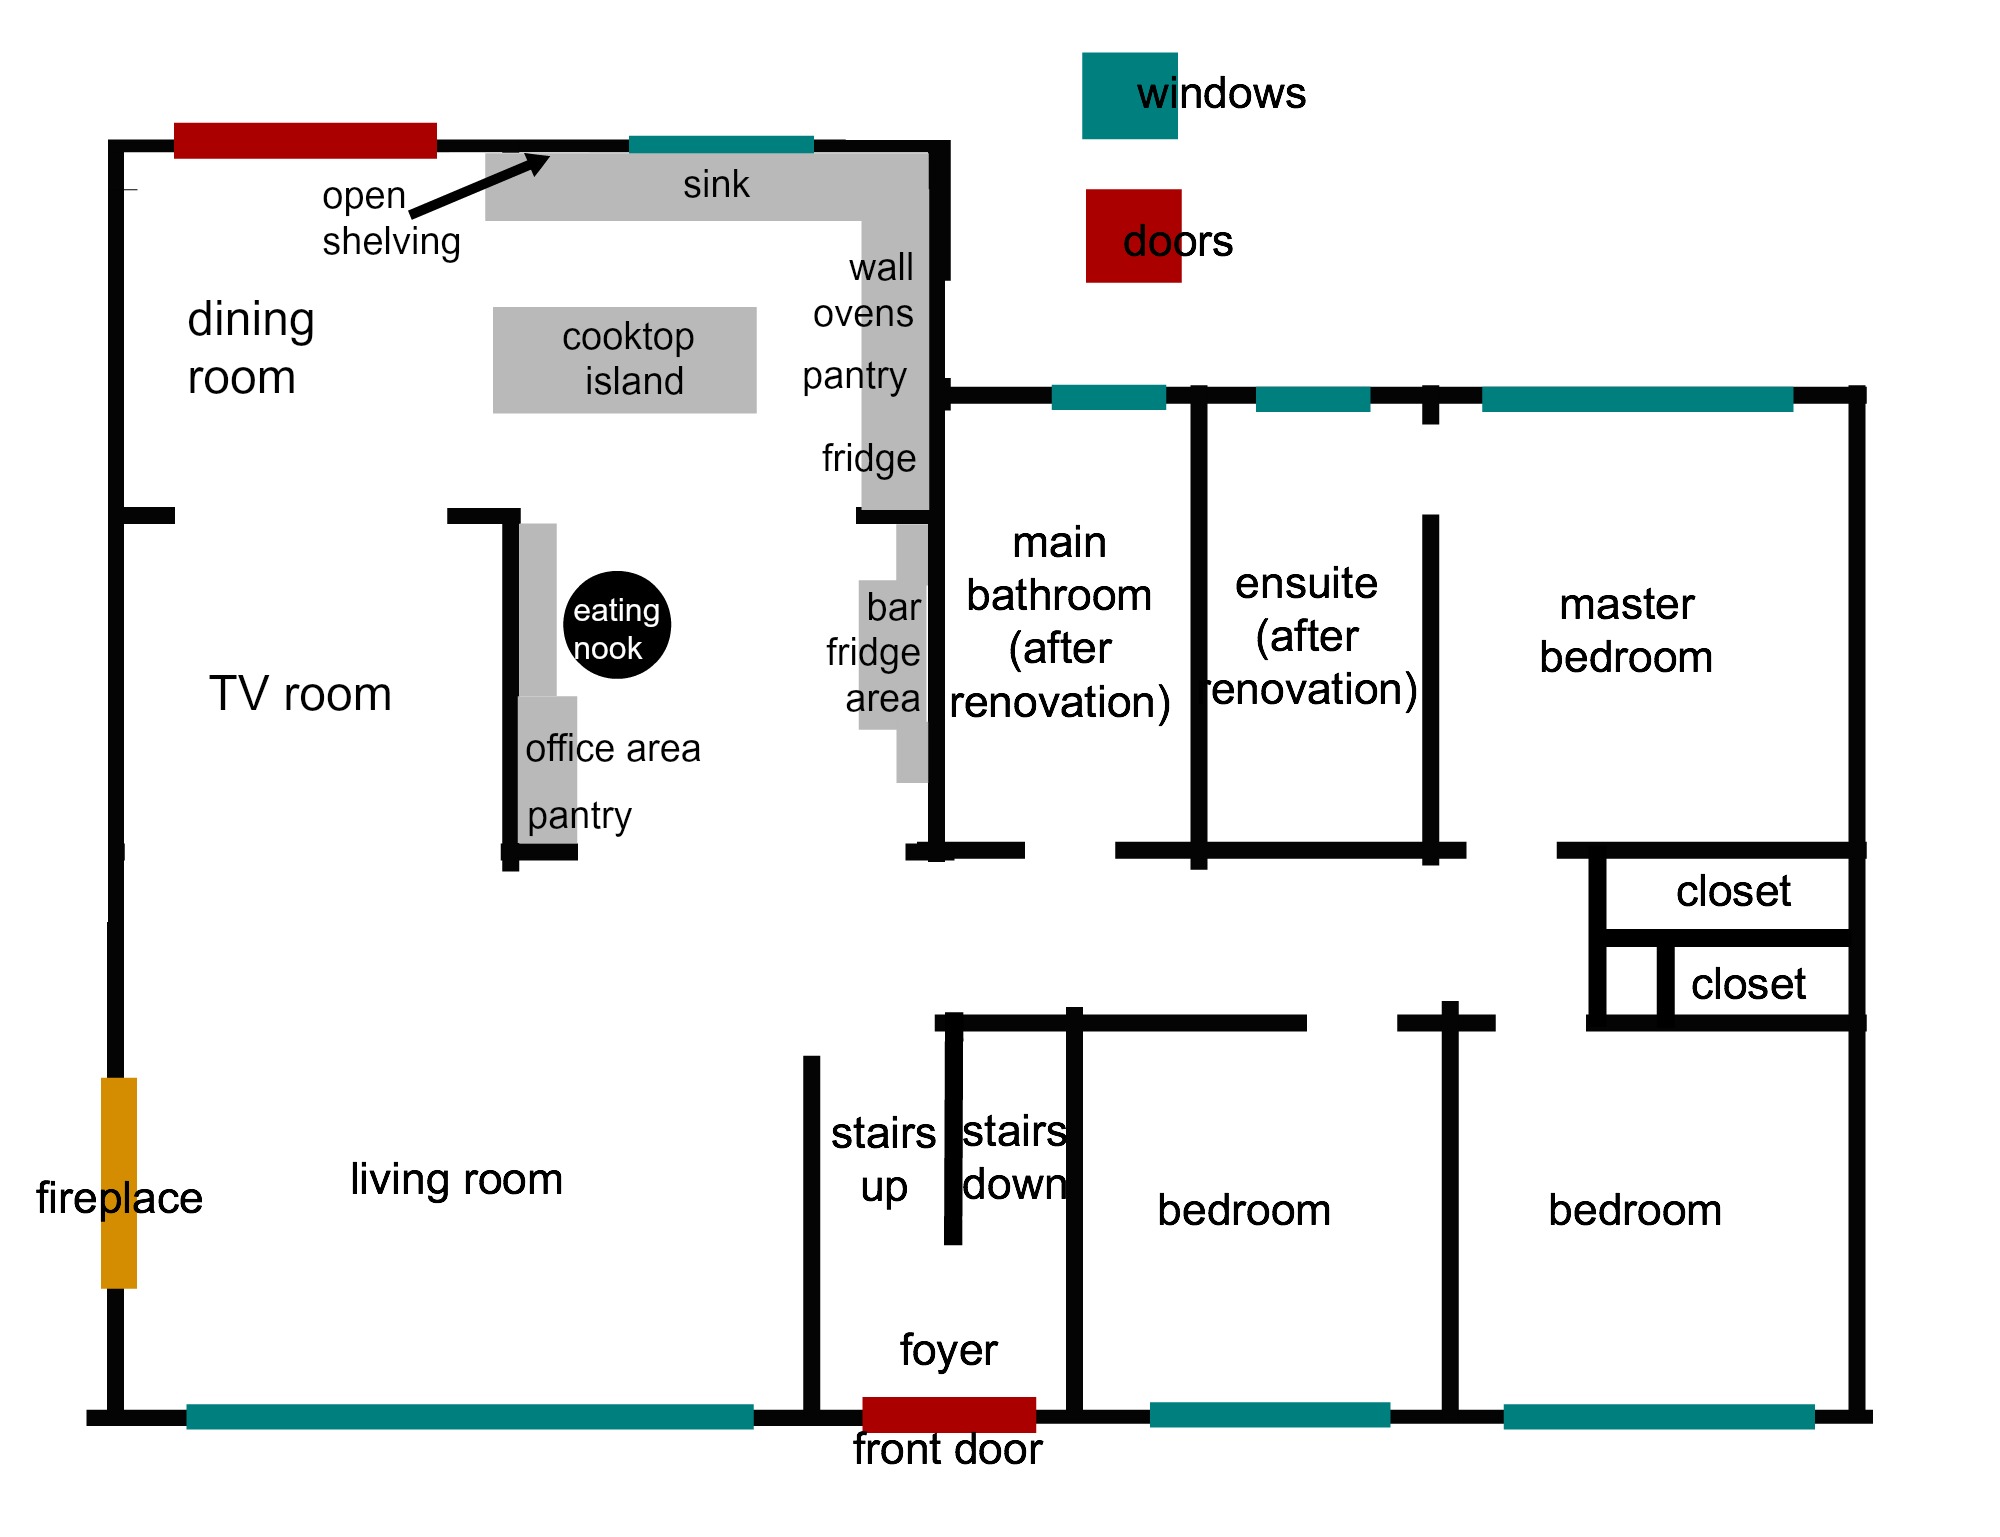
The Kitchen
The floor plans below shows exactly what we opened up and where we changed things.
It went from this…
To this…
Here is how the kitchen looked when we viewed the house…
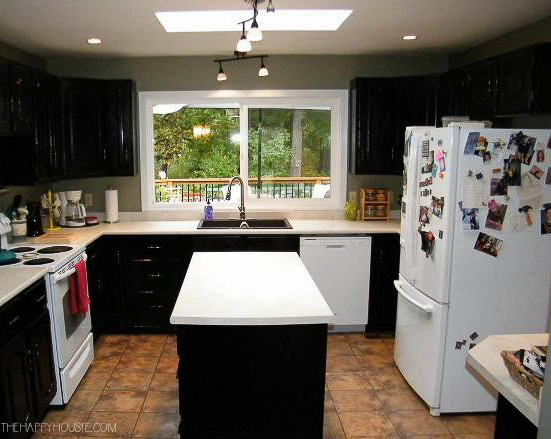
And after the project was complete…
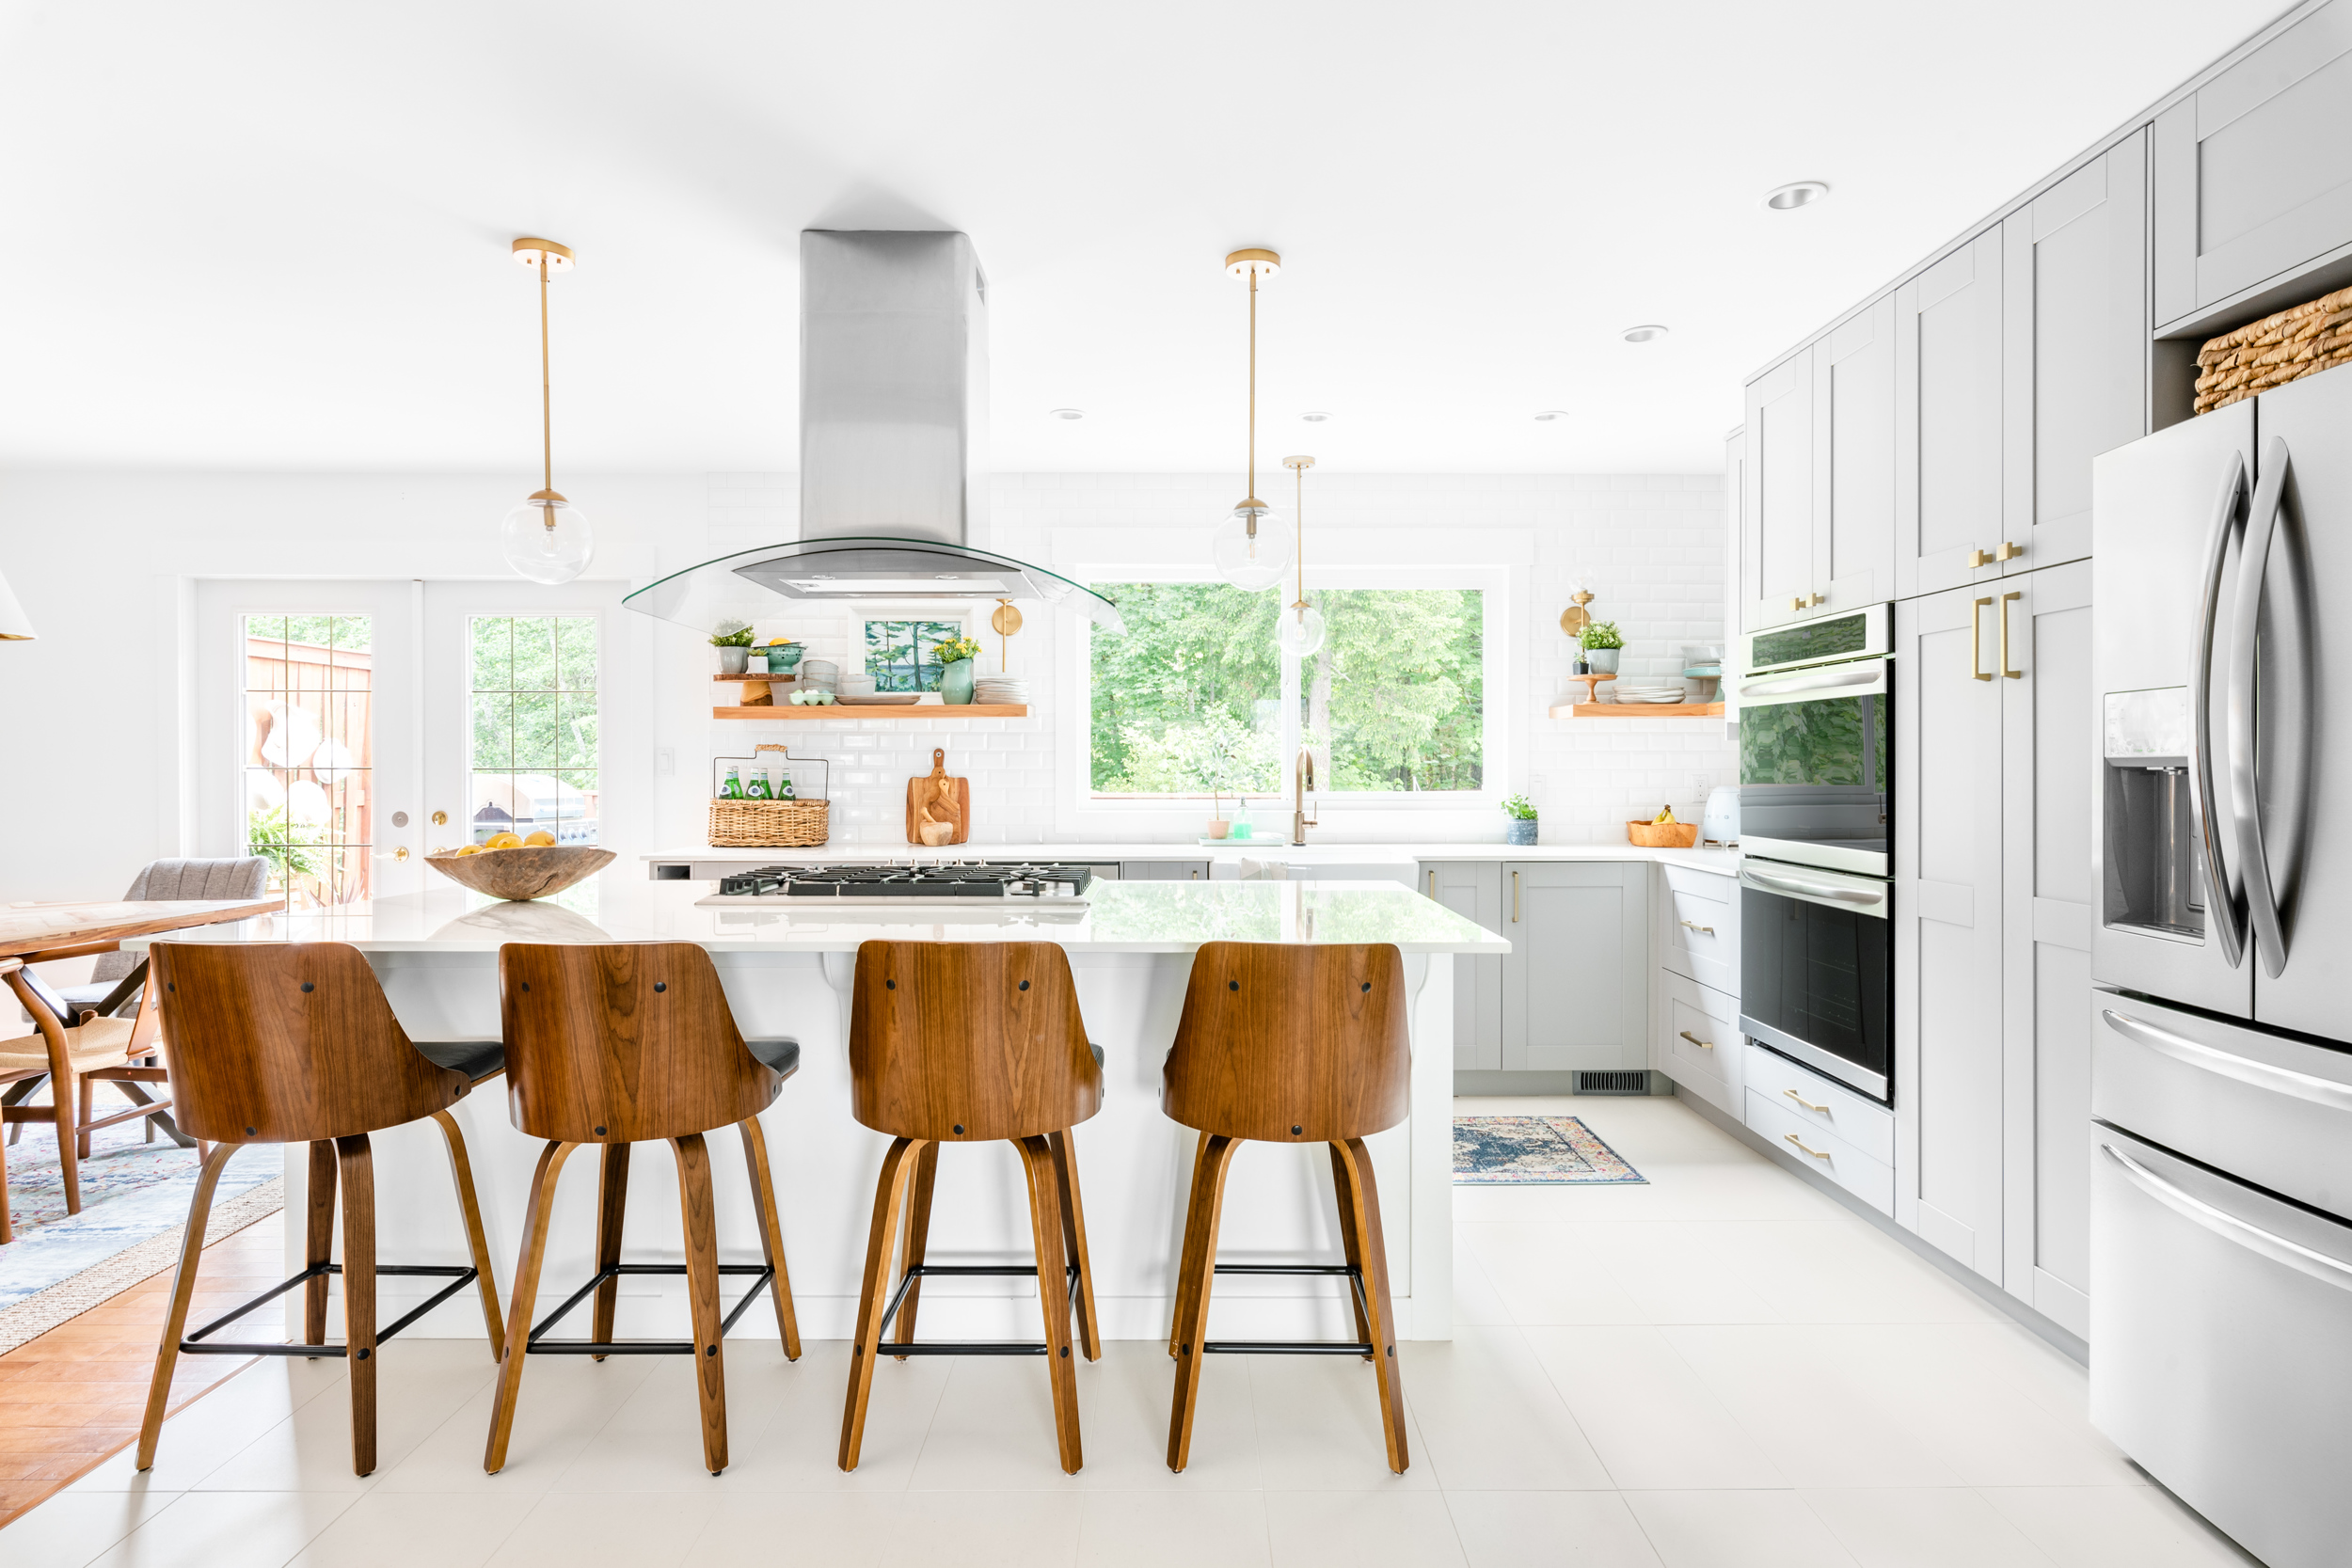
You can read all of our kitchen renovation posts here:
Our Big Kitchen Renovation Before & Construction Details
Kitchen Reveal: The Main Kitchen
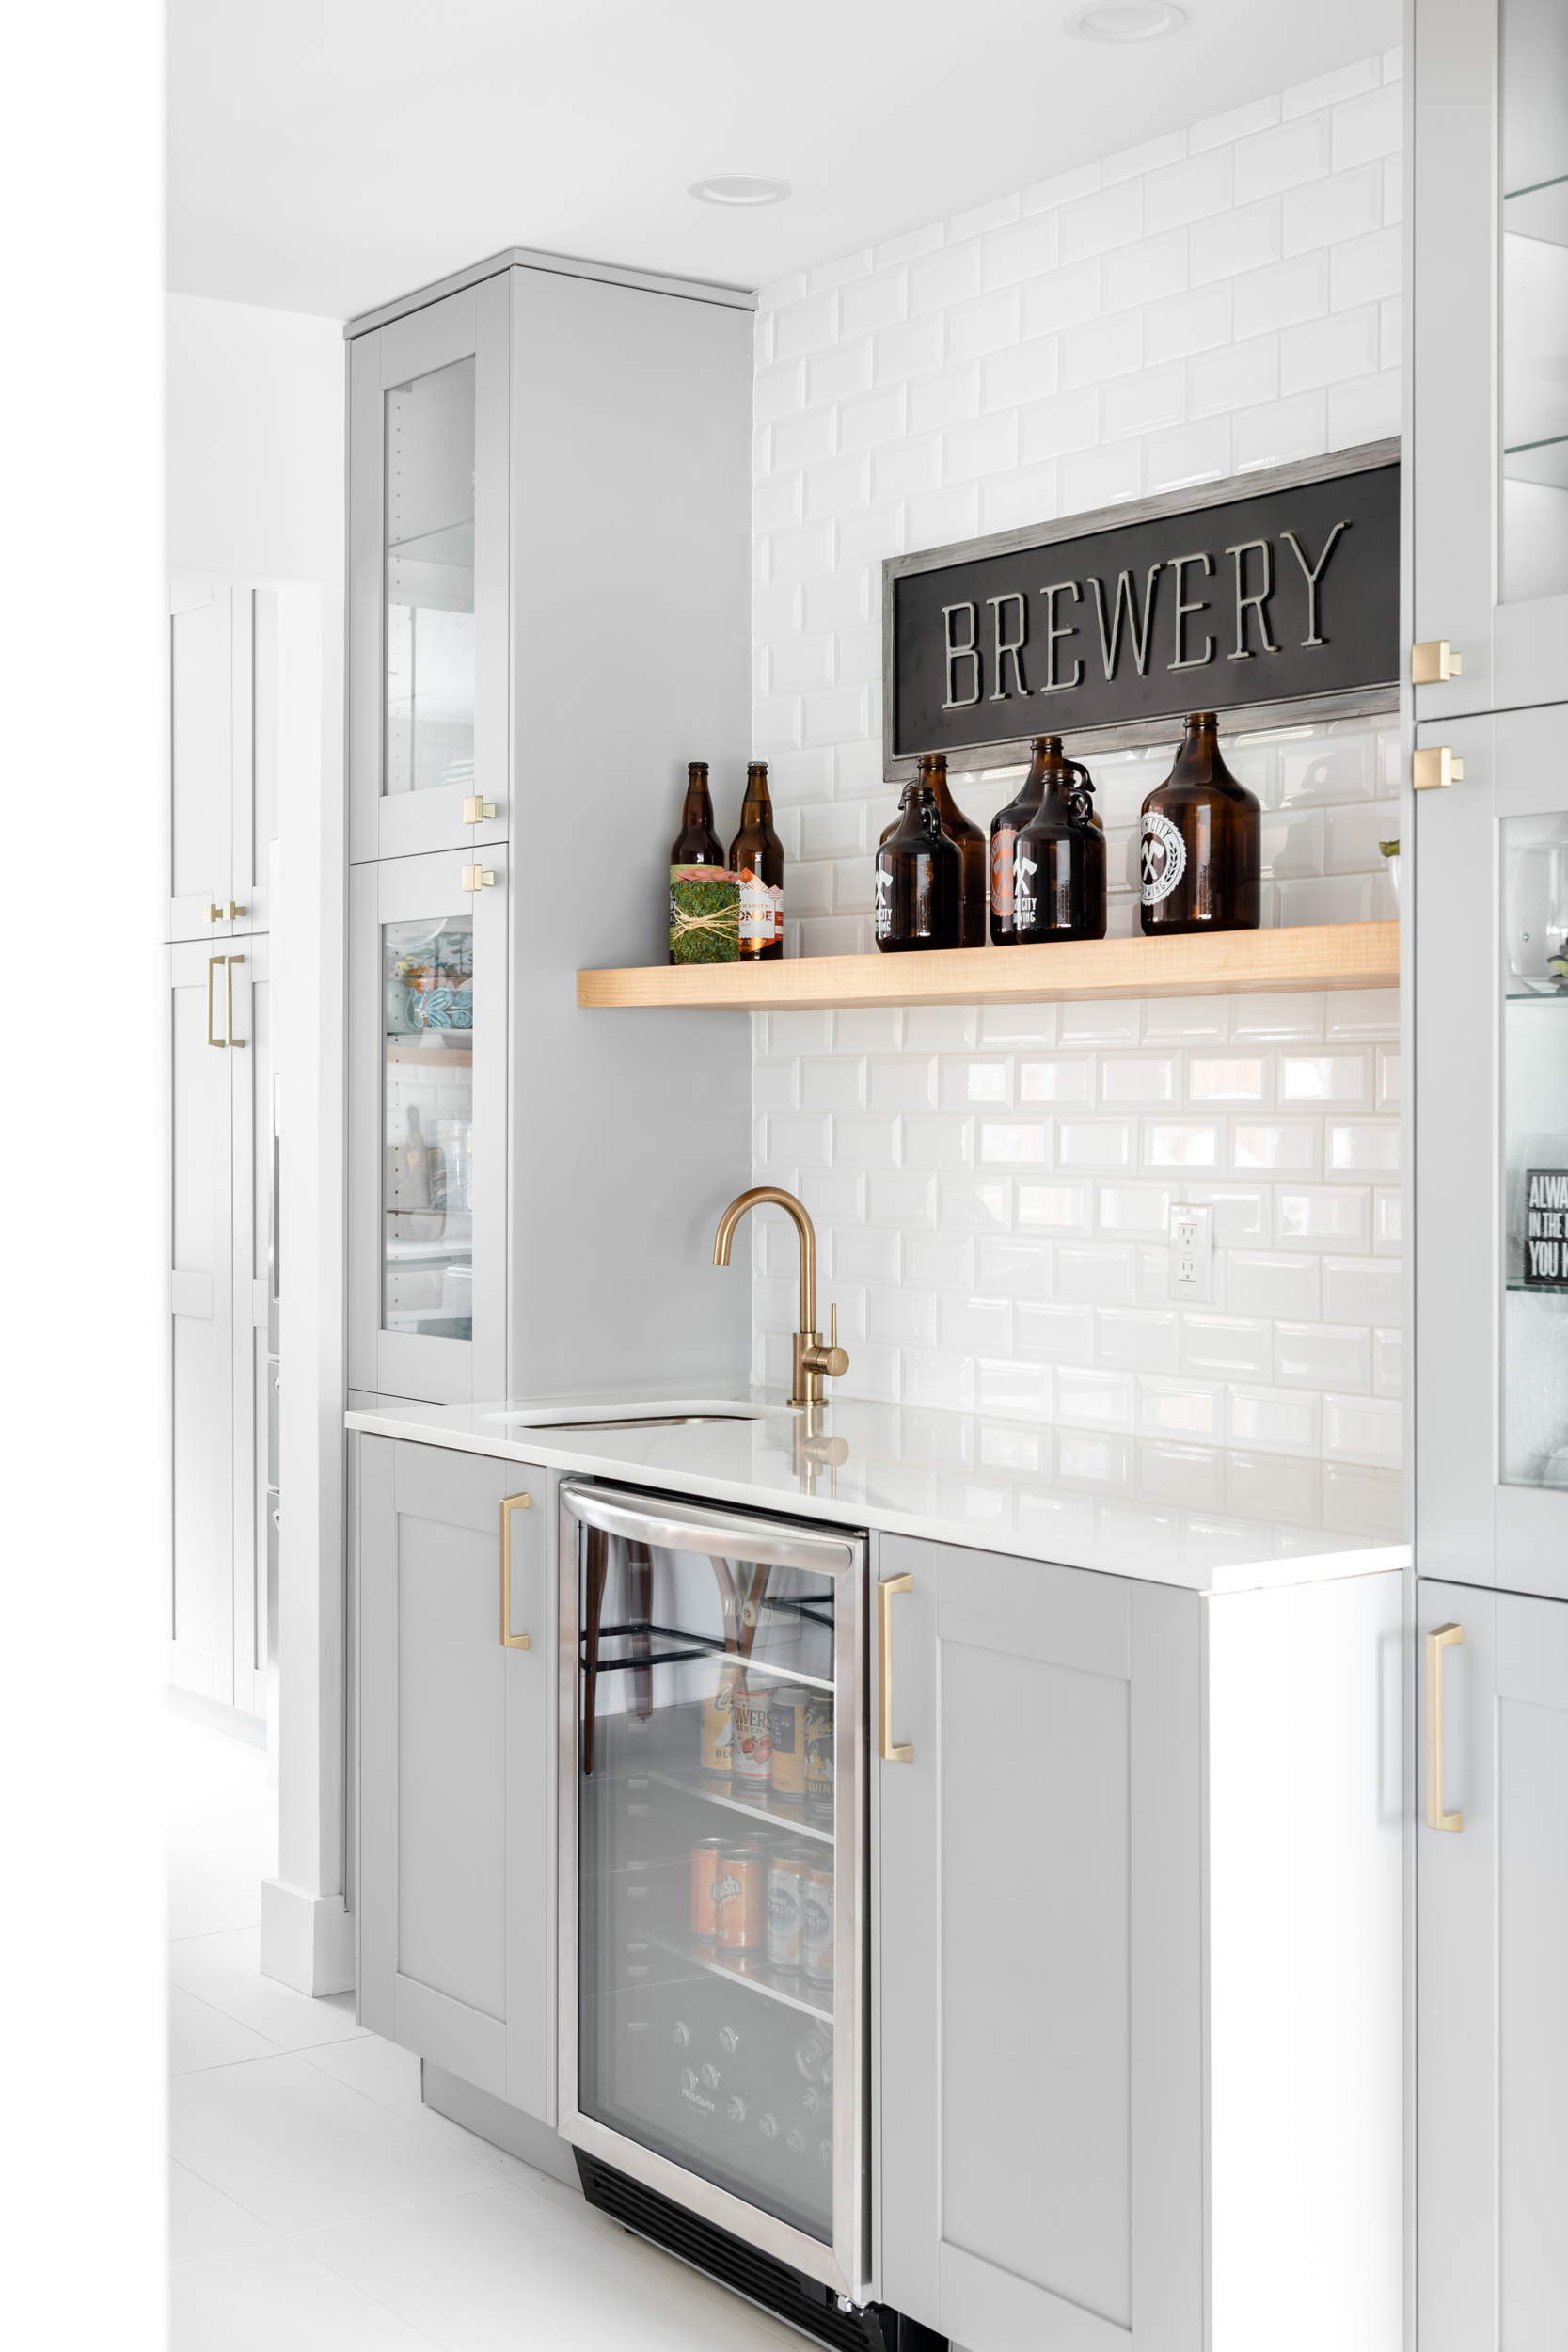
Kitchen Reveal: Banquette Eating Area & Beverage Centre
Why We Chose Dekton for Our Kitchen Countertops
Grey & White Kitchen Renovation Plans & Inspiration Board
An Honest In-Depth Review of Our Ikea Kitchen
The before below is of the area that the previous owners had used as a dining room. What you can’t see in this picture is there was a large pantry closet with glass sliding closet doors on the left wall of this room. We actually took that closet space and used it in the main bathroom, taking the hallway coat closet out as well so as to gain more bathroom space.
We turned this area into a bar/beverage centre on one side (where the closet had been) and then added an extra pantry, office closet, and little nook for a table on the other side of the room. We also widened the doorway towards the living room/stairs to bring in the light and improve the flow in the house.
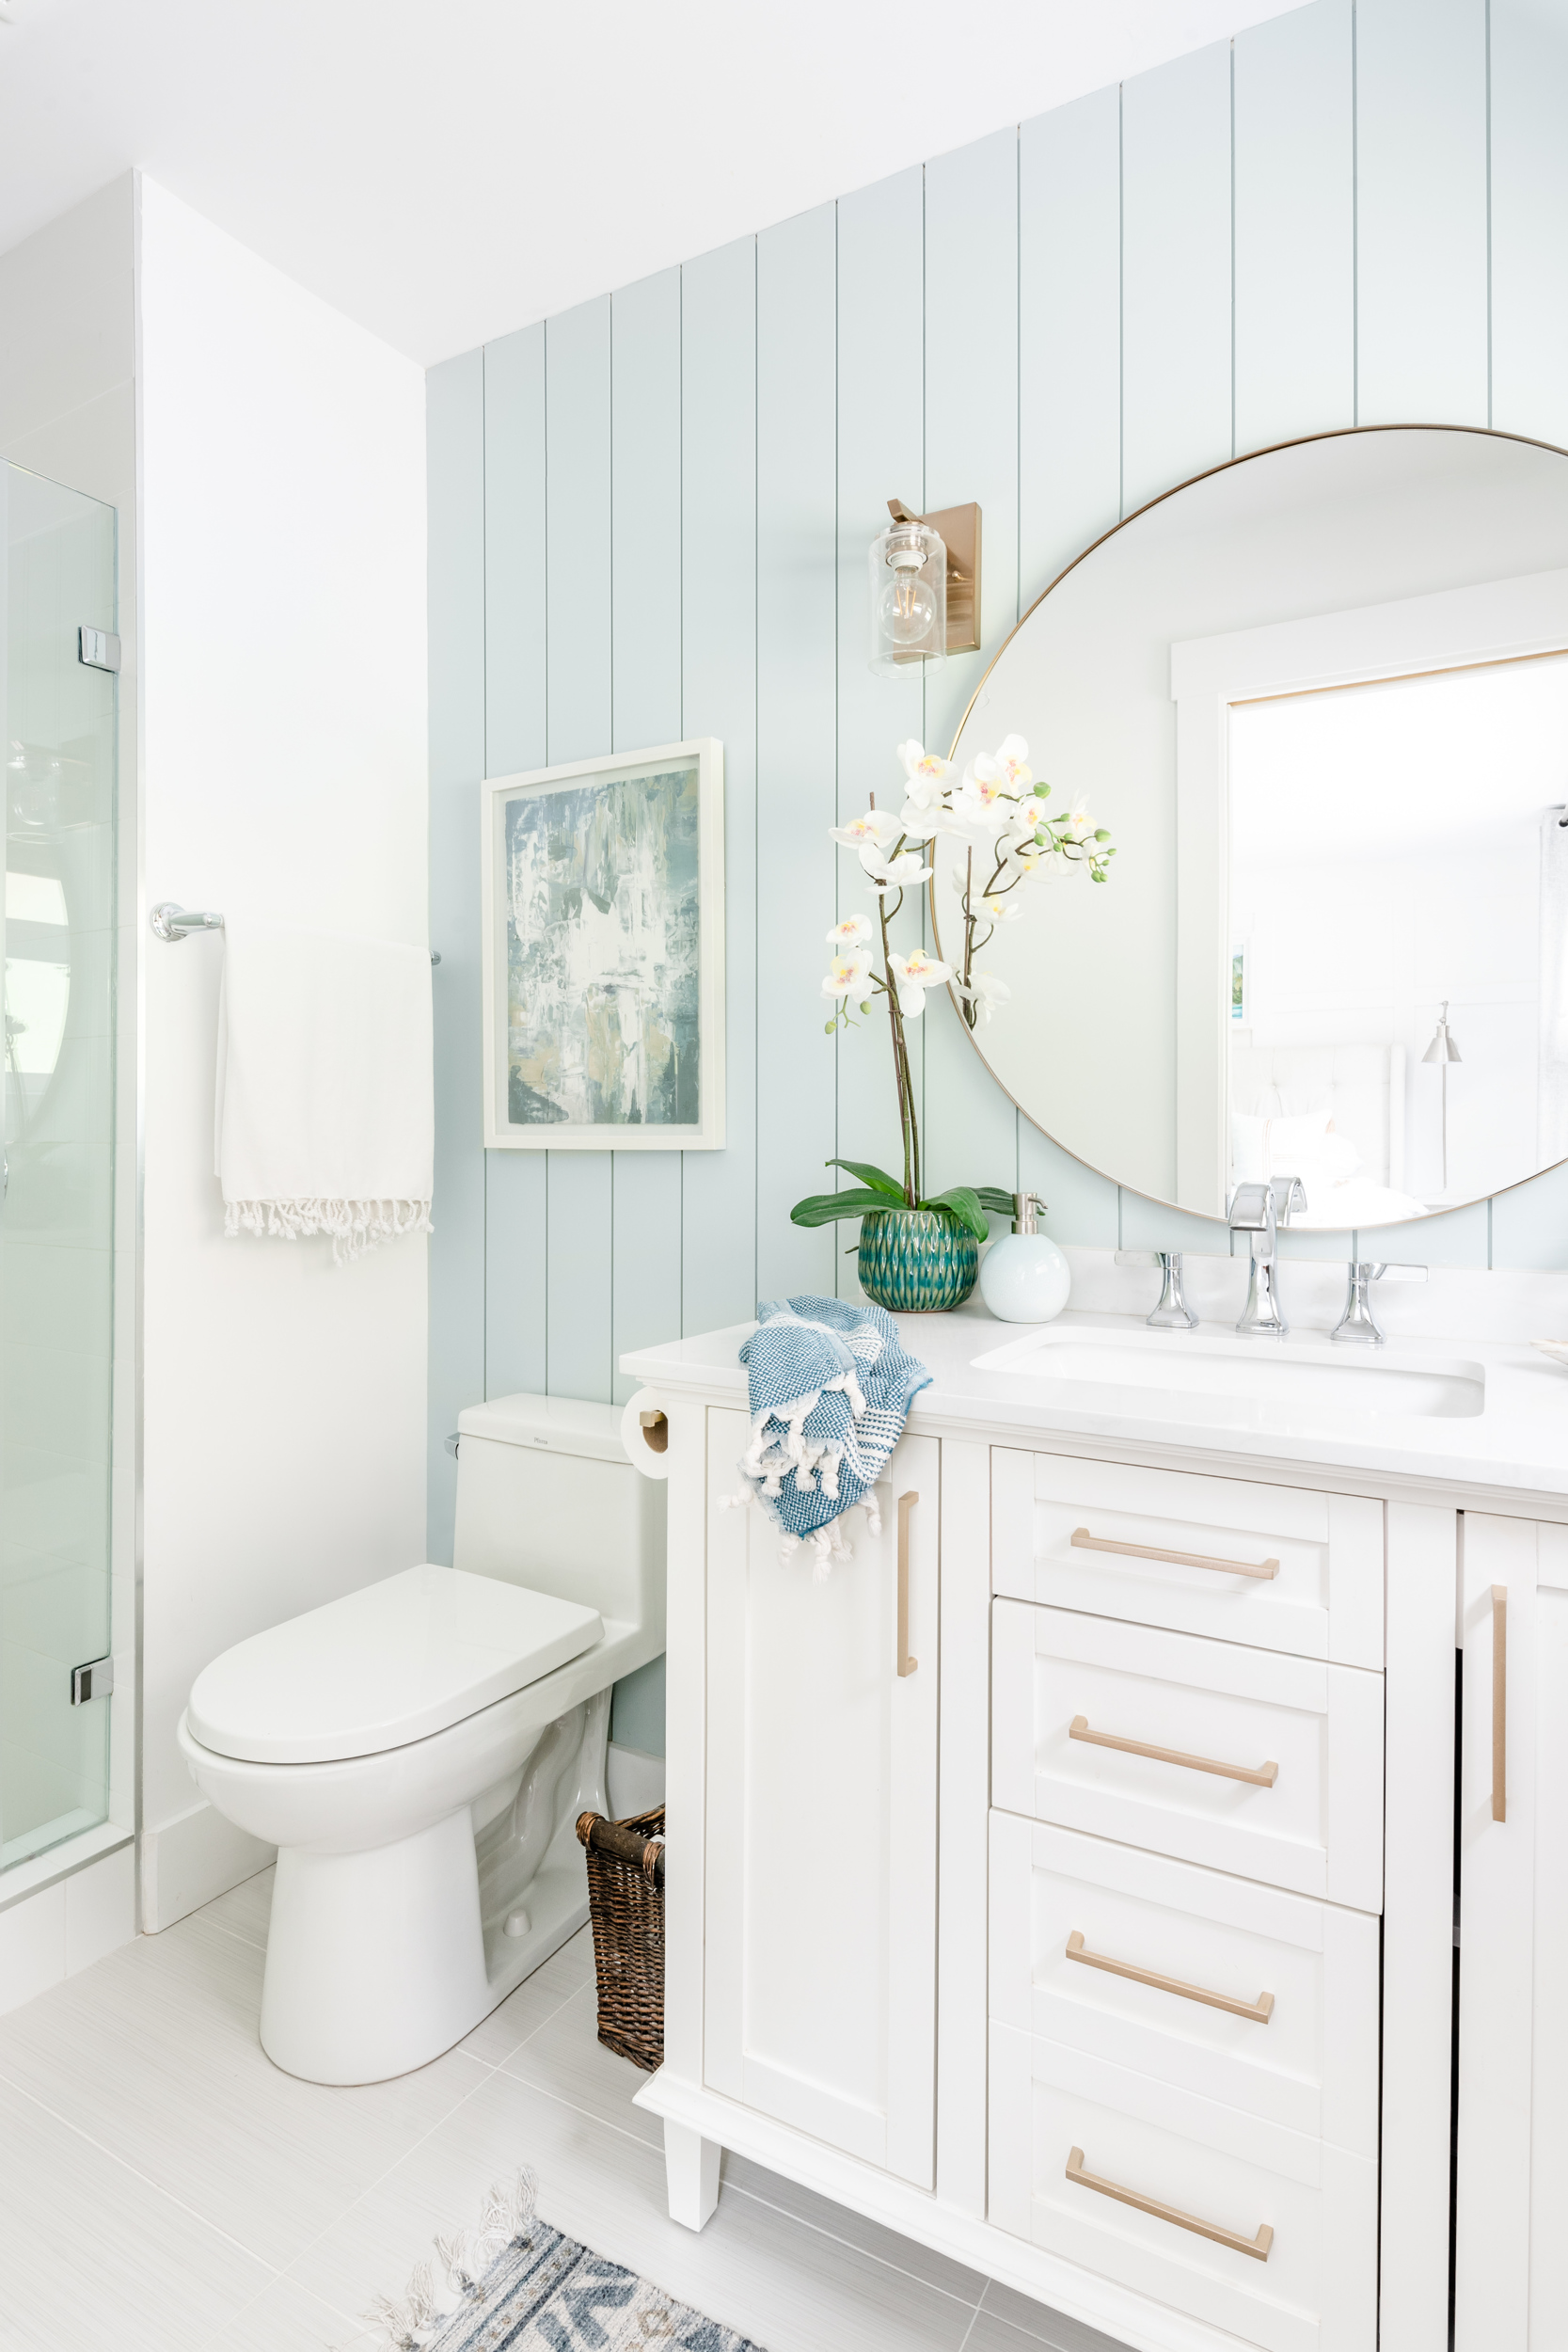
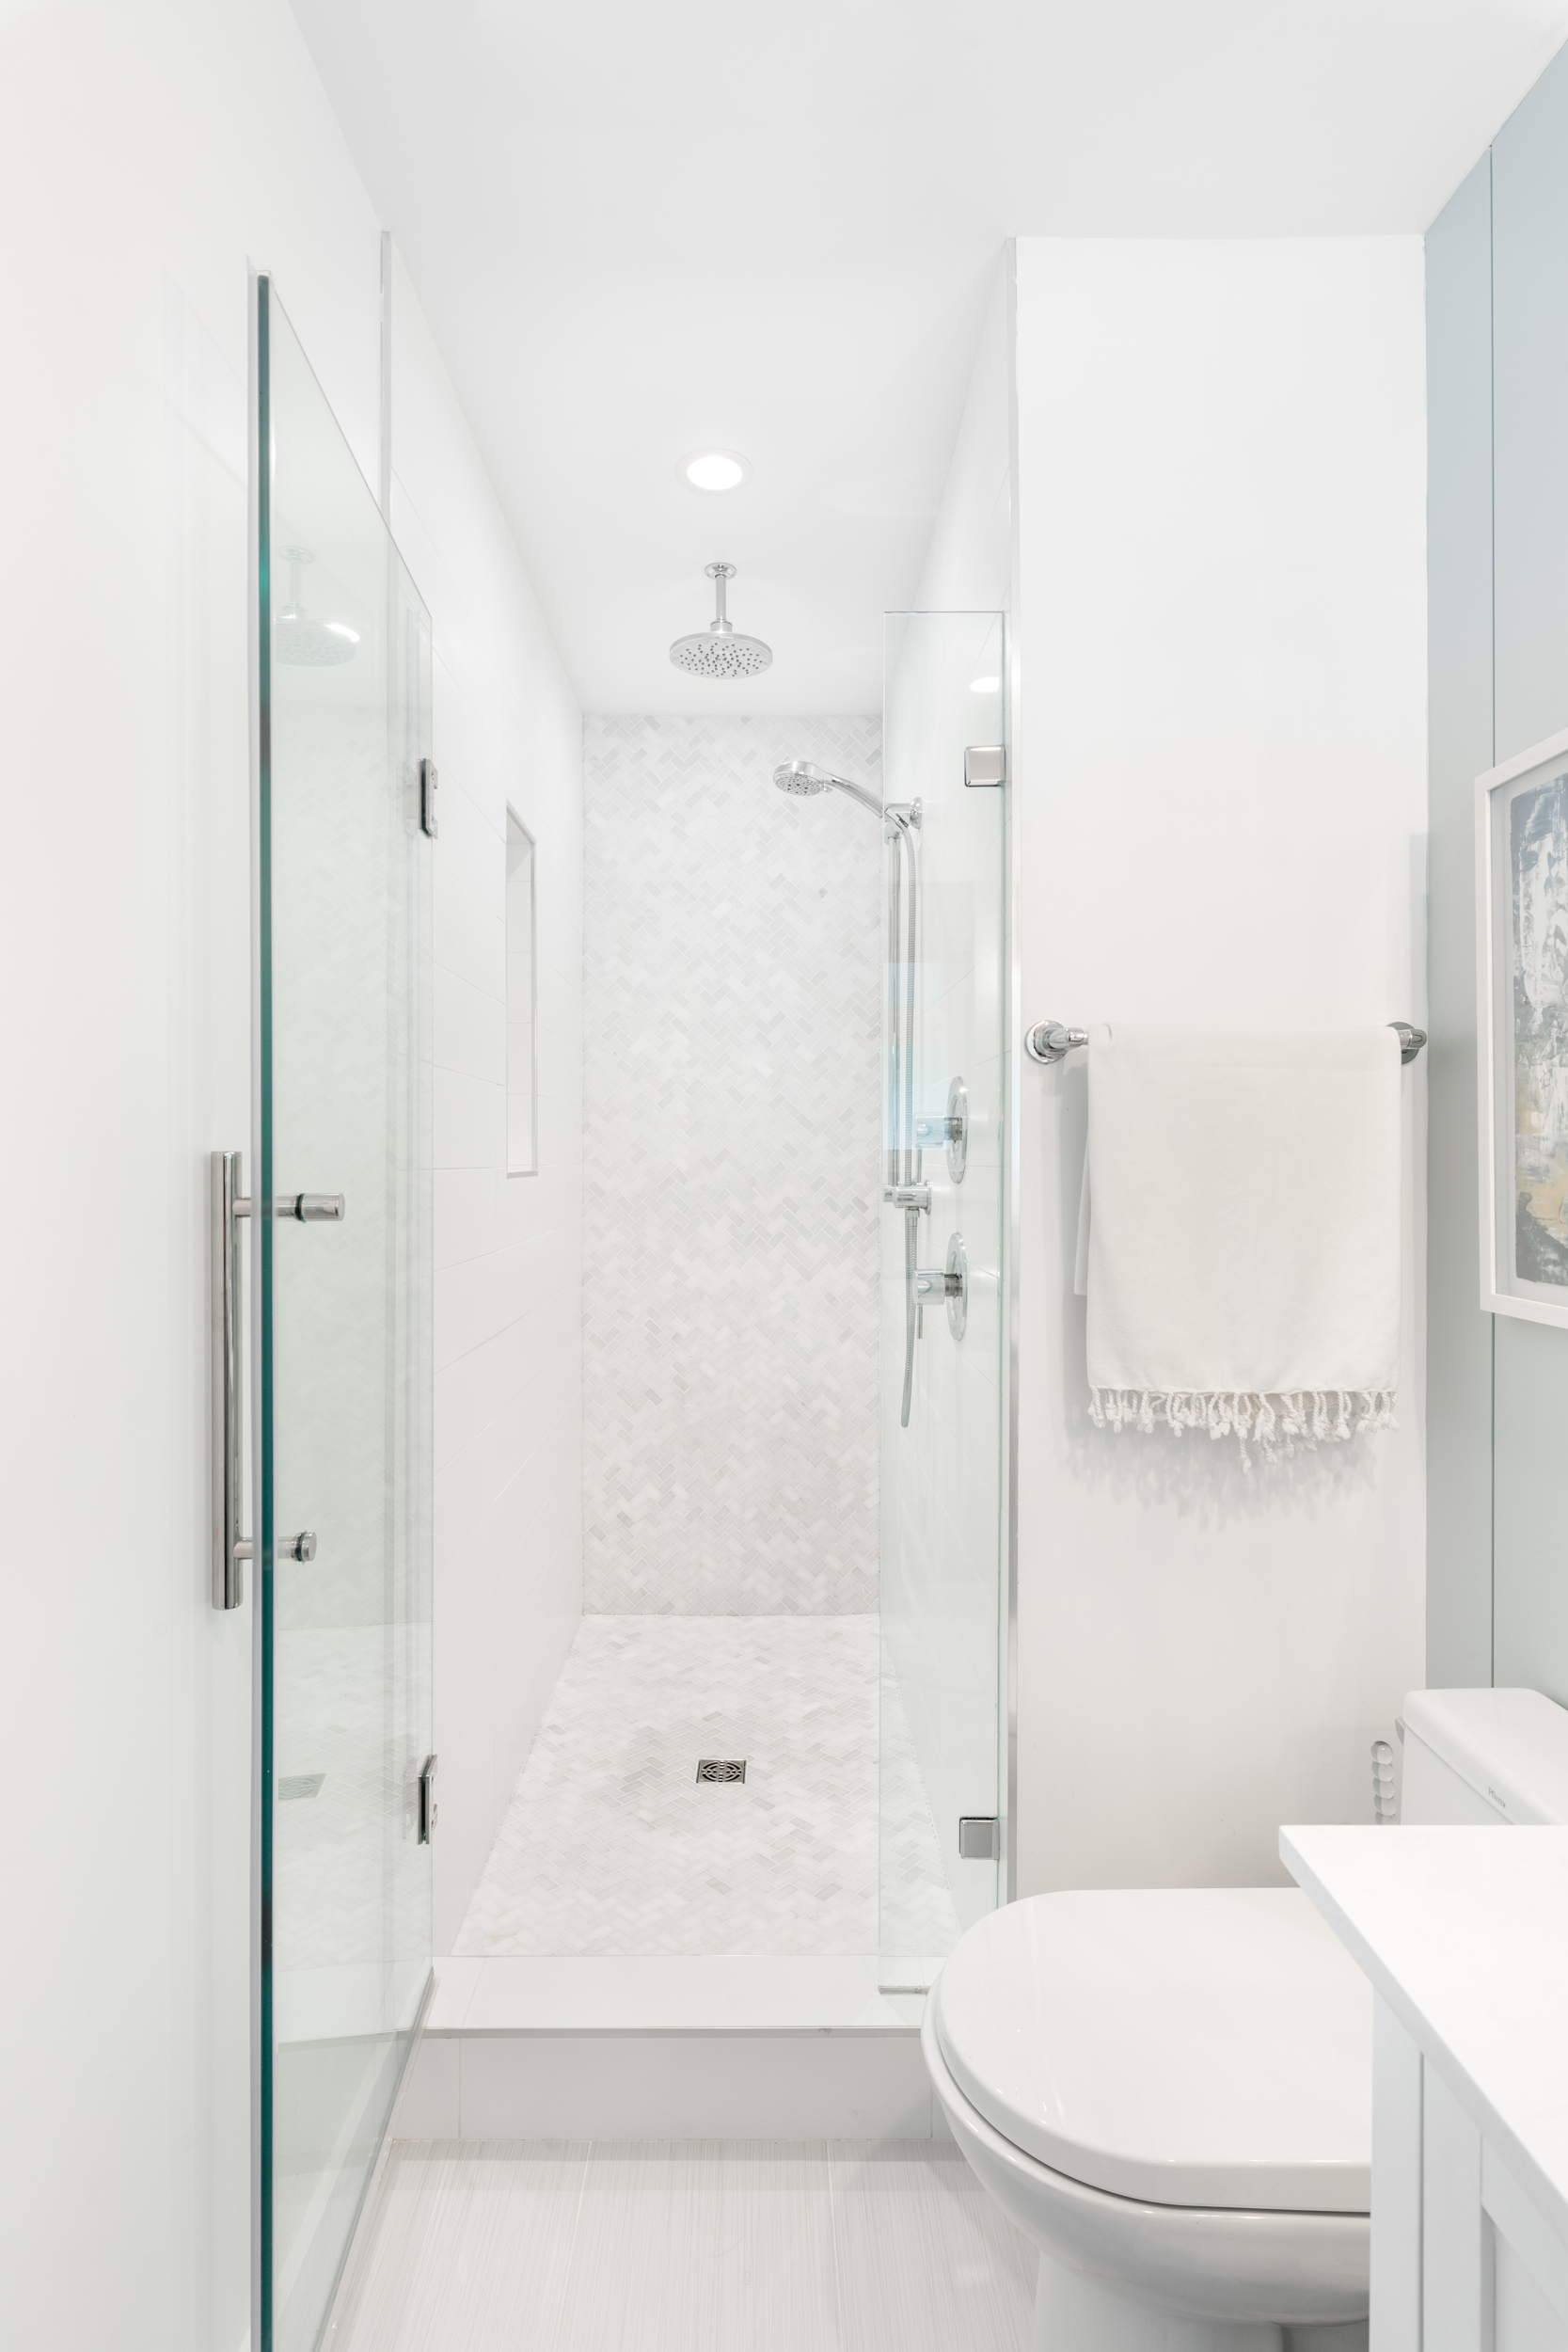
The Main Bathroom
As I mentioned, we added a couple of feet of space by taking out the previous pantry closet and coat closet to open up the room. That allowed us to gain enough space for a separate tub and shower, double vanity, as well as enough room to add a shower to the master ensuite (see further down in this post).
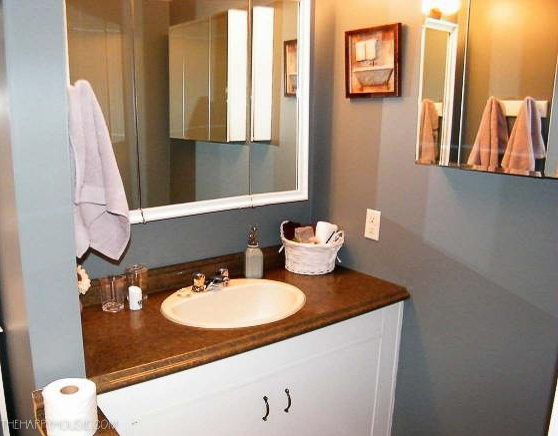
Here is how the main bathroom looked when we viewed the house…
Here is the light and bright main bathroom after the renovation was complete…
You can see how the window is no longer centred – that is because the additional space we gained by incorporating the closets.
Read all about the main bathroom renovation here:
Fresh & Modern Main Bathroom Renovation on a Big-Box Store Budget
Main Bathroom Before & Renovation Plans
The Bedrooms
The upstairs of our forest house has three bedrooms including the master, the smallest of which was used as an office by the previous owners.
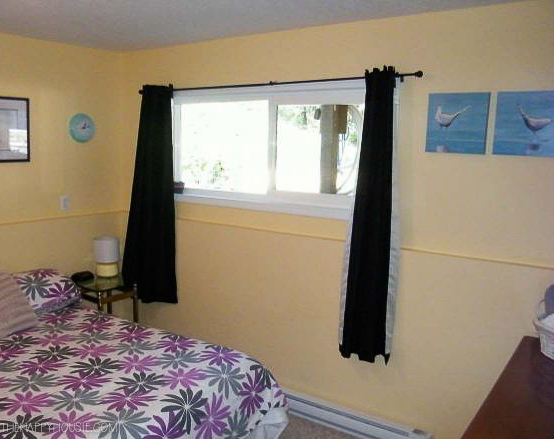
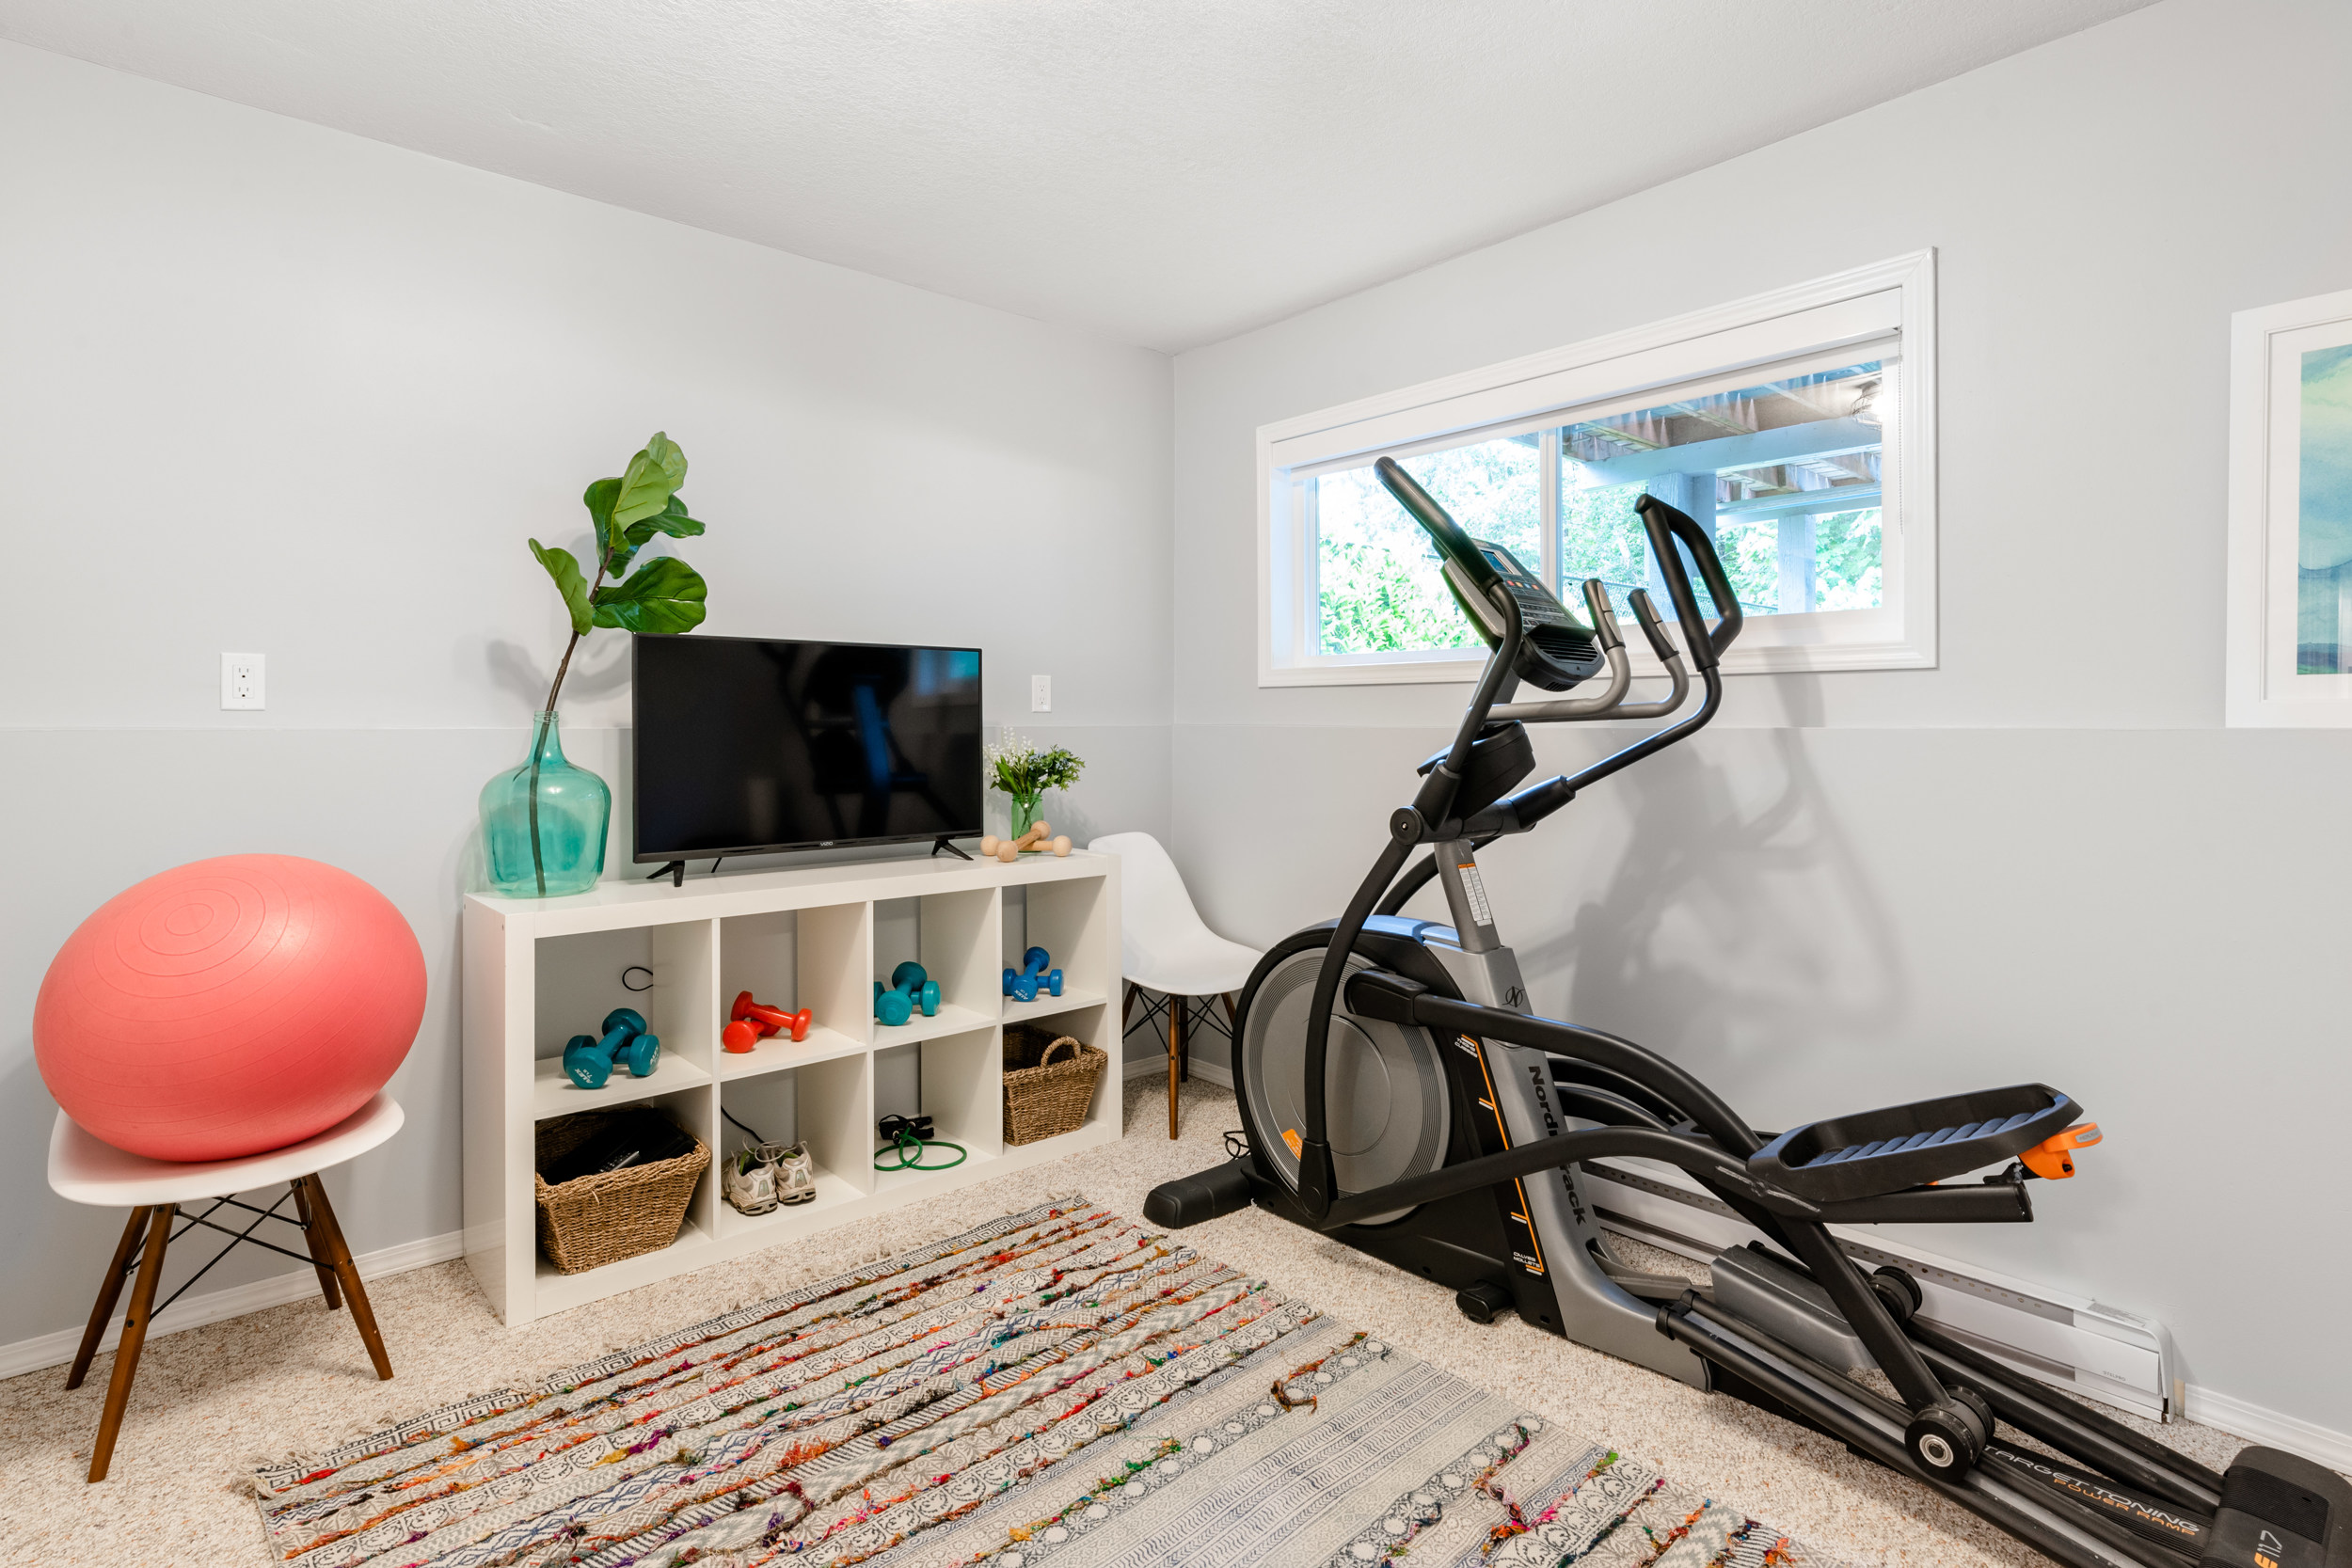
Here is how the smallest bedroom/office looked when we first viewed the house…
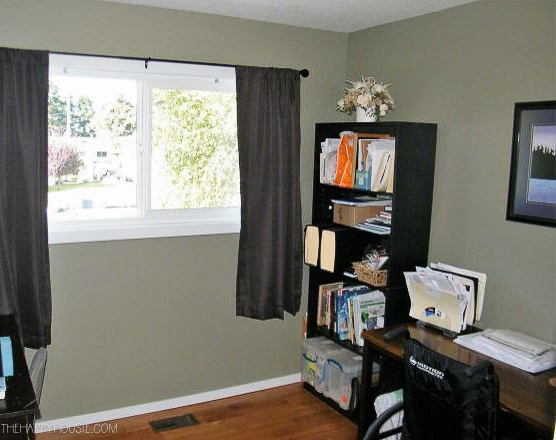
And here is how it looked after we had updated it into a fun bedroom for our youngest son….
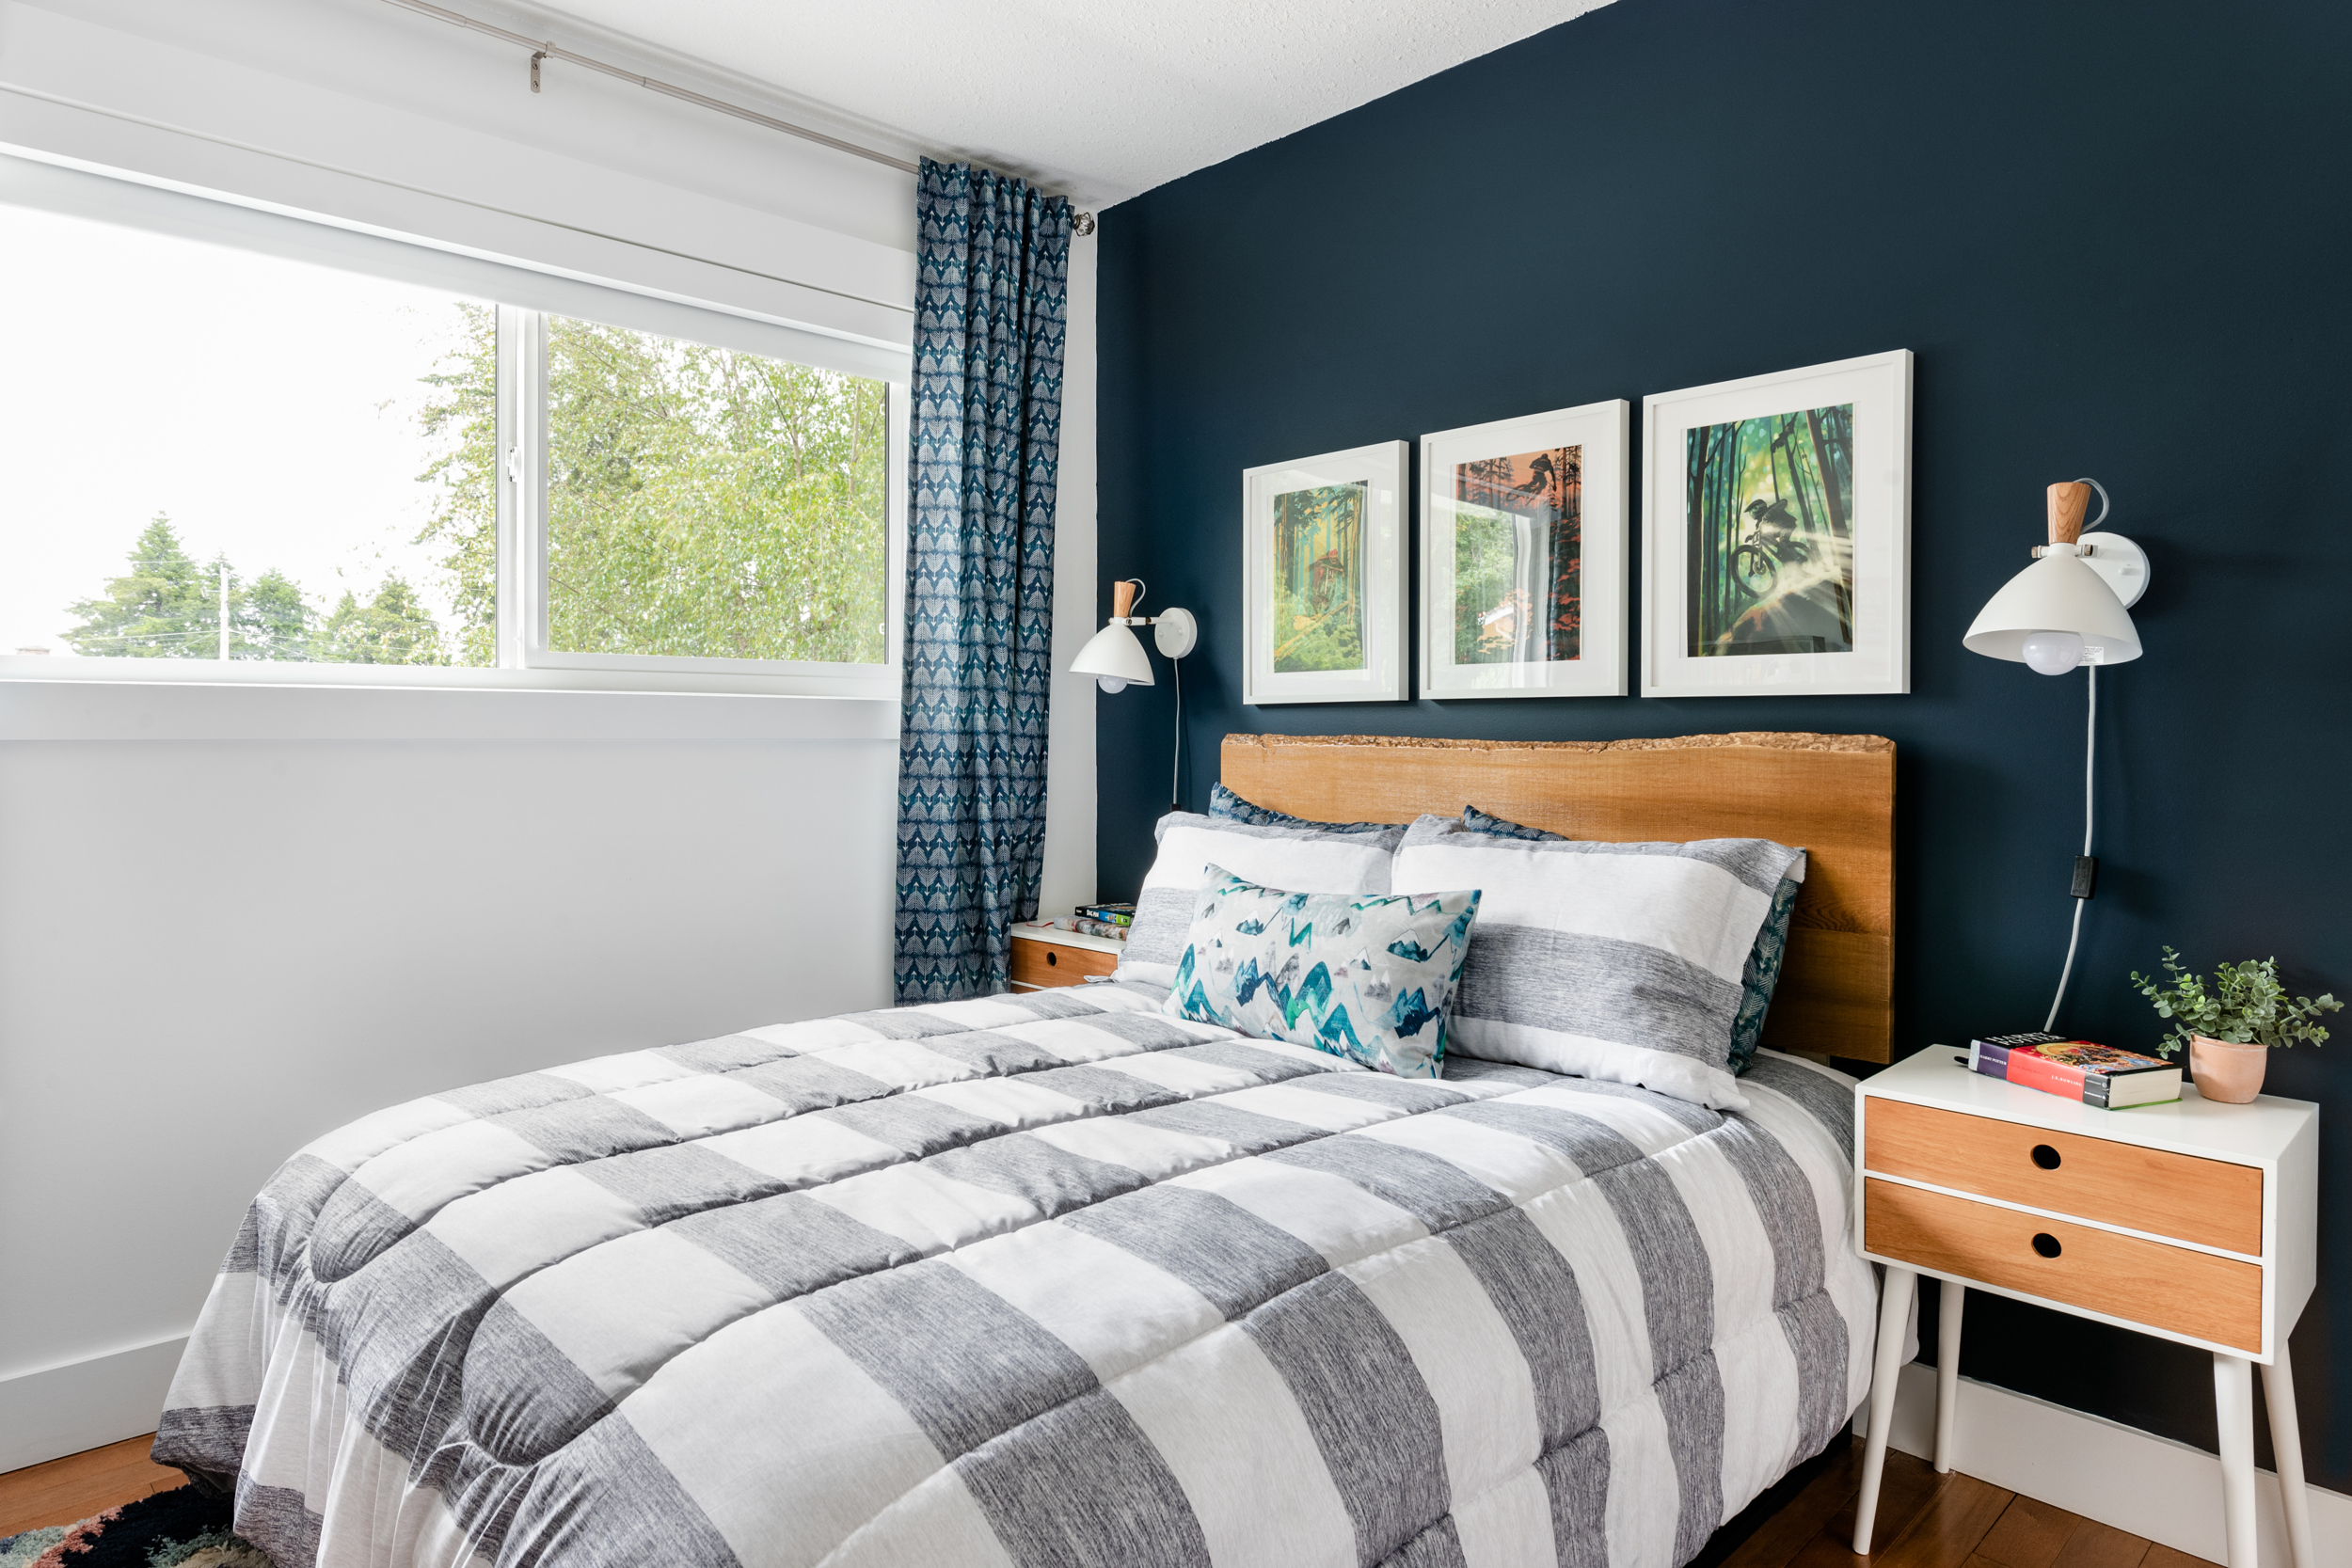
Read all of the posts about this five week long room makeover here:
Tween Boy Adventure Bedroom Makeover Reveal
Week 4 Update
Week 3 Update
Week 2 – Inspiration Board & Plans
Tween Boy Adventure Bedroom BEFORE and Ideas
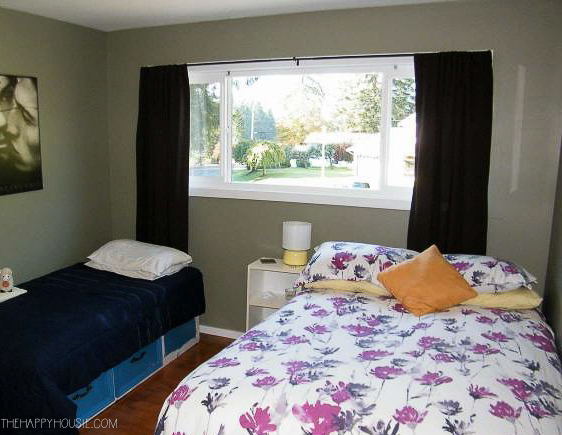
The next bedroom was a decent size and was used by our oldest son.
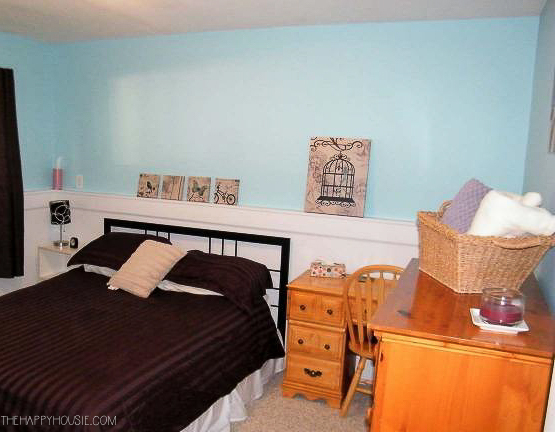
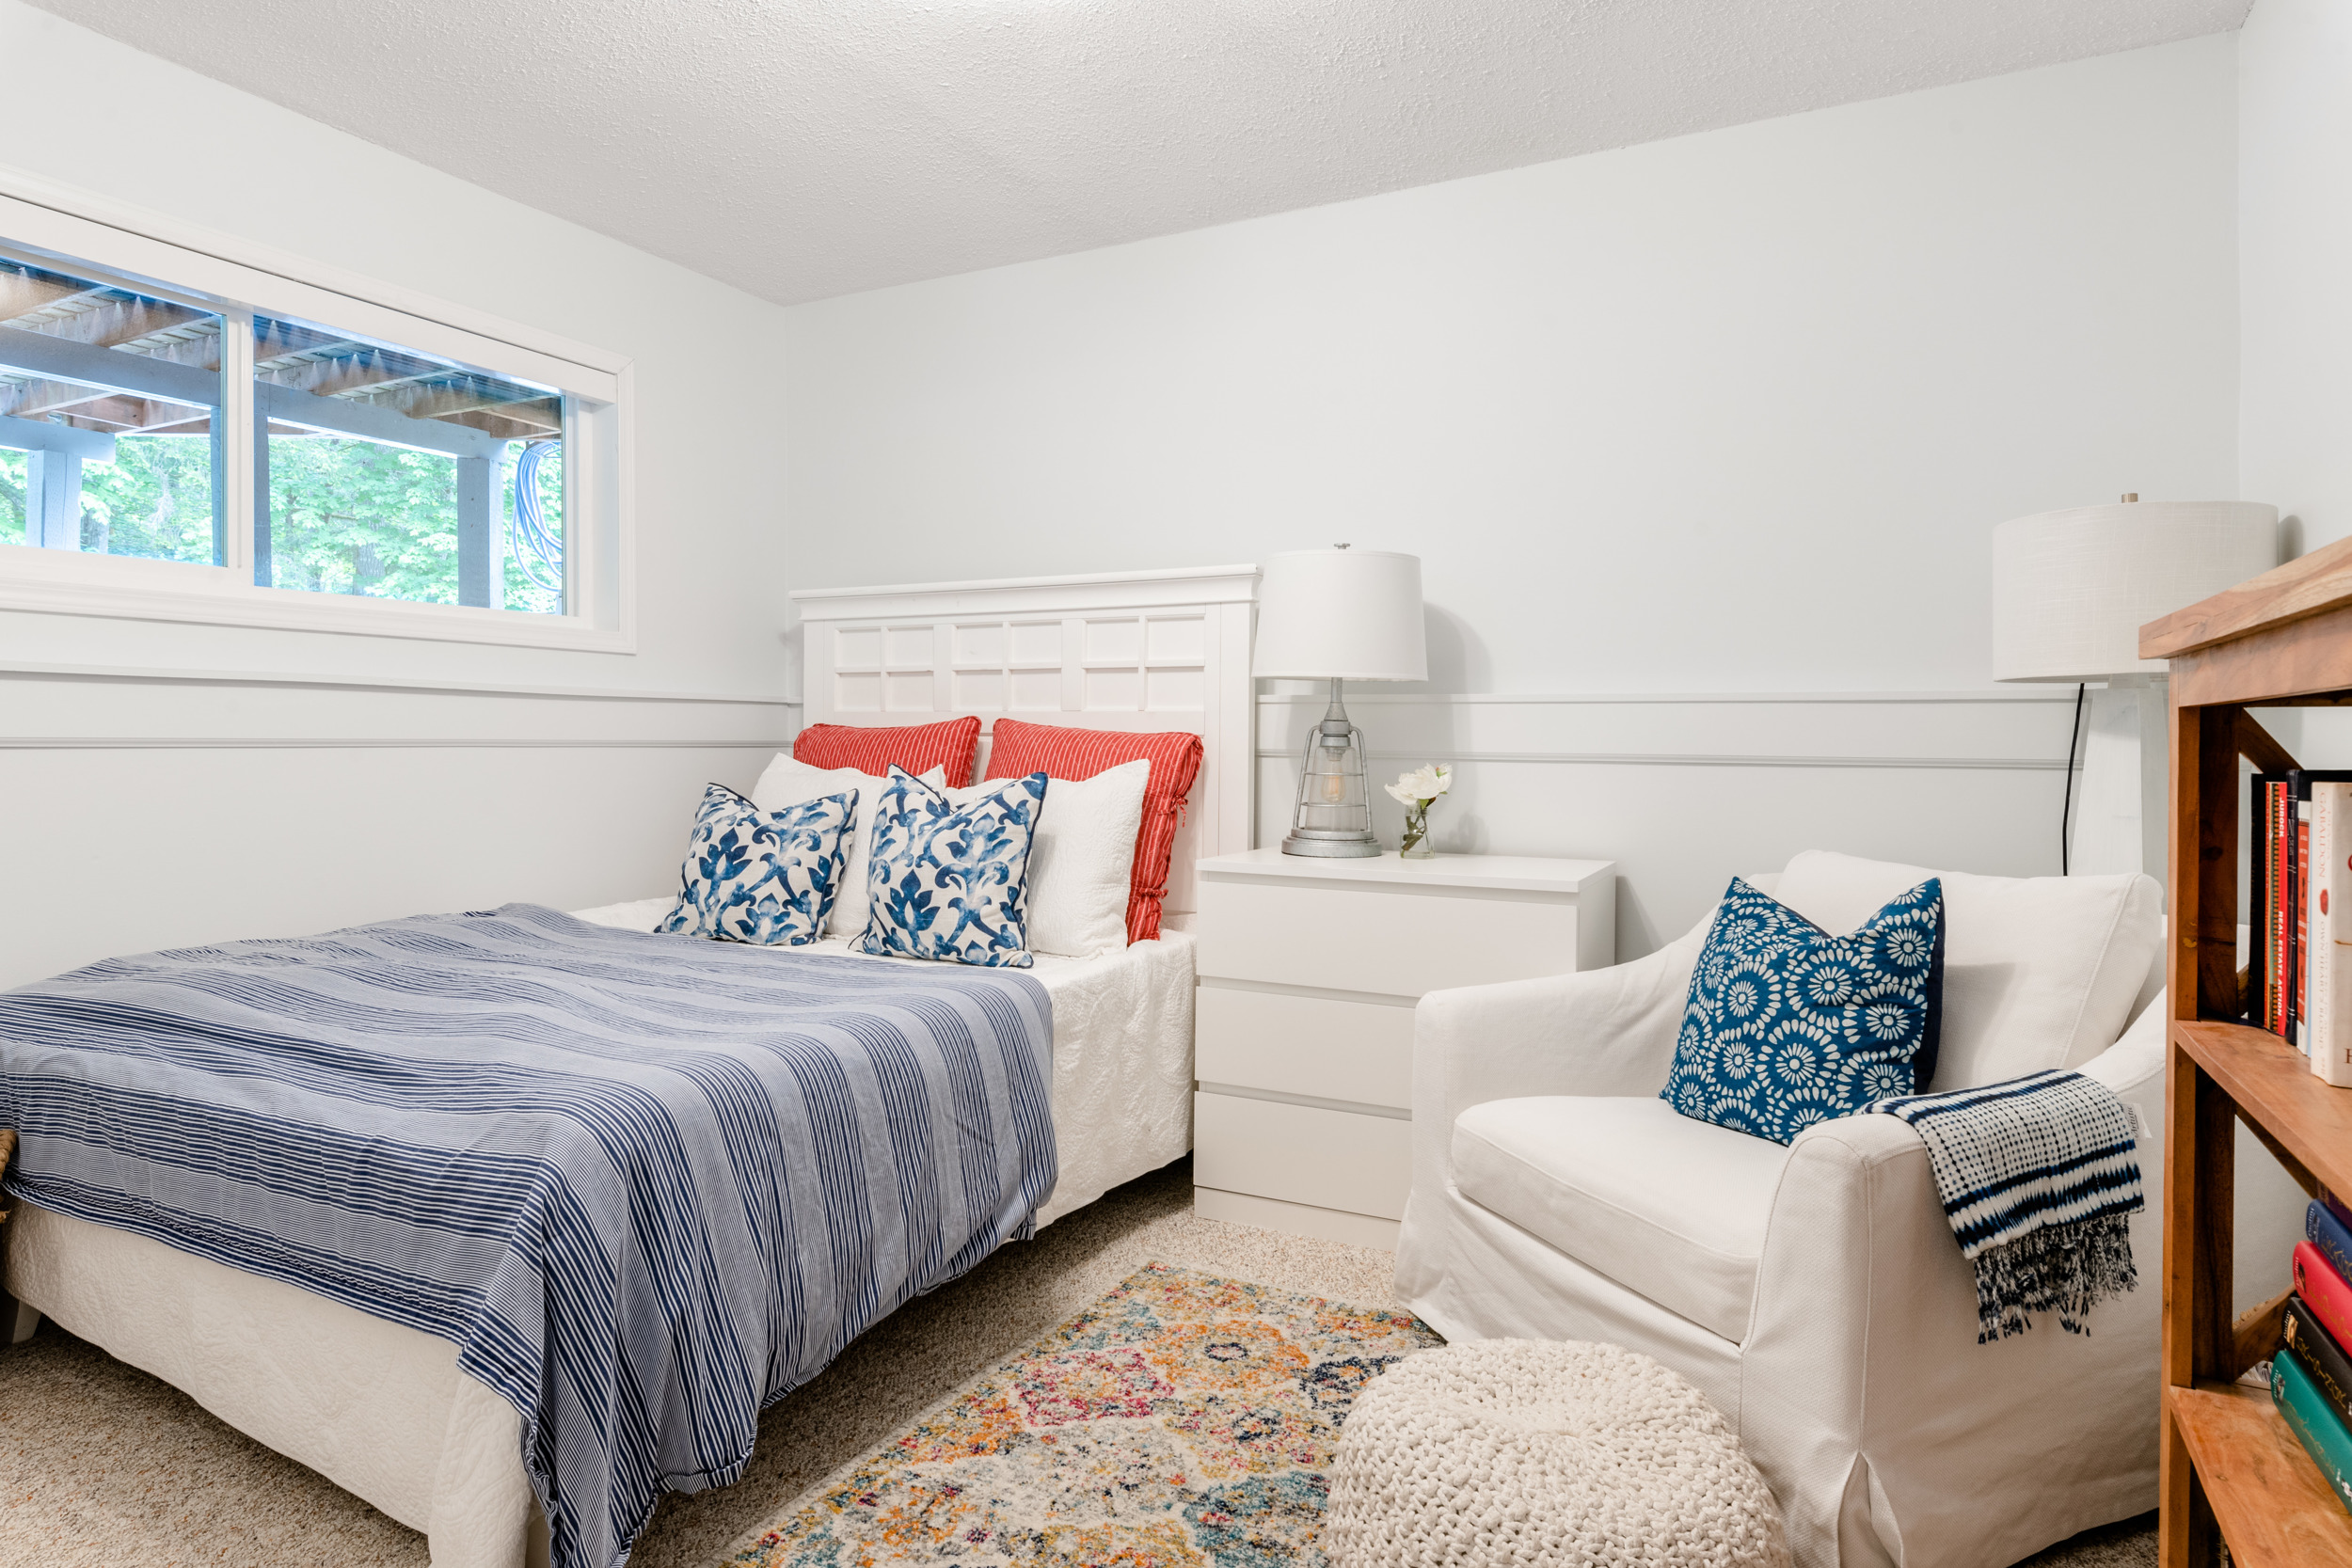
Here is how it looked when we viewed the house…
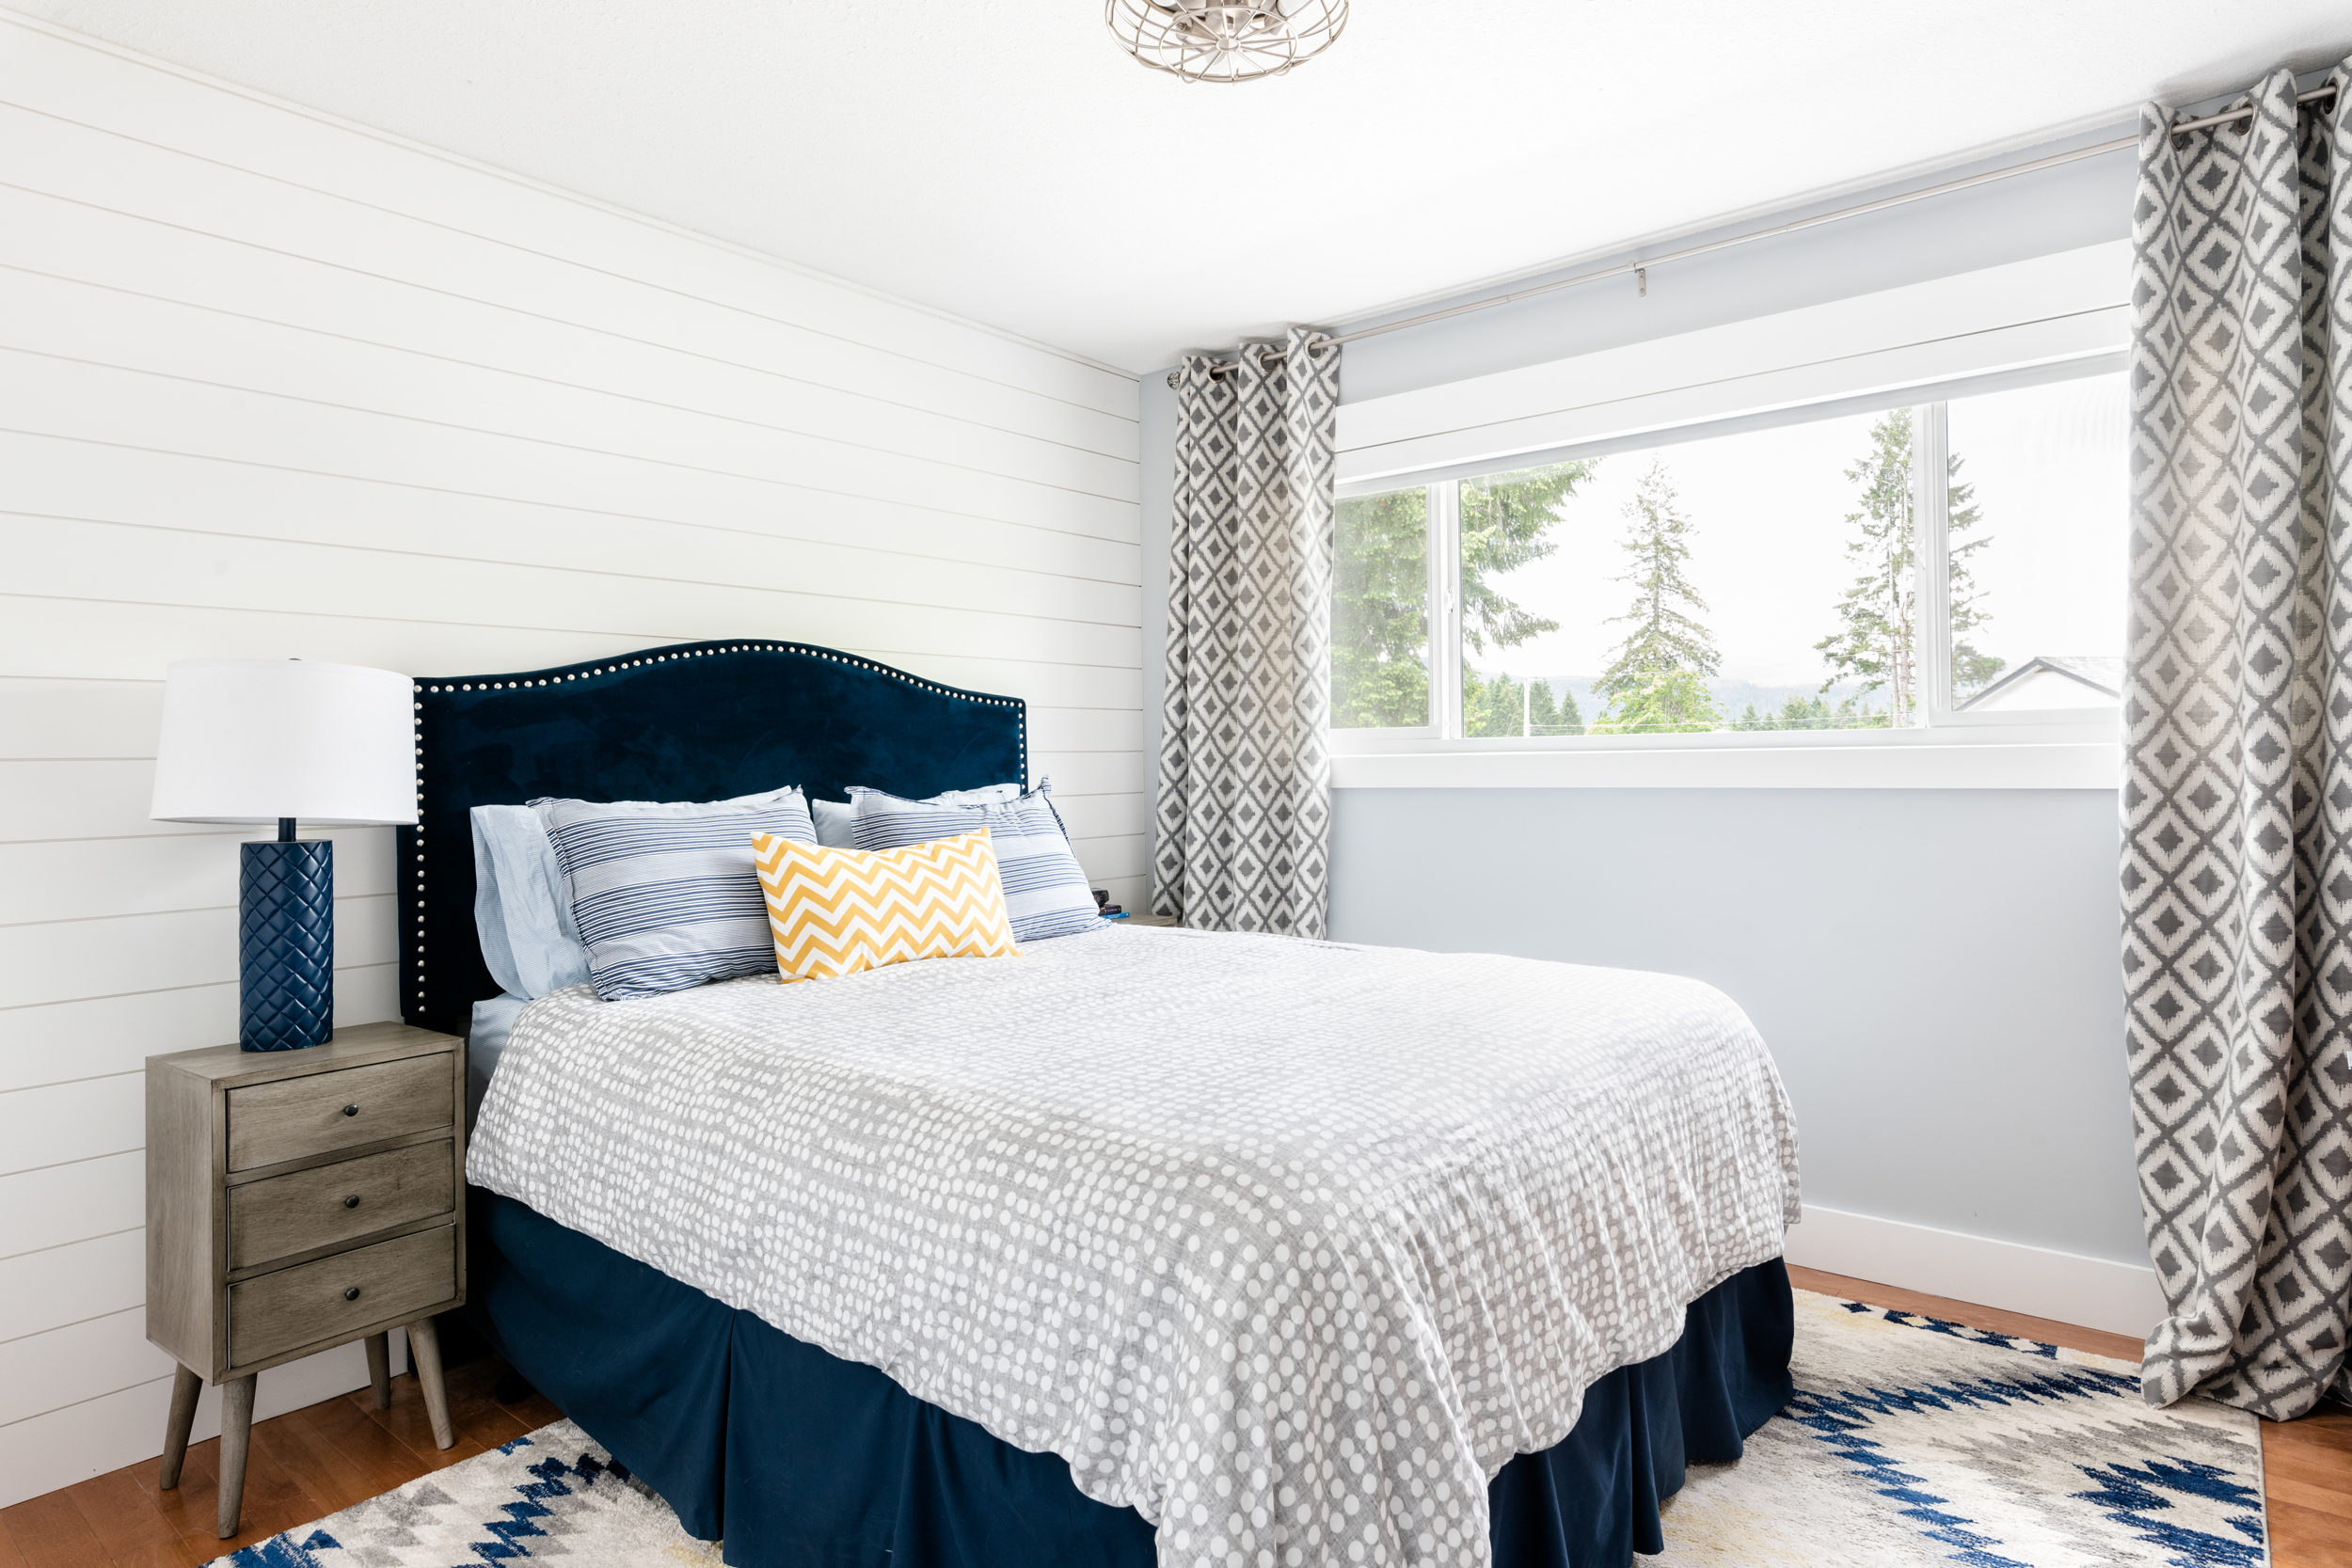
After a few simple updates like paint and shiplap on the back wall, it was a pretty spacious and functional bedroom for him.
Here is how it looked while we lived there…
I’ve realized that I never did share a before and after of this makeover – I’ll have to put something together soon!
The Master Bedroom & Ensuite
The master bedroom was a bigger project as we had drywall to contend with due to the bathroom renovations. We removed the window valance at the same time, so the entire ceiling got a few skim coats when the drywallers came to do the finishing in the bathrooms.
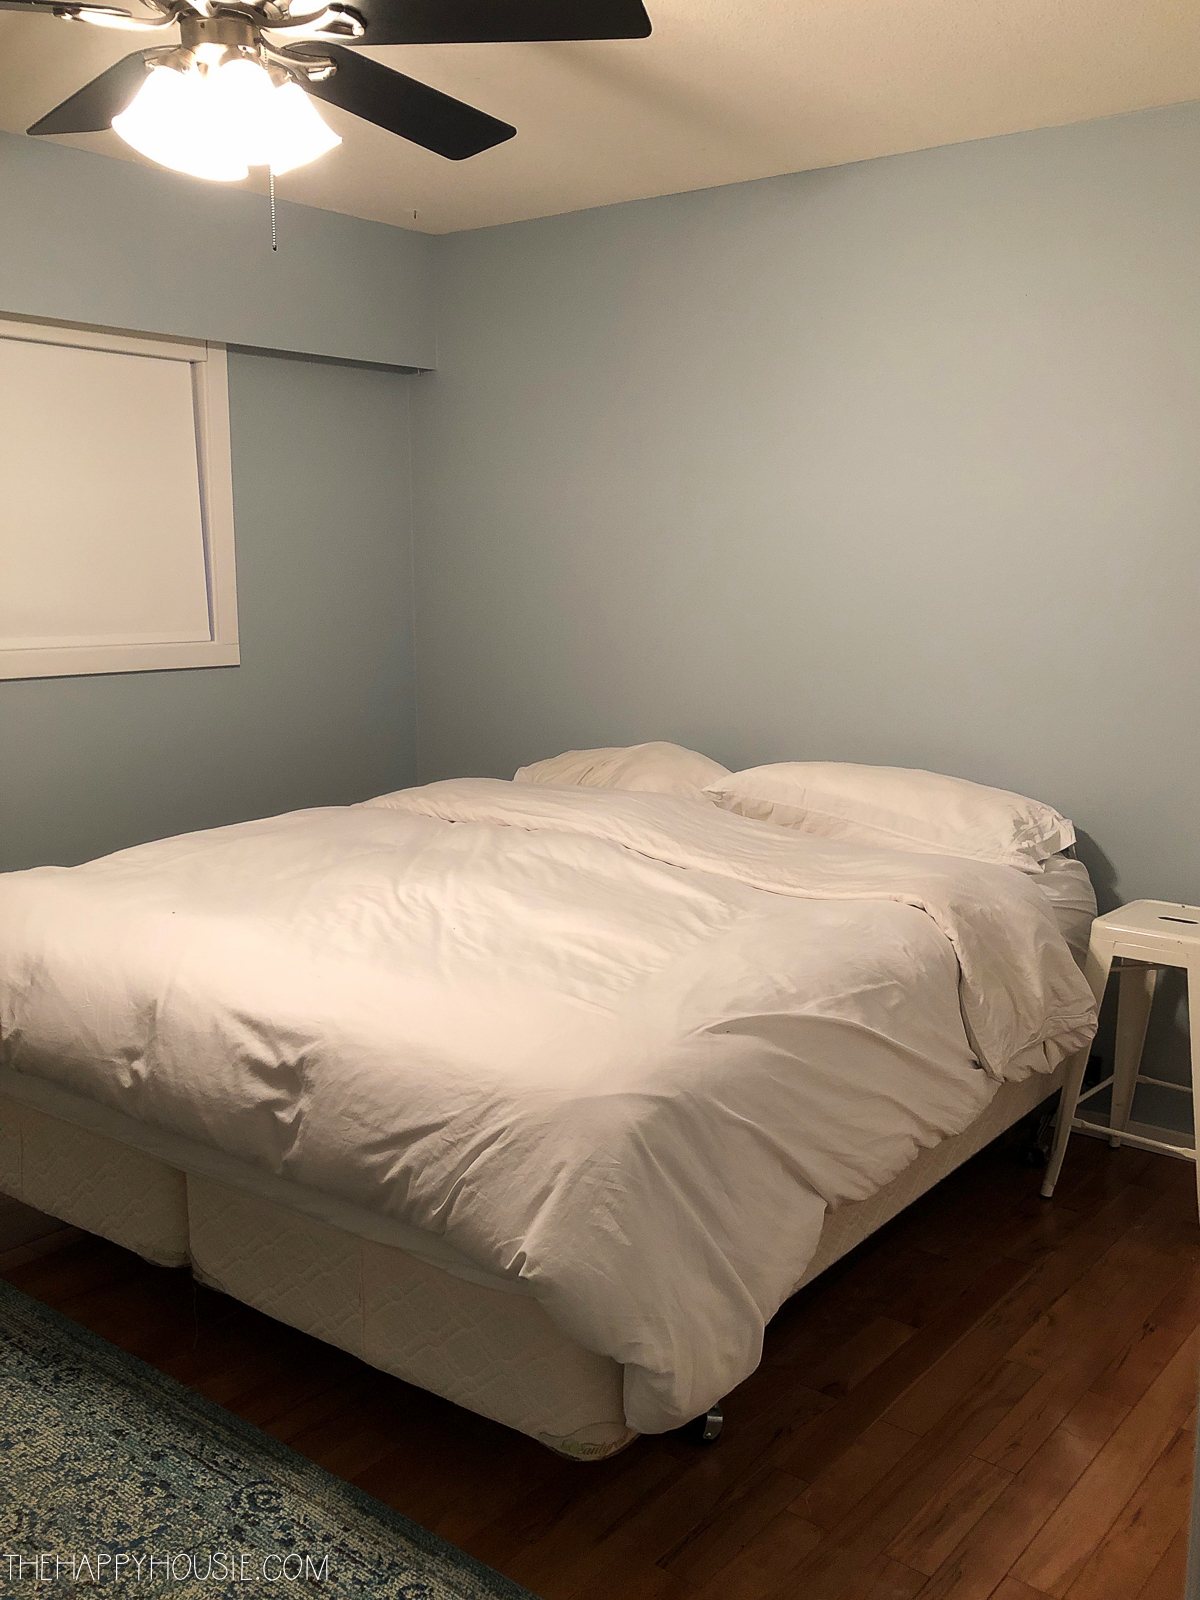
Here is how our master bedroom looked right after we moved in to the house…
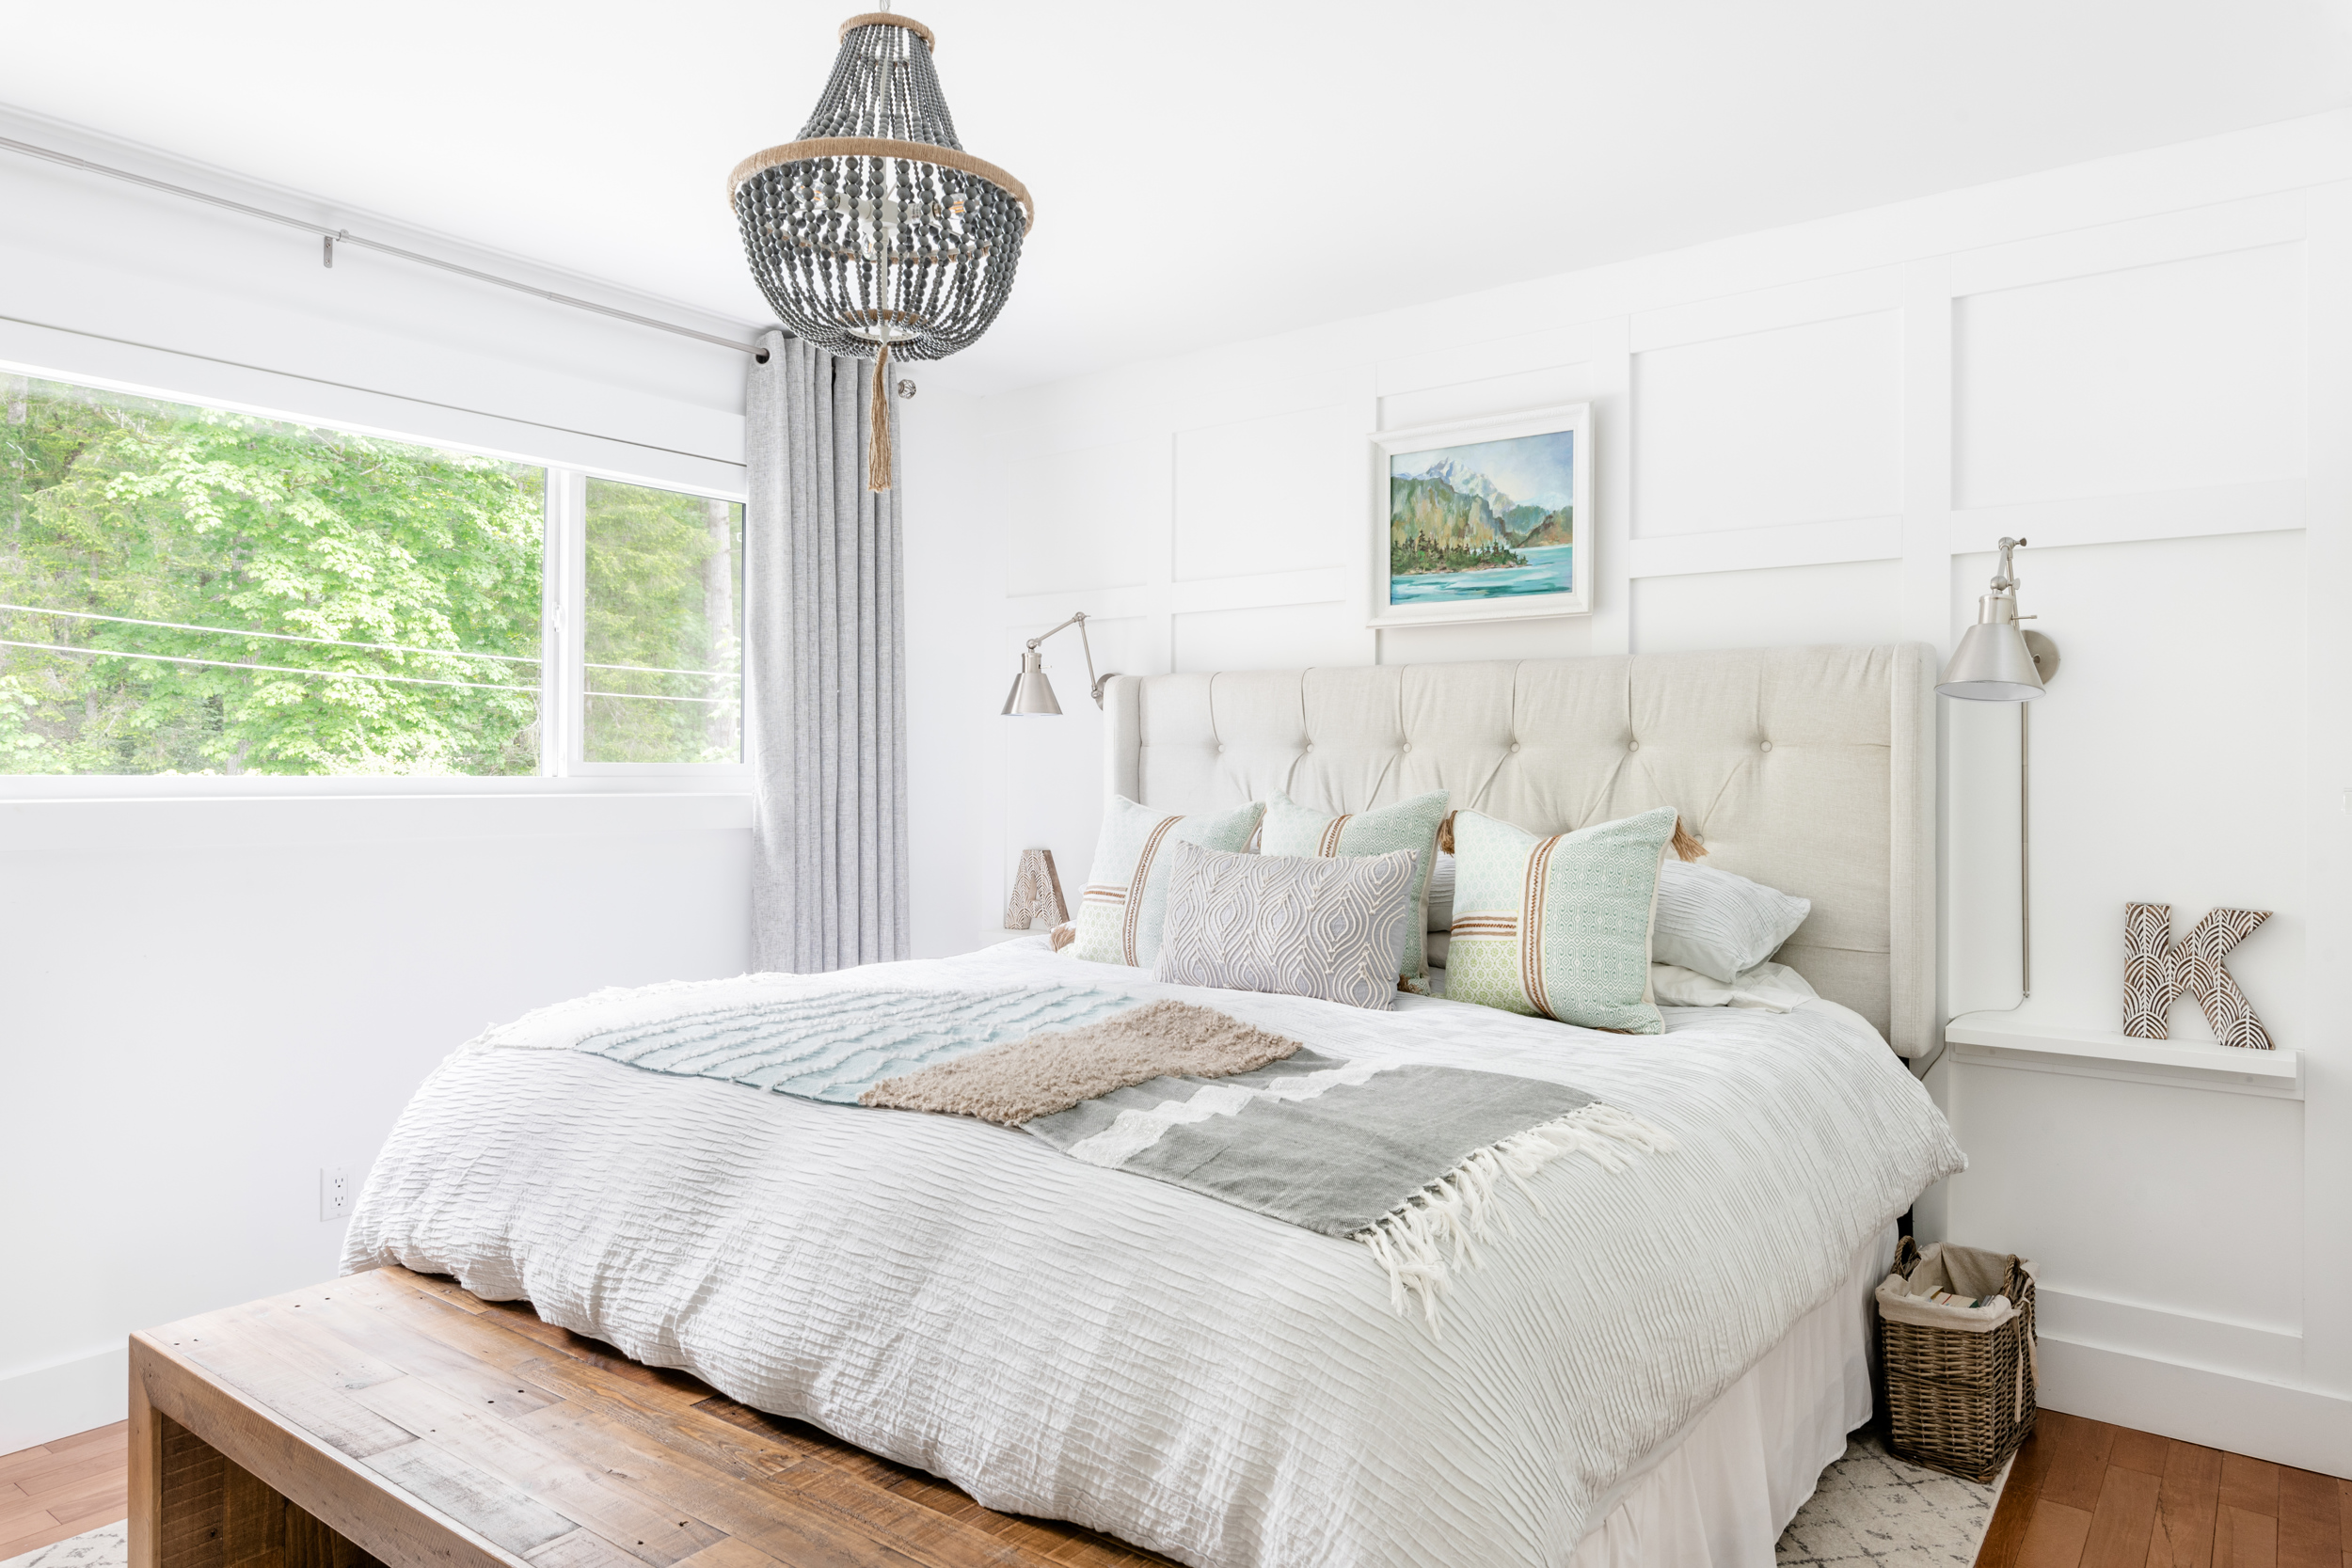
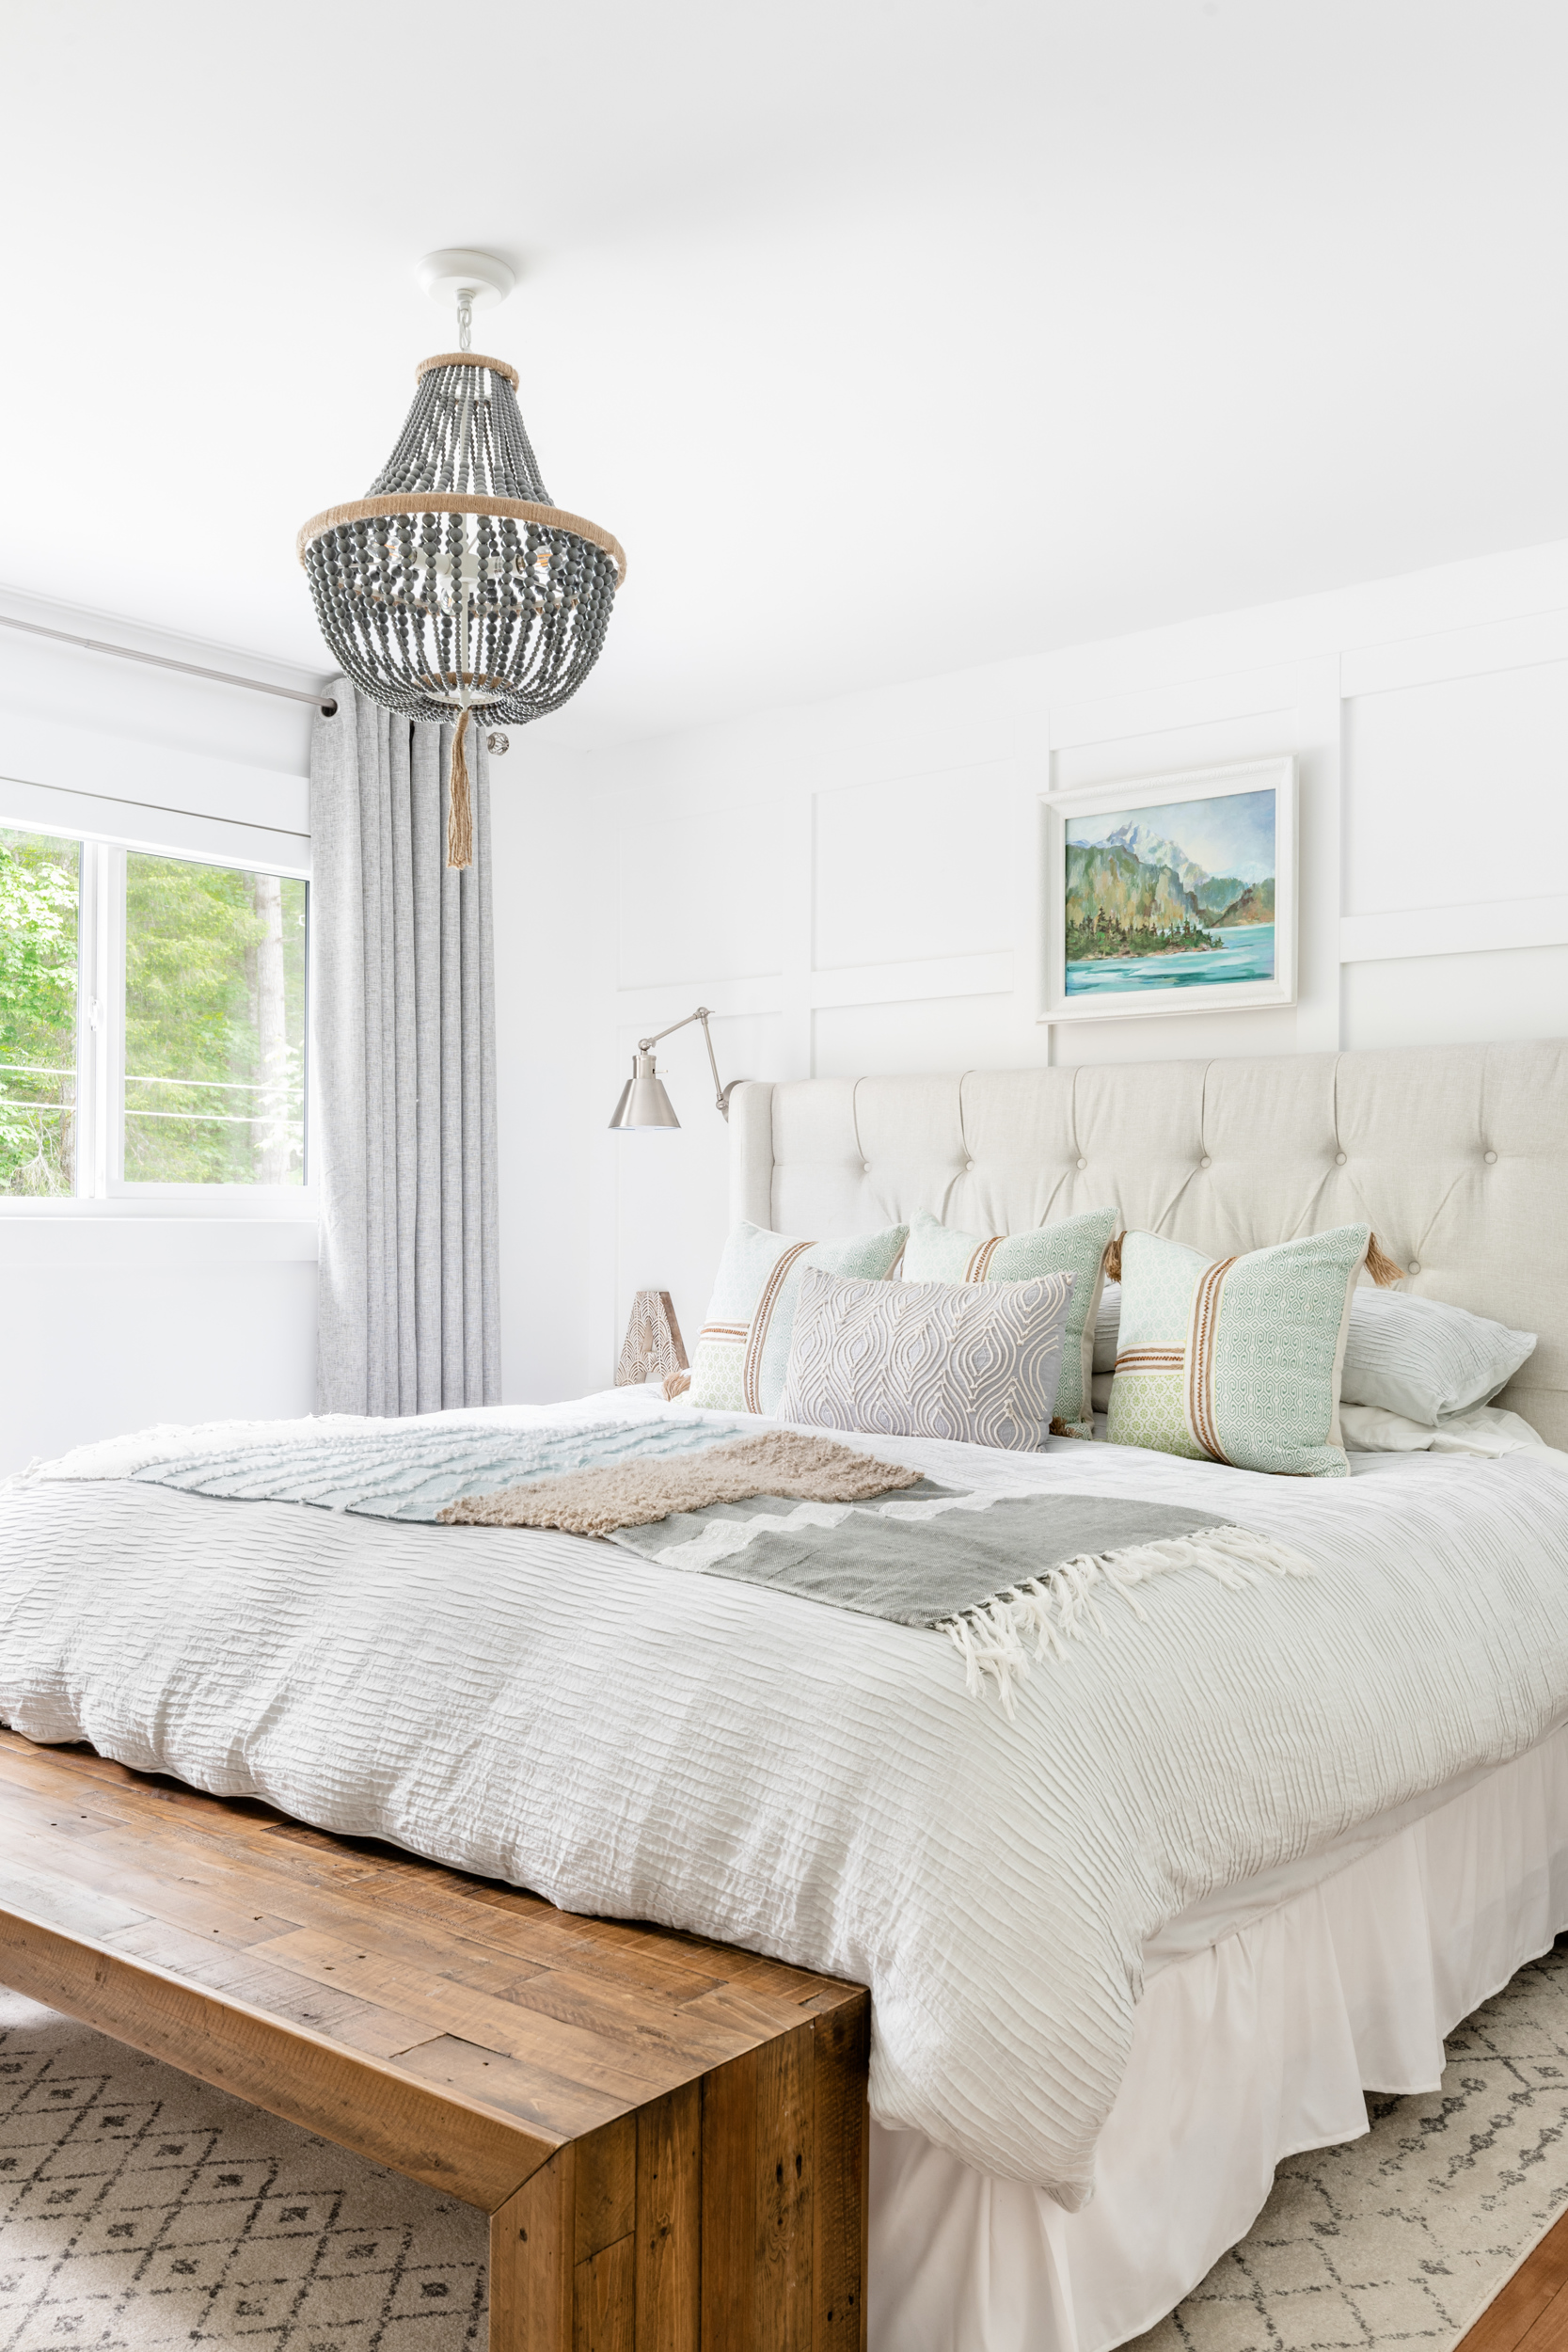
After we’d finished the makeover it looked like this…
I shared this renovation over six weeks as part of the One Room Challenge Spring 2019.
You can read all the posts about it here:
Master Bedroom & Ensuite Makeover Reveal
Week Five: Progress & a Nightstand Alternative
Week Four: Paneling & PAX
Week Three: Inspiration Board & Construction Progress
Week Two: Ensuite Progress & Inspiration Board
Week One: Master Bedroom & Ensuite BEFORE
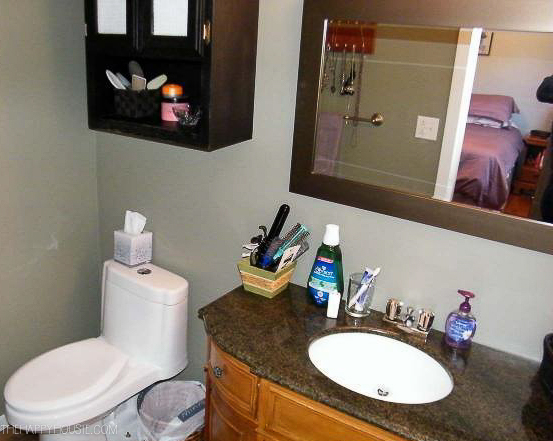
Here is how the tiny ensuite looked when we first viewed the house…
There was no shower in this bathroom before. We were able to grab enough extra square footage between taking out a closet in the master bedroom and gaining a few inches from the main bathroom renovation in order to be able to add a shower.
After the renovations it looked like this…
And that shower!
You can read the Before/Plans here and see the details and full reveal here.
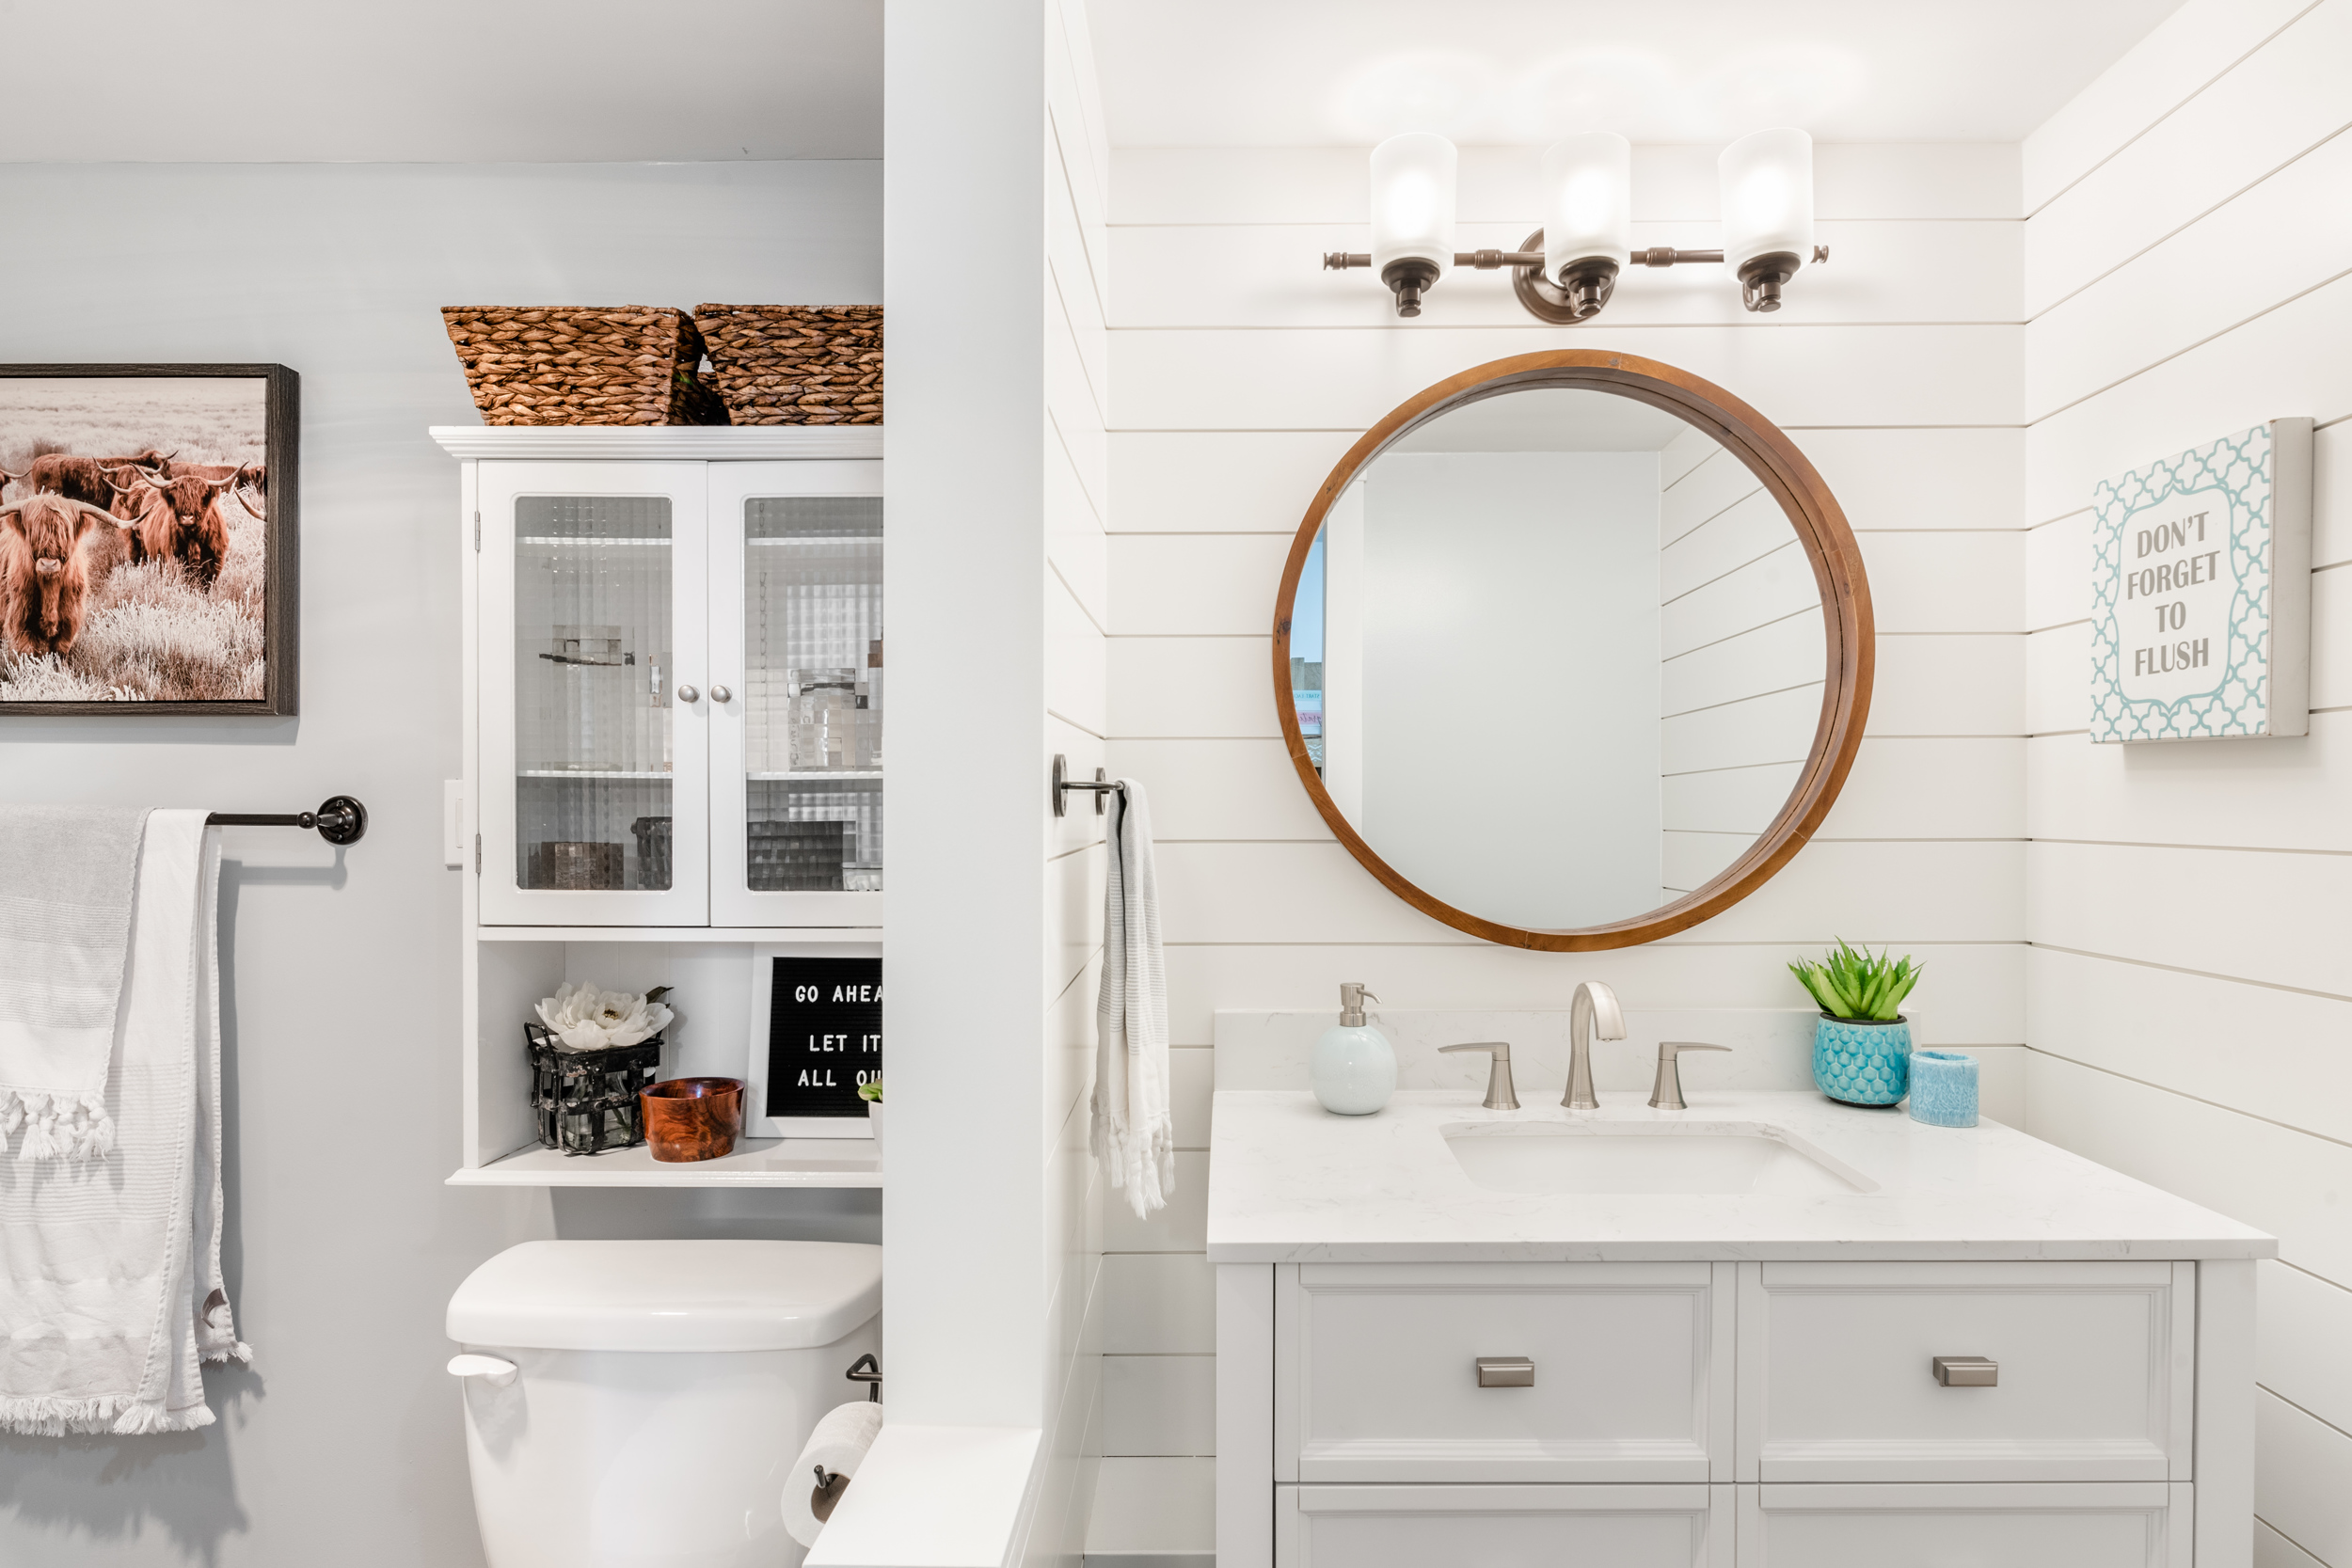
The Basement Bathroom
Downstairs we also renovated a bathroom, though it was actually the last thing we tackled before listing the house for sale. We used this bathroom exclusively for months as it was while we tackled the renovations on the upstairs bathrooms.
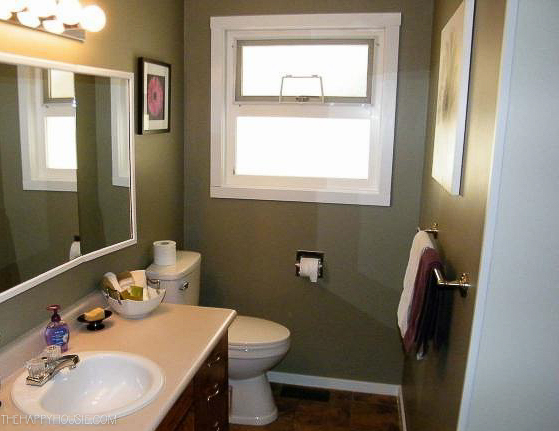
Here is how the basement bathroom looked when we viewed the house…
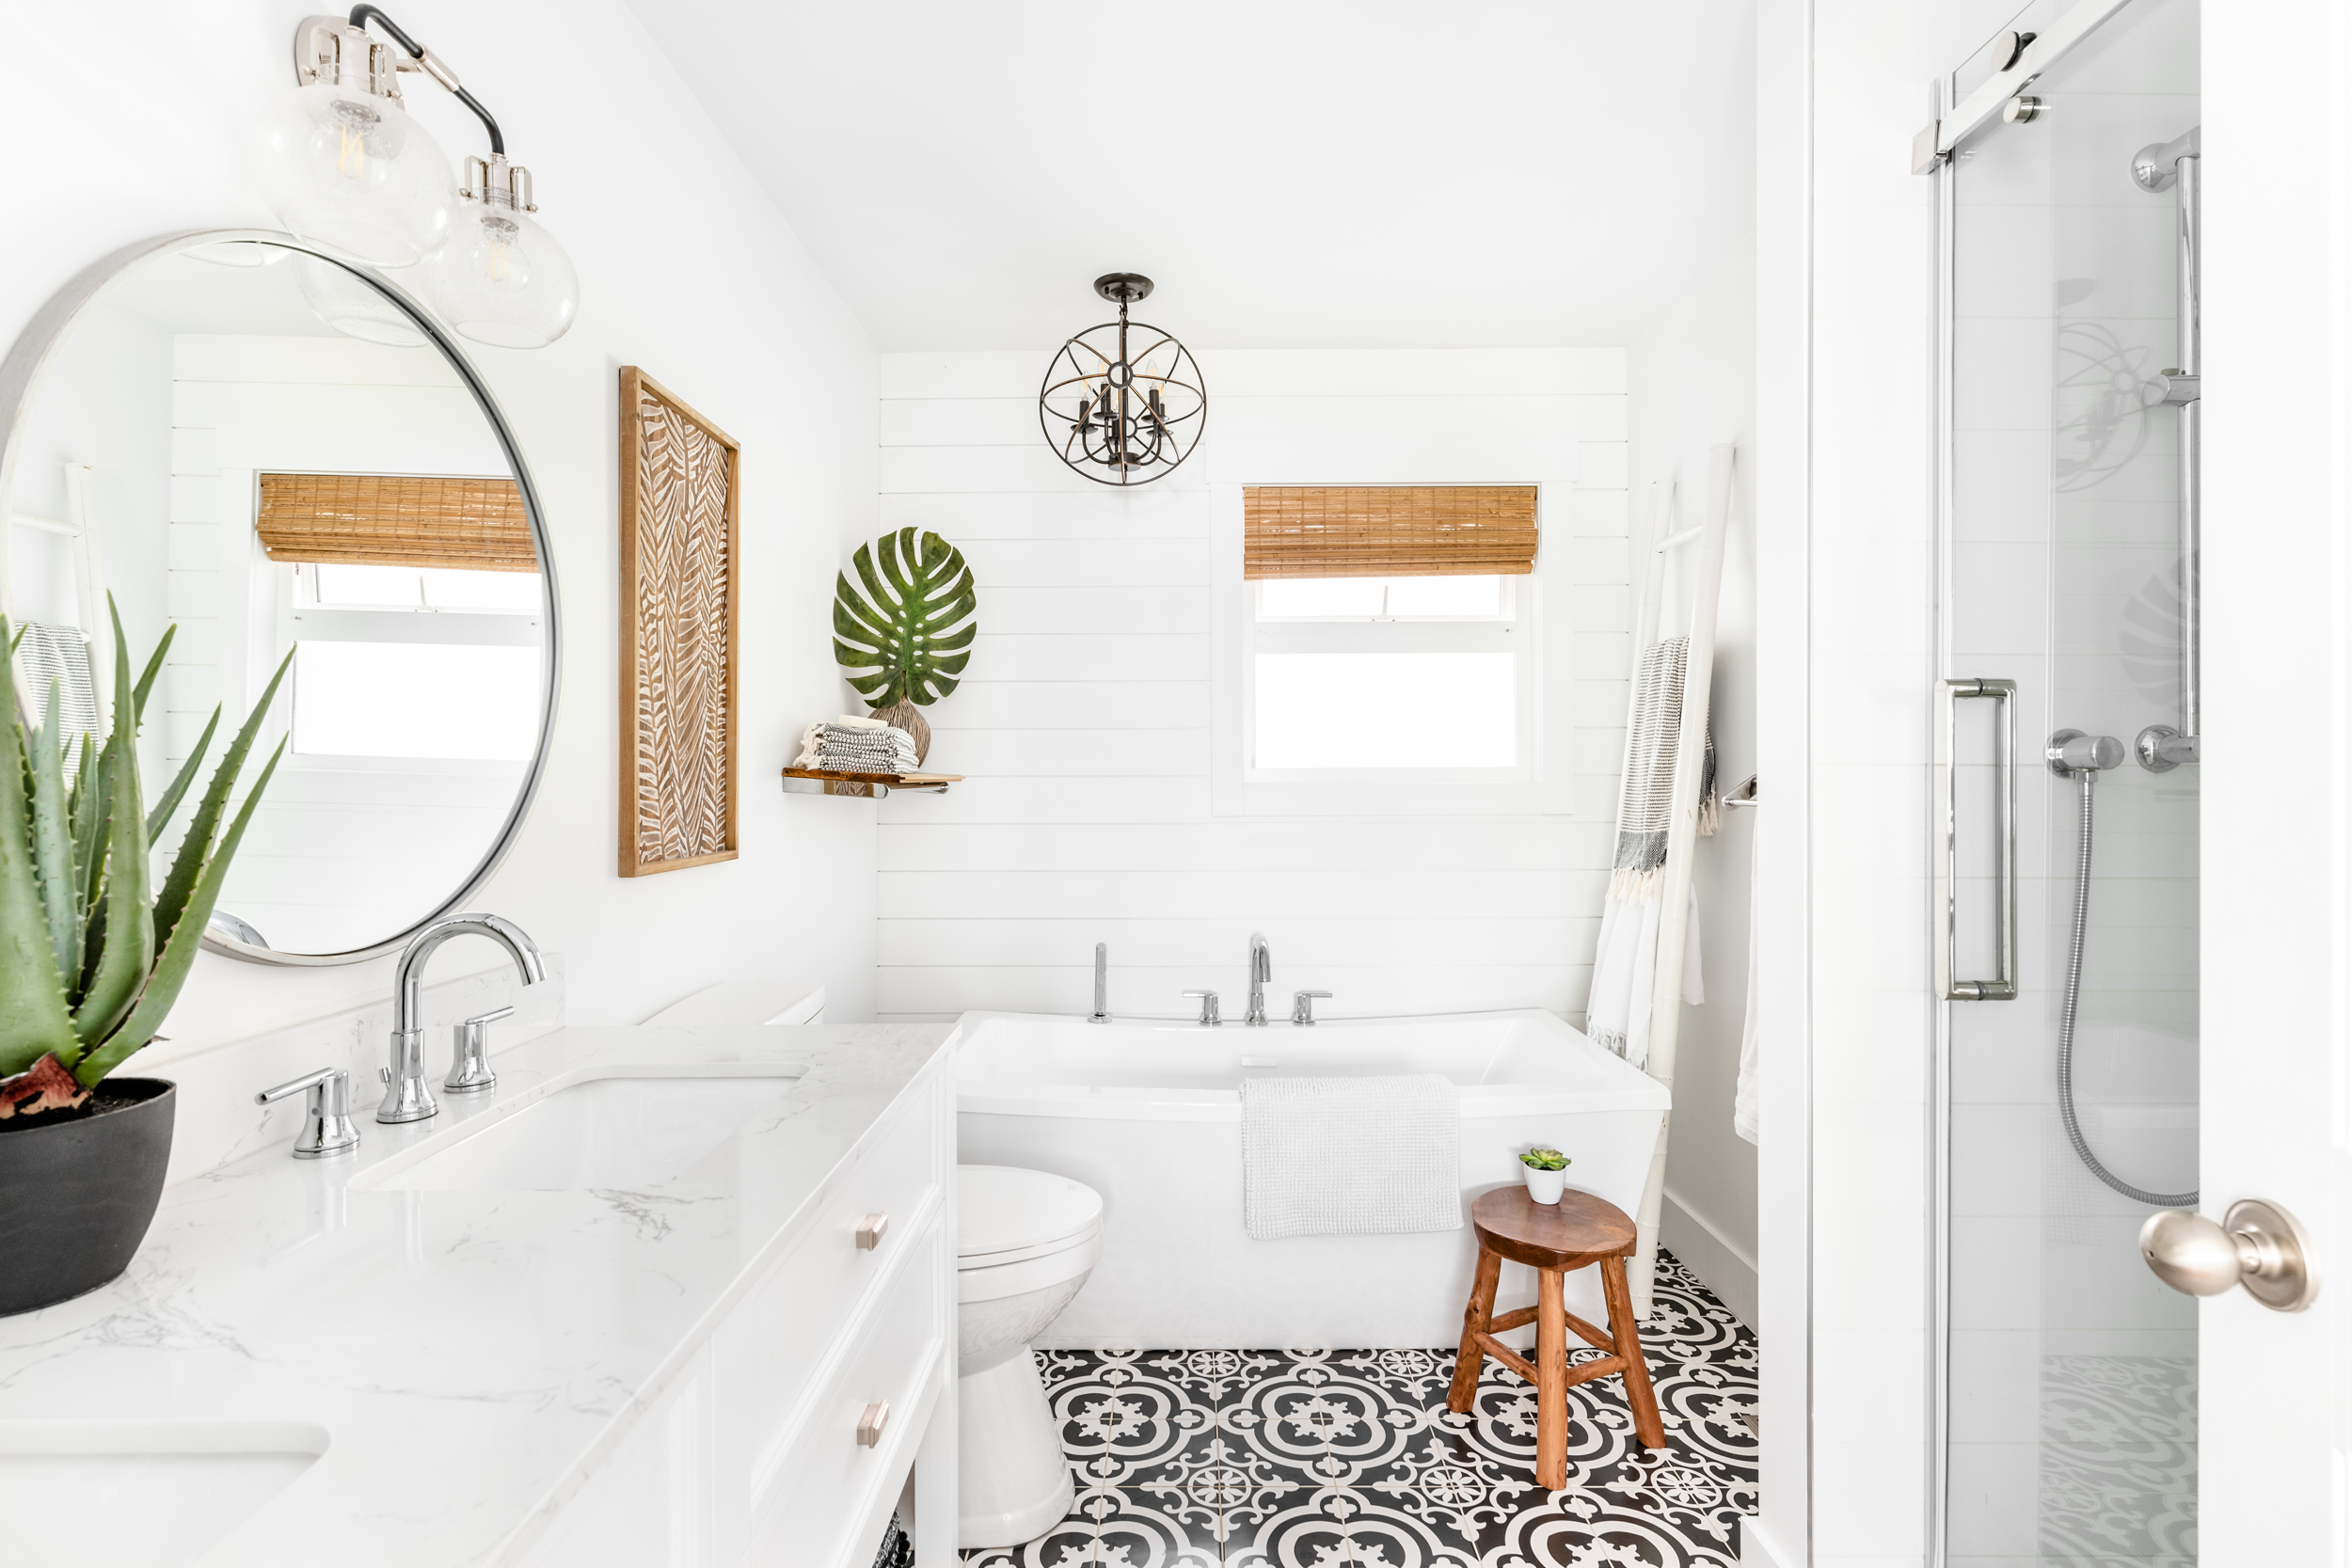
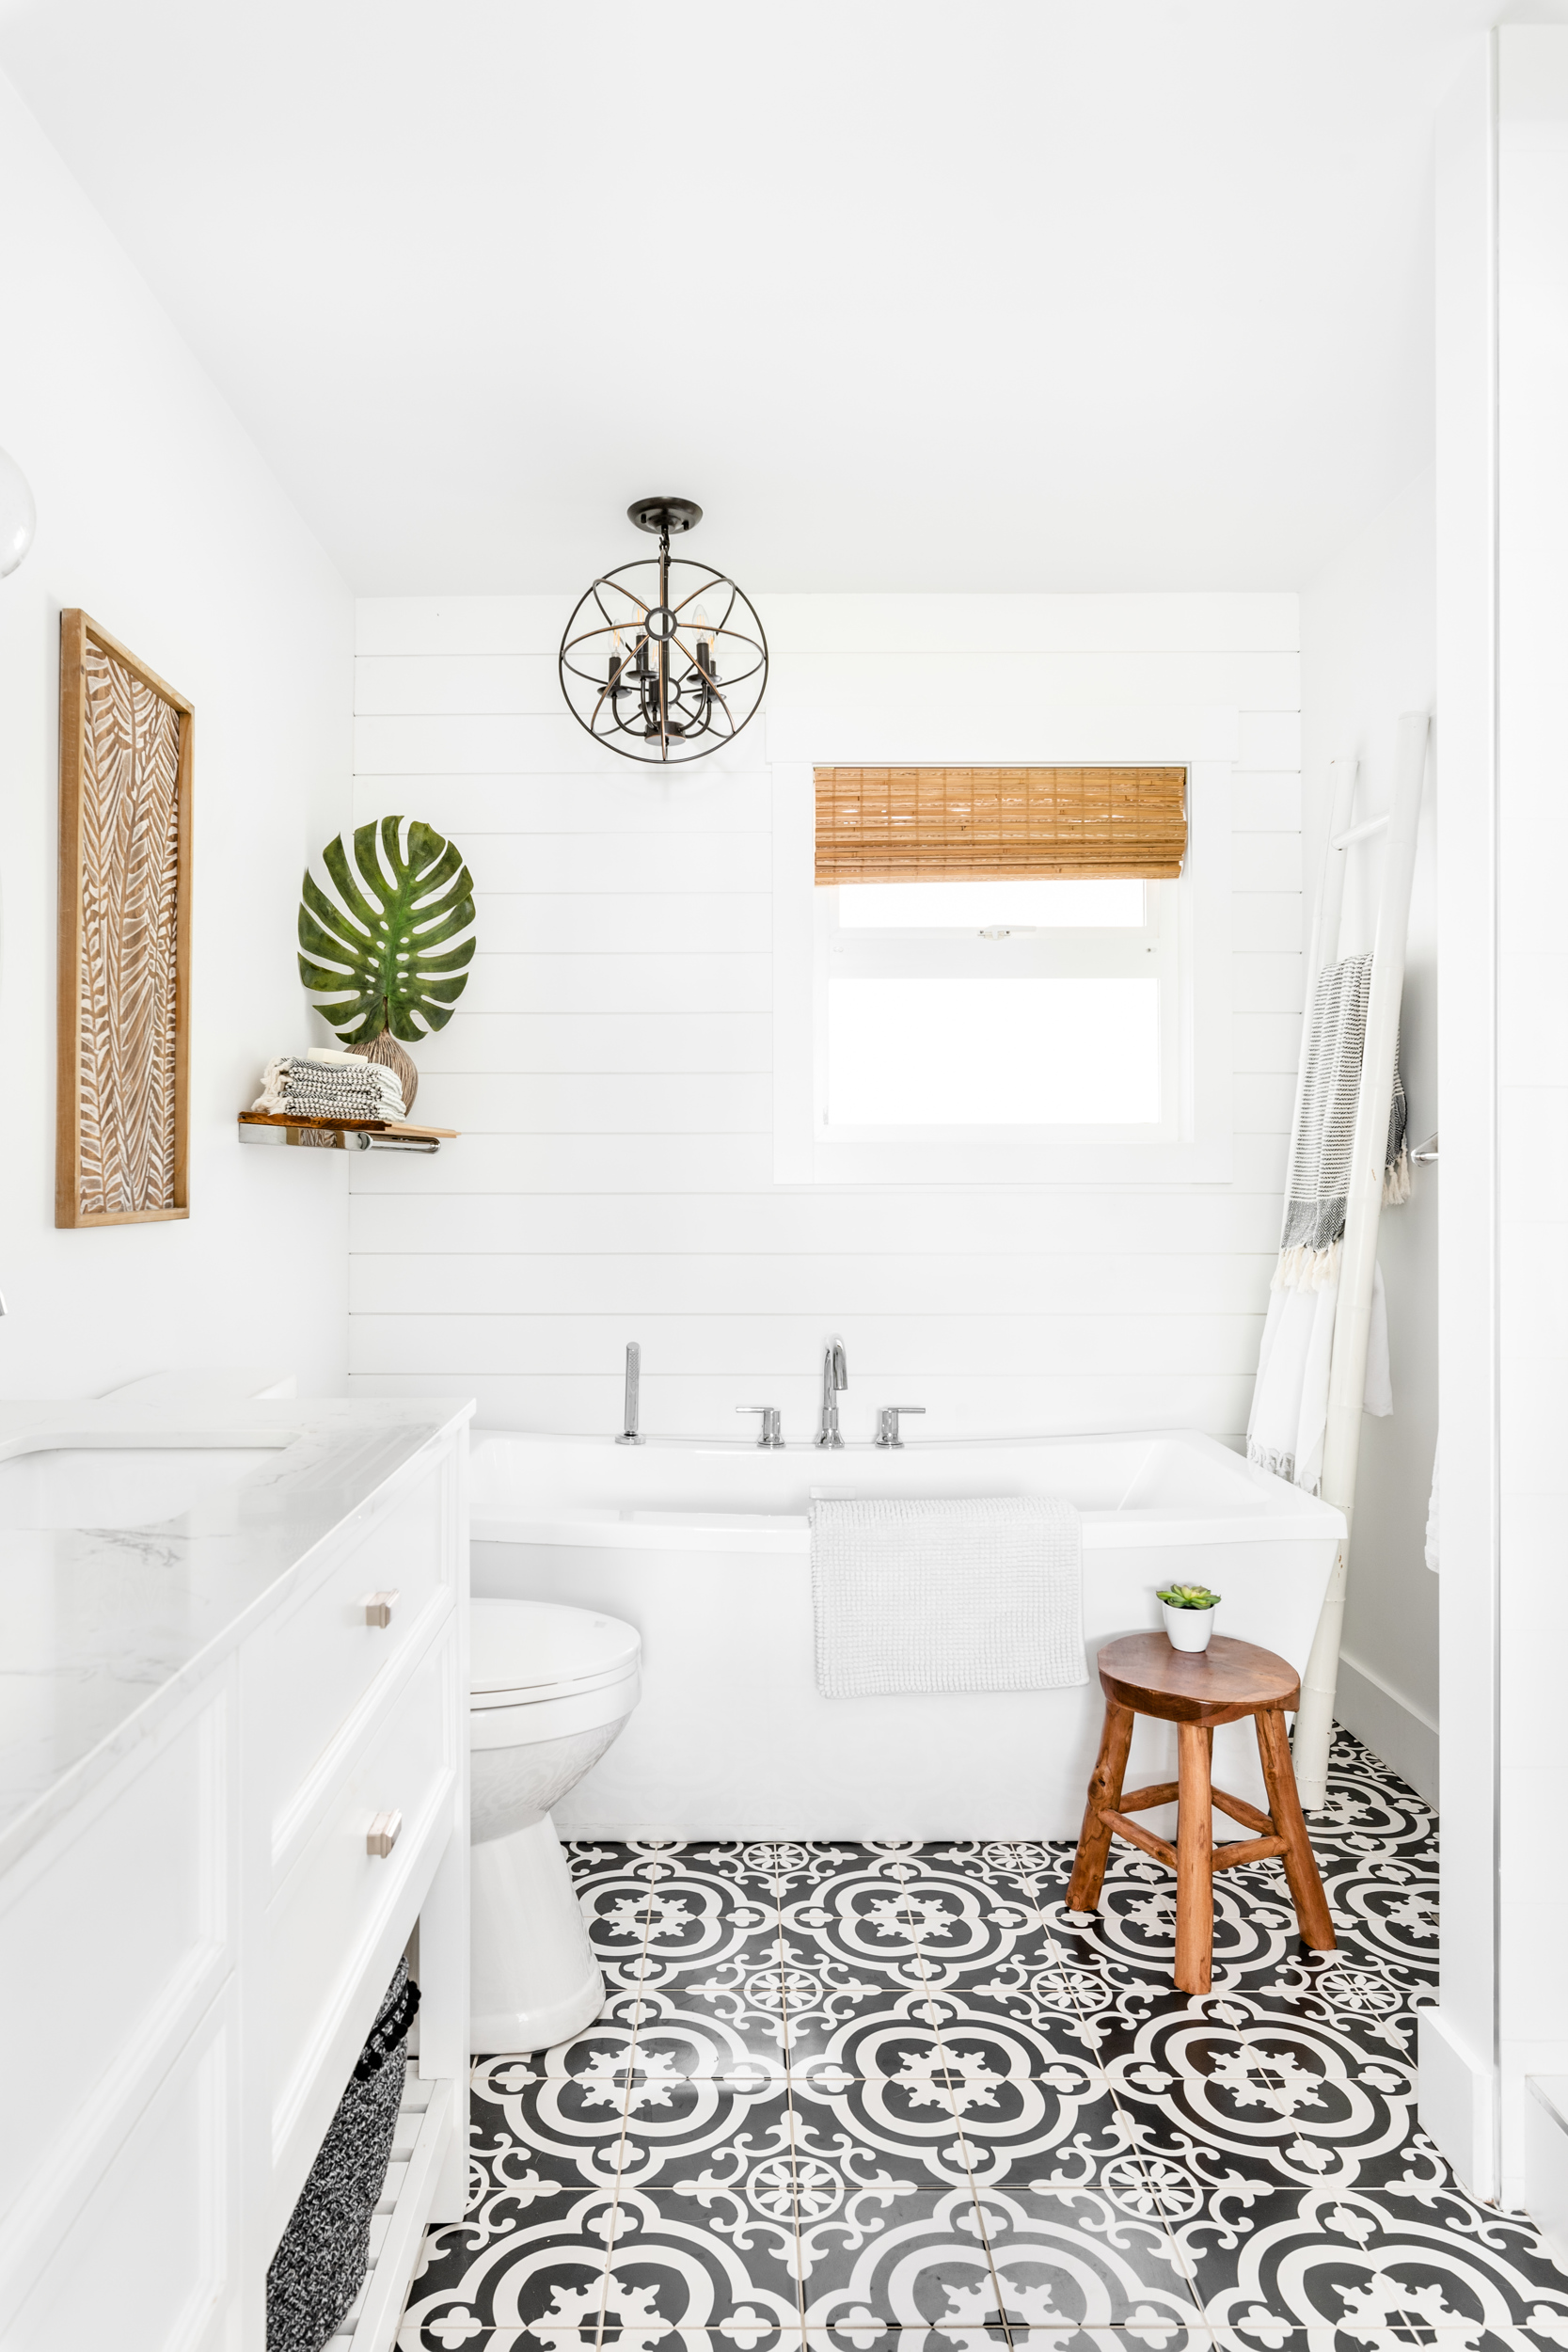
And after we gave it a fresh update…
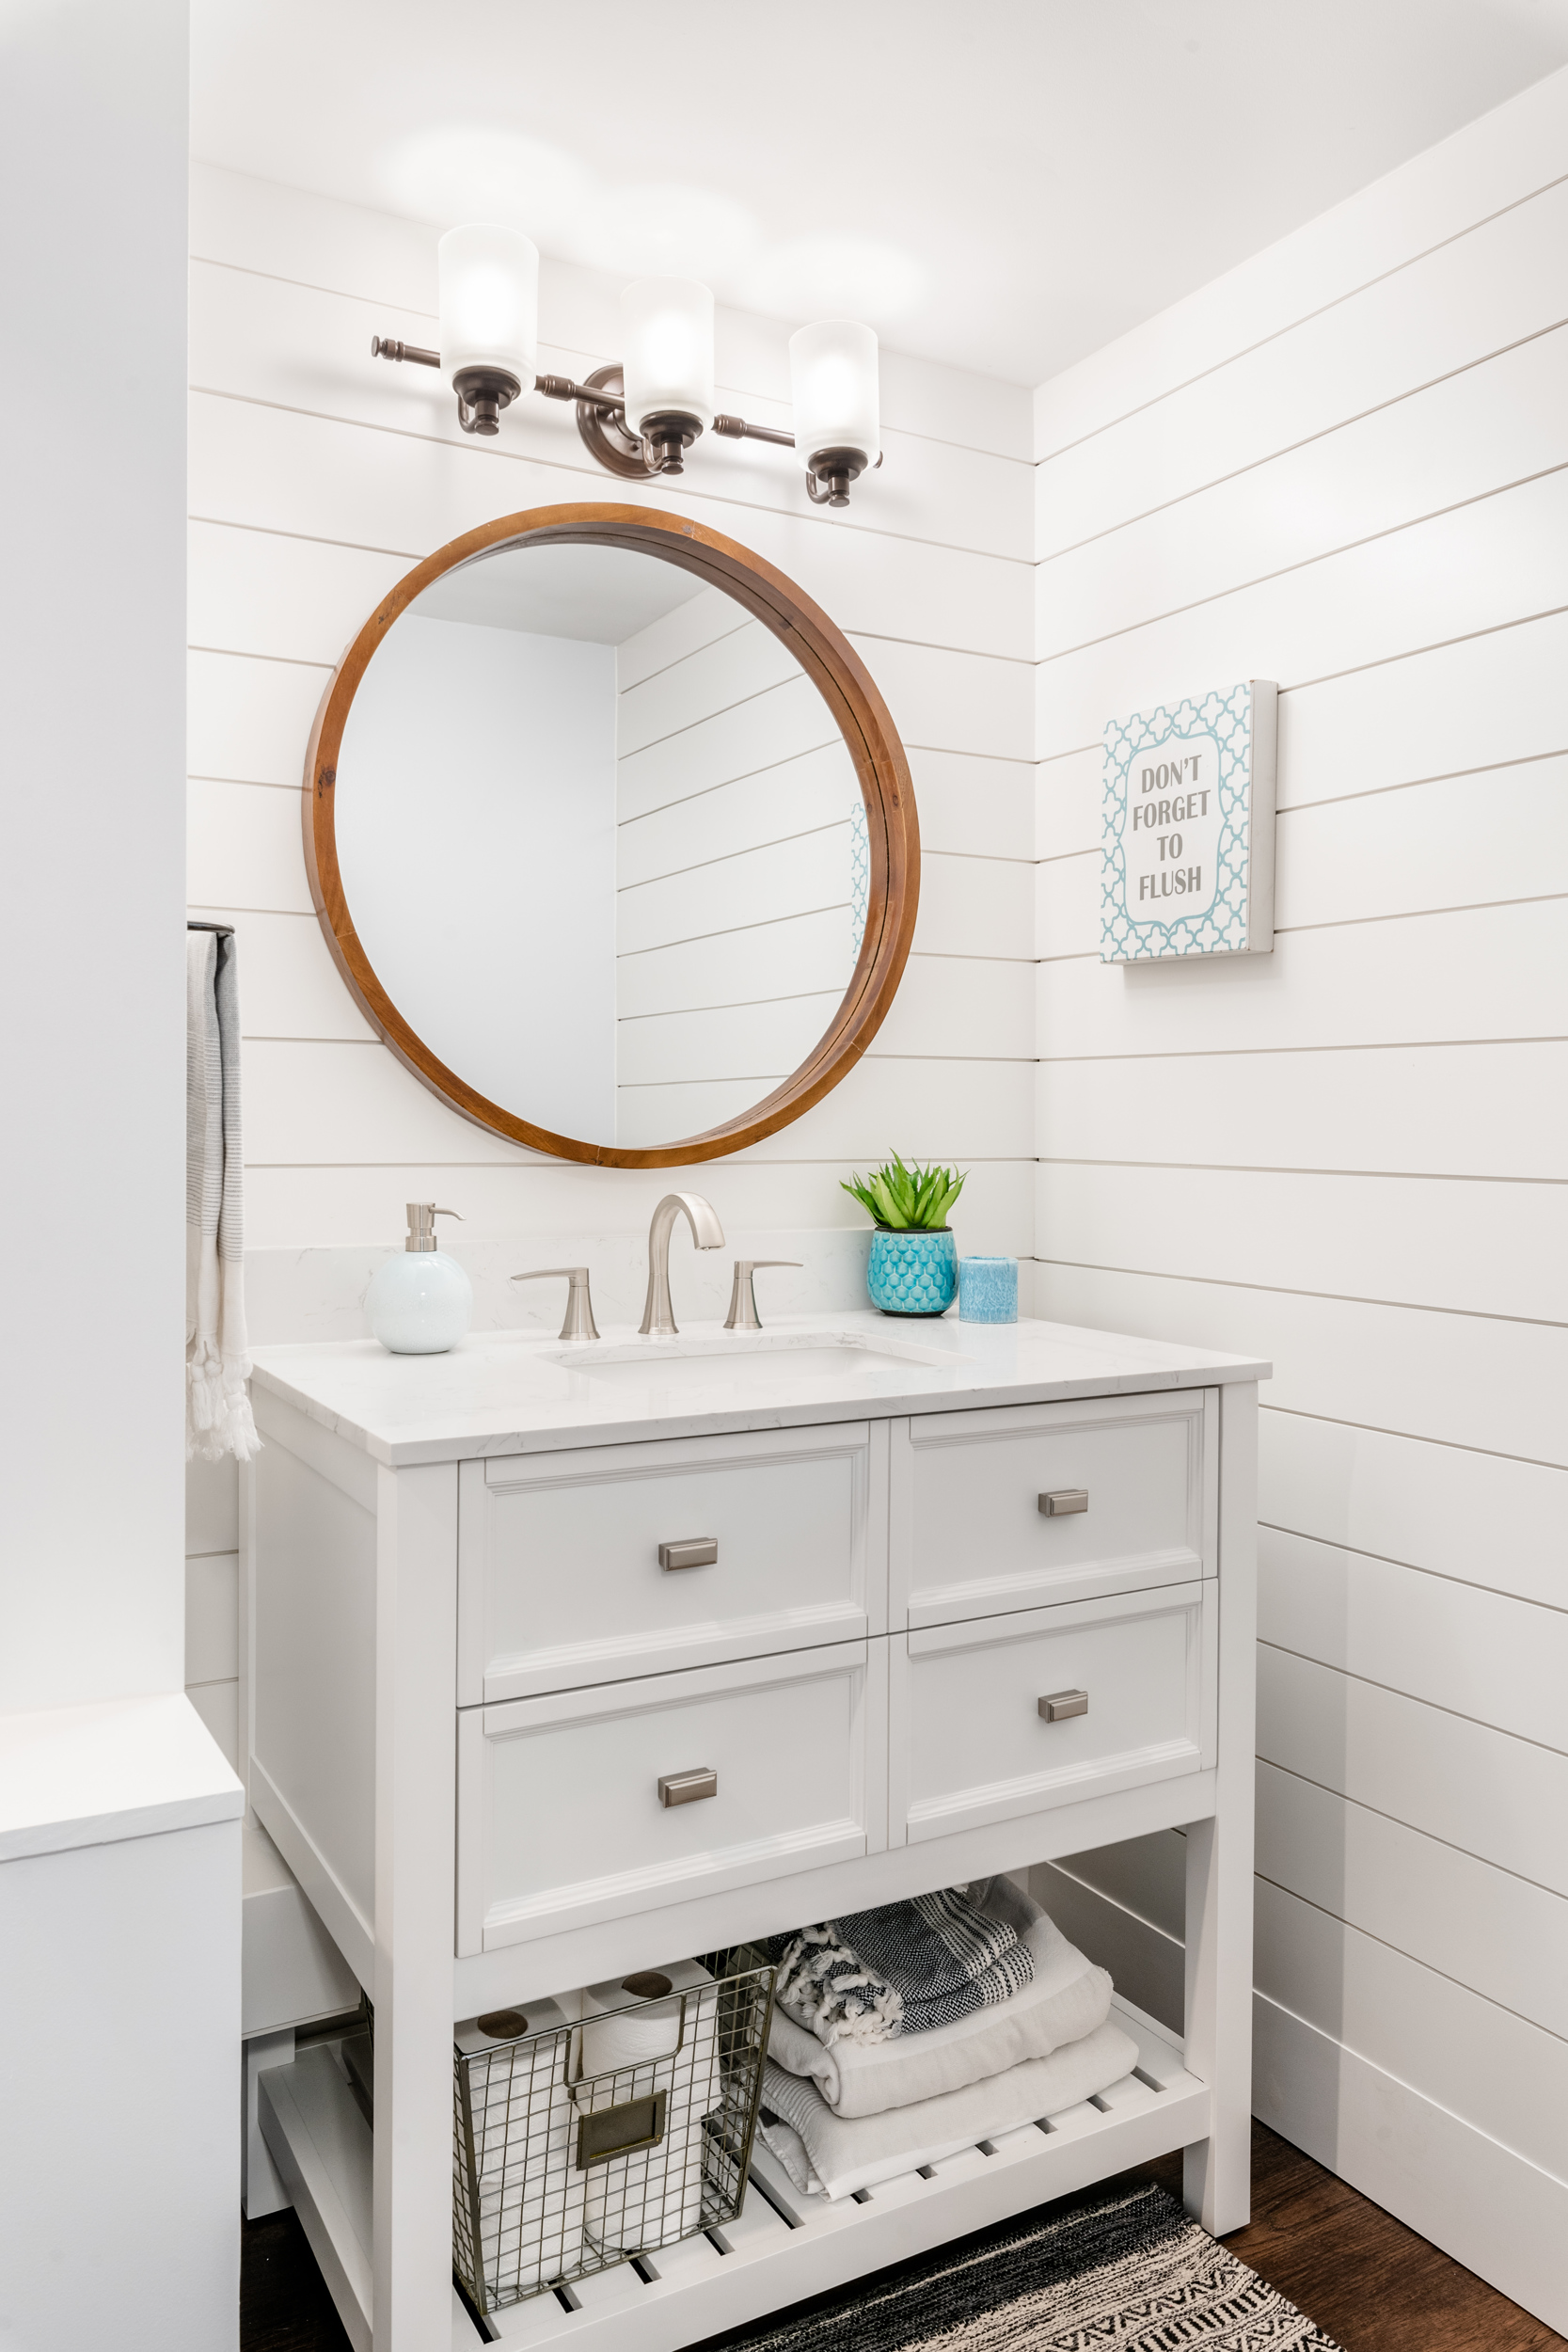
You can read all about how we updated this basement bathroom here:
Modern Boho Farmhouse Bathroom Makeover Reveal
Modern Boho Farmhouse Makeover Before and Design Board
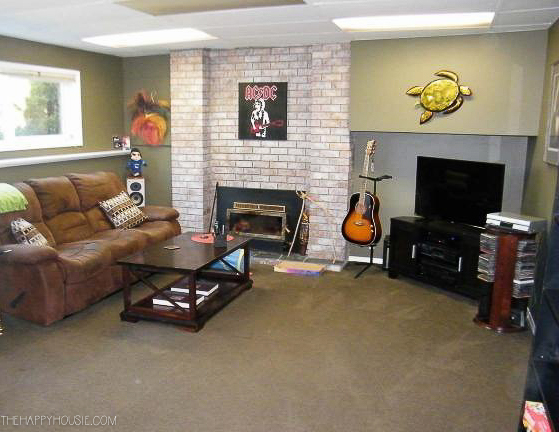
The Basement Family Room
In the basement we did a pretty did makeover on the family room as part of the Spring 2020 One Room Challenge. It was a great quarantine project and kept us really busy!
Here is how the basement family room looked when we viewed the house…
After the renovations it looked like this…
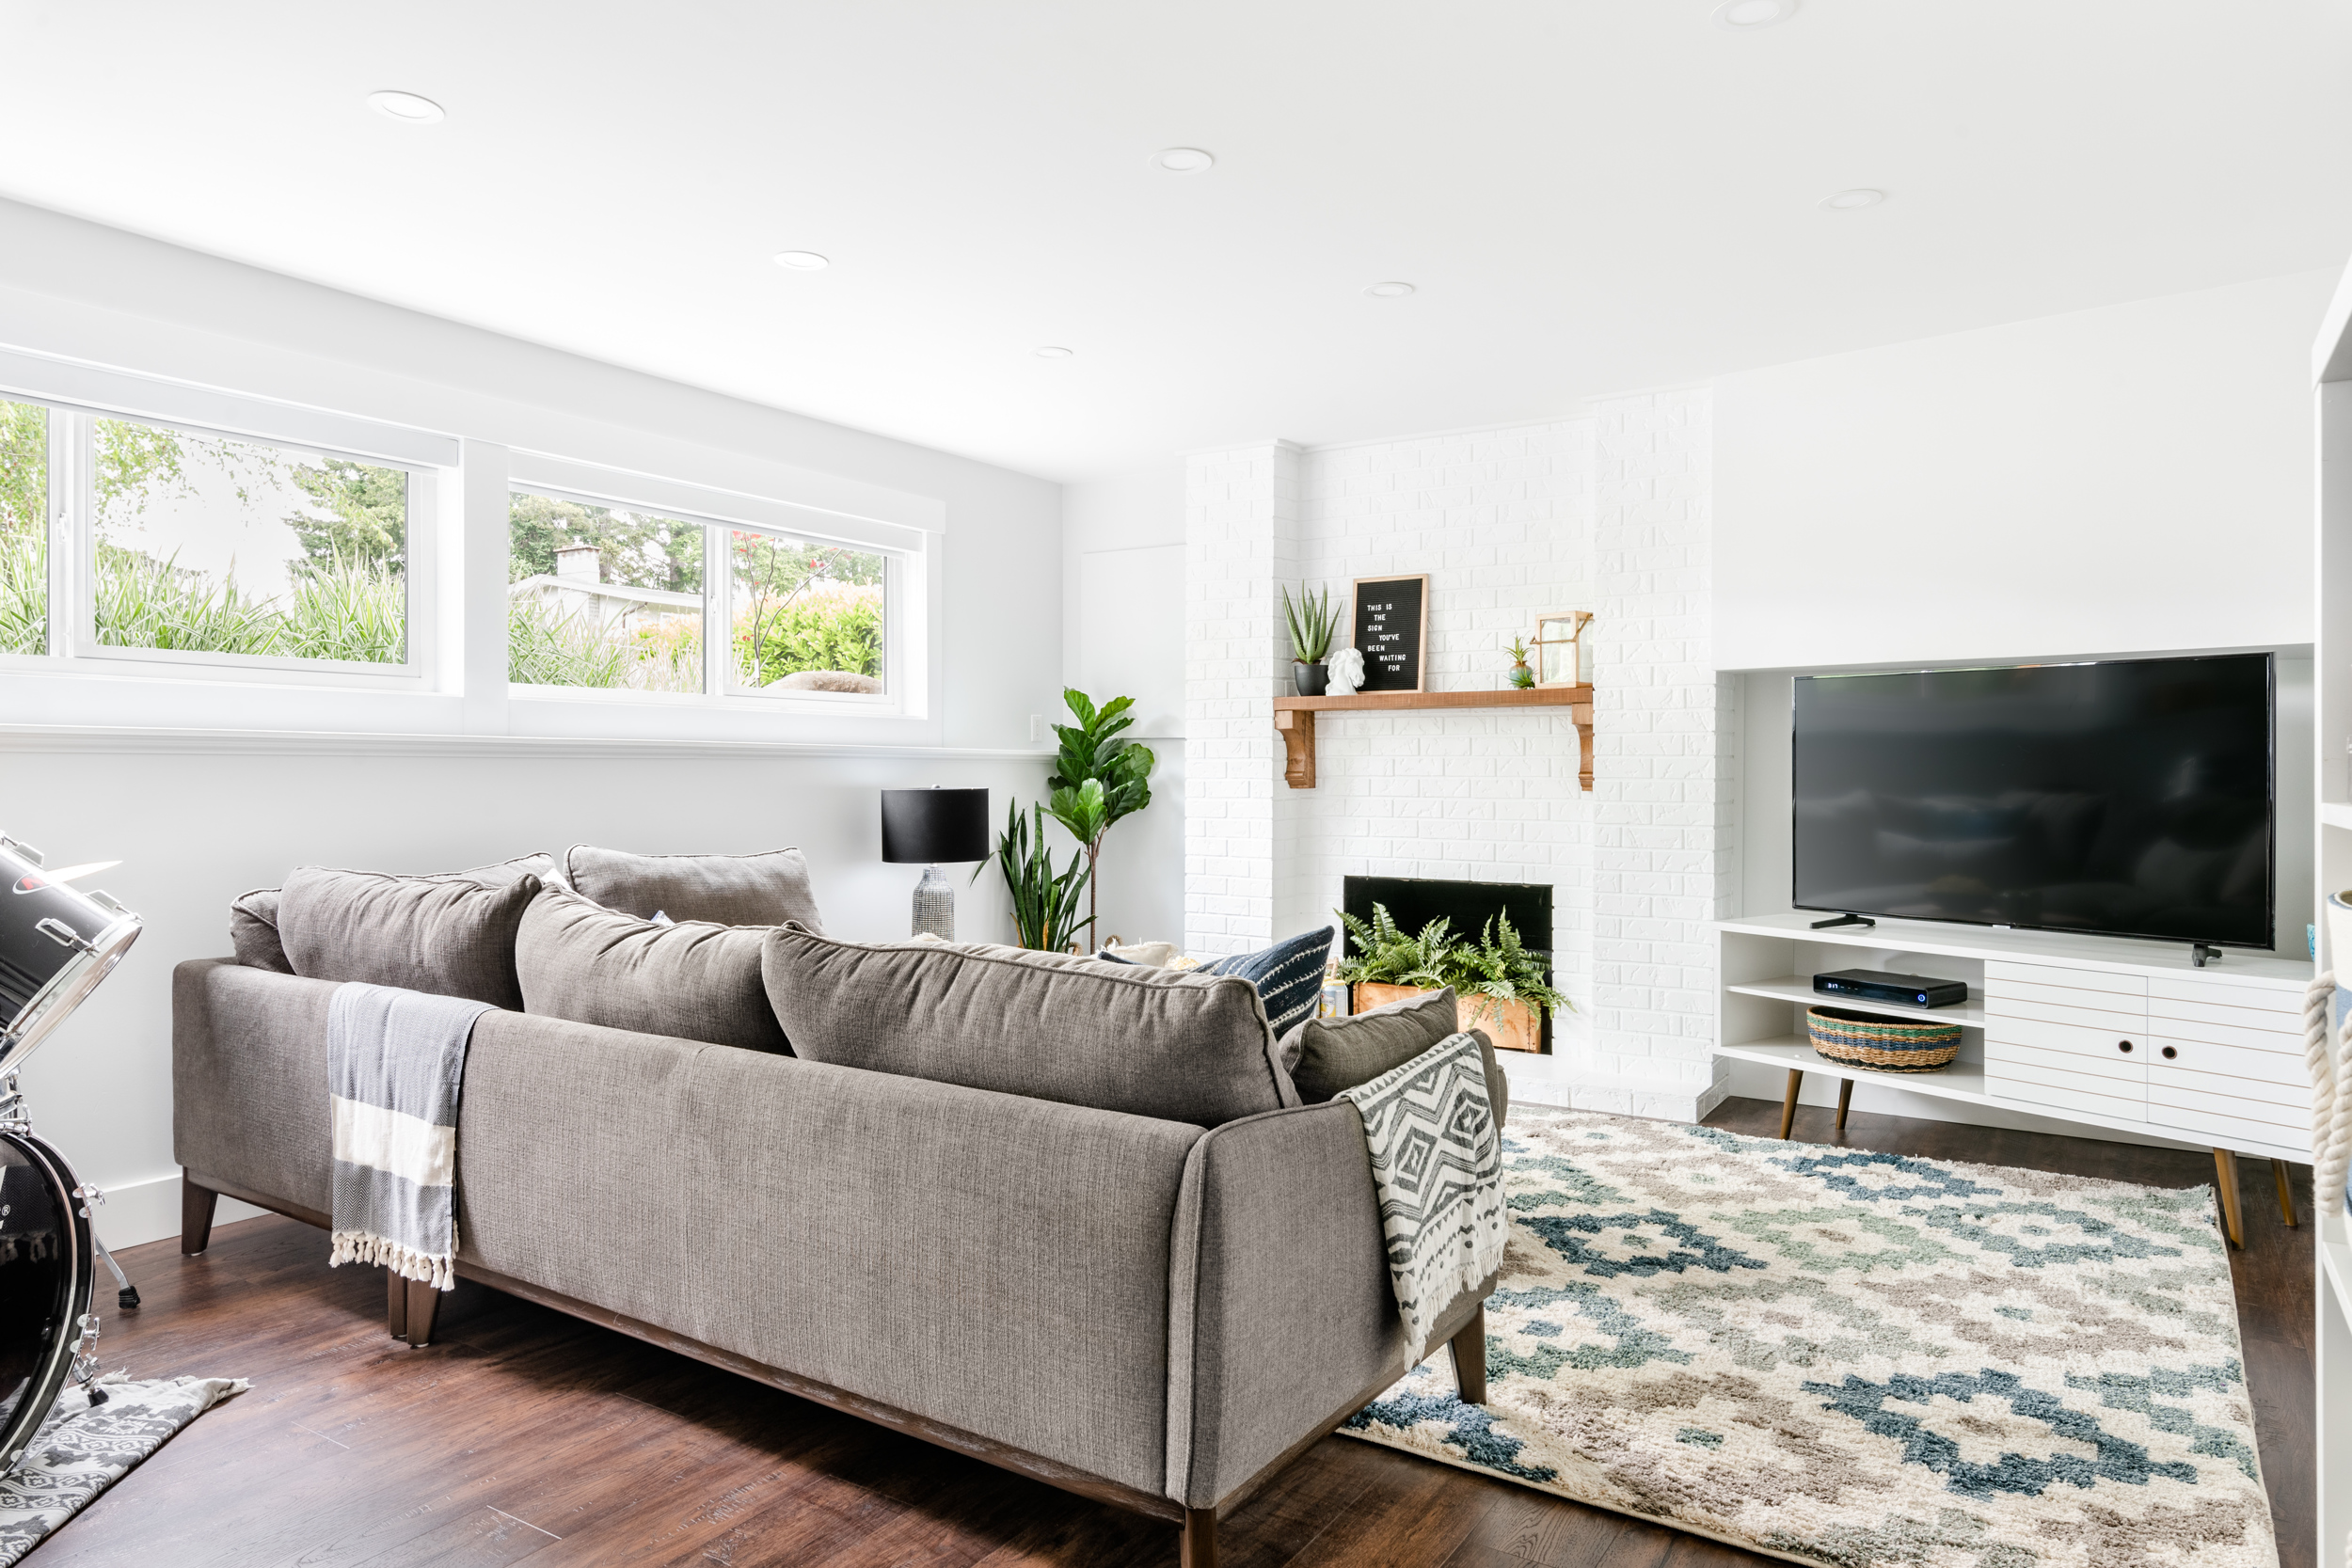
You can read all the posts related to this room makeover here:
Family Room Makeover Reveal
Week 6/7: Art, Rugs, Furniture Choices
Week 4/5: How to Install Vinyl Plank Over Concrete
Week 3: Brick Fireplace Makeover
Week 2: Replacing a Drop-Tile Ceiling
Basement Family Room Before & Plans
We also freshened up the whole basement with fresh paint, new vinyl plank flooring, and new trim during COVID quarantine.
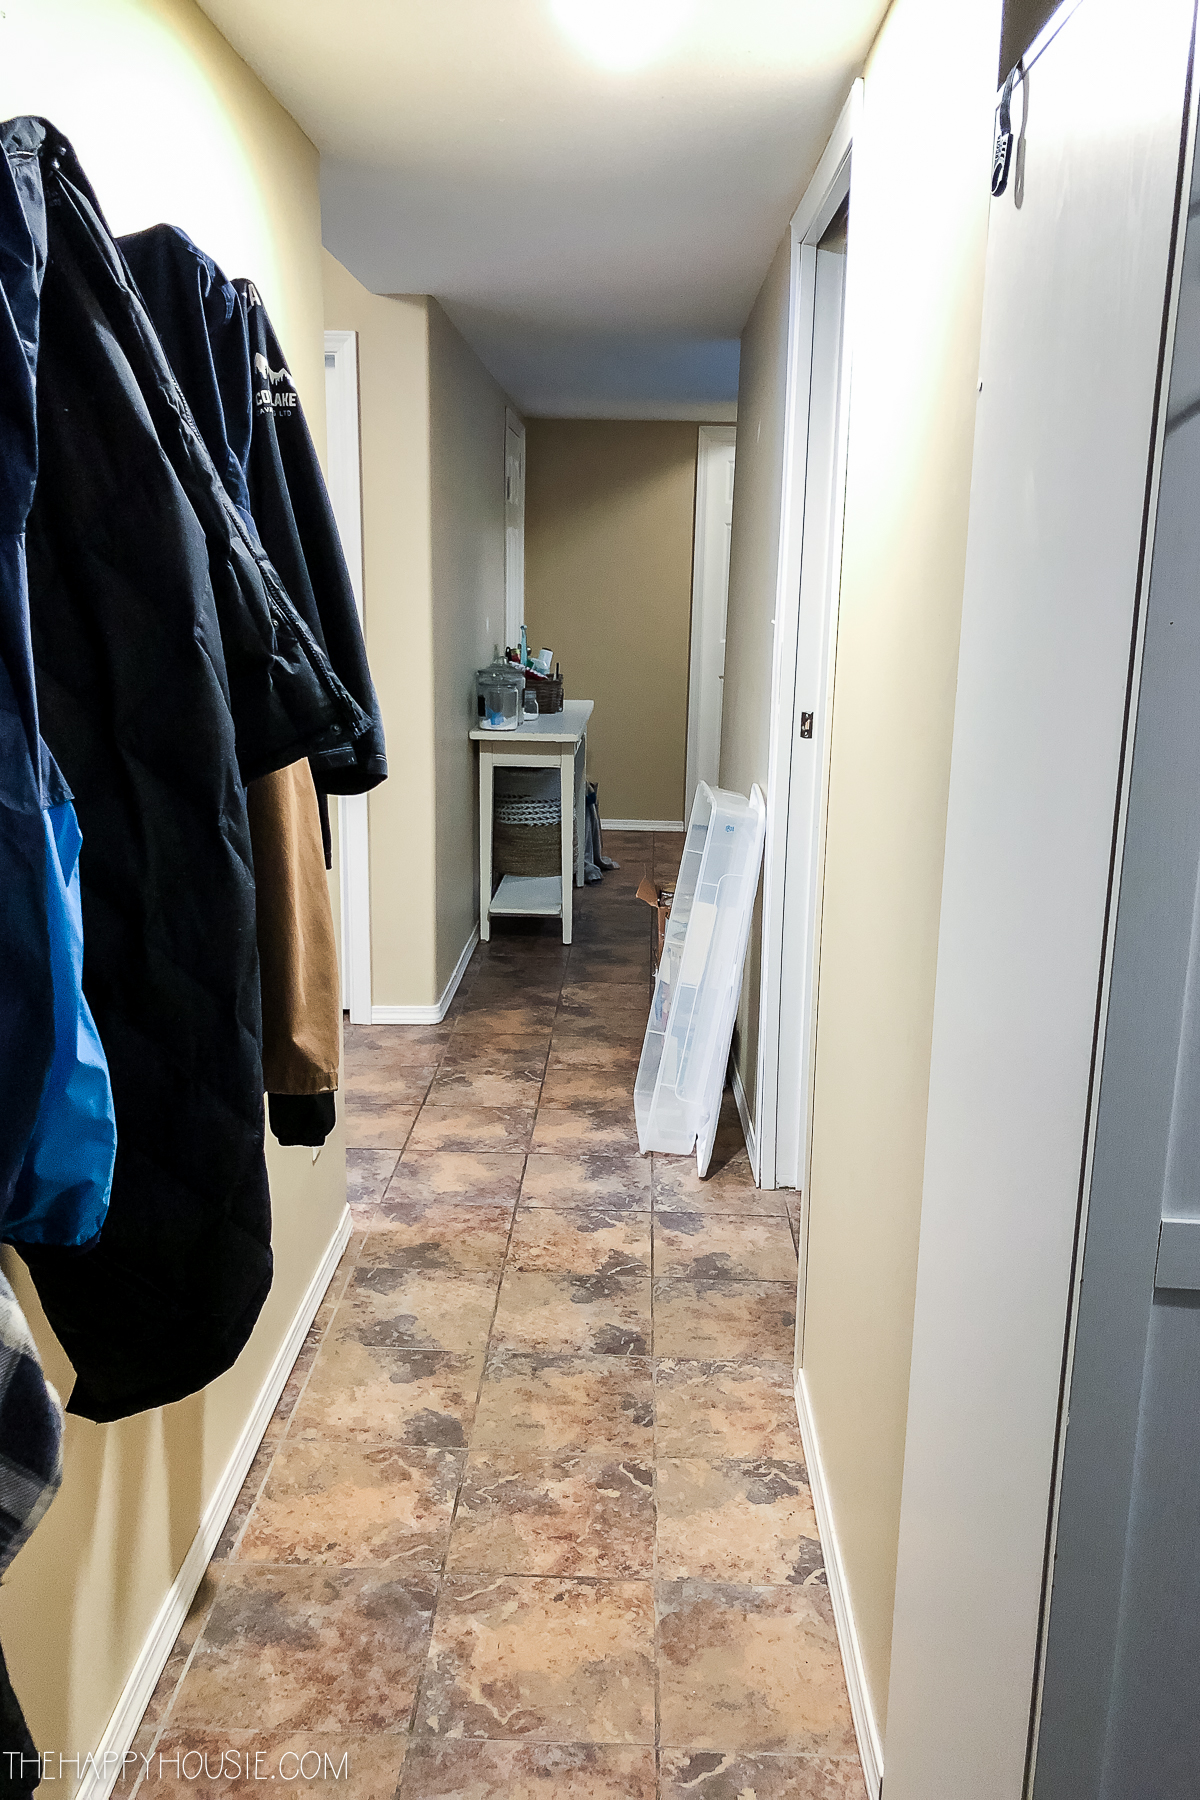
The Basement Hallway & Rooms
Here is how our basement hallway looked before…
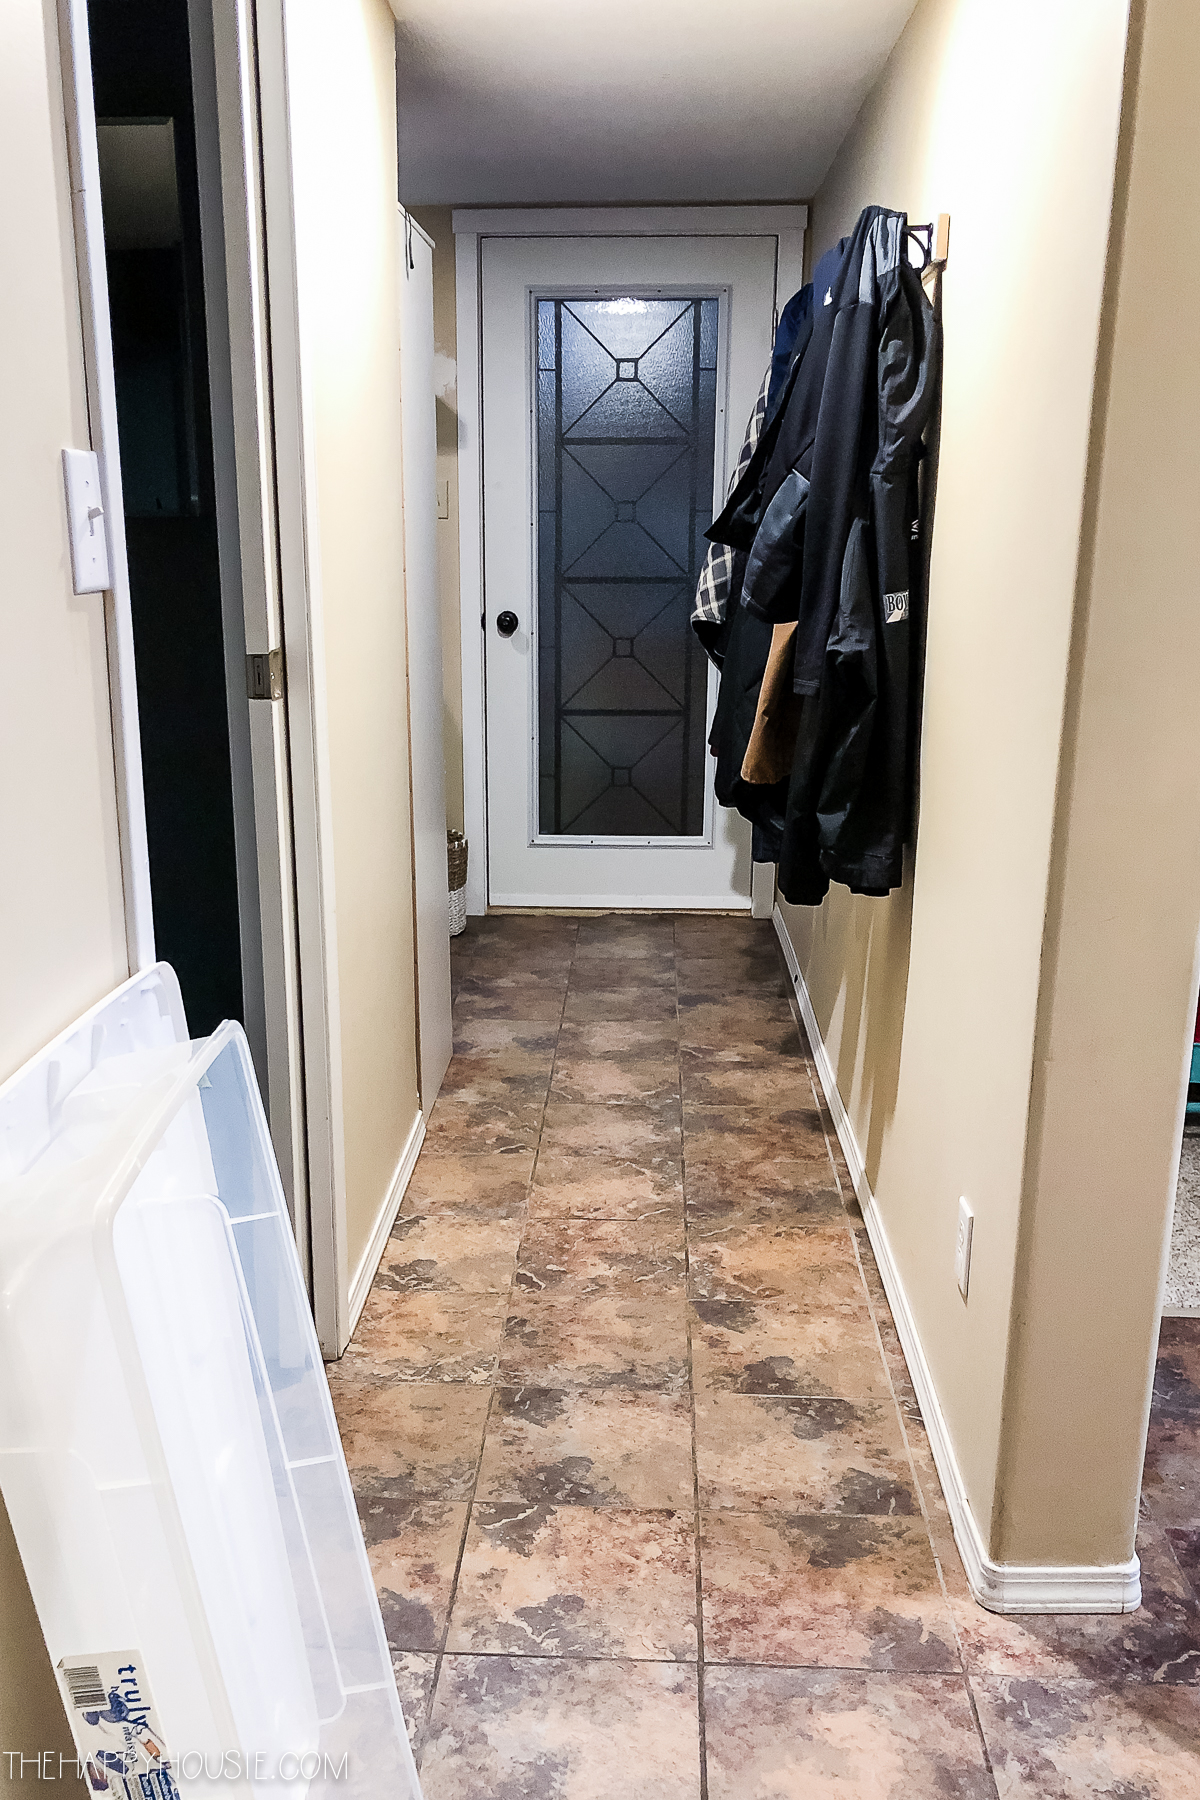
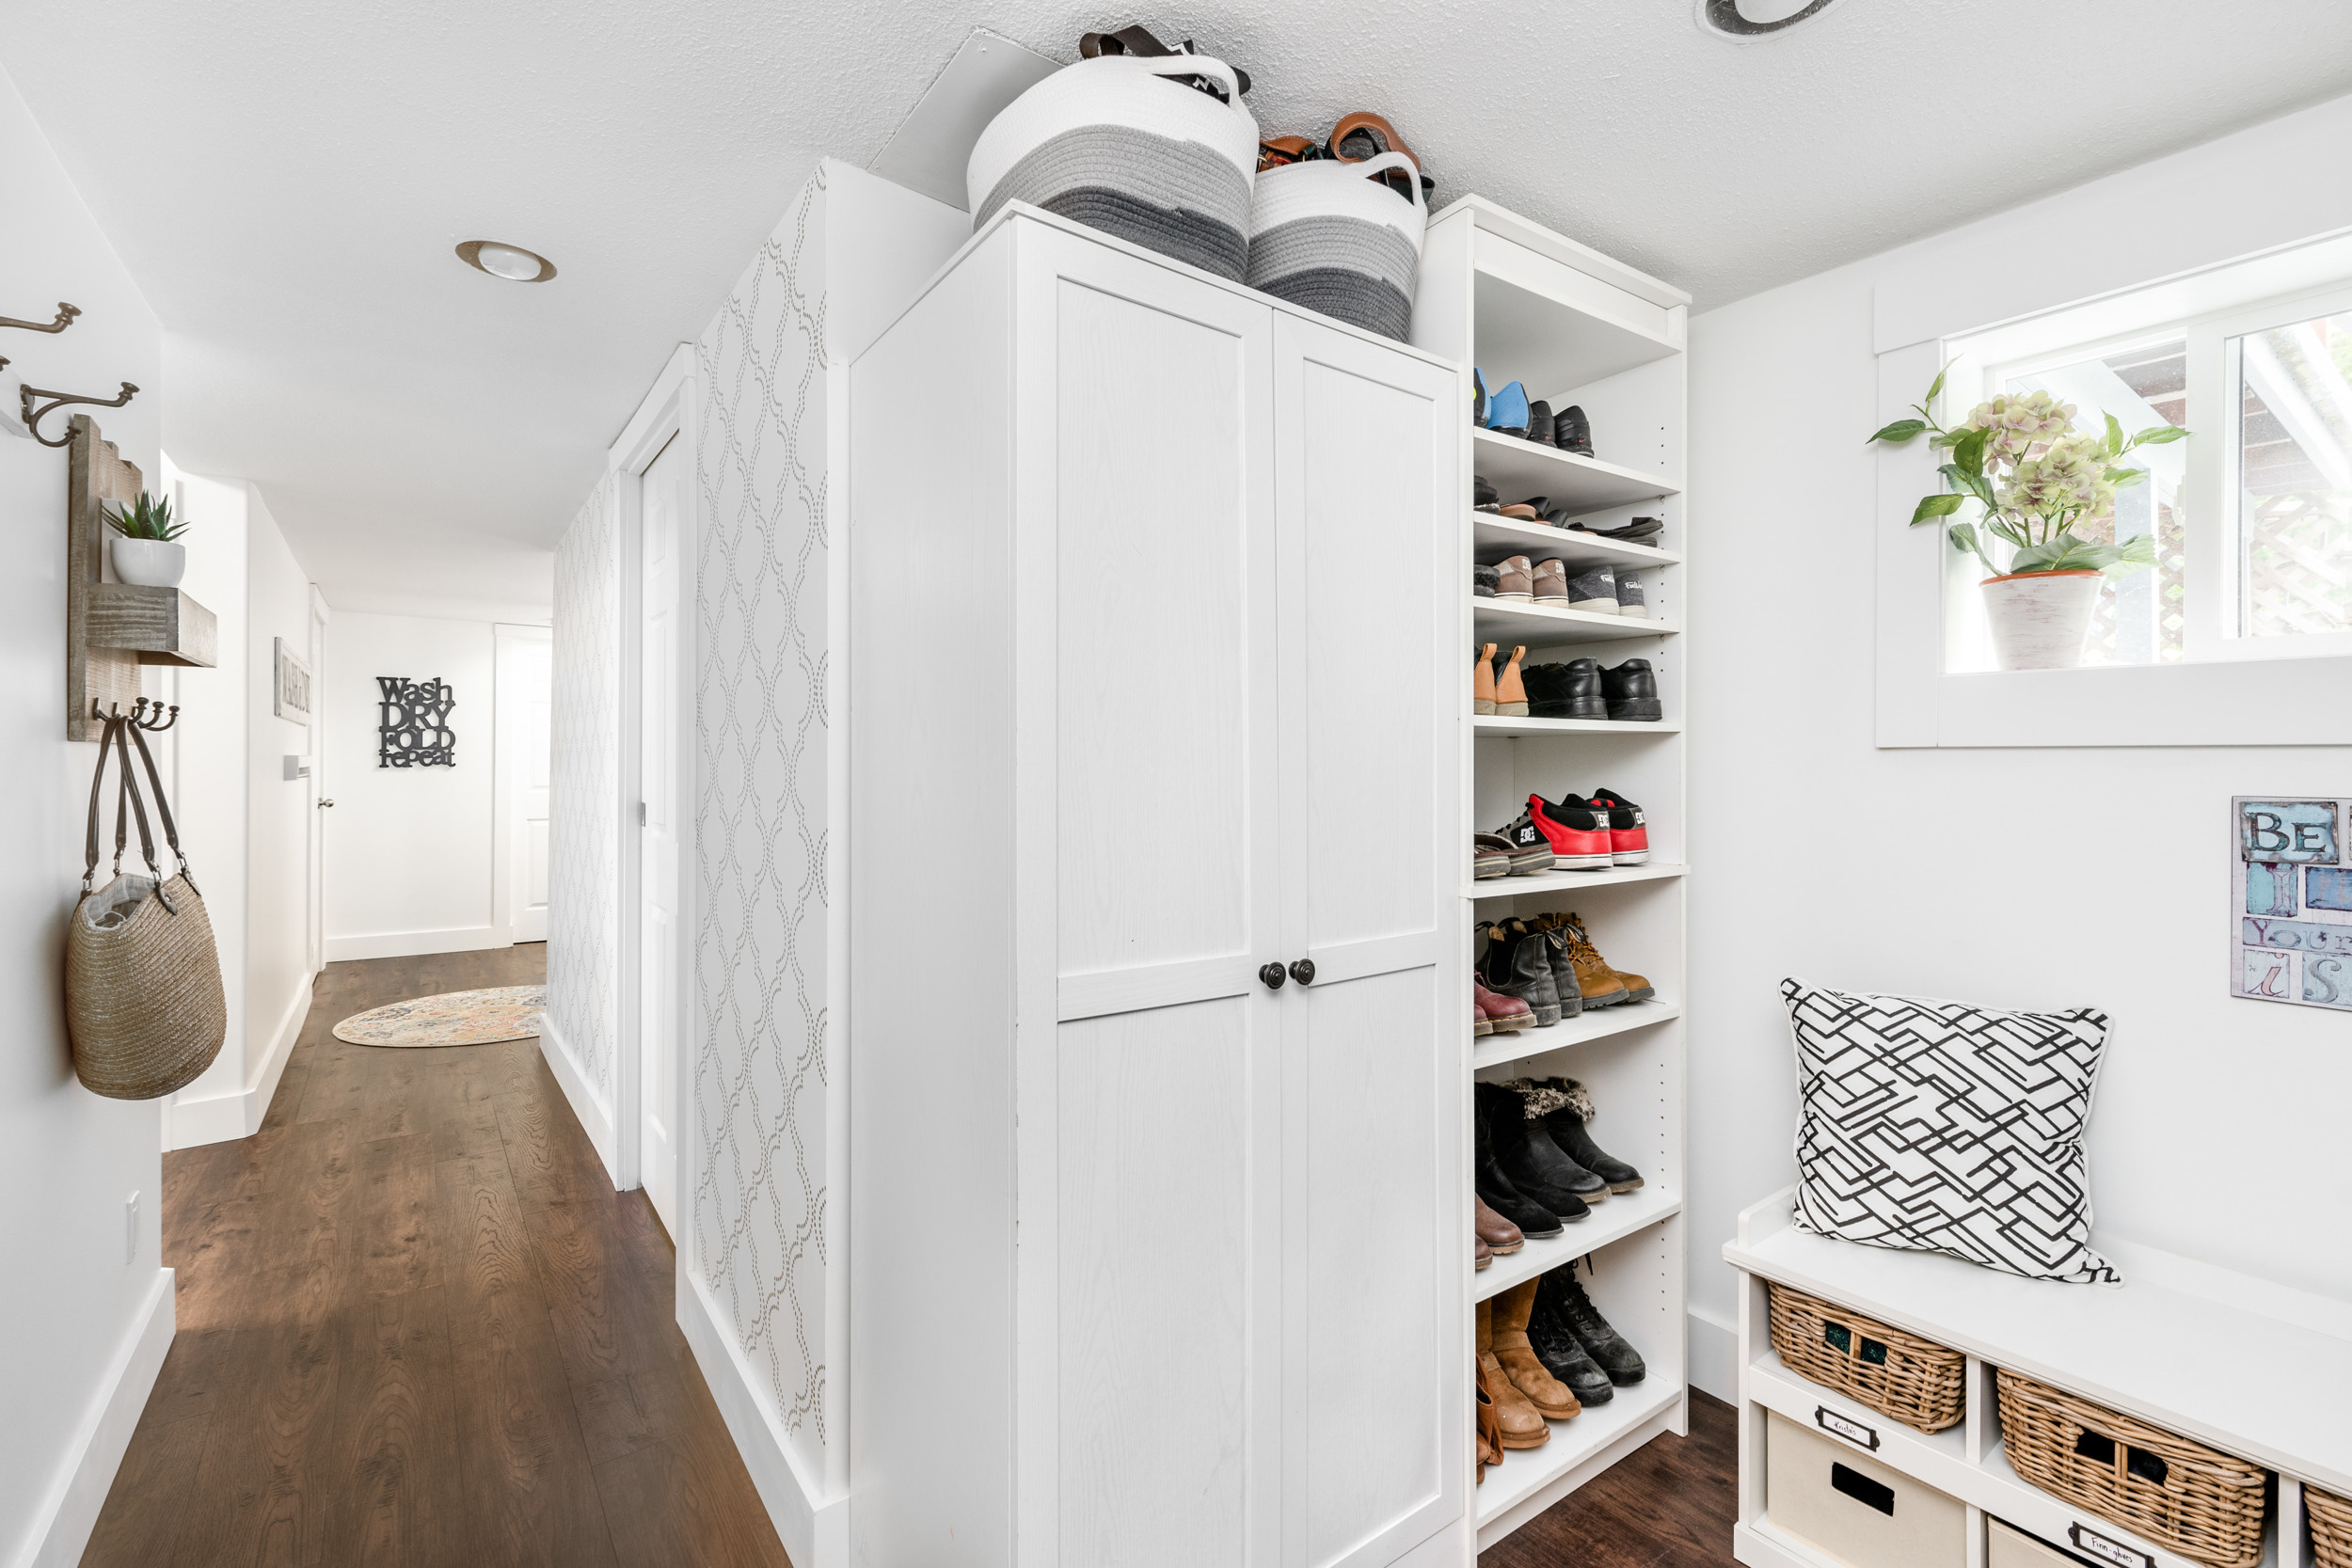
And after our renovations…
Here are the posts related to this makeover:
How to Install Vinyl Plank Over Tile Floors
How to Give Your Hallway a Makeover on a Budget (prior to flooring install)
How to Setup a Functional Mudroom in a Small Space
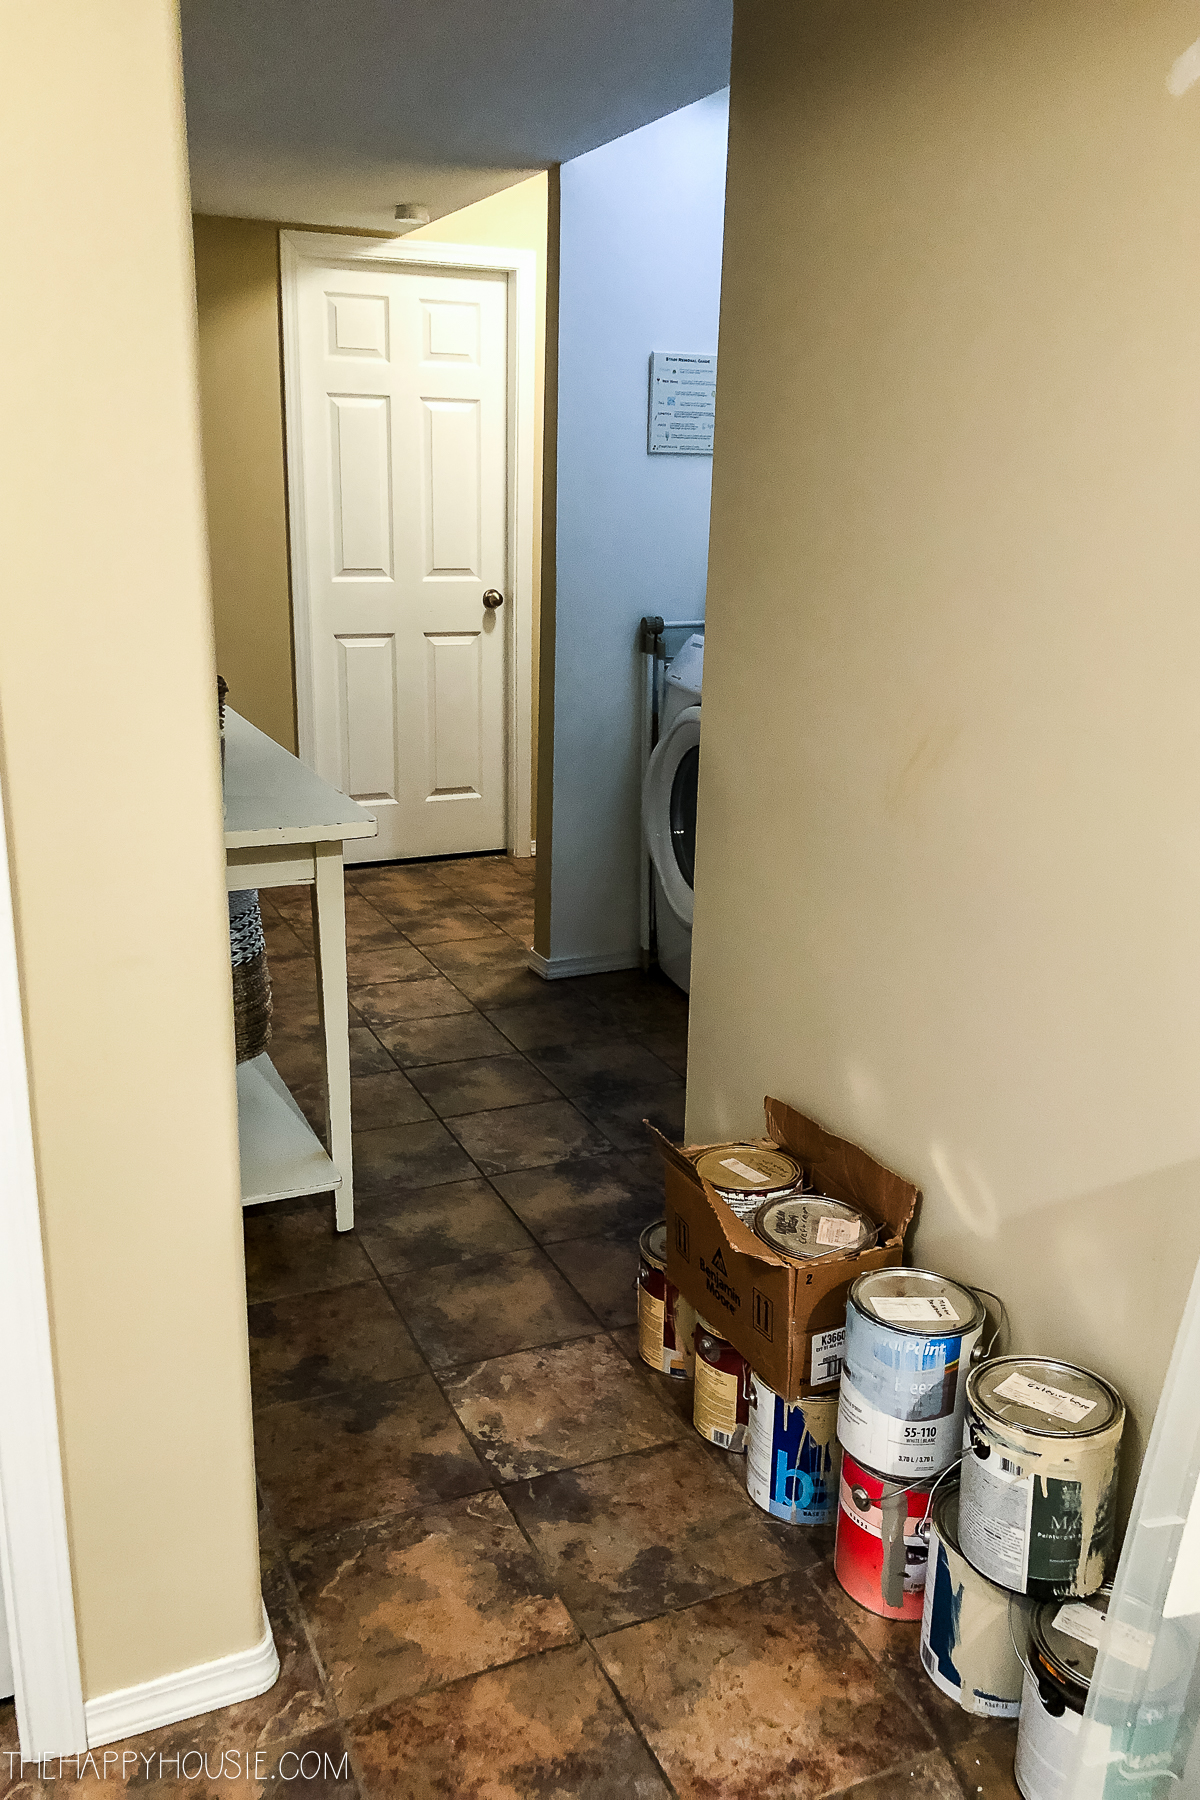
The laundry nook before…
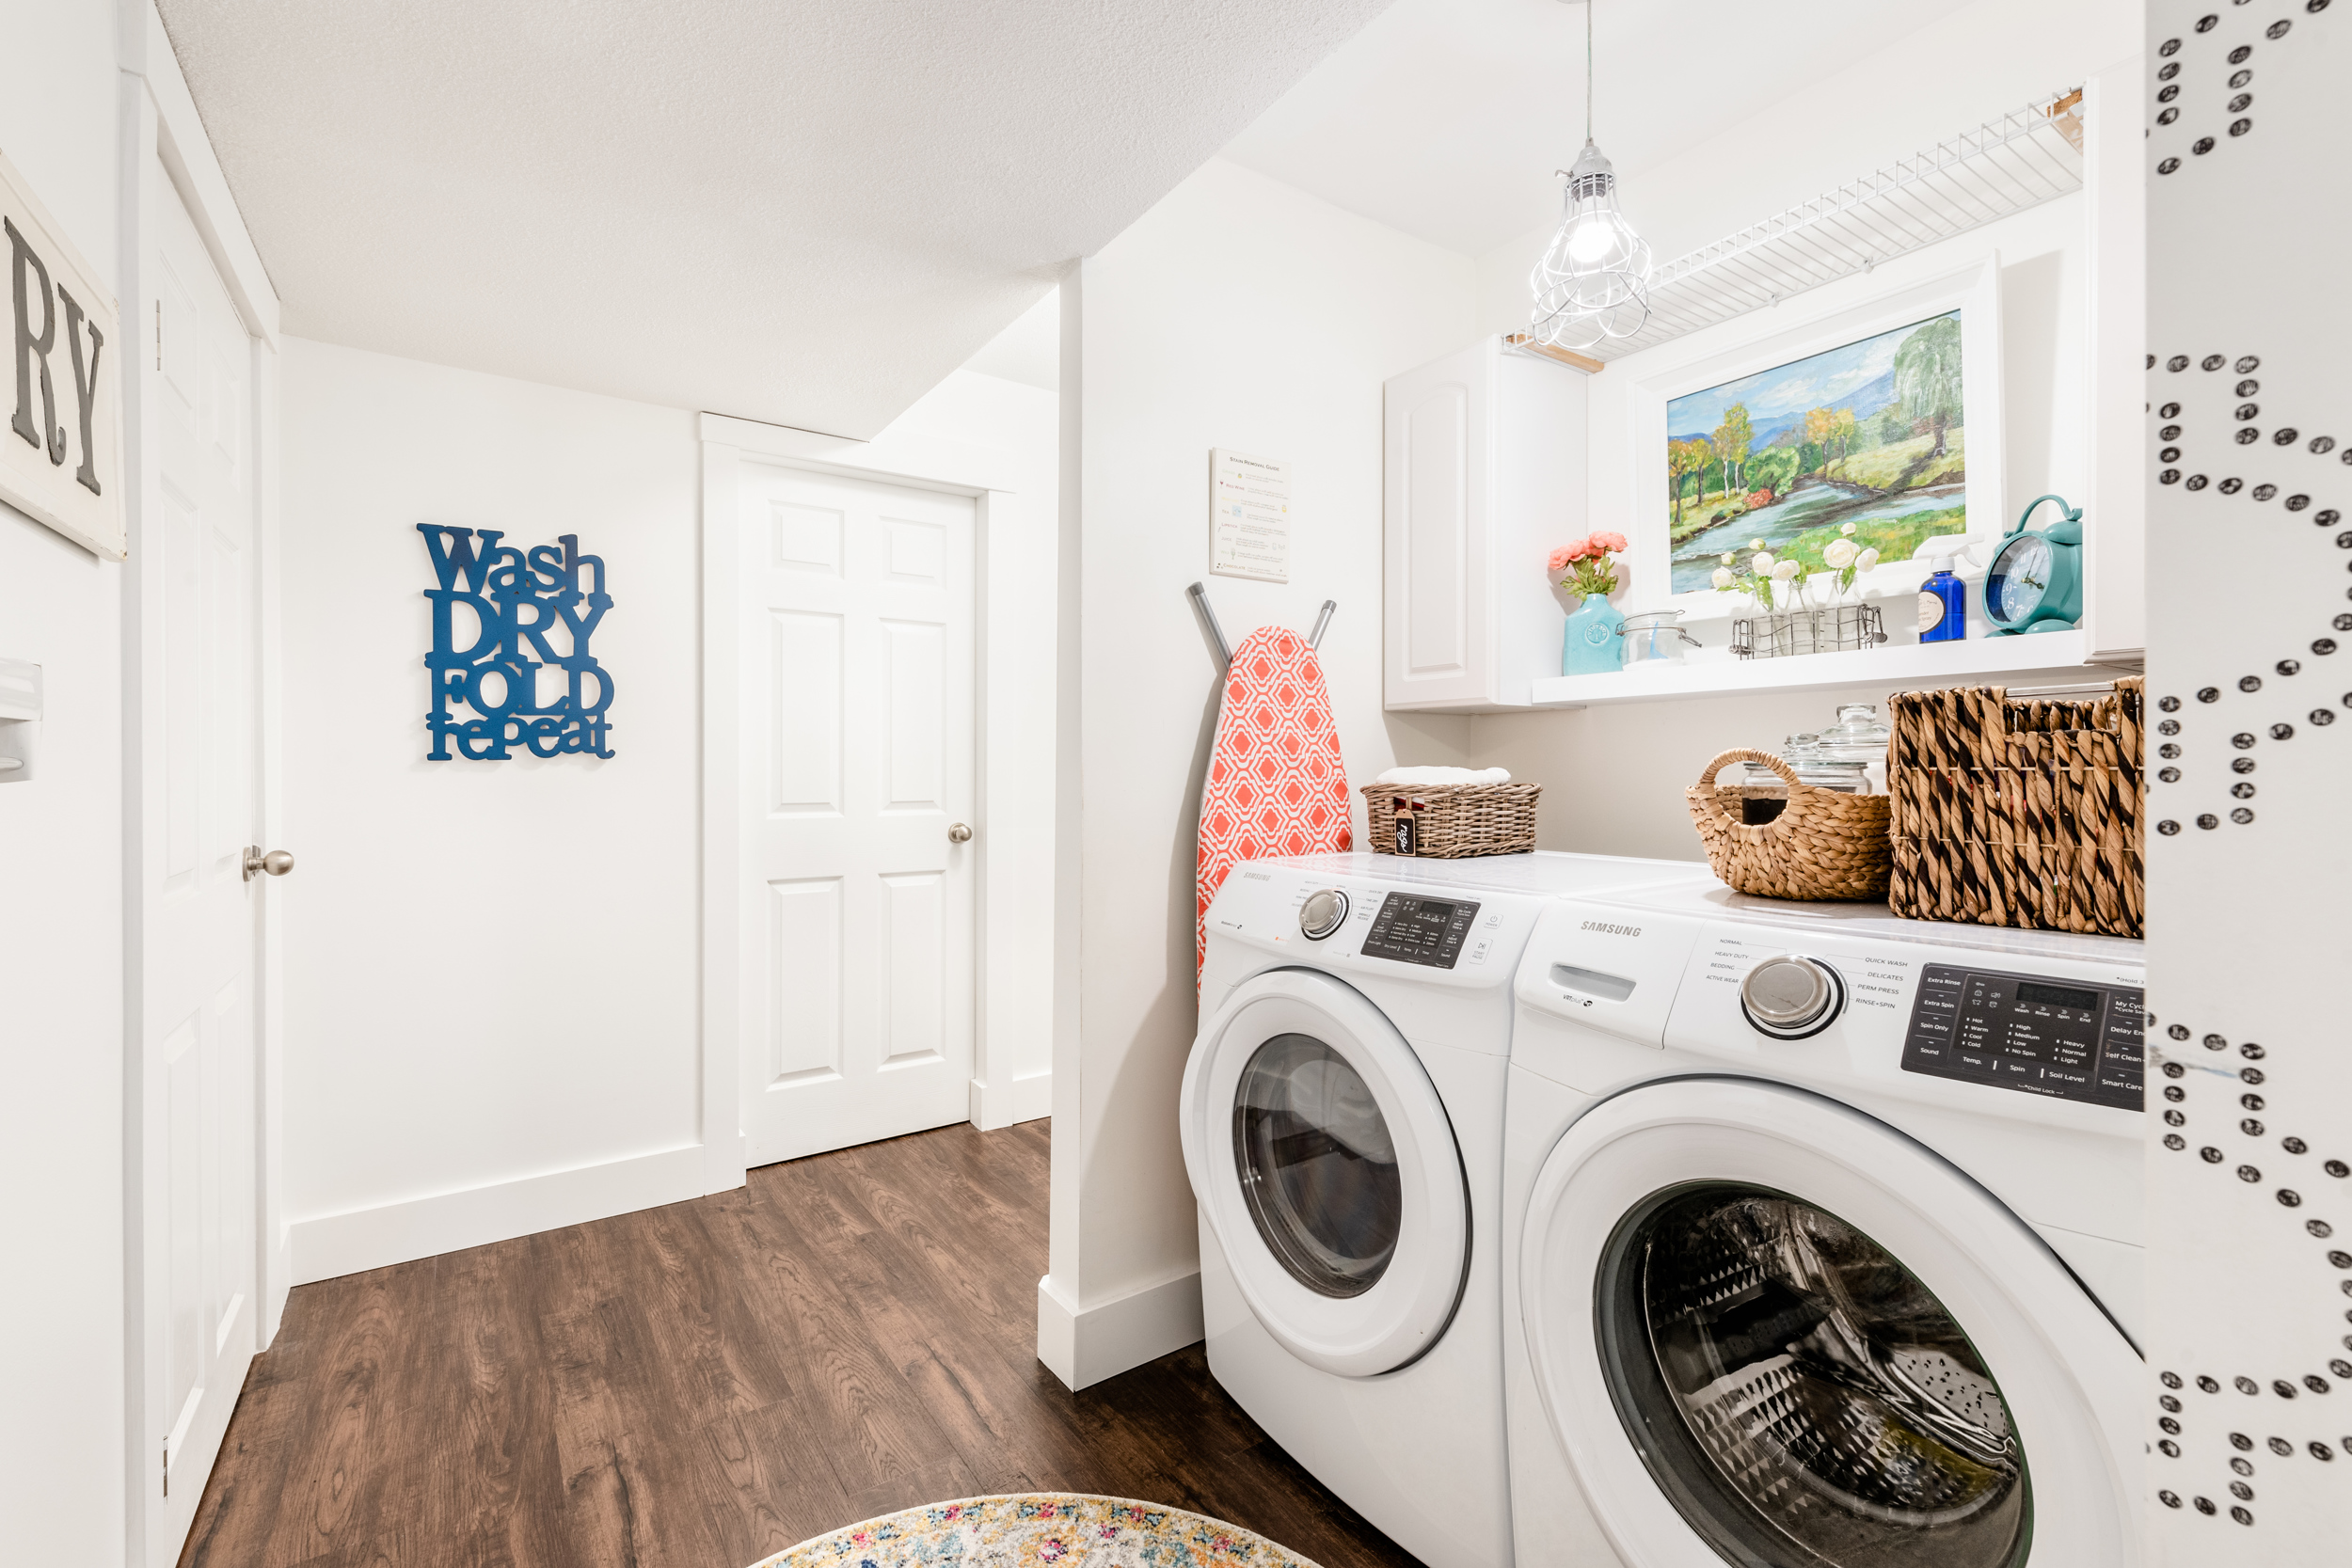
And after we’d finished everything…
Related Posts:
How to Organize Your Space with a Rolling Laundry Cart
We didn’t do a lot to the basement bedrooms other then painting them, as the carpets were in decent condition and warm for a bedroom.
Here is how the back bedroom looked when we viewed the house…
And after some paint and repurposing…
The other back bedroom before…
And after…
The Deck & Backyard
Outdoors was a bit bigger of a project, and we didn’t get around to finally tackling it until Spring 2020.
Here is how the deck looked when we viewed the house…
And after we re-stained everything and painted the house…
You can read about the before and after of our backyard and deck here:
Forest Deck & Backyard with Before and Afters
The pool area when we viewed the house…

And after we changed the terracotta pool deck to a light grey colour…
We also added a new fence (to code with insurance regulations, as the old fence was falling down and not of legal height for having a swimming pool). To keep things simple we did river rock landscaping around the edges of the fence and use our favourite, ornamental grasses, to soften the edges. You can see from this picture why we called this house our ‘forest’ house! All in behind us was a huge network of trails, that actually wrap all the way up to our new house just a couple of minutes up the road.
Well, there it is. Project complete. We really did love living in our forest house, at least once the insulation and drywall dust had stopped falling in our food while I was trying to cook dinner. It was a wonderful neighbourhood right near a stunning trail system and with fabulous neighbours. But the promise and enticement of building from scratch was strong, as we’d talked about it for many years. So here we go… drywall was starting today at the new house, and soon the time will come for us to begin adding our own touch to the finishes. I can’t wait to share that part of the journey with you all!


What a cool project! Everything turned out so well! We are renovating our kitchen and putting in all new appliances. We have an old 1920s English tutor home so I really want to be able to keep as many original parts as possible We ended up just keeping our old cabinets and just getting a cabinet refinishing
. It did actually help us save some money in the long run! Thanks for the photos, everything looks great!
Such a huge difference! I love how the white elements really brings life to the house! Thank you for such a wonderful inspiration!
Love your entryway. Where did you get that ceiling light pendant from?
This looks like it came out of a magazine cover! Beautiful home
This is so beautiful.
Seeing this makes me miss our first house. It was a split-level, nearly identical to yours. It was two acres, and was backed by BLM land. We had such hopes and dreams for that house, and although we had started renovating, we ended up moving after only five years. It seems a lifetime ago.
Krista, your entry way is amazing! Can you link to the tile you used?
L.O.V.E. your blog!! I’ll be returning for a lot more visits.
One of my favourite house makeovers of all time, love everything about it! Looking so forward to see what you do with your new home
Everything is absolutely beautiful!! I love it all! You’re truly gifted!
Drooling, your home is an absolute dream! Bravo!
Hi Krista-
Where is the pendant in the foyer from? Love it!
Everything you do is completely amazing. You are so gifted. I wish I could bring you to my house and have you re-design my house. Thanks for sharing!!!!
You did a beautiful job!
WOW ! Is this the same house ! It’s beautiful ! Y’all did a wonderful job , it’s so bright and clean looking just so fresh !
A bloody great post
As I looked through the before and after pictures I was utterly amazed. Truly beautiful. And I appreciate that you were so organized in presenting the before and after pictures. Made so much more sense than many. The lure of a new home must have been extremely strong to draw you away from this home . I don’t know how you accomplished renovating the home, taking such wonderful pictures and then writing about it. Thanks so much. Lots of really wonderful ideas and resources.
Wow! What a beautiful, fantastic finished project! I can tell that you and your husband have talent, energy, ambition, and drive. Congratulations on a job well done. You must be exhausted, Krista. Time for a well needed rest, I’m sure.
Judy
What a wonderful way to spend my dreary cold Sunday, looking at your beautiful pictures of your before and after! Unreal how much you have accomplished! I love all of your white walls. Beautiful!!
Your talent, determination and energy leave me in total awe. Every house you have done is a bigger project with more impressive results than the previous one. Can hardly wait to see the start from scratch one currently underway. Amazing work!
I never knew that white could look so elegant and beautiful. This rainy Sunday I am just taking time to read emails that I don’t often have time for in a busy schedule. Your home looks fantastic! How blessed you are to have been able to see the true beauty hidden within those walls. You must feel like a princess when you come home to your castle. Thank you for sharing this magnificent transformation.
What an amazing transformation! You have a great eye, I wish I had that, but sadly I don’t. I can however run with things I see and paint, sew, shop and craft about anything. Thanks so much for sharing!!
WOW!! I am in utter awe reading that list and seeing all the unbelievable before’s and after’s! And all in only 18 months? How are you still standing?! I don’t think we could do all that in 18 years, let alone months. Congratulations on such a monumental achievement. Your home is fabulous and brings me endless inspiration.
Truly Amazing! I don’t know where to start. It is all spectacular and you have a real talent.
I needed to see this because I am feeling remodeling weary. Six years ago we purchased a home in Florida with the idea of retiring there. We have been remodeling that seventeen-year-old home, one room at a time, since the day we closed. Then, we decided to sell our big family home up north after our last kiddo moved on. We purchased a smaller home there because we both have aging parents but didn’t need that big older home. The smaller home we bought was about 30 years old and we have gutted it back to the studs. I feel like all I do is remodel but your beautiful post and photos have inspired me and give me hope that our projects will also ultimately culminate in two uniquely different but welcoming homes. Thank you for keeping me inspired.
Hello Pamela,
Wow – that is a lot to take on! I know how exhausting it can be, for sure. It is inspiring to look back at your before and afters every now and then to remind yourself of how far you’ve come. Good luck with both of your projects! Sounds fun to tackle two such different homes in different locations!
Krista
This is amazing!!! I’ve been following your blog for years but didn’t have a sense of the timeline. 18 months – wow! Congratulations on your achievements! 🙂
Thanks Brie, it ended up being a much bigger undertaking than we had expected, but we are happy with how it all turned out in the end!