
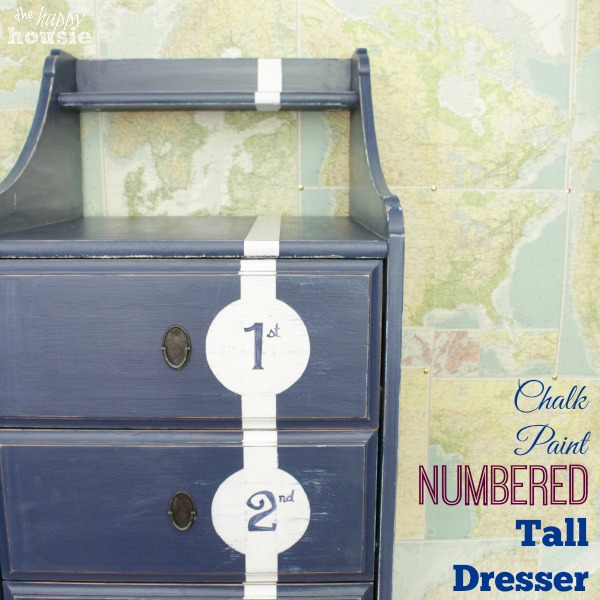
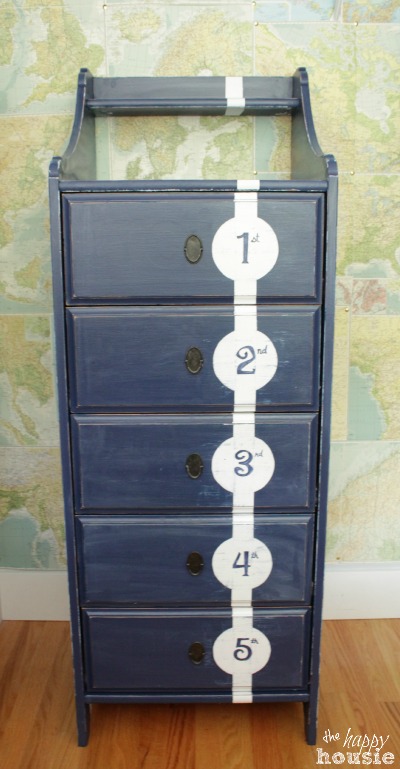
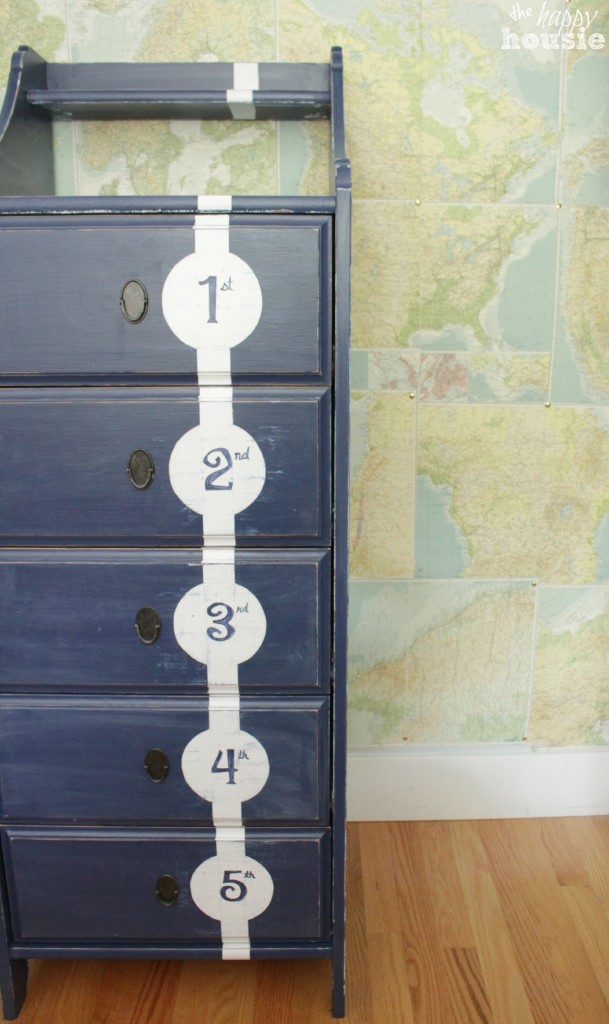
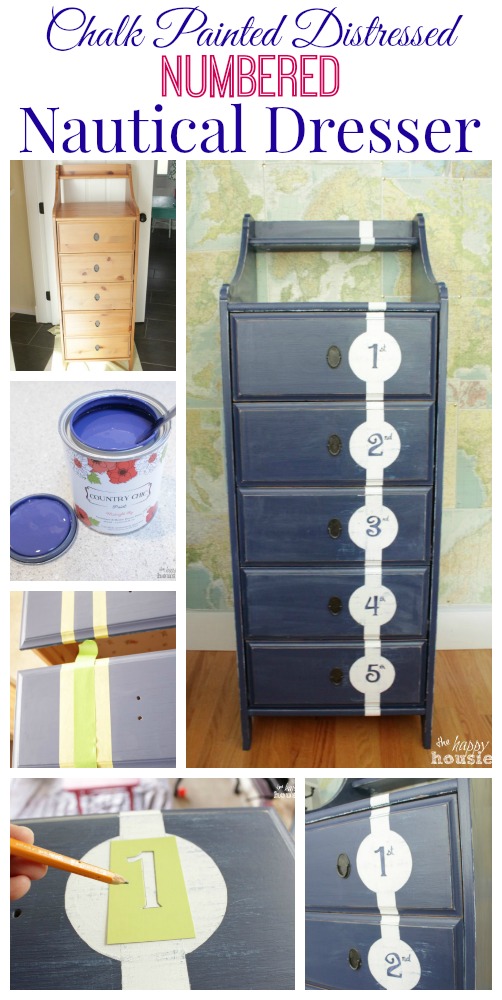
Chalk Painted Distressed Numbered Nautical Dresser
My oldest son loves to change clothes several times per day. He probably changes clothes 5-10 times per day on the weekends…
If he feels like playing hockey, he runs inside and puts on his hockey jersey.
When he wants to practice baseball, he goes and gets on his baseball shirt/pants/even cleats.
We are working on the clothes making it back into the drawers rather then on the floor. This part is still in progress.
A nice, easy glide dresser was definitely a must have for him to encourage him to USE it.
But I still wanted it to be fun – so I updated that old Ikea piece into this Chalk Painted Distressed Numbered Nautical Dresser. It fits perfectly in his Faux Map Wallpapered closet.
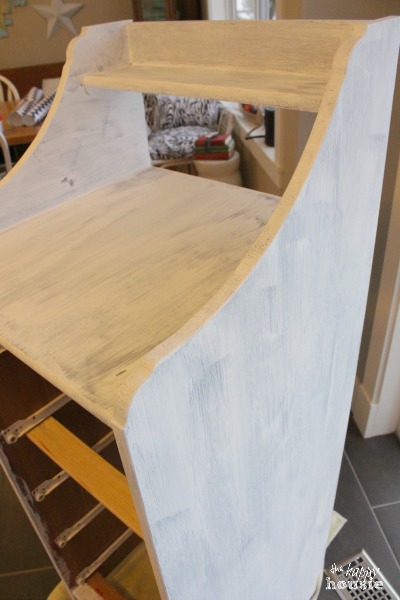
I started out with this tall dresser that we bought from Ikea at the beginning of our marriage (13 years ago!). It was still in pretty good shape and the nice thing about a new dresser is how smoothly the drawers glide. I love my other son’s vintage flag dresser but it does not glide all that smoothly…. more like a heave.
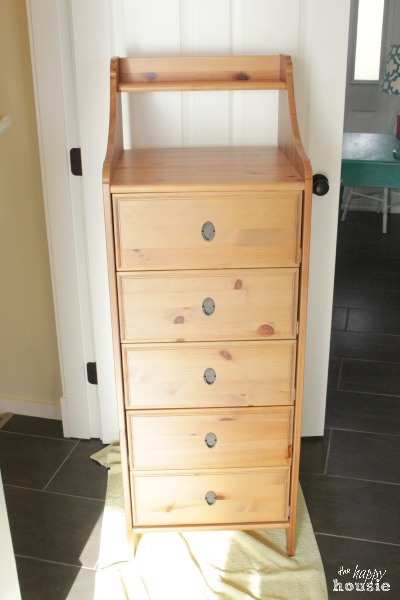
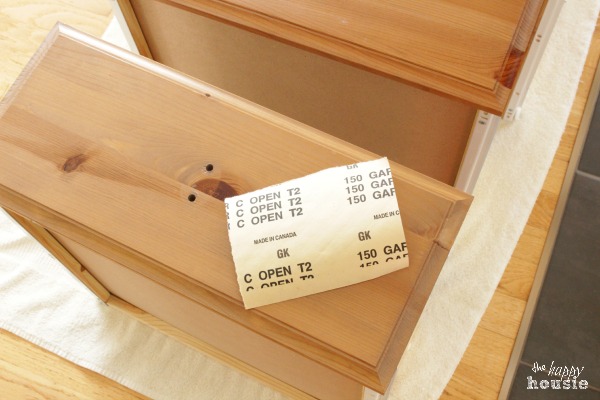
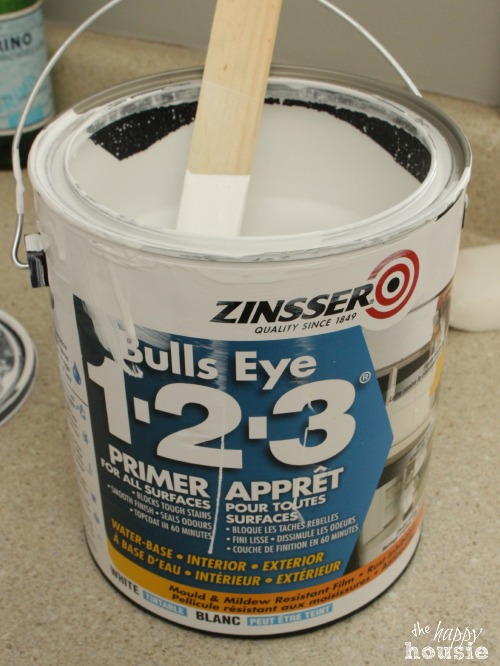
Because the finish was so shiny I decided to do a little extra prep work. I sanded and then primed it.
I know you don’t have to use primer with chalk paint but I didn’t feel like sanding it very thoroughly so I decided to give it a coat of primer instead… Let’s be honest. I can’t stand sanding. Priming seems so much easier.
I also thought that when I went to distress it I wouldn’t mind having a little layer of the primer showing through in some spots to add some extra dimension.
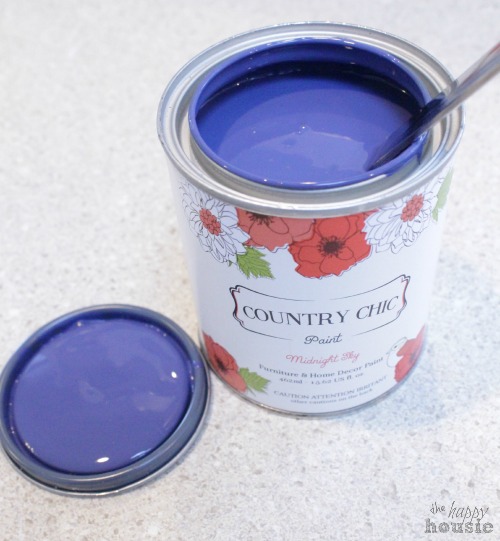
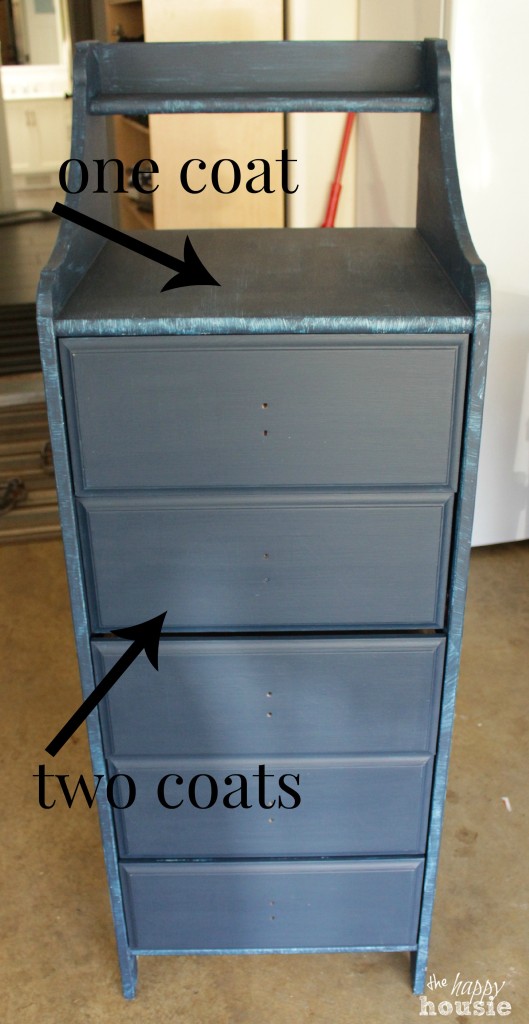
Once the primer was dry I gave it two coats of Midnight Sky Chalk Paint…
You can really see the difference from one coat to the next…
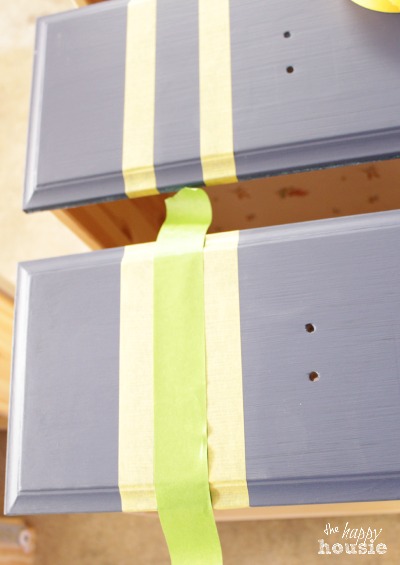
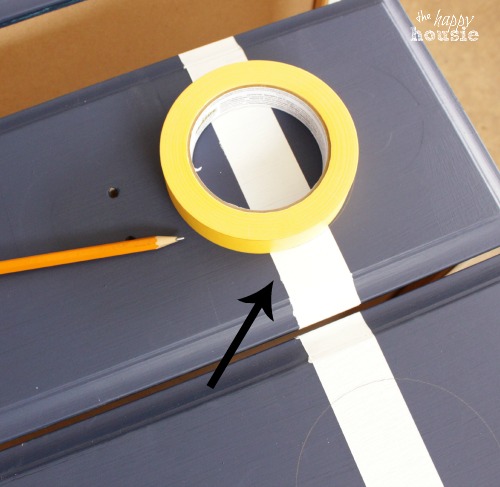
I let it dry overnight and then used some Frog Tape for delicate surfaces (the yellow stuff) to tape out lines…I found a pad of paper that I used as a way to measure the same thickness and then taped a line all the way down the front of the dresser….
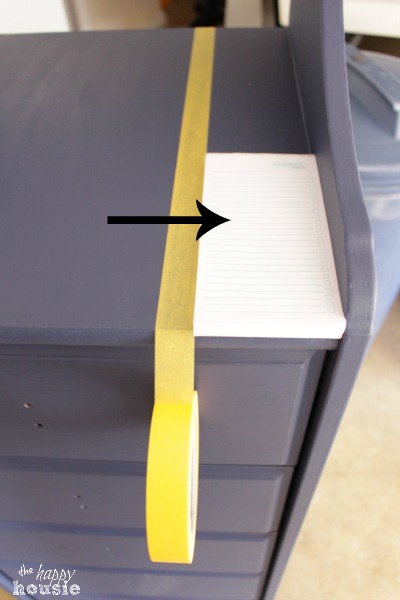
Once the first line was taped, I used an extra piece of frog tape to help me tape a second line…I used some of my green frog tape so that the space that was painted white would be a little bit thicker then my thinner yellow delicate tape was.
Then I simply painted between the lines with white paint, two coats, and removed the tape. I used Country Chic Paint in Simplicity.
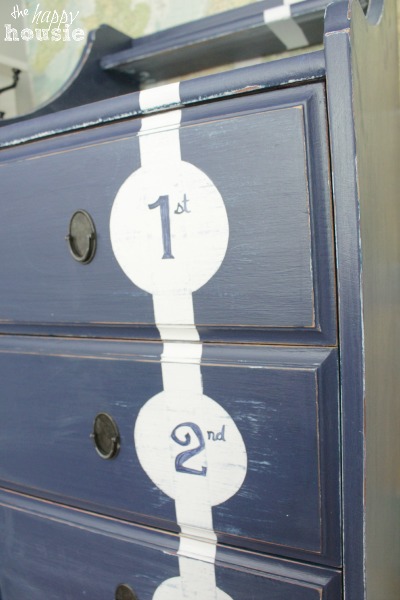
I wanted to add a circular shape to paint my numbers inside so I drew these using my roll of tape, and then filled them in with a small brush…
Here is what I would do differently:
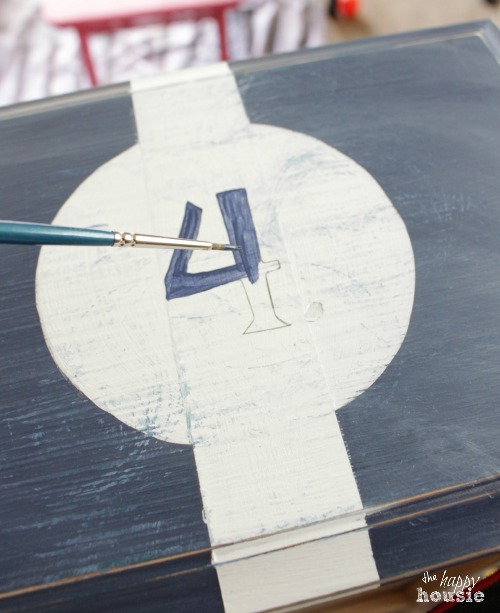
I would paint the circles at the same time as the lines (by not taping where the circle overlaps the line… because doing the two coats of white stripes left a bit of a ridge the still showed through a little bit even once I had done three coats of white on the circles.
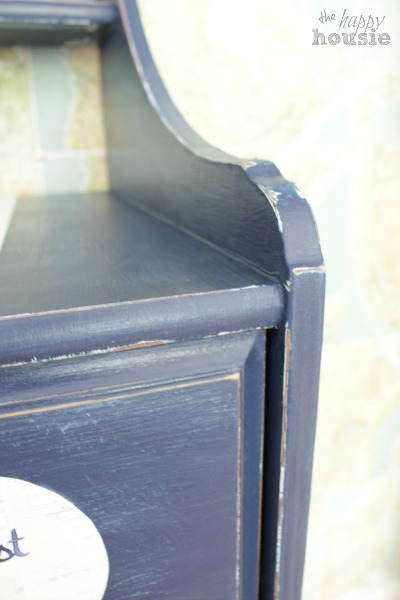
After the stripes/circles were dry I gave the whole dresser a good sanding and distressed all the edges and the surface paint lightly… you can see the distressing more clearly in the next few pictures.
Once dry, I used a stencil to trace the numbers onto the circles. I got my pack of stencils at Walmart a couple of years ago…

I filled the numbers in with a small craft brush, two coats meant the numbers were still a little see through which was perfect for the distressed look I wanted.
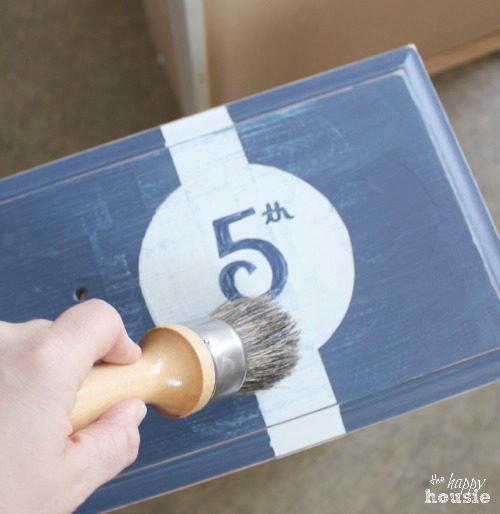
Time to add some clear wax with my beloved wax brush… Wax the whole piece then go back immediately and buff off/dry with a clean lint free cloth.
Done!
You got a little hint of it the other day when I shared my DIY Faux Map Wallpaper…
There is something about adding numbers to a piece that makes the fun-factor explode….
Like this? Want to try it?
Pin it to remember it!
Do you love numbered pieces as much as me?
Have you tried adding numbers to any of your own projects??
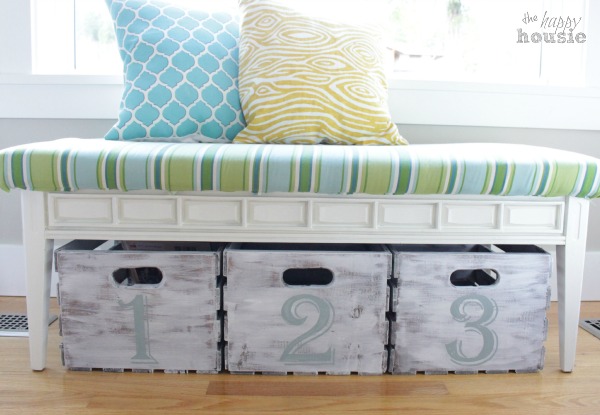
I made some numbered crates recently too. I loved them so much I couldn’t help but repeat myself…
Thanks for reading. And remember my housie friends, HOME isn’t built in a day. Enjoy the journey.


I may link up at some of these fabulous places below, for more info check out housie parties:
Make the Scene Monday , Monday Funday , Give Me the Goods Monday , Inspiration Monday, Craft-o-Maniac Monday, Nifty Thrifty Tuesday, Tip Junkie, Project Inspire{d} , Inspire Me Tuesday, The Scoop, Hit Me With Your Best Shot, Wow Me Wednesday Whimsy Wednesday , Fall Into Fall , From Dream to Reality, The Inspiration Exchange, Live Laugh Rowe Live Laugh Linky, Thursdays Are Your Days, The Weekly Creative , The Creative Connection, Inspire Me Please, Catch as Catch Can, Fabulously Creative Friday, Party Junk, Pinworthy Projects , Link Party Palooza,, Weekend Bloggy Reading, Strut Your Stuff Saturday, Spotlight Saturday, Get Schooled Saturday, Overflowing With Creativity , , Suburbs Mama , That DIY Party
If you are a regular reader then you likely know that I am a member of the Country Chic Chalk Paint Blog Squad for 2014. This means that I receive paint in exchange for writing tutorials and posts for their blog. Of course am always 100% honest in my reviews.
I love how this turned out! I love navy and numbers, so of course this is the perfect project and turned out amazing! Great job! Pinned!
This looks so good. I like the white stripe all the way down it makes a real feature of the numbers. Great job 🙂
LOVE how this turned out, Krista! That color is perfect and the numbers are so fun! Pinned! Hope you’re having a wonderful weekend!
~Abby =)
I love it, Krista! You have such a knack for stencilling, lady! This is such a great transformation!
I still think this dresser is so so adorable! I love numbers too, in fact the one numbered dresser I have done is still one of my faves! I love how you measured where the tape goes with stuff you had around, that is how I do things! Totally pinned!
That’s really cute!
Thank you Kelly!!
I love it, Krista! Great job… I especially like the style of the dresser! And yes, love numbered decor! Gives it that little but of extra character! 🙂
Thanks Kendra! I am loving the numbers too- maybe I need to make a clock to get it out of my system (lol). Hope you are having a great week!
Krista, it’s gorgeous…I have the same IKEA series in our sons bedroom. I am so sick if it…lol……Also love the maps in the background. Did you by any chance blog about that project and I missed it?
Hi Christine! I was sick of it too- we originally had it in our bedroom and it had been banished to the basement for a few years now. It has found new life! Yes, I did blog about their faux map wallpaper here. It was easy and I love how it turned out!
Krista this looks amazing. You always do such a wonderful job on your projects. I just love your blog and all your creative ideas!!
Aw, thank you so much Courtney! Your super sweet words totally made my day!!
Love, love, love! There’s just something about numbers isn’t there! Pinned and sharing!
There is just something about numbers! Thanks for your kind comments and for the pin Jamie!!
i love how this turned out- the way you did the numbers is fab!
Thanks Cassie! I only changed my mind about fifteen times throughout the whole process with this dresser but it turned out well in the end!
Oooh, I love it! The color is amazing. also love how you used such high tech “Measuring equipment”, that’s my kind of DIY! 🙂 Do you find the wax brush the best tool to apply? I haven’t yet invested in one, but I think it may be time. Have a great day!
Haha – yes, very high tech. I kinda just grab whatever I have on hand that will be easy to use. Lol. Not exactly a perfectionist here – just a “good enough” ist. I LOVE my wax brush. It makes waxing fun. Smooths the wax on so nicely and then just buff and done! Thanks for coming by Kimm!
LOVE this Krista! I was just like your son as a kid–changed all the time. This dresser is such a cute solution! Pinning and sharing!
Thanks Tasha! His old dresser was a freebee and the drawers were always falling out… this one will, hopefully, encourage more “use”. That and my threats to confiscate his wardrobe if he keeps leaving it strewn all over his bedroom floor:) lol.
Oh WOW Krista! Love the dresser!! I love how you put together the look! Great step by step tutorial!!
uhhh it’s Christine from Little Brags
Thanks Christine!! After going back and forth several times I am finally happy with how it turned out!! So thrilled you popped by!