
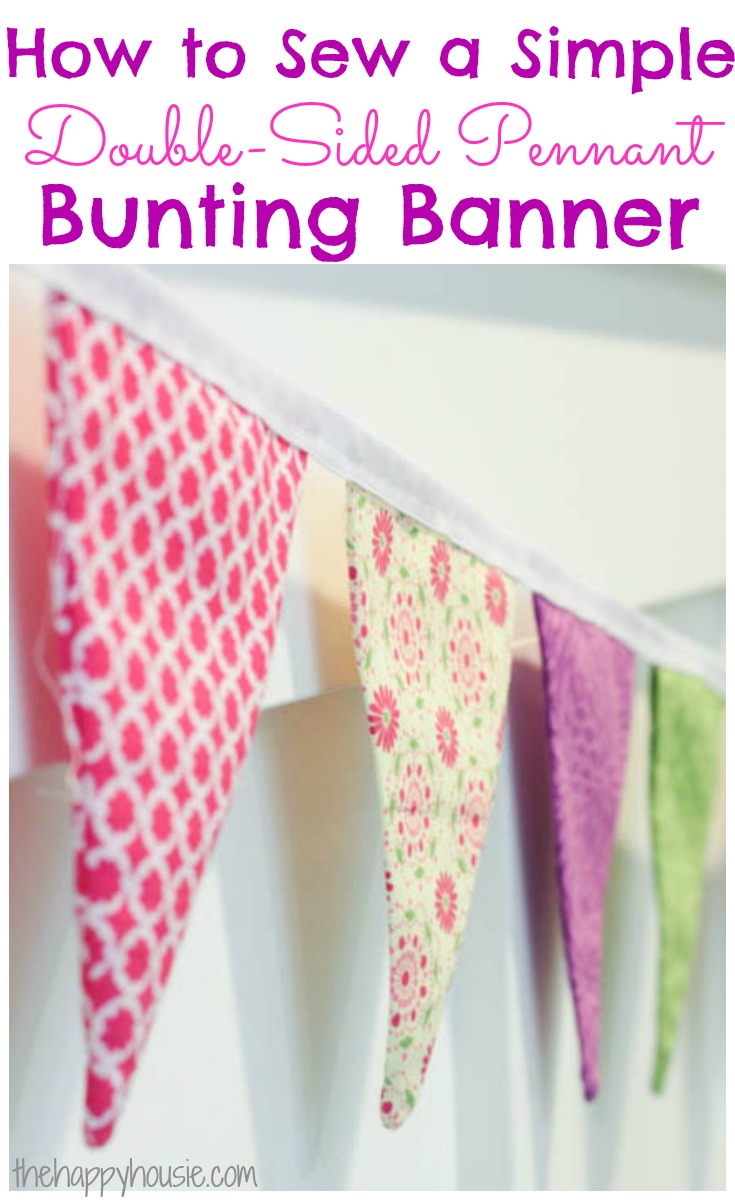
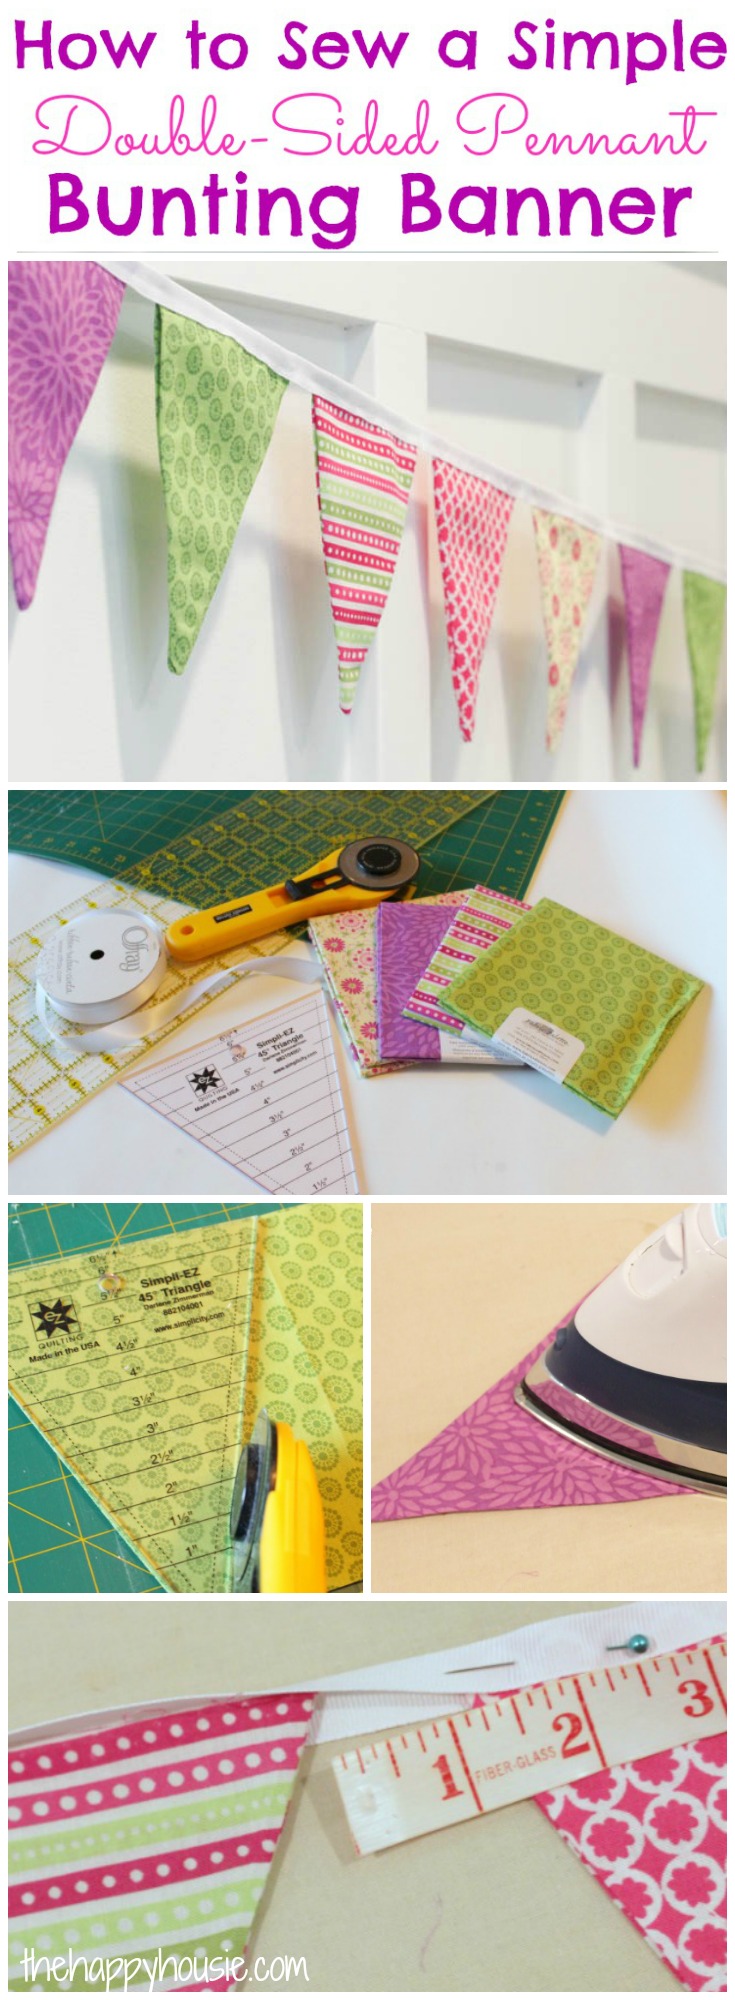
How to Sew a Simple Double-Sided DIY Pennant Banner
I will show you how to sew a double sided pennant banner with this easy tutorial.
I love pennant banners. AKA buntings. AKA flags.
Whatever you want to call them…. I love them.
I think they are so cute and cheery and fun. I could put the banners up all over my house.
Unfortunately the hubs doesn’t quite agree. I made some that I hung up at Christmas for a couple of seasons but he complained endlessly about them. Okay, maybe not endlessly, but he didn’t like them much. Something about them being tacky? But how wrong is he!
Pffffttt I say.
Well, if you love pennant banners as much as I do, then I have a great and easy tutorial for you today. I’m going to show you how to make your own really simple double-sided DIY Pennant Banner (aka “bunting”).
And if you can’t stand sewing, you could probably just sub in some no-sew hemming tape and get the same results. They are pretty light-weight, so hem tape should work just fine for this project.
These DIY Pennant Banners are perfect for a bold backdrop at a party, holiday, child’s room, nursery, craft space… the list goes on and on. And now you can make your own in a couple of quick hours.
![]()
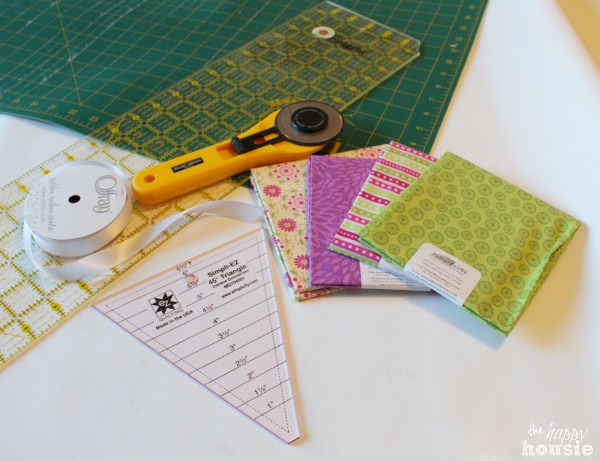
To make these I used some handy quilting tools that I have (a cutting mat, straight edge, triangle shape, and my rotary cutter). I also used four fat-quarters of quilting weight cotton and some 1.5″ white grosgrain ribbon.
You could do this without these special cutting tools: just cut out a triangle shape in the size you want your bunting flags (remembering to make it big enough to allow for a seam allowance), and trace the shape onto your fabric then cut it out using regular fabric scissors. I just used the cutting tools because it made the whole process that much quicker.
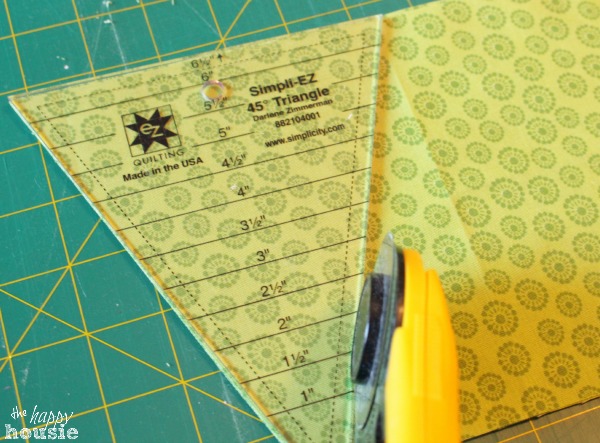
 To use the triangle tool, I laid it on top of my fabric and then used my rotary cutter to go straight down the edges. You can cut through more then one layer of fabric at a time this way.
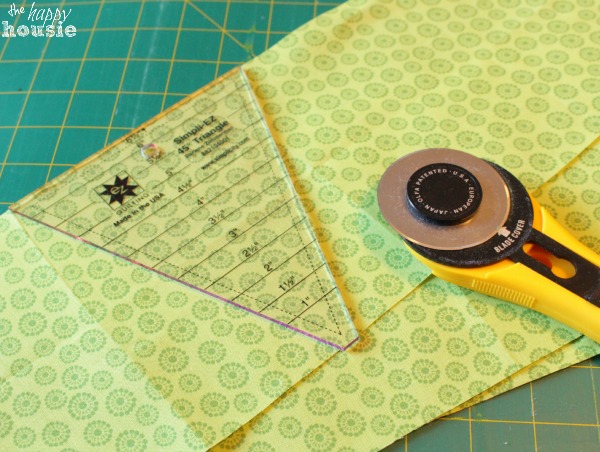
 NEXT: (I don’t have any pictures of this step)…
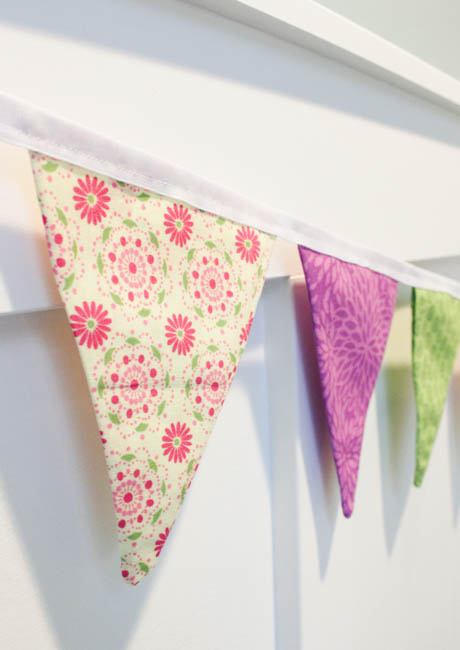
This is the part where you lay your matching triangle pieces together – two “right” or good sides facing in on each other. Then whip around the long side edges (NOT THE TOP EDGE) with your sewing maching.
Now flip that little triangle inside-out so that your “right” or good sides are showing on the outside.
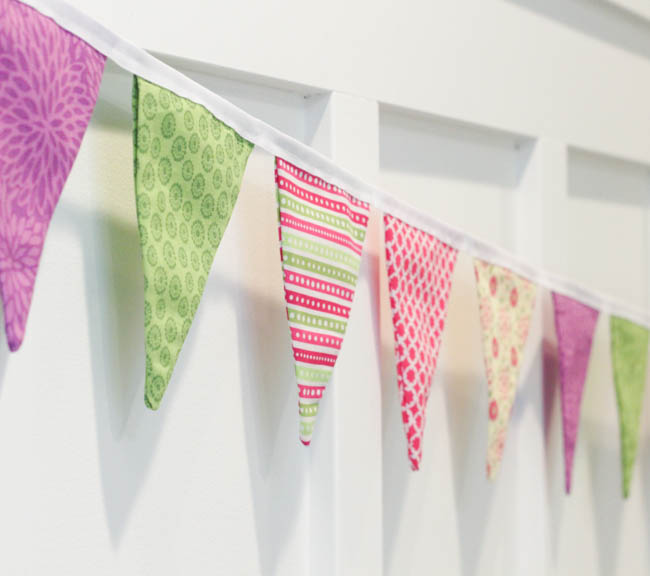
Repeat with all of your pennant triangles.
I used this little handy dandy crochet hook to help push out the tip of my fabric triangles once I had flipped them right sides out. 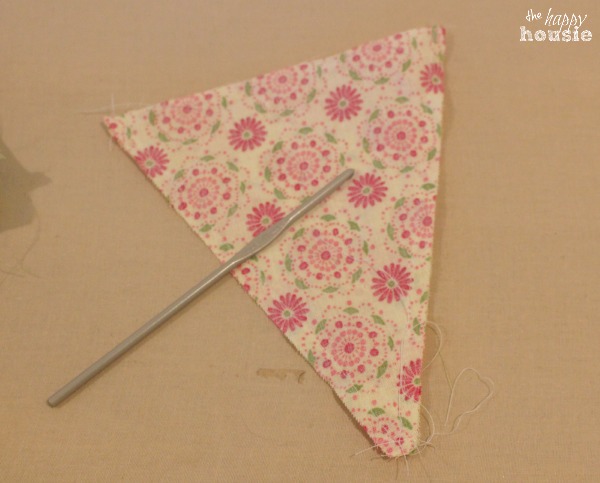
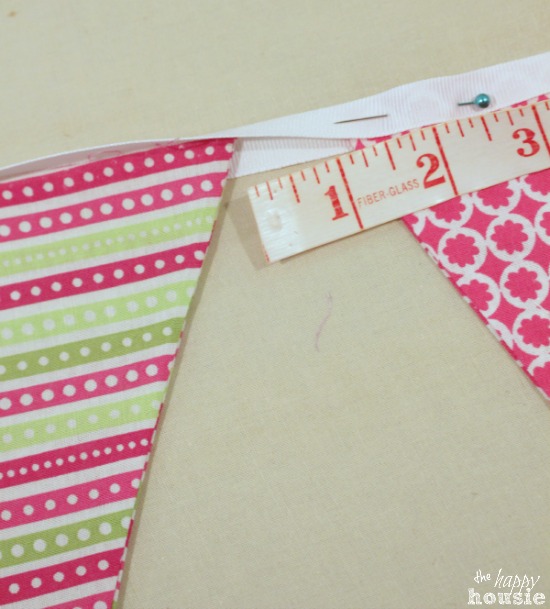
Also I didn’t bother stitching up the top of the triangles, I just folded my ribbon over and pinned it (I used the iron to help me flatten it down) and then stitched along the ribbon with my sewing machine. I measured to make sure the distance between each pennant triangle was equal before I pinned the ribbon on.
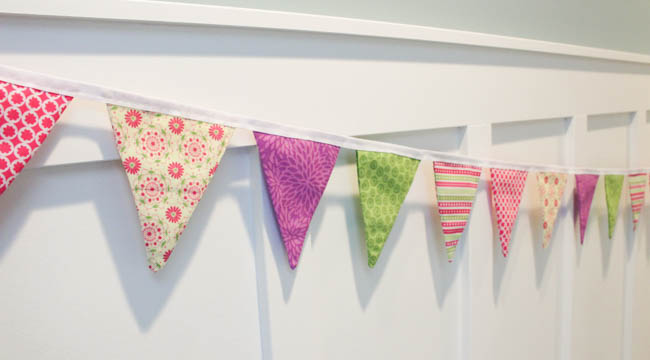
To finish off the ends I just stitched up along them and then used my pinking shears to cut it off along the edge…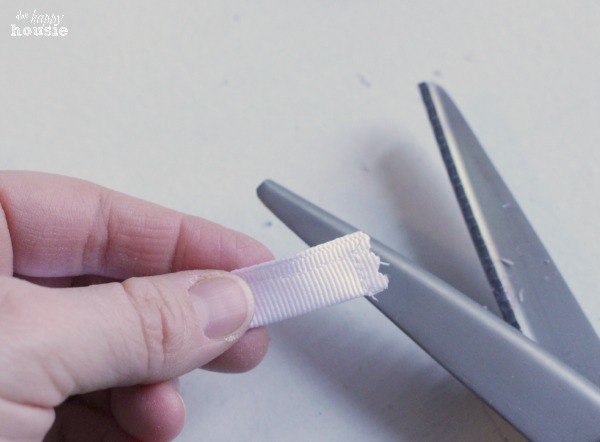 Done! I love how it perks up a room!
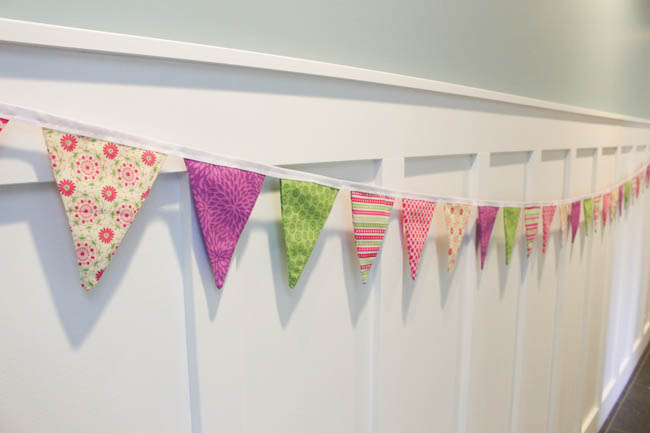
This particular bunting banner was made as a birthday gift for my niece… but you may have seen the fabrics that I shared for my craft room yesterday?
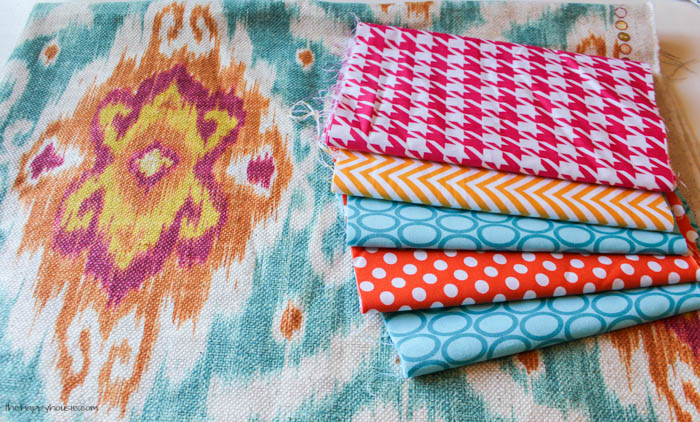
Well, I will tell you that the quilting cottons on the right side of the picture are destined for a pennant banner for my craft room. I think it is going to be super adorable!! And by putting it up in there, I figure the hubs can’t complain, right??

This week is the Get Your DIY On Challenge Party: DIY for Spring!!

Check out what my cohosts came up with for this month’s challenge:
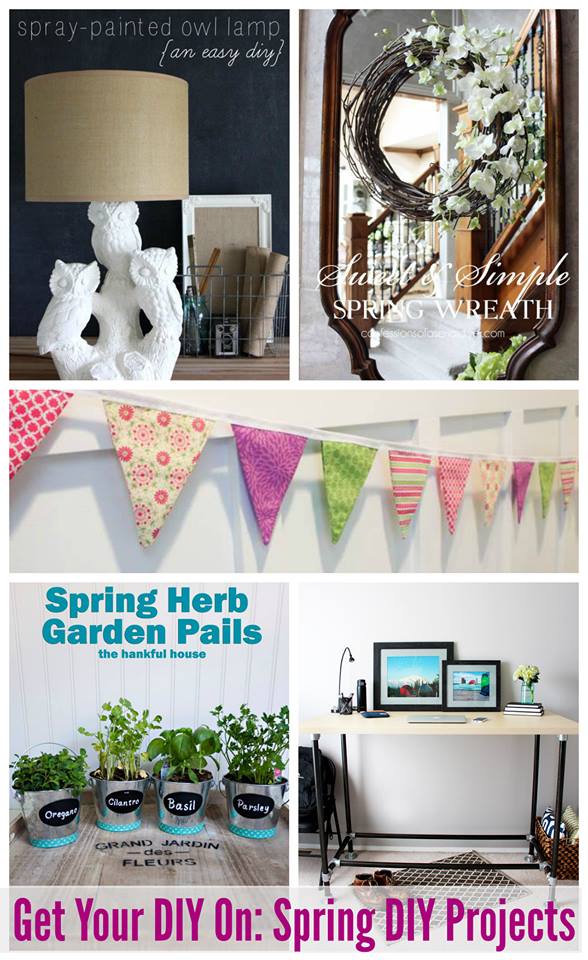
Spray Painted Owl Lamp at House by Hoff / Sweet and Simple Spring Wreath at Confessions of a Serial DIY-er / DIY Pennant Banner at The Happy Housie (you are here!) / Spring Herb Garden Pails at The Hankful House / DIY Industrial Standing Desk at Just a Girl and Her Blog
And for my fellow bloggers out there, don’t forget to come on back on Sunday to share your own DIY Project with us at the Get Your DIY On Challenge!

![]()
![]()
![]()
![]()
![]()
![]()
![]()

What an adorable banner! Must make some of these with all the Christmas fabric I have.
The bunting is so cute! Can you tell me how long it is from end to end?
Hello Lisa! I gave this one away to my niece so I don’t have it to measure anymore, but I think it was about 15-20 feet?! Sorry! I wish I could be more specific!
Your fabrics are stunning. I’m salivating over that craft room set…
I have a link party going on this weekend, I’d love to have you join:
http://www.bobijensen.com/2015/05/come-join-party.html
Thanks, Bobi
This is so pretty, Krista! Buntings are a perfect way to add a seasonal pop of color! XO
Thank you Christy! It looks adorable in my niece’s bedroom. I can’t wait to tackle the one for my craft room:)
This is so cute, Krista! I’m new to sewing, but I think I could handle this. I love the fun colors and patterns. I’ll definitely need one of those triangle tools (yeah, an excuse to hit the craft store)! :0) Thanks for sharing. Love that bedding, too.
Hi Tiffany! I am no expert at sewing- I try to keep straight lines (that is about the best I can do, and often they aren’t all that straight:). The triangle tool made it so much easier to cut! I can’t wait to tackle the next one – this time I will keep it!
It’s SOOOO pretty Krista! Would love to make one for my craft room! And that bedding is gorgeous!!!
Perfect for a craft room, right? And no husbands to go in there and complain about it being tacky! I love the blue floral…that whole room scene is stunning. Feels right out of an old house in England. Hope you win!
Oh my goodness, I had no idea they had one of those triangle tools, those are perfect!! Super cute banner 🙂
Isn’t it awesome? I guess there must be a lot of triangle designs in quilting to warrant a tool for it…but I put it to a different use. Quilting is too big a project for me- a bunting, I can handle:)