
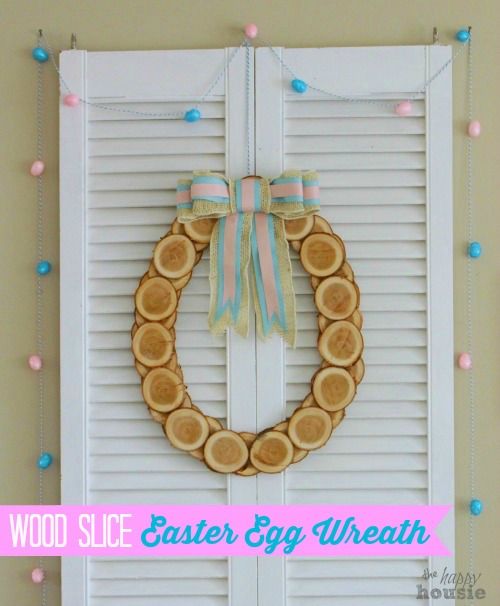
Wood Slice Easter Egg Wreath {and Blog Hop}
This creative wood slice Easter egg wreath brings rustic warmth to your decor.
I might as well call this Easter week around here… as today I have another cute little Easter craft to share with you: this Wood Slice Easter Egg Wreath Wall Décor. This may be my favourite Easter DIY project so far… though I did really love the Easter Bunny Bunting that I shared with y’all yesterday. And, of course, I have one more fun Easter project to share with you tomorrow. I wonder which one you will like best??
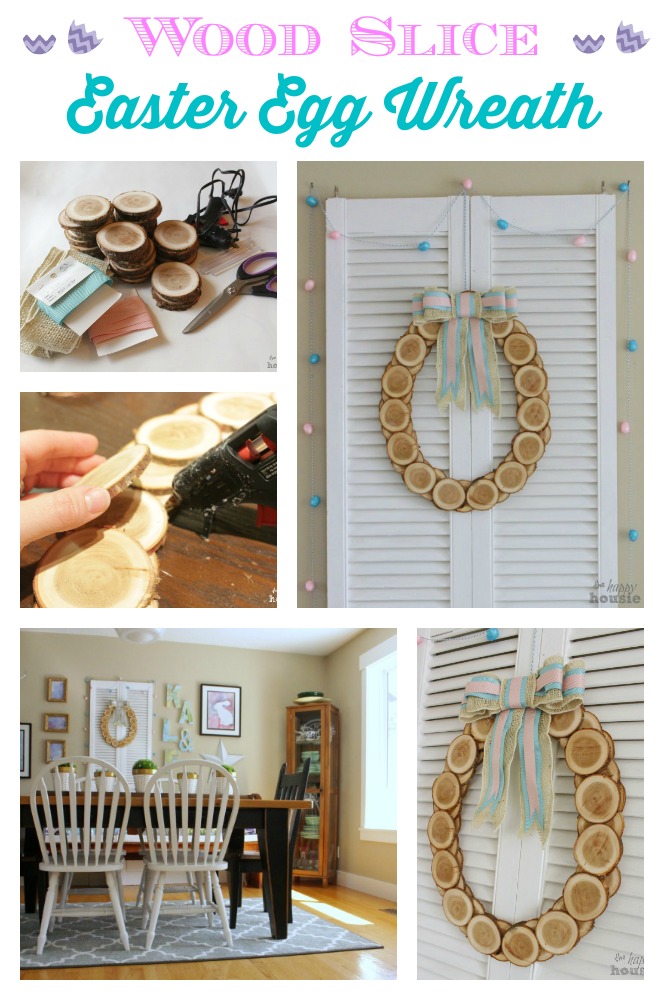
To make this I used:
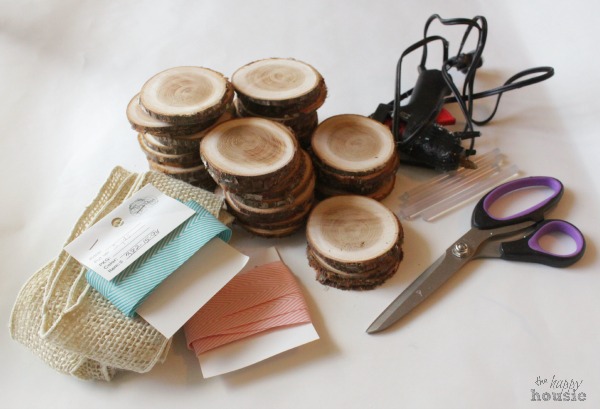
– Wood Slices (you can buy these at some craft stores but my husband cut these for me using some branches from our yard and his mitre saw)
– Glue gun and glue
– Scissors
– Ribbon (I used this beautiful chevron patterned ribbon in blue and pink as well as some burlap ribbon – both from MayArts)
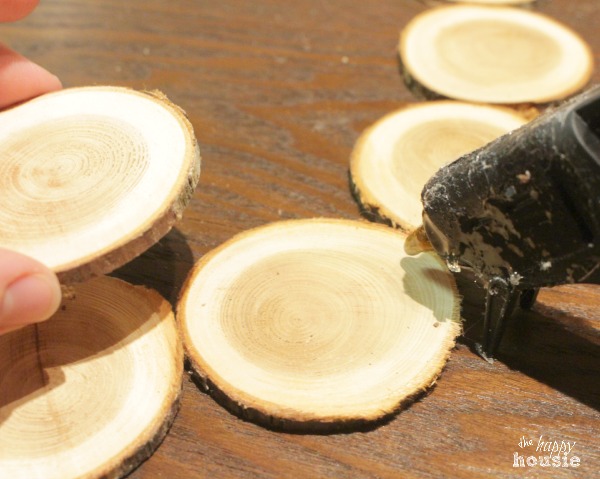
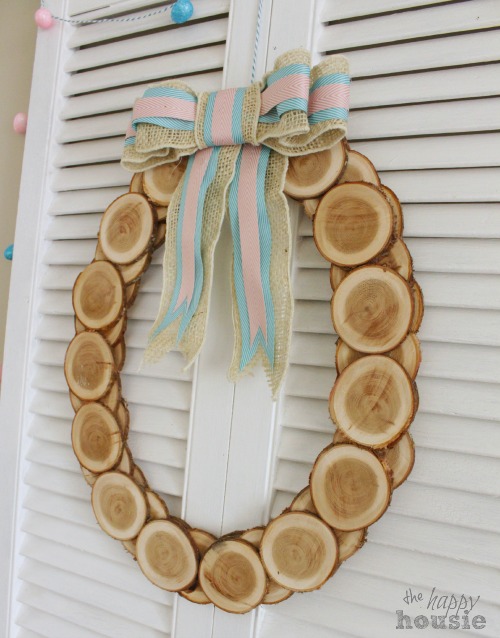
I started by arranging my wood slices into an egg shape and decided to go with three layers, overlapping the wood slices as I went. I used my glue gun to glue the middle layer of overlapped wood slices to the bottom layer.
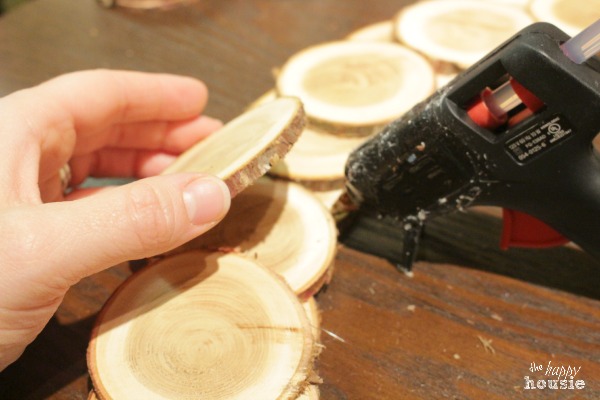
Then I continued and glued the top (or third layer) to the middle layer. It was super quick and easy to do…
I let it set for a few minutes, and worked on the bow.
I’m not going to lie to you. I pretty much suck at making bows. I kind of fumbled my way through the whole process…. using loops and cutting and gluing… until it all came together in some semblance of order. I must thank my crafty lady friends for helping me out with my bow-crisis. So I can’t offer you any photos of this process because, at any point, I was convinced it was all going to explode apart on me.
Here is a little verbal explanation instead, supplemented with some post-crafting photos… just in case you struggle with bow-making as much as I do.
I used hot glue and made my bow in parts. No sewing.
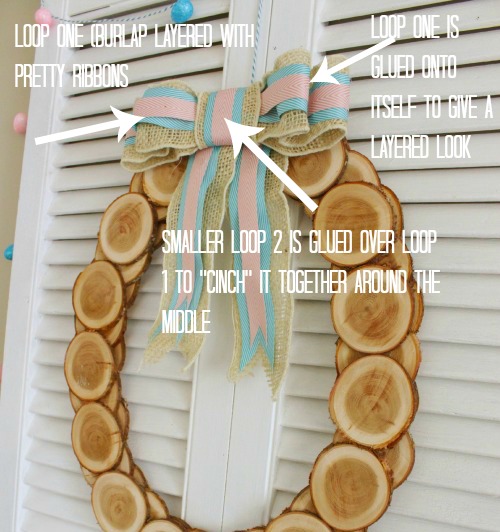
I created the top part first by creating a loop (Loop 1 in the picture) using the burlap and two layers of ribbon and attaching them together at the back with glue. Then I made a smaller looped piece (Loop 2) and hot glued it around the middle of the larger loop to cinch it together. The sides of the bow were folded in to create that fun little double bow look and attached together using a few dots of hot glue.

The long loose ends are just two separate pieces of burlap/ribbon layers that I glued directly onto the wood slice wreath behind the bowy-bow top loopy part.
Okay, so I hope you get the idea… it was a little traumatic for me but I was desperate to make a beautiful bow because the ribbon from MayArts was so stunning and really deserved to be shown in all it’s glory. Good luck with yours. I only almost cried twice and burned myself 17 times with my hot glue gun. Minor injuries when the results are taken into account…
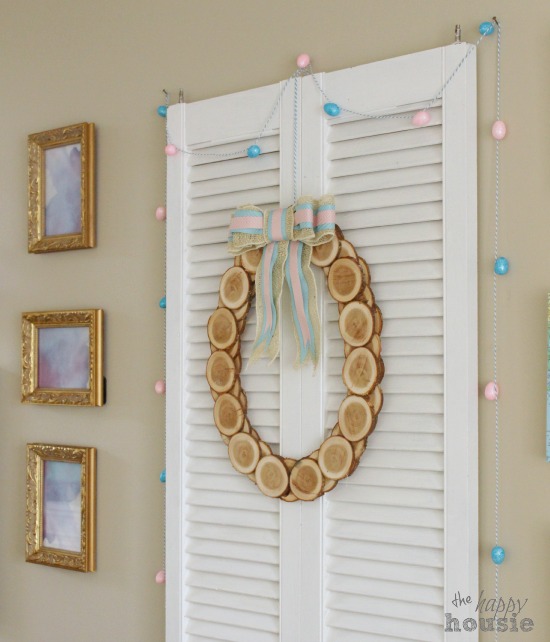
I pretty much love it and am thrilled to have this Easter wreath as the centerpiece of our dining room gallery wall. The other day when I shared our new dining room rug I was careful not to show too much of the rest of the dining room… but here you can have a little sneak peak at it.
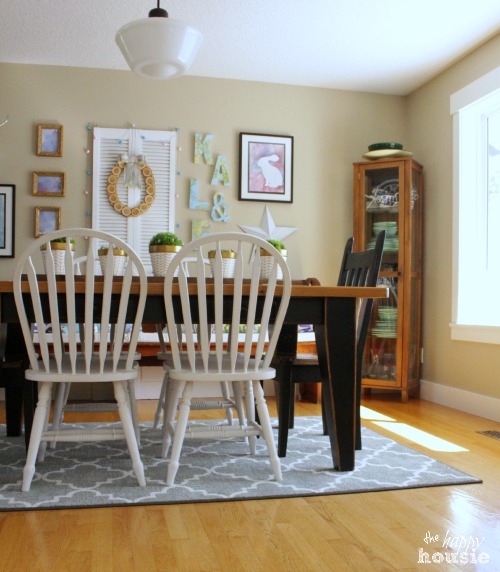
Oh, and see our beautiful new dining room rug… I have a giveaway going on right now so that you can win your own new rug from Mohawk Home. Click here to head over and enter it!
You like?? Then PIN this to remember it!
Today I am so lucky to have been able to team up with some amazing fellow Canuck bloggers who have some seriously spectactular Easter Projects that they are sharing over at their respective blogs….
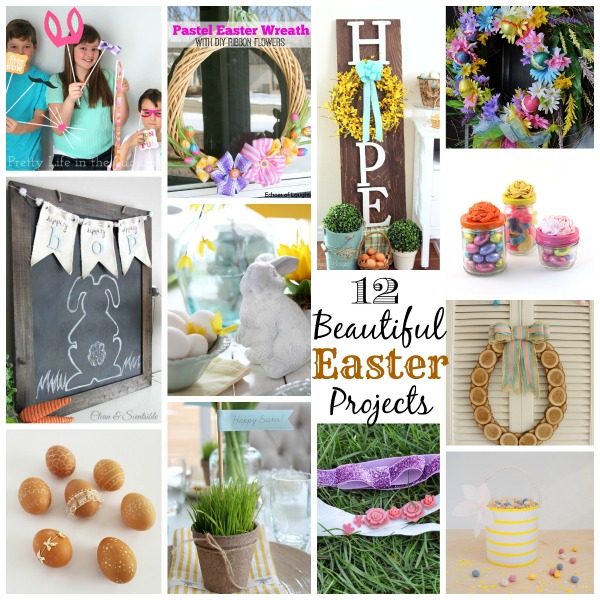
Stunning, right?!?!? So make like a bunny and hop right on over…
From left to right, they are:
DIY Easter Photo Props by A Pretty Life in the Suburbs
Pastel Easter Wreath with DIY Ribbon Flowers by Echoes of Laughter
Hope Wreath by Fynes Designs
Vibrant Easter Wreath by Time With Thea
Hippity Hop Wall Art by Clean and Scentsible
Pottery Barn Inspired Easter Bunny by Craftberry Bush
Ribbon Rosette Candy Jars by The Sweet Escape
Wood Slice Easter Wreath by The Happy Housie
Decorate Easter Eggs with Paint and Ribbon by The DIY Dreamer
An Easter Tablescape with Peat Pots by Satori Design for Living
Simple and Spring-y Easter Headbands by Suburble
An Upcycled Easter Basket by Northstory
Thanks for reading. And remember my housie friends, HOME isn’t built in a day. Enjoy the journey!


I may link up at some of these fabulous places below, for more info check out housie parties:
Make the Scene Monday , Monday Funday , Give Me the Goods Monday , Inspiration Monday, Craft-o-Maniac Monday, Nifty Thrifty Tuesday, Tip Junkie, Project Inspire{d} , Inspire Me Tuesday, The Scoop, Hit Me With Your Best Shot, Wow Me Wednesday Whimsy Wednesday , Fall Into Fall , From Dream to Reality, The Inspiration Exchange, Live Laugh Rowe Live Laugh Linky, Thursdays Are Your Days, The Weekly Creative , The Creative Connection, Inspire Me Please, Catch as Catch Can, Fabulously Creative Friday, Party Junk, Pinworthy Projects , Link Party Palooza,, Weekend Bloggy Reading, Strut Your Stuff Saturday, Spotlight Saturday, Get Schooled Saturday, Overflowing With Creativity , , Suburbs Mama , That DIY Party
Disclosure: This is not a sponsored post. MayArts sent me some free ribbon to try out in exchange for my 100% honest opinion about their product. I loved the stunning design and quality of it!


You ROCK for linking up this week to Tip Me Tuesday {high fives} Just a heads up, Tip Junkie can help you index your blog more effectively if you upload at least 2 images, 2 steps, and blog post URL into your Tip Junkie craft room! Simply login and click “add a project” on your profile page to get started. {yep I’ve got your back!} ~ Laurie {a.k.a. the Tip Junkie}
Link ~ http://www.tipjunkie.com/how-to-add-a-craft-room-project-on-tip-junkie
I love how this wood slice wreath turned out! You could reuse this for so many seasons, too. Thanks for sharing at our link it or lump it party.
This is so beautiful and creative. 🙂
Oh what a cute wreath!!! Love how you made the egg shape! So sweet!
I love this idea, Krista! I have some wood in the garage that would be perfect for this! Thanks!
I love your wood slice wreath, Krista (of course I do, I love all wood-sliced things!) – it’s such a great and natural colour to add to the pastels of Easter! Pinned!
It looks really good, Krista! I love how it is flat….. Even the bow is “flat” … Looks great on your kitchenr wall!!
🙂
“hugs” Crystelle
Crystelle Boutique
I’m a big fan of wood slice crafts so this is up my alley. You all are making me give into making a wreath for spring!
So cute, Krista! Great idea to use wood slices! 🙂
I love this project Krista! The wood slices are a brilliant idea! It looks so great in your dining room! Have a lovely weekend! Angie xo
The options for these wood slices are endless. I still have a bunch left from my Christmas projects and you’ve got me thinking! I’m a sucker for natural elements!
I love how you used the wood slices along with the burlap ribbon to create such a nature/natural inspired wreath. The pop of blue and pink in the bow are the perfect touch!
I love the wreath Krista!! Love the egg shape!! Pinned! 🙂
What a beautiful wreath Krista! It’s so simple & pretty…I love natural elements for Easter!
Love this wreath and how the burlap looks with the other ribbons…brilliant!xo
I love using wood slices in any decor project. WHat simple yet pretty natural Easter decor.
Hi Krista! I absolutely love this wreath and it looks amazing in your room. Very unique!! Thanks for sharing and pinning – hope you have a happy Thursday!