
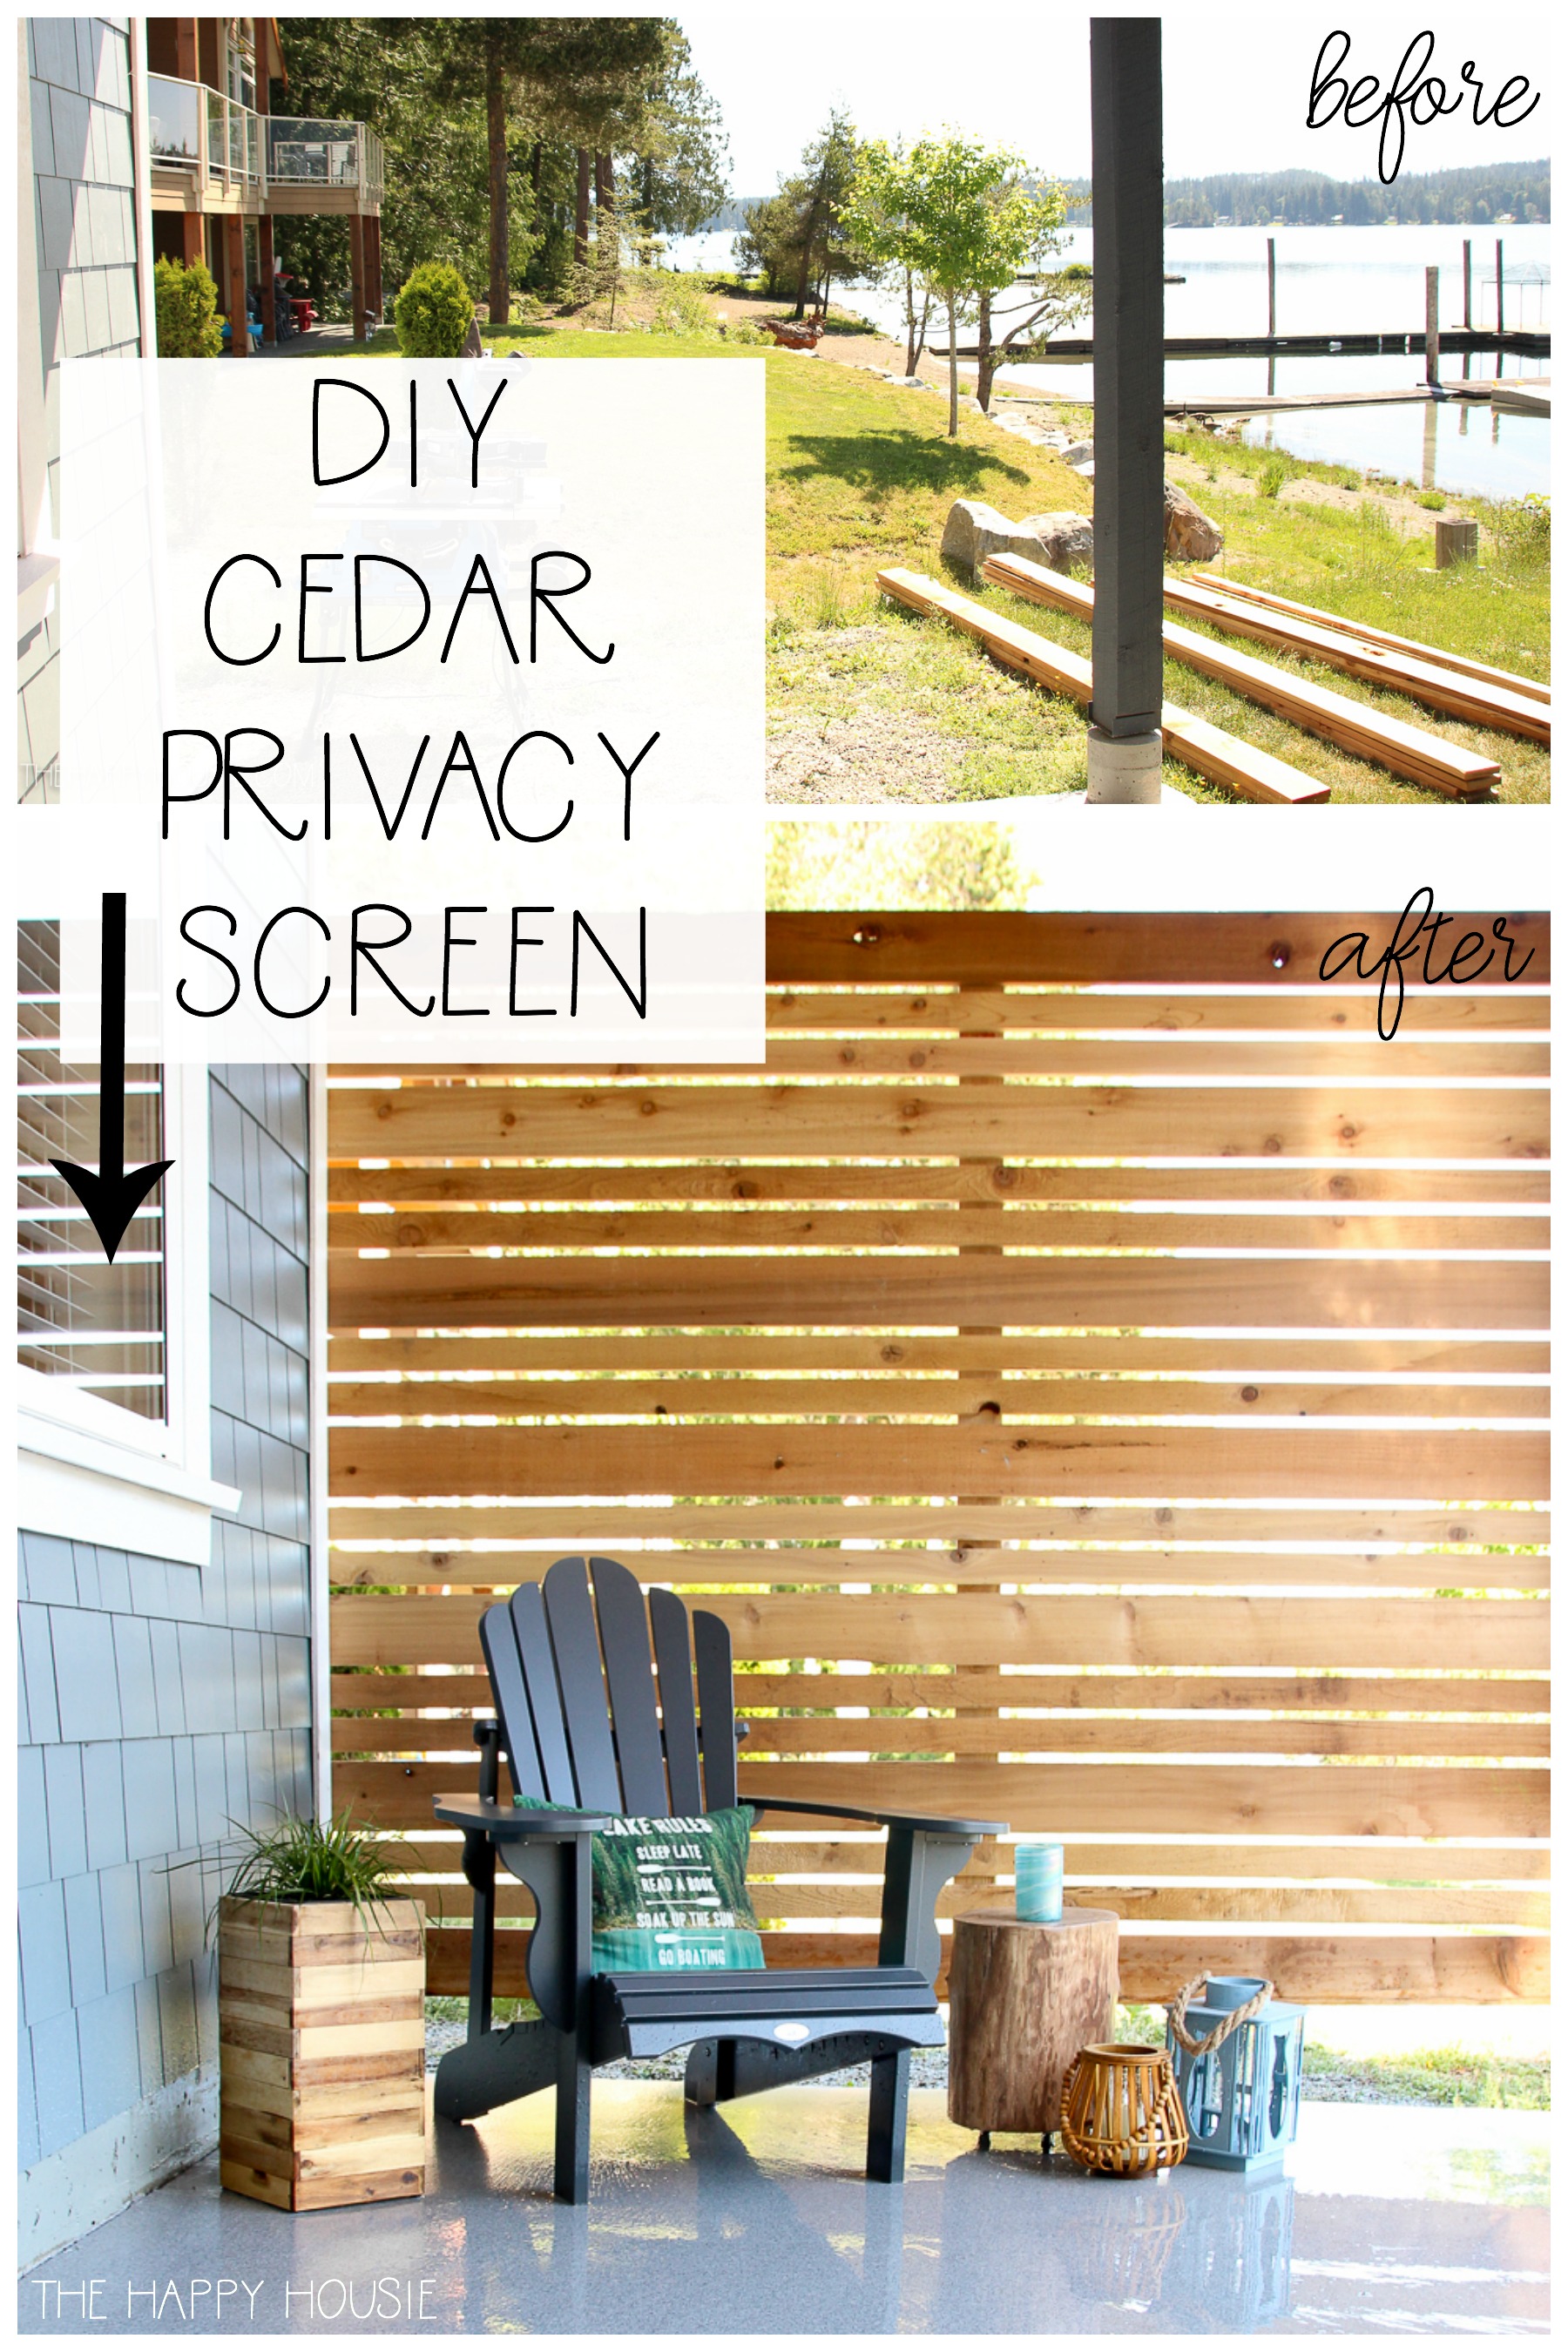
How to Build a DIY Cedar Privacy Screen
Today I’m sharing how to build your own easy DIY Cedar privacy screen; perfect for creating a sense of privacy on your patio or deck and screening your home from your neighbours.
Neighbours.
A reality that most of us live with.
They can be amazing! They can be a challenge. Or, they can fall somewhere in between.
But no matter how much we love our neighbours, it’s always nice to create a feeling of cozy privacy both inside and outside of our homes.
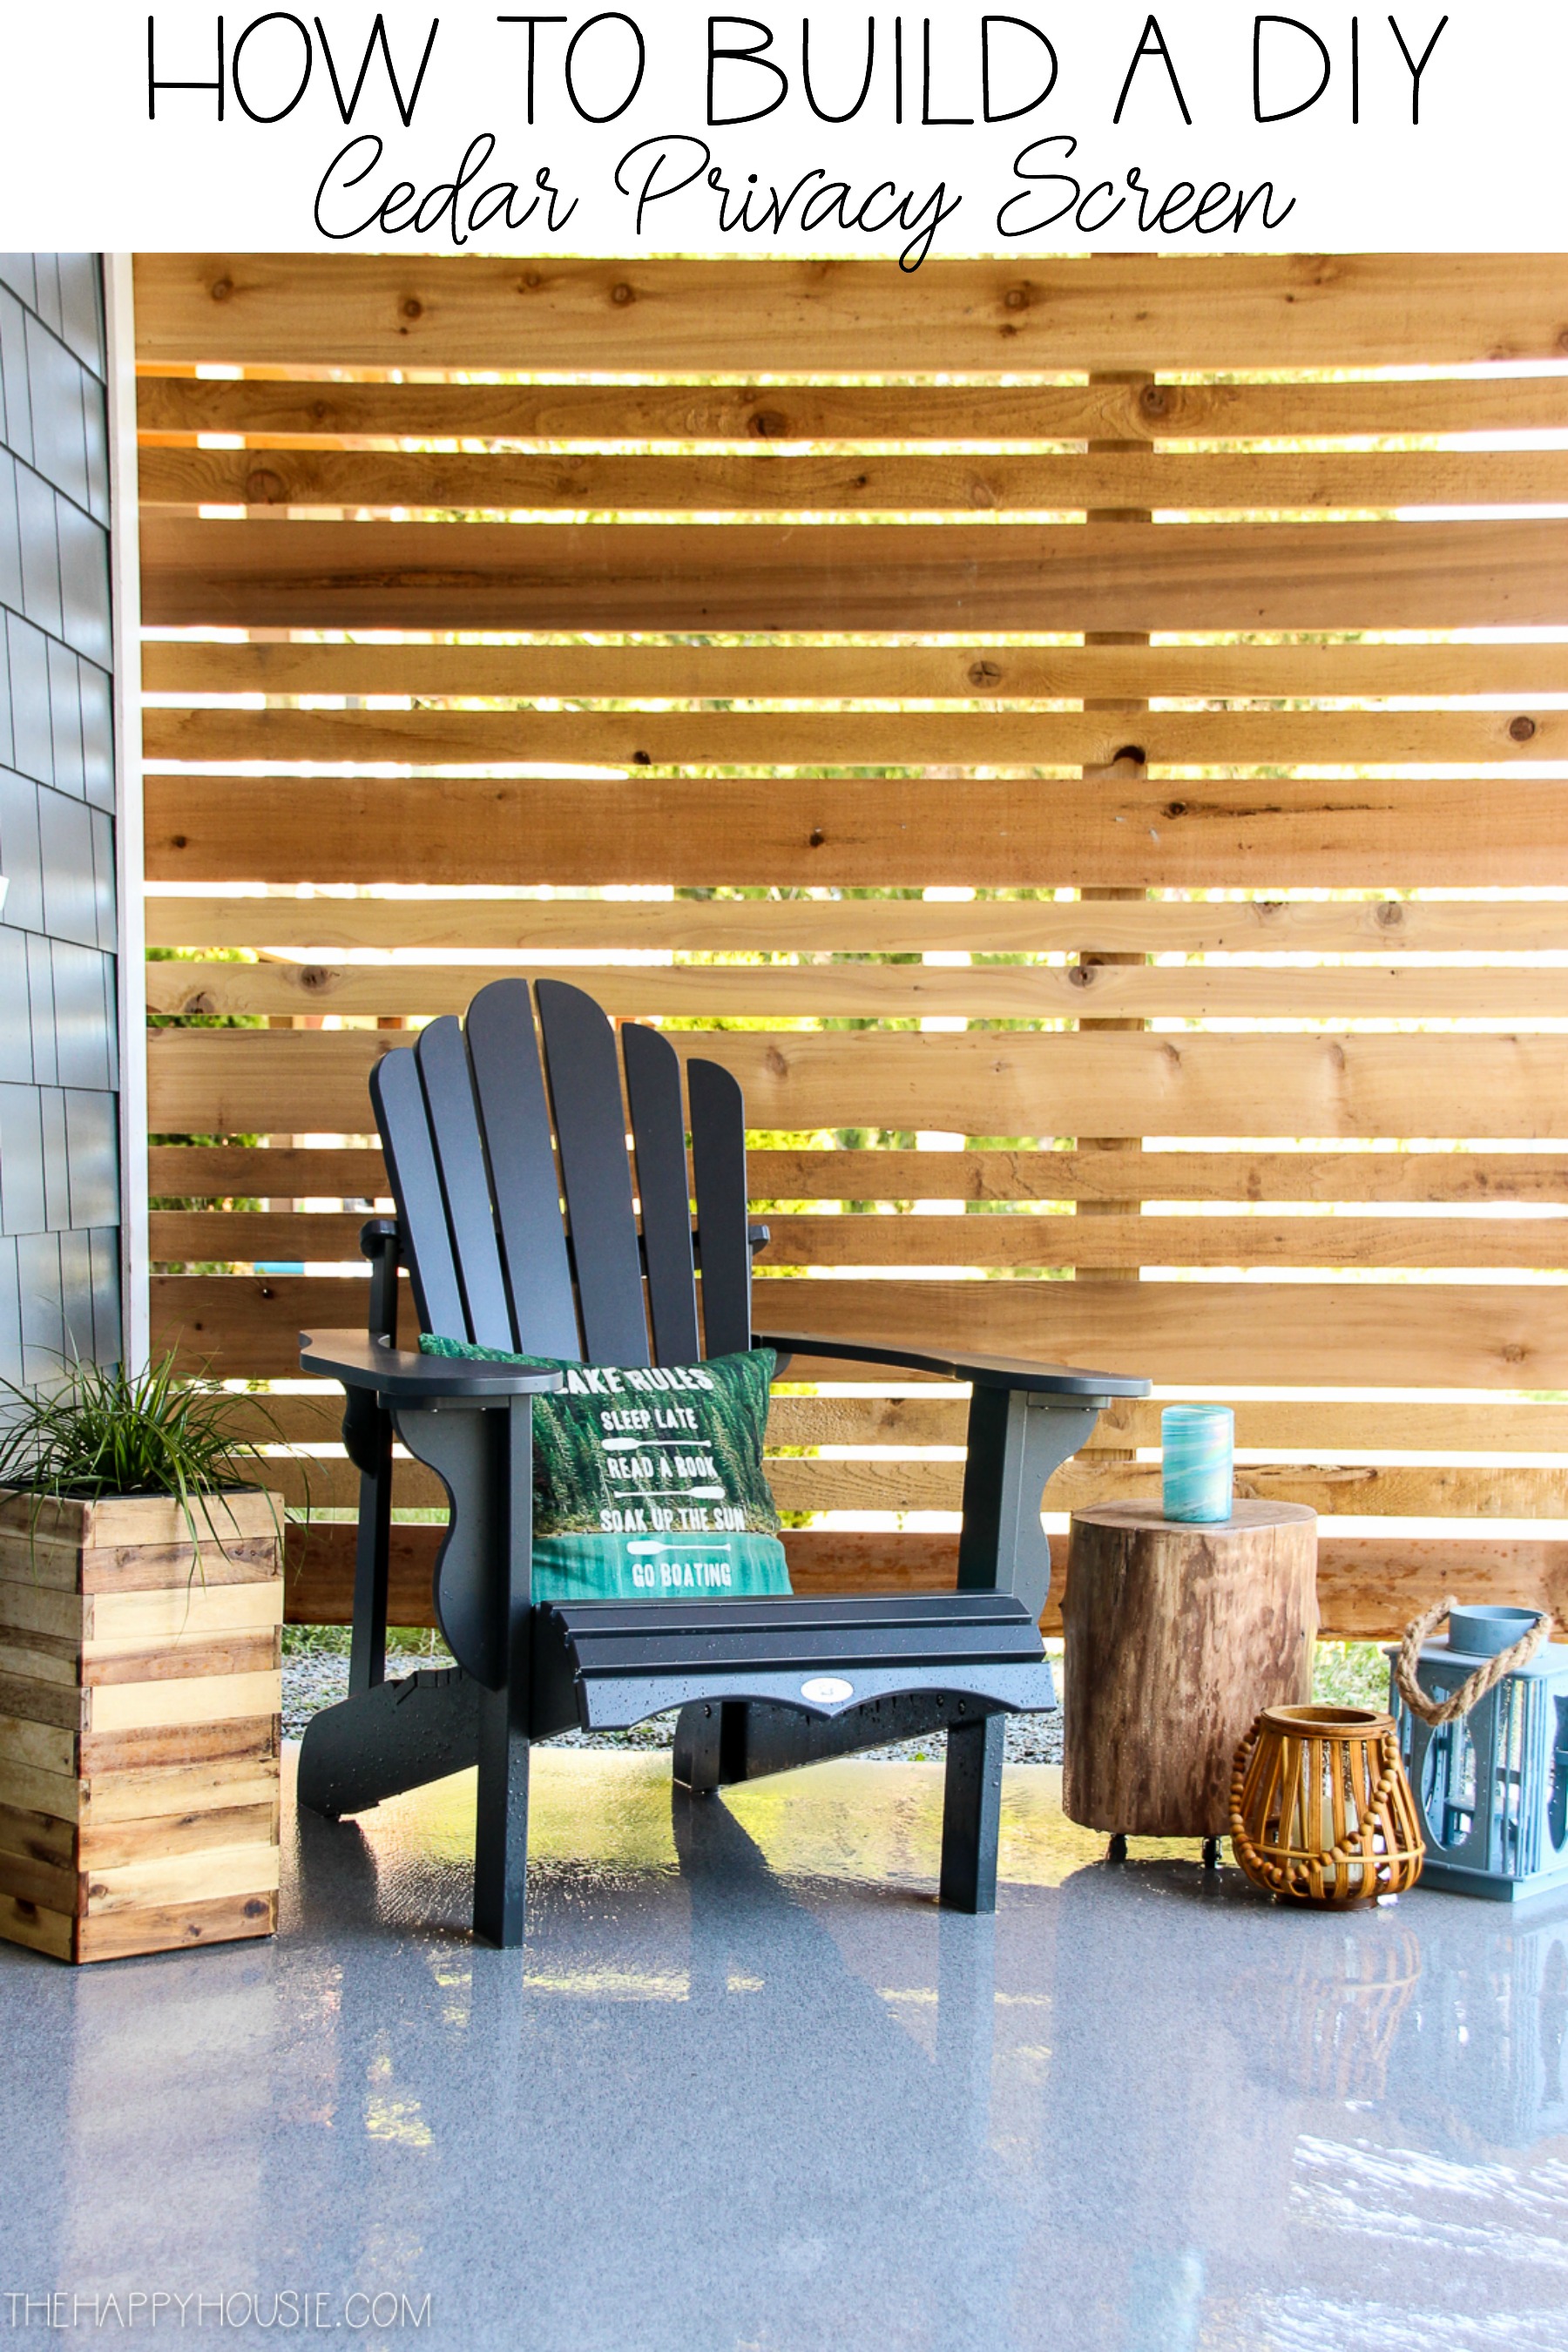
While we actually love our neighbours, we really wanted to give our lower patio a more quiet private feel by installing this simple DIY cedar privacy screen along the far wall of it….
Today I’ve joined my friend Shauna from Satori Design for Living for the last week of the Outdoor Extravaganza series! Read the details and check out the beautiful posts that my blogging friends are sharing, at the end of my post today.
Perhaps you remember our deck from last year when I shared how we gave our old, tired and cracked concrete patio surface a completely new look?
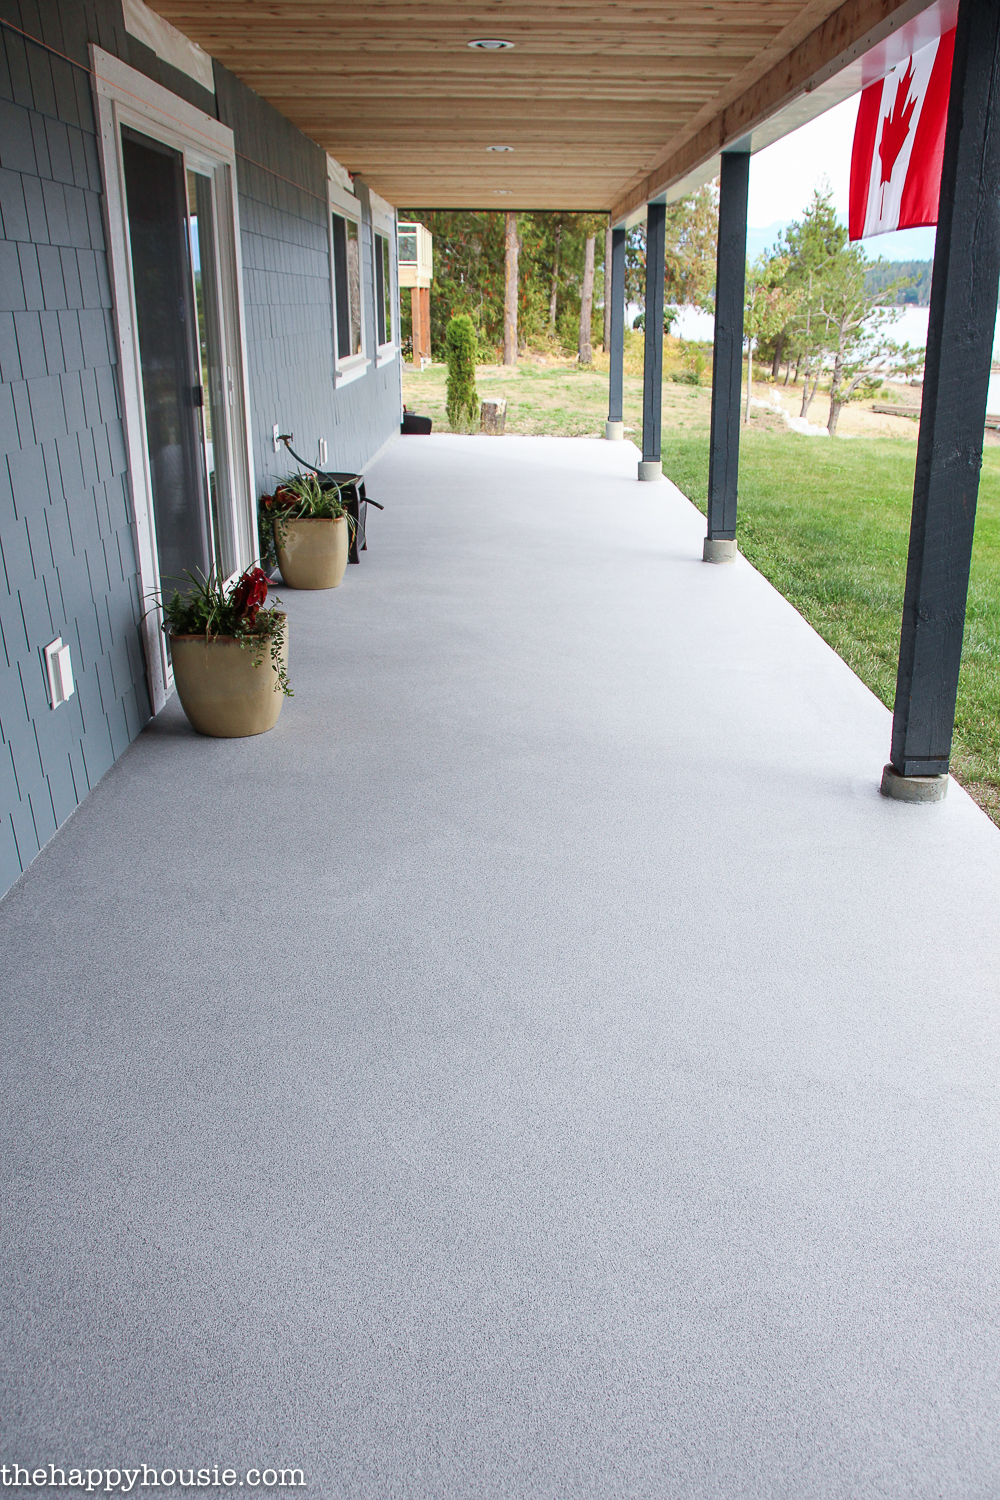
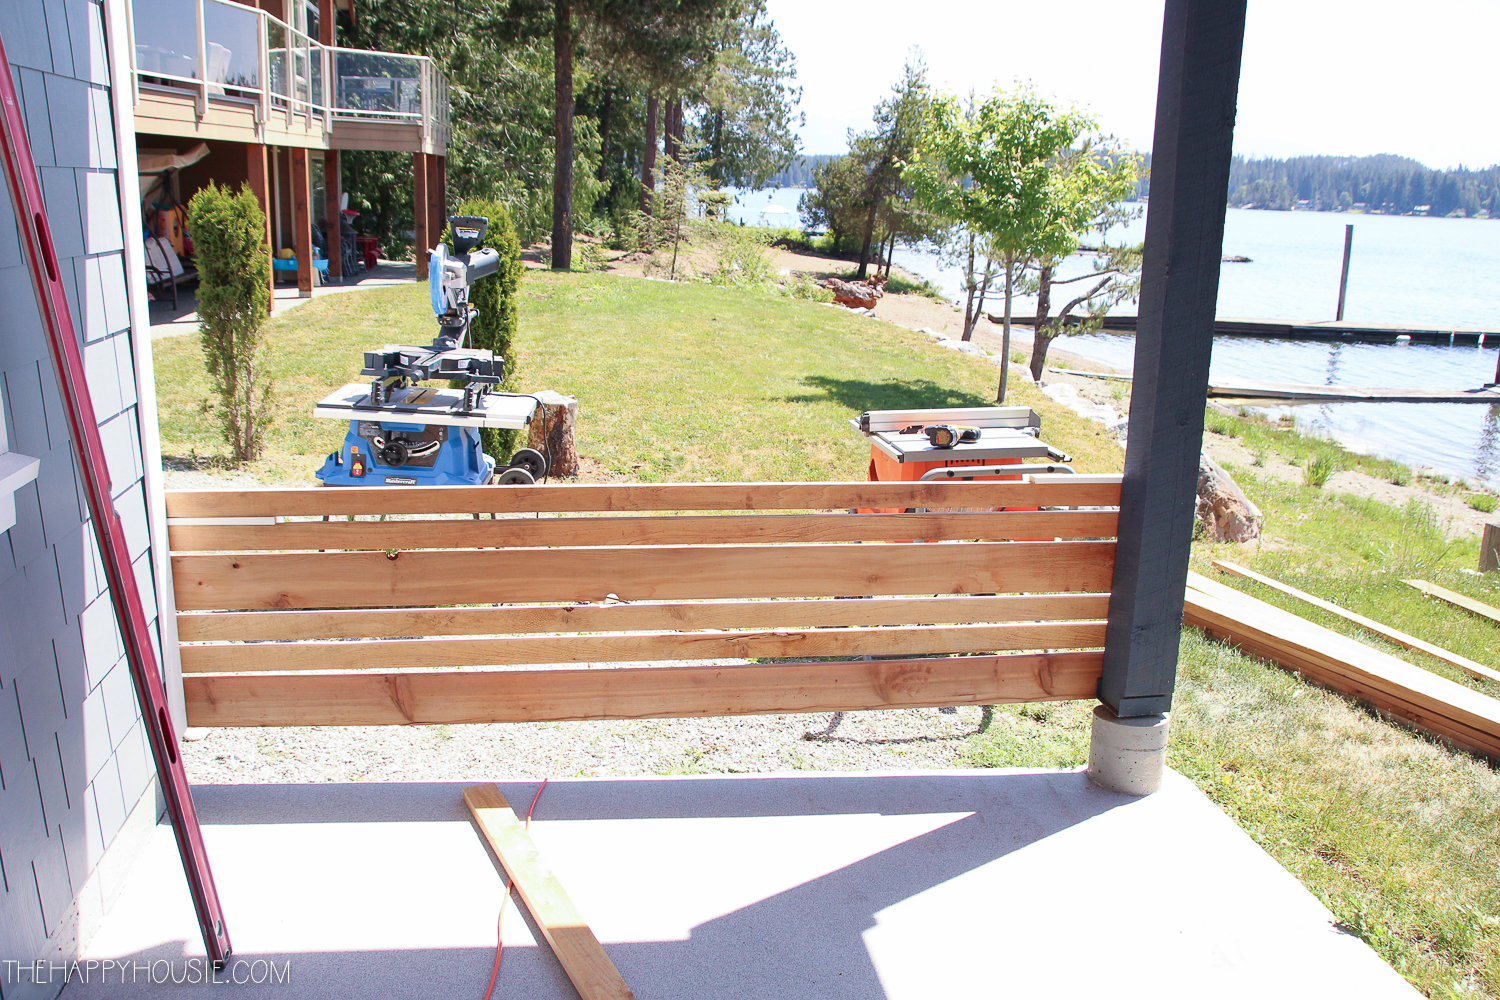
You can see how completely open to our neighbours this side of the patio is, so although it has some lake view out the side (and we have fantastic neighbours!), we still wanted to create some privacy screening on this side of the house.
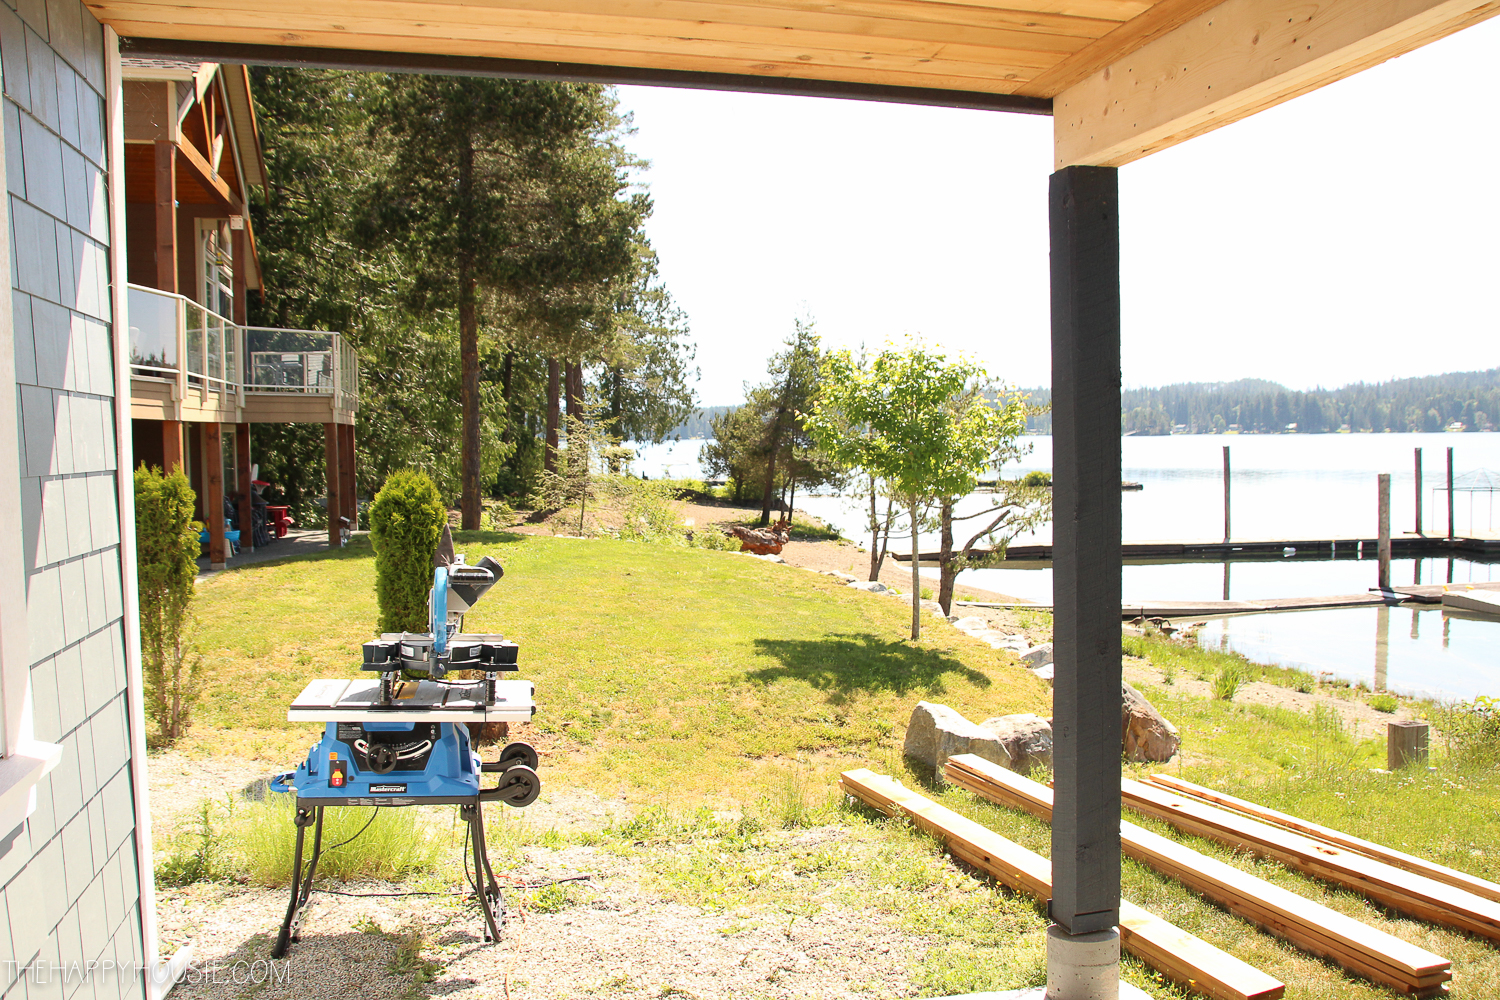
We picked up 1″ by 10′ lengths of cedar in a 6″ width, and then ripped it down with the table saw to 6″ and 3″ widths (half size).
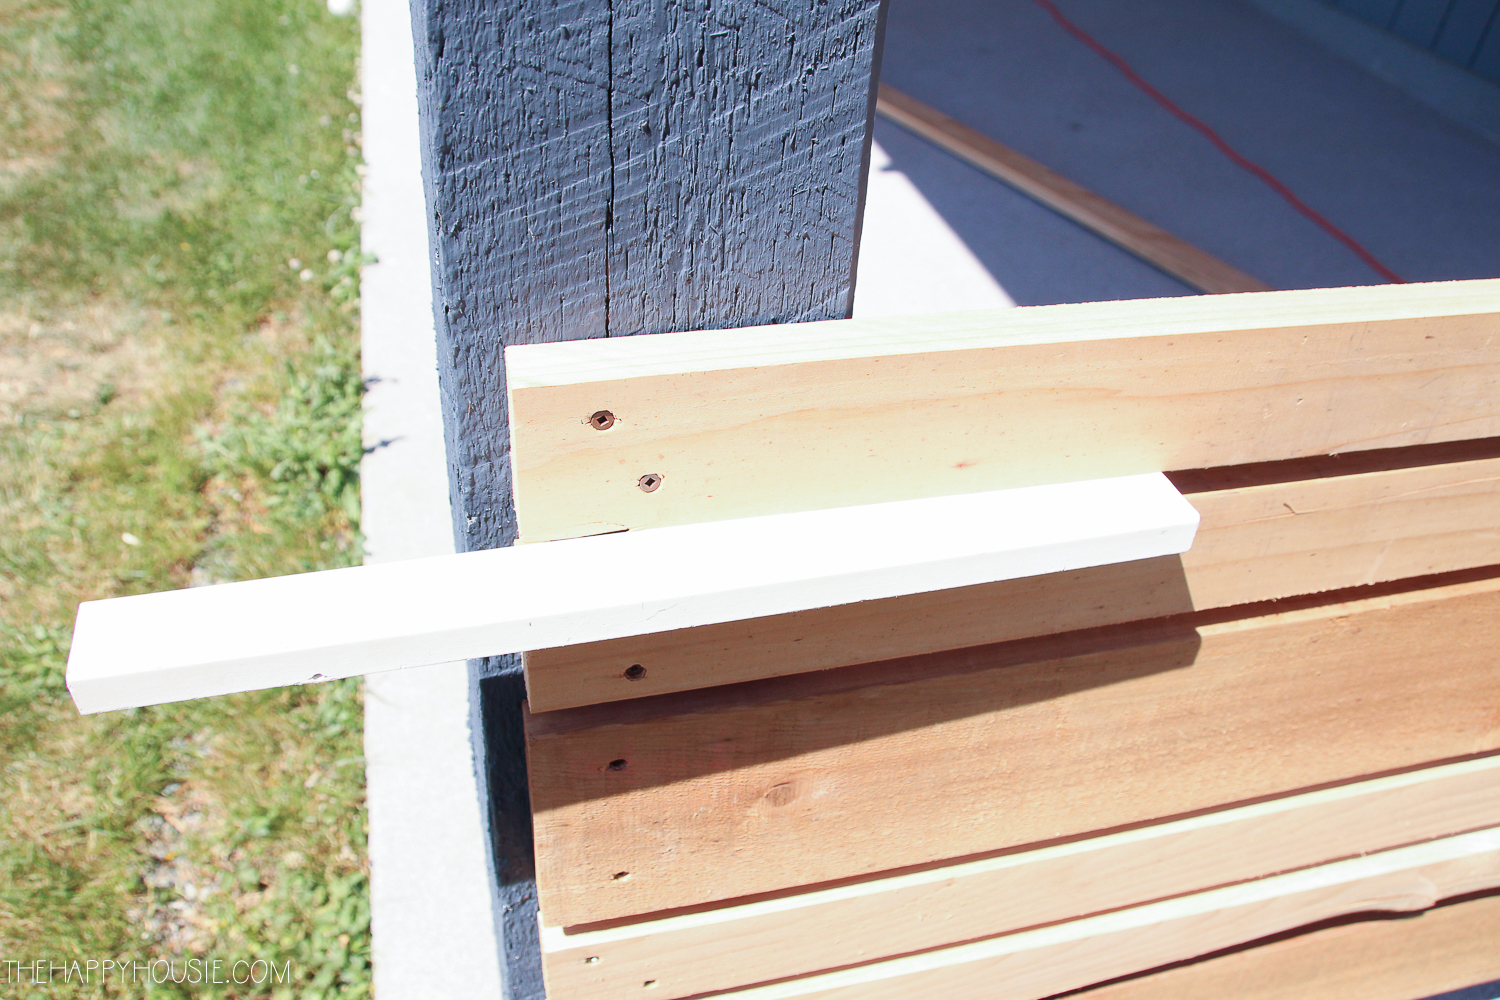
Then we started with a 6″ width board and made sure to get it completely level as it was the guide for the rest of the privacy screen. We had a post on one side and a corner trim board on the house side, so it was easy to screw the cedar lengths directly into each of these (you will see we followed up with finishing boards at the end).

Once you have ensured that your first board is straight, you can use a spacer to help you evenly space the rest of the boards. Don’t worry about the slightly messy looking edges; as I mentioned this all will be covered with some finishing boards at the end.
Continue to work your way up in the pattern you’ve selected. We elected to do one 6″ board followed by two 3″ boards all the way up to nearly the top of the opening….
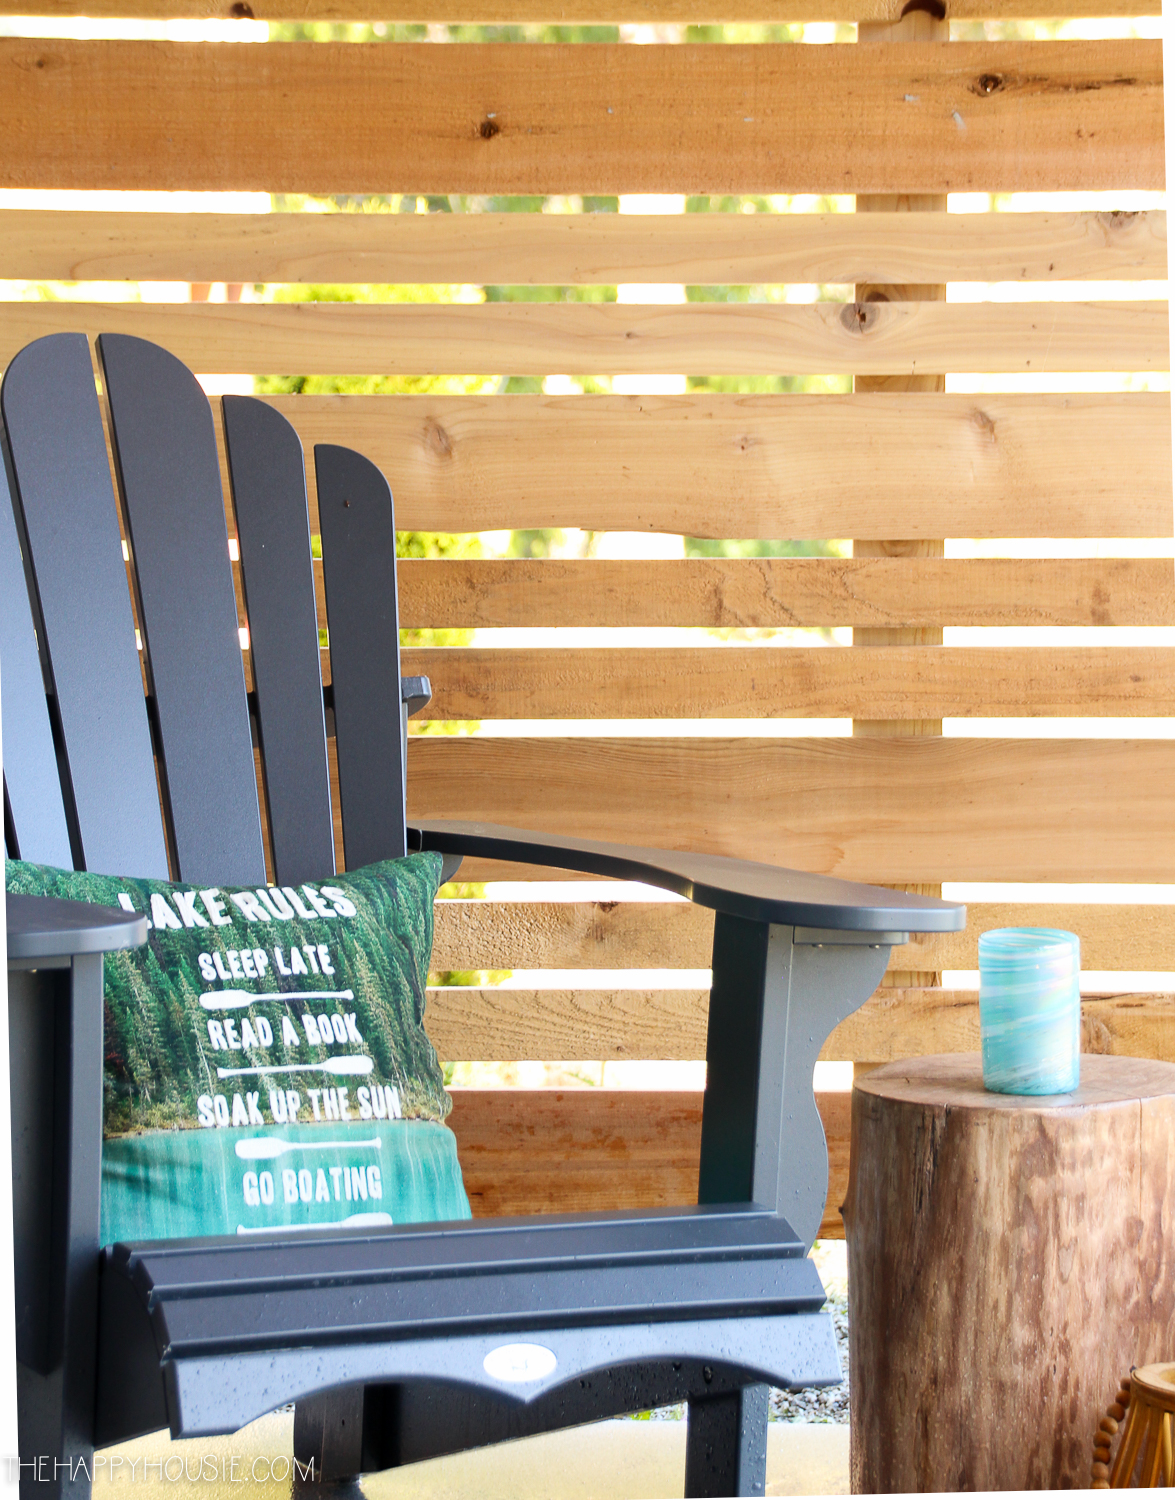
Once we had all the horizontal pieces attached, we used some 4″ widths of the same material to cover where we had attached it on the trim and post, as well as an additional 4″ width in the middle to secure and straighten all the pieces together in the center. You can see this middle board in the finished pictures!
Pretty, right?
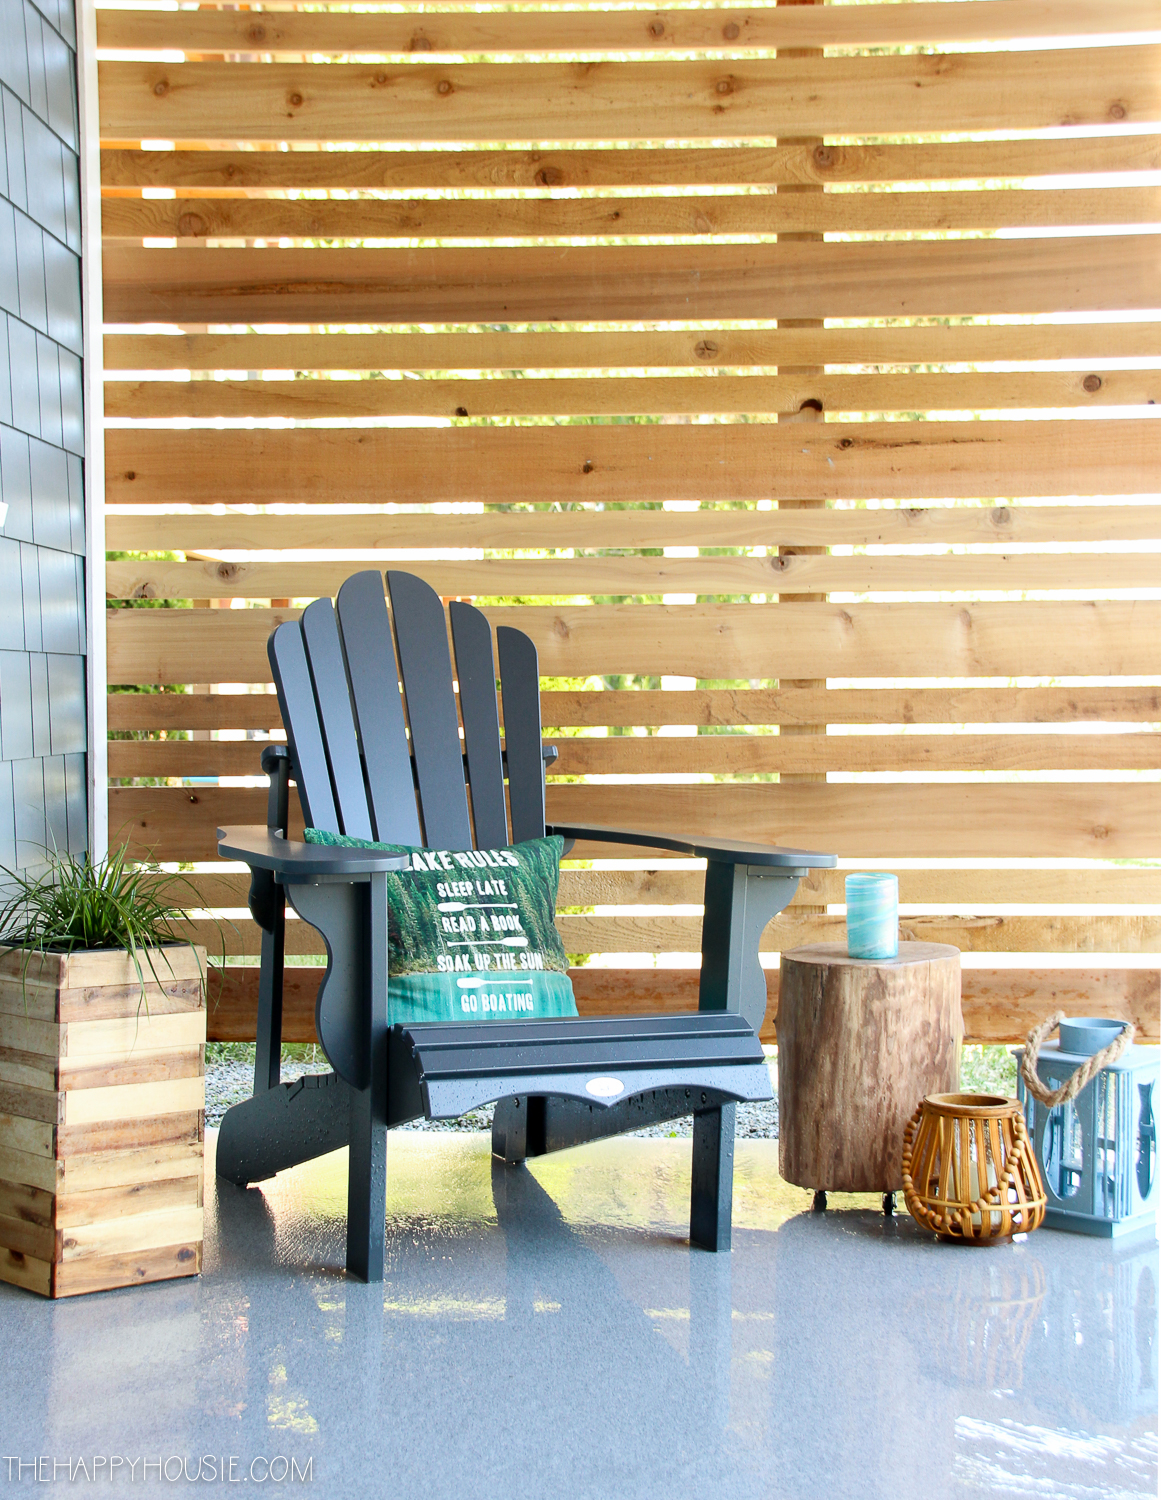
I love the rustic texture of the cedar, and think it works beautifully with the cedar soffits we had installed on the ceiling in this lower patio area. You could do a similar design in a smooth, modern finish by selecting higher quality cedar without knots or dents and sanding it and staining or clear coating it to give a shinier finish. I, personally, like the rougher finish with the beachy coastal feel of our new shingle siding.
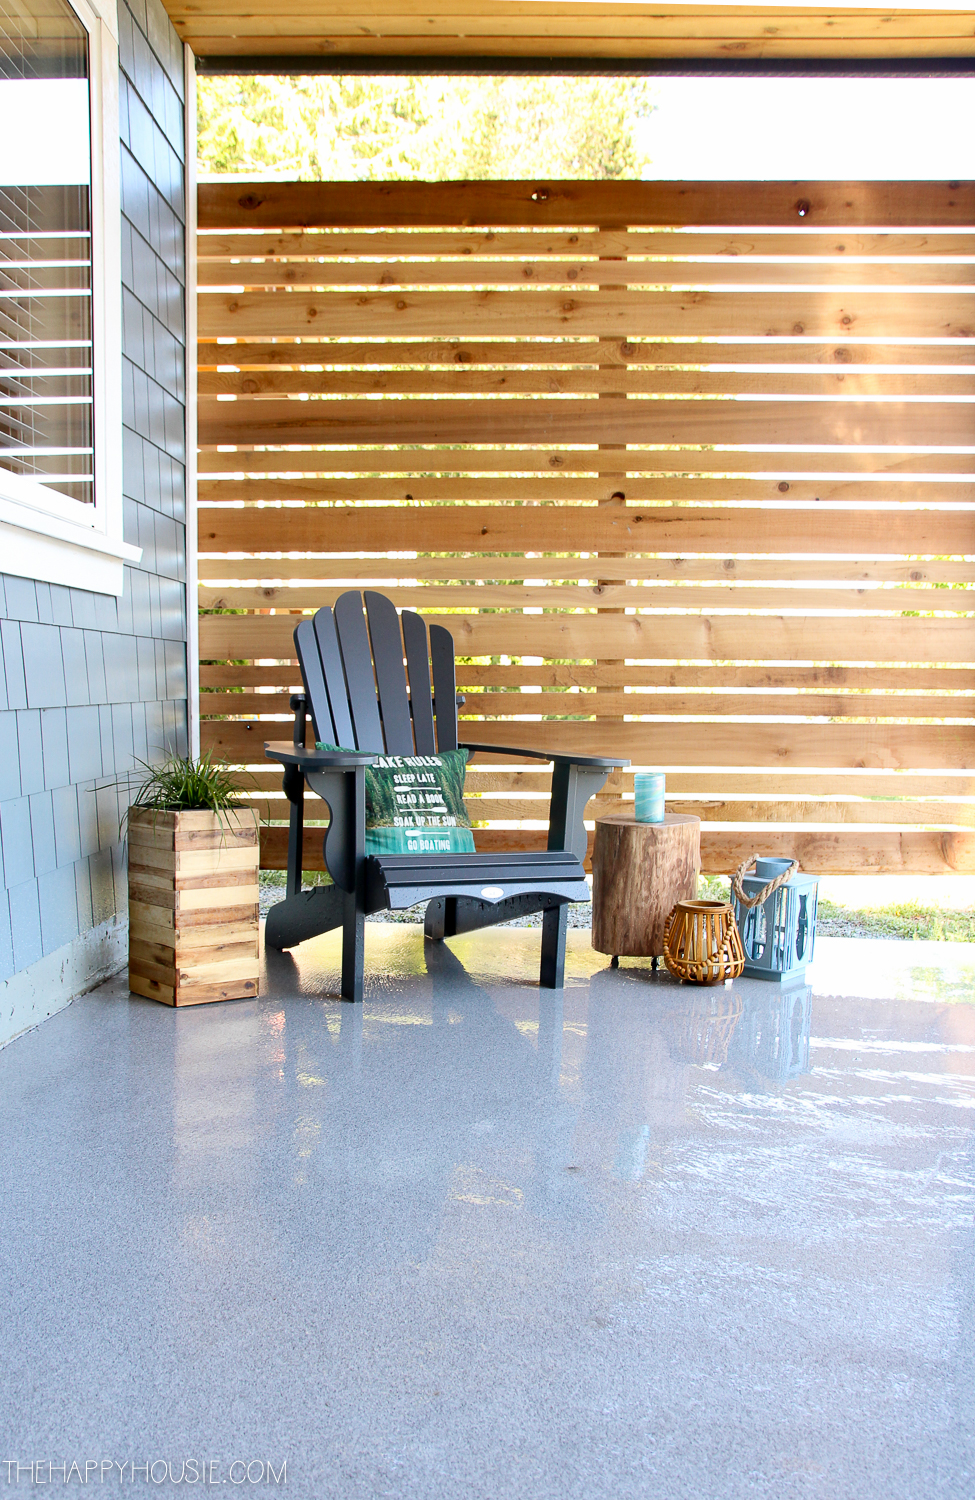
Pretty big difference, right??
I’m so excited to see our outdoor areas finally coming together after a year of working on them. I’ll be back soon to share our “before and afters” from last year’s big BEFORE!
And today I’m thrilled to be joining my friend Shauna of Satori Design for Living for the final week of this year’s Outdoor Extravaganza series. Today several of my talented blogging friends are sharing their outdoor build it and paint it projects. Pop over to see what they have to share!

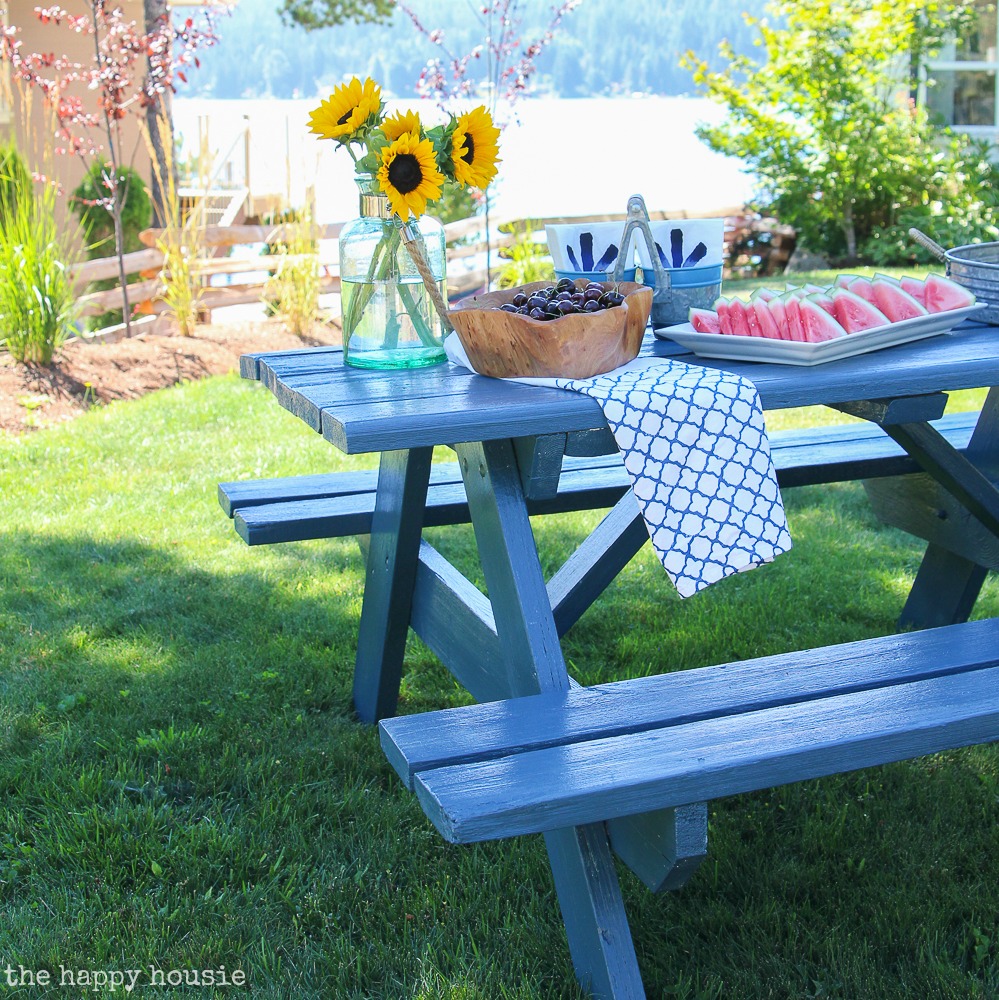
Satori Design for Living | Vinyet Etc. | The Happy Housie | The DIY Mommy

PMQ for Two | Clean and Scentsible | Finding Silver Pennies | Casa Watkins Living | So Much Better with Age
Zevy Joy | Shades of Blue Interiors | Amber Tysl | Craftberry Bush | A Pretty Life

SaveSave


I like how you still create a small space for lights to come inside and it added additional features to your privacy. Thanks for sharing this idea and you also have a lovely home.
We have siding on the edge of house. How did you attach to side of house?
It looks great! What is the size of the spaces between each of the slats?
That is an excellent question! I’m guessing that the white board she has [I think it’s the third picture] is sold as 1/2 inch thick. However, I have found that at the lumber yard, what they say is 1/2 inch is generally somewhere between 1/2 inch and 3/4 inch. Always take your tape-measure with you!
What about the outer side? Won’t it look unfinished? Shouldn’t it look equal to the inside? Just me thinking I’ll see an unfinished look. Could a different pattern be used.
Hello Nadine,
You can think of it kind of like a fence, that isn’t necessarily the same on both sides. It didn’t look unfinished on the back – the wood looked the same, it just had a board up the middle. It looks nice from both views – though we didn’t really see the other side very often as it was near the edge of our yard. You could add a board down the middle on the front side if it being exactly the same mattered to you a lot;)
Krista
This looks great! Did you use different coloured stain on this privacy screen or is that the natural difference in cedar colour?
I’m so going to do this . What size did you use as a spacer here ?
Sheri
Hi Sheri, I’m so thrilled with how it came out!! The spacer was nearly an inch of thickness. Hope that helps! Krista
Looks great Krista! We have one with a similar design on our porch too. It makes so much difference!
Hi Jennifer! Thank you!! It’s so great to get a little privacy down that end of our patio… and I love the contrast of the cedar.
This looks great and is perfect to add some privacy. Love it!
Thank you Danielle! I am thrilled with how it turned out:)
Looks great! I’ve done something similar with our trash bins and AC unit. Works like a charm eh?
Totally! Such a great idea for hiding those kind of eyesores, as well!
What a HUGE difference that made! I love it…it’s so pretty that you even forget it’s supposed to be for privacy! I don’t love my neighbours, so this would be perfect…I’ll be showing this to Tobin stat! 😉
Yes – and it went up really quickly! Thanks Jo-Anna!
This looks absolutely lovely, I’m loving that you left the beautiful cedar contrasting against your new shingle siding!
Thank you Laurie- I love our new shingle siding. I would definitely chose it again:)
I love this Krista! What a difference it makes! And it’s so pretty. I love your lakeside home.
Hugs, Jamie
Thanks Jamie! I love it too, but time for a little change… 😉
Wow! Lovely. Looks great. I love that chair, it looks very decent. Thanks for sharing this.
Thanks so much!
We built something very similar years ago and it made a world of difference. Looks great, too! Thanks for sharing your lovely projects for the OE once again. Have a great summer 🙂
It’s crazy what a difference it makes! Thank you Shauna- and thanks for hosting!!